Power Brake Thoughts
(4-wheel disc)
Looking for Input
Updated - 11.31.2013
updated from 3.8.2008
many P/Ns have been changed or
are no longer offered from the sources cited.
I did find all the front parts available
through Autozone.
Long Download
| So. .
. as geezers,
pre-geezers and folks looking to improve our vannin' experience there
is a "need" for an effective, "simple, cheap & easy" method to
install disc brakes (power ???) in our first and second generation vans. Before moving on, I must thank M1Dado, BvrWalley and RipVanArkie for their input, direction and completed and working (power) brake conversions - - they are all great!!! Some conversions are front disc/rear brake others are 4-wheel disc brakes. As always - - - I am just looking for "cheap & easy". As I will be installing 4-wheel disc brakes, I am concentrating on that set-up. Many of the pictures are "borrowed" from others & most of the "imagineering" has been done by others. I will credit them all as time permits. I am just assembling many parts into one place so I may better complete a virtual build. |
|
|
3/9/2013
I have four wheel disc brakes on
my 1st gen. I did not use that ('79
- '85 Eldorado/Toronado/Riviera) rear disc set up, but I believe
it is the best option for early rear disc set up.Words of Wisdom from m1dadio who has completed the conversion That ('79 - '85 Eldorado/Toronado/Riviera) rear disc set up is available cheep in parts yards. Found on all those front wheel drive Cadillac Eldorado and Oldsmobile Tornado. I used the Camaro/Firebird rear disc set up which is drum because the calipers are the same both sides so they put one forward of the axle and the other behind the axle, but the main reason the Cadillac rear disc brakes are better is because the caliper piston size is smaller which makes for better proportioning on these vans . The Camaro caliper pistons are a bit too big and I have my proportioning valve maxed to one end and I still think I have too much rear brakes. You see a lot of hot rod s with rear disc and the disc itself looks rusty all the time. This is shameful to see at hot rod shows not because of the rust or dark look but because it tells you the proportioning is wrong and that a the rear brakes are hardly being used at all or not at all. That is a seriously dangerous situation because if you have to slam on the brakes in an emergency, you front brakes are going to lock up and the rear wheel drive keep pushing from behind. Any of you out there who have driven on ice before know what I'm talking about. Its important to reduce the rear braking so they don't lock up on regular braking but its a very dangerous situation if the rear brakes are not used enough and the fronts lock first. A properly set up four wheel disc brake set up will have shiny rotors all around and will be producing corrosive brake dust and rotor fillings to stain your mags equally al around. So yea I've been there/tried that, I think that ('79 - '85 Eldorado/Toronado/Riviera) rear disc set up is the best choice. Don't forget you have to have your axles flange machined down to smaller dia, so they will fit into the rotor hat section. That's what GM did when adding the rear disc option. |
|
| Following are some research and thoughts I have: | |
Stock Front Brake Drum removed ** note shock location **  Click to Enlarge |
Stock Front Brake Hub removed  Click to Enlarge |
Brake Parts removed Steering Spindle  Click to Enlarge |
Disc Brake Adapter (BZ's ??? NOT an M1dadio) Installed  Click to Enlarge |
Rotor installed **May need to file/grind hub ** (if using an S-10 rotor)  Click to Enlarge |
Caliper Installed **Note Shock Location** (moved from rear to front) 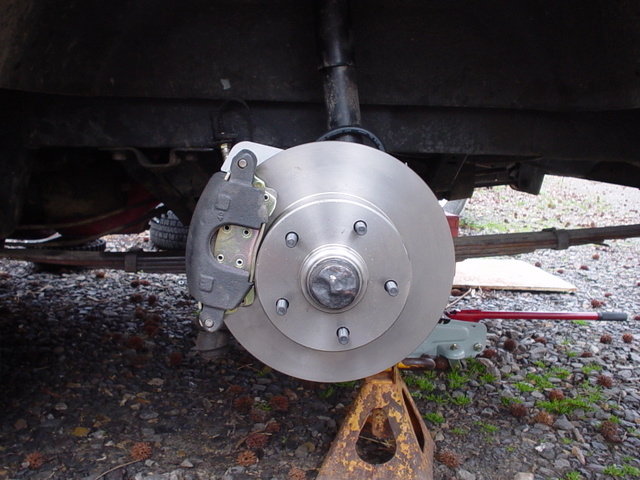 Click to Enlarge |
| Installation
Instructions - - scroll to end. |
|
| Parts needed | |
| Master
Cylinder C3 Corvette disc/disc (Power Brakes) Summit Racing 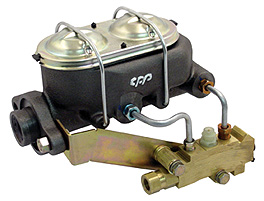 Click for info Option #2 (Manual Brakes) Summit Racing |
Proportioning
Valve C3 Corvette disc/disc 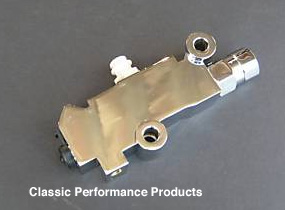 |
| Rear
Disc Brake Information |
|
| Caliper
Mount Brackets '79 - '85 Eldorado/Toronado/Riviera 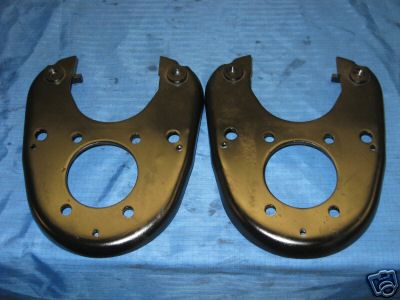 Click to Enlarge |
Rear
Calipers '79 - '85 Eldorado/Toronado/Riviera 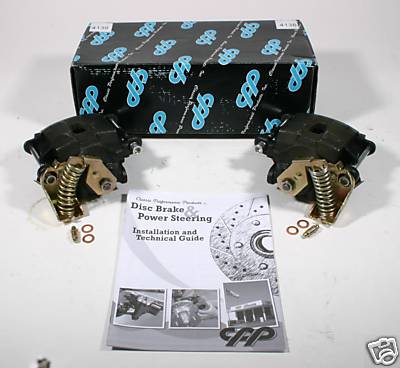 These are from CPP Click to Enlarge |
Rotors '79 - '85 Eldorado/Toronado/Riverea Early '90's S10 Front AutoZone #5550 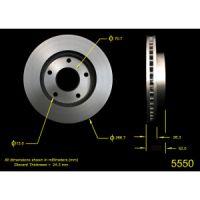 Click for more Info |
Long Wheel Lugs |
'64 - '70 Chevrolet Van Stock Rear Brake  click to enlarge |
'64 - '70 Chevrolet Van Stock Rear Brake Axle Removed  click to enlarge |
'79 - '85 Eldorado/Toronado/Riviera Stock Rear Disc Brake Caliper Bracket Installed '64 - '70 Chevrolet Van  click to enlarge |
'79 - '85 Eldorado/Toronado/Riviera Stock Rear Disc Brake Caliper Bracket Installed '64 - '70 Chevrolet Van  click to enlarge |
'79 - '85 Eldorado/Toronado/Riviera Stock Rear Disc Brake Caliper/Rotor Installed '64 - '70 Chevrolet Van  click to enlarge |
|
 courtesy of RipVanArkie http://www.vcvc.org/ubb/Forum1/HTML/004168.html (dead) http://vintagevans.forumup.jobs/viewtopic.php?t=5028&highlight=&mforum=vintagevans Must be a member |
|
| Possible
used parts source e-Bay
-
Jeff_Vette Store- (Dead)
|
|
| Front
Brake Parts Needed using BZ's Caliper mounts Wild
Bill's
List: (joyrde modified
11/31/13)
"Parts you will need. these part #’s are from AutoZone.com (p/n changed - same parts)
(Notes)
|
|
| Rear
Disc Brake Parts |
|
|
If
not using CPP kit. These are the caliper parts you will need.
Calipers
1985 Cadillac * Seville ('79 - '85 Eldorado/Toronado/Riviera) rear with internal E-brake (with pads and hardware) * Wagner L- 107094 R- 107095 * Autozone - P4138 (Pair loaded) with all caliper parts Remainder of caliper parts from GM Cadillac parts counter
|
|
Thoughts???
you are visitor
9330