Joyrde's
Power
Brake
Thoughts
(4-wheel
disc)()
[best viewed with Firefox or Google Chrome]
This page and all the links are a record of my experience, for my personal use.
Nothing here nor in the accompanying links are intended to be a "how-to",
a guide, recommendation for anyone, other than myself.
Updated - 3.25.2014
updated from 3.8.2008
many P/Ns have been changed or
are no longer offered from the sources cited.
I did find all the brake parts available
through either
Autozone, NAPA, or Summit Racing.
Long Download
| All
of the
following work is not for the inexperienced or under-equipped. I am an
ASE Master Tech, taught high school Auto Tech for 30+ years, have had
an automotive
repair shop for a number of years, and have 50+ years automotive
experience. Although my, present, shop is a "hobby" shop, it
is a well-equipped. If I did not have the
machining tools needed, I had the work professionally done. All the
fasteners are Grade 8. There
are no shortcuts or easy methods.
All the parts are either new or professionally rebuilt. Neither is this retro-fit inexpensive or a quick "kit" installation. I have at least 100 hours of hands-on, parts runs & on-the spot fabricating in this project. As for cost, a rough estimate for all new/rebuilt parts, brackets, etc., is at least $1,000.00+ invested in this project. Many of the parts were purchased over a six year period. The bulk of the rear components, and a few of the remaining components were bought from "big box stores" that run sales on eBay. I also live close to Summit Racing's original store. Whenever I am in the area, I often "shop" their clearance section for parts. When the Van is back on the road and the bugs worked out, I will crunch & post the numbers. There were NO "used" parts used in this retro-fit. Only new or professionally rebuilt components were used. Reasoning
So. .
. as geezers,
pre-geezers and folks looking to improve our vannin' experience there
is a "need" for an effective, "simple, cheap & easy" method to
install disc brakes (power ???) in our first and second generation vans.Before moving on, I must thank BZ, RipVanArkie, M1Dadio, & BvrWalley and for their research, work, planning, input, direction and completed and working (power) brake conversions - - they are all great!!! Some conversions are front disc/rear brake others are 4-wheel disc brakes. As always - - - I am just looking for "cheap & easy". As
I will be
installing 4-wheel disc brakes, I am concentrating on that
set-up.
Many of the pictures are "borrowed" from others & most of the "imagineering" has been done by others. I will credit them all as time permits. I am just assembling many parts into one place so I may better complete a virtual build. |
|||
| Following
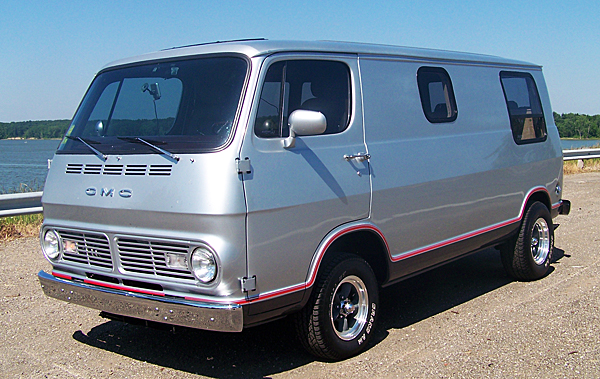
is the install on my '67
GMC Van The procedures are based on the work, successes of others, as well as, my 50 years+ work experience in the automotive field. |
|||
| . | . | . | . |
| Unexpected When I disassembled the front brakes, I found both kingpins were not within specifications. I removed them, bought a king pin bushing kit, with metal bushings, from Rare Auto Parts. As of this 2/22/2014, there are 3 kits in stock. Following are the "general" instructions I followed to check & install king pins. Factory instructions My Experiences |
|||
| Front Brake Disc Brake Install | |||
| Whatever brackets you use
for the install,
PLEASE, read & follow the instructions completely. I swapped several e-mails with M1dadio before purchasing the brackets he recommended for my application. m1dadio & I also swapped several emails during the build. If you like the install below, Please contact M1dadio for more information. |
|||
| . |
. |
. |
. |
| Stock
Front Brake ** note shock position does not change **  Click to Enlarge |
Brake
Parts removed Steering Spindle  Click to Enlarge |
Stock Front Brake Click to Enlarge |
Stock Front Brake Click to Enlarge |
| Stock
Front
Brake Side view 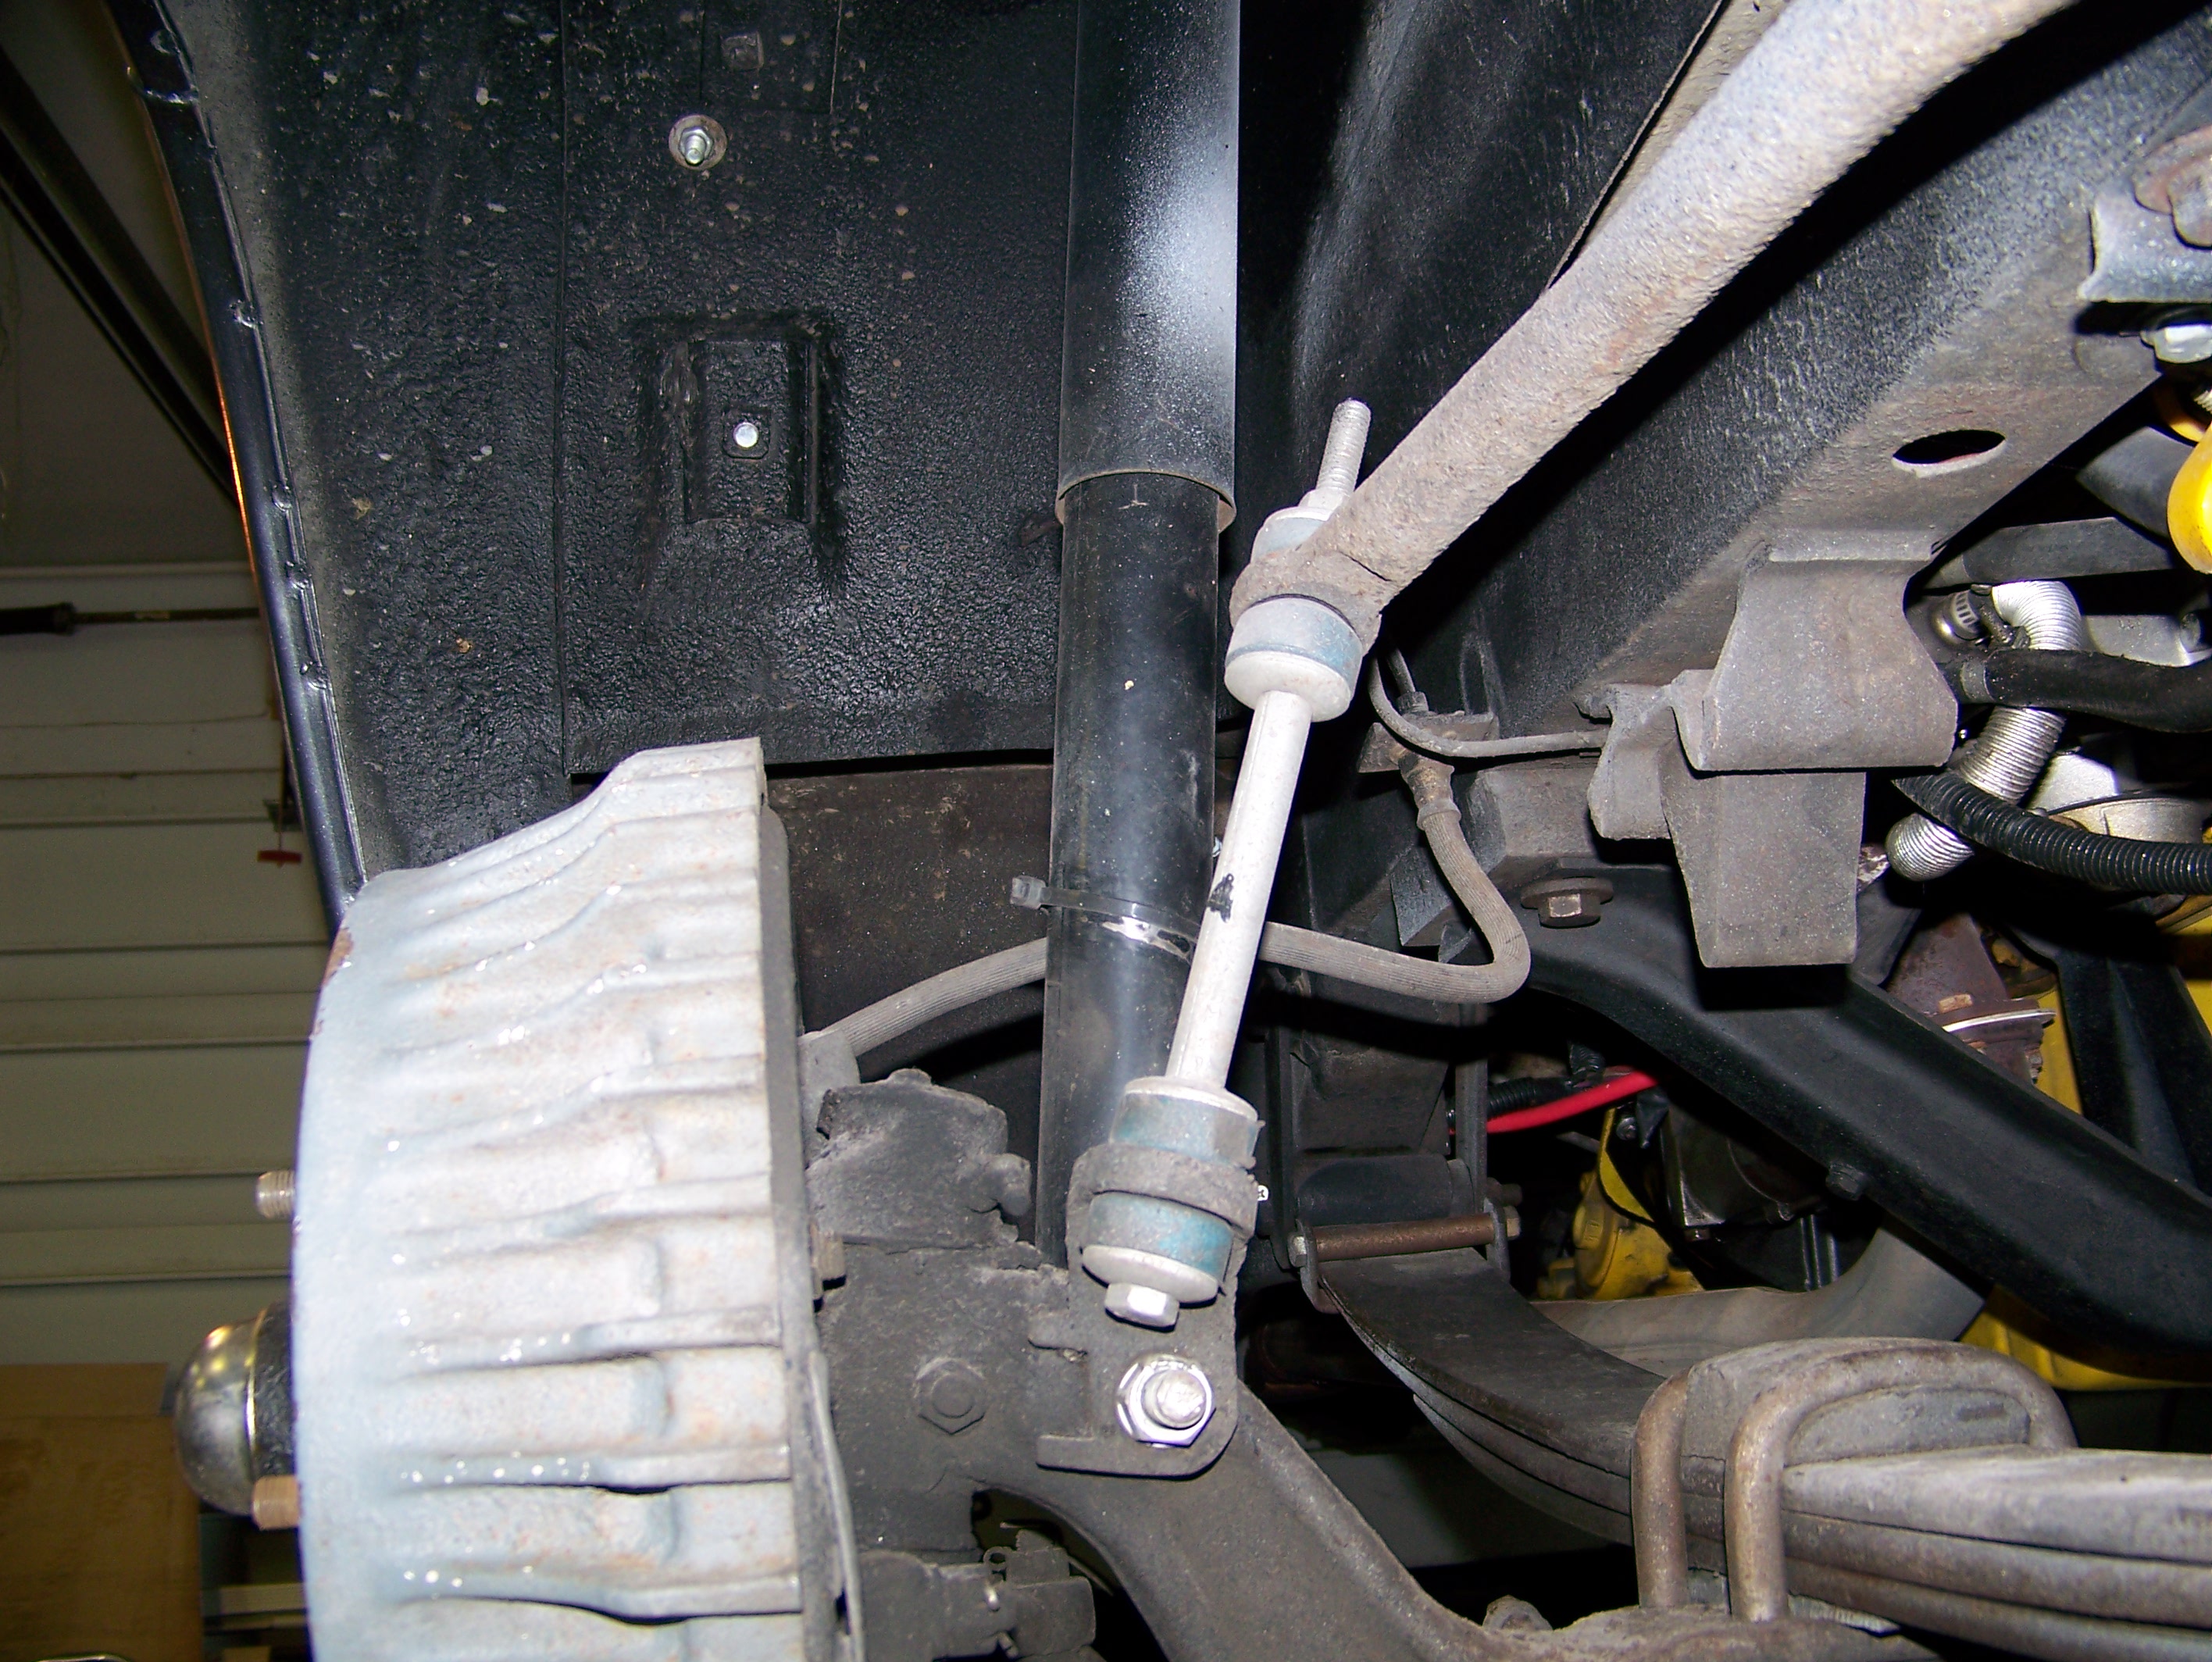 Click to Enlarge |
M1dadio Front
Brake Adapter Side view  Click to Enlarge |
M1dadio Front
Brake Rotor Side view  Click to Enlarge |
M1dadio Front
Brake Caliper Side view  Click to Enlarge |
| M1dadio Bracket Hub work 1  Click to Enlarge |
M1dadio Bracket Hub work 2  Click to Enlarge |
M1dadio Bracket Hub work 3  Click to Enlarge |
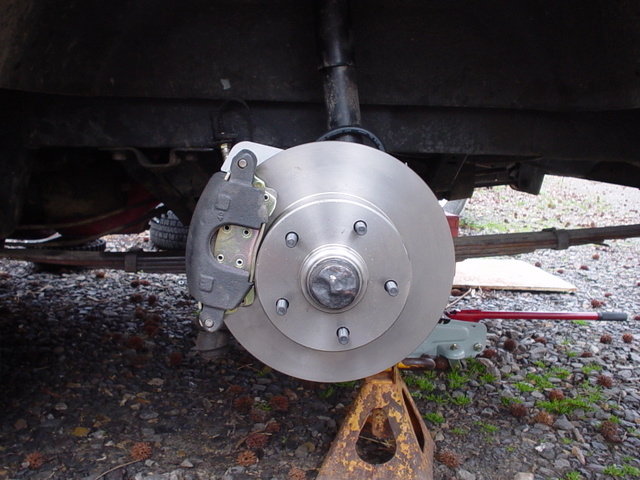
Rotor
installed **Need to file/grind/machine hub ** (this is a Firebird rotor)  specific instructions included with M1dadio brackets Click to Enlarge |
| Please
note, the Van is running after market wheels designed for vehicles with disc brakes (Camaros & Novas). 14" X 6" wheels in the front 15" X 8" wheels in the rear. Even so, portions of the front calipers needed "clearanced" |
|||
| Wheel 14" front 15" rear 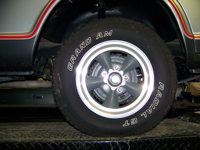 Click to Enlarge |
Front
wheel Clearance Measurements  Click to Enlarge |
M1dadio
Front
Brake Caliper stock fit  Click to Enlarge. |
M1dadio
Front
Brake Caliper after grinding  Click to Enlarge |
| Using
non-recommended heavy duty brake pads NAPA SS-728-A-M  Click to Enlarge |
Using
non-recommended heavy duty brake pads - pad ears ground to fit -  Click to Enlarge |
M1dadio
Front
Brake Caliper fit Wheel Installed 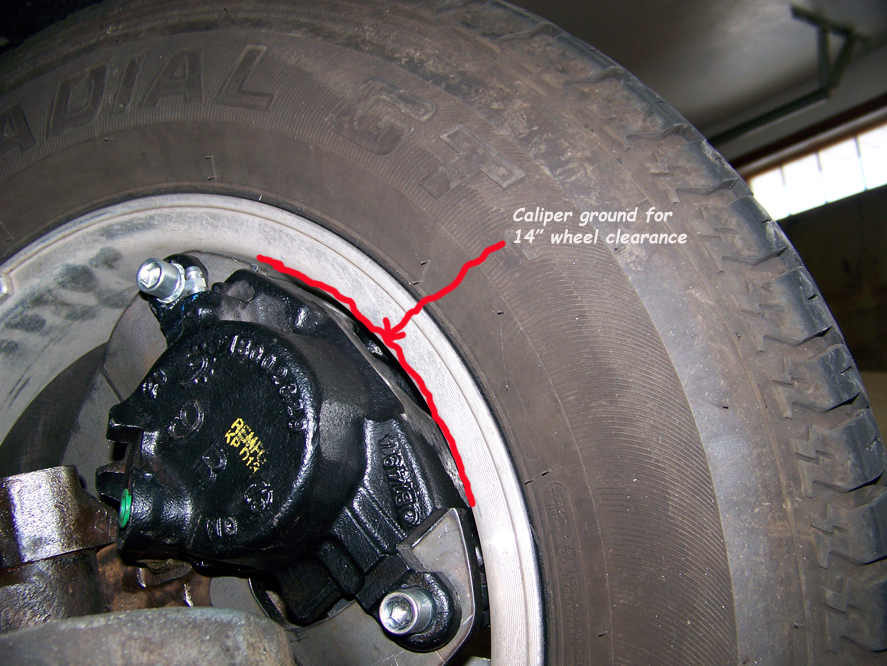 Click to Enlarge |
M1dadio
Front
Brake Adapter & Caliper painted  Click to Enlarge |
| . |
. |
. | . |
| Stock Front
Brake Front view - right turn 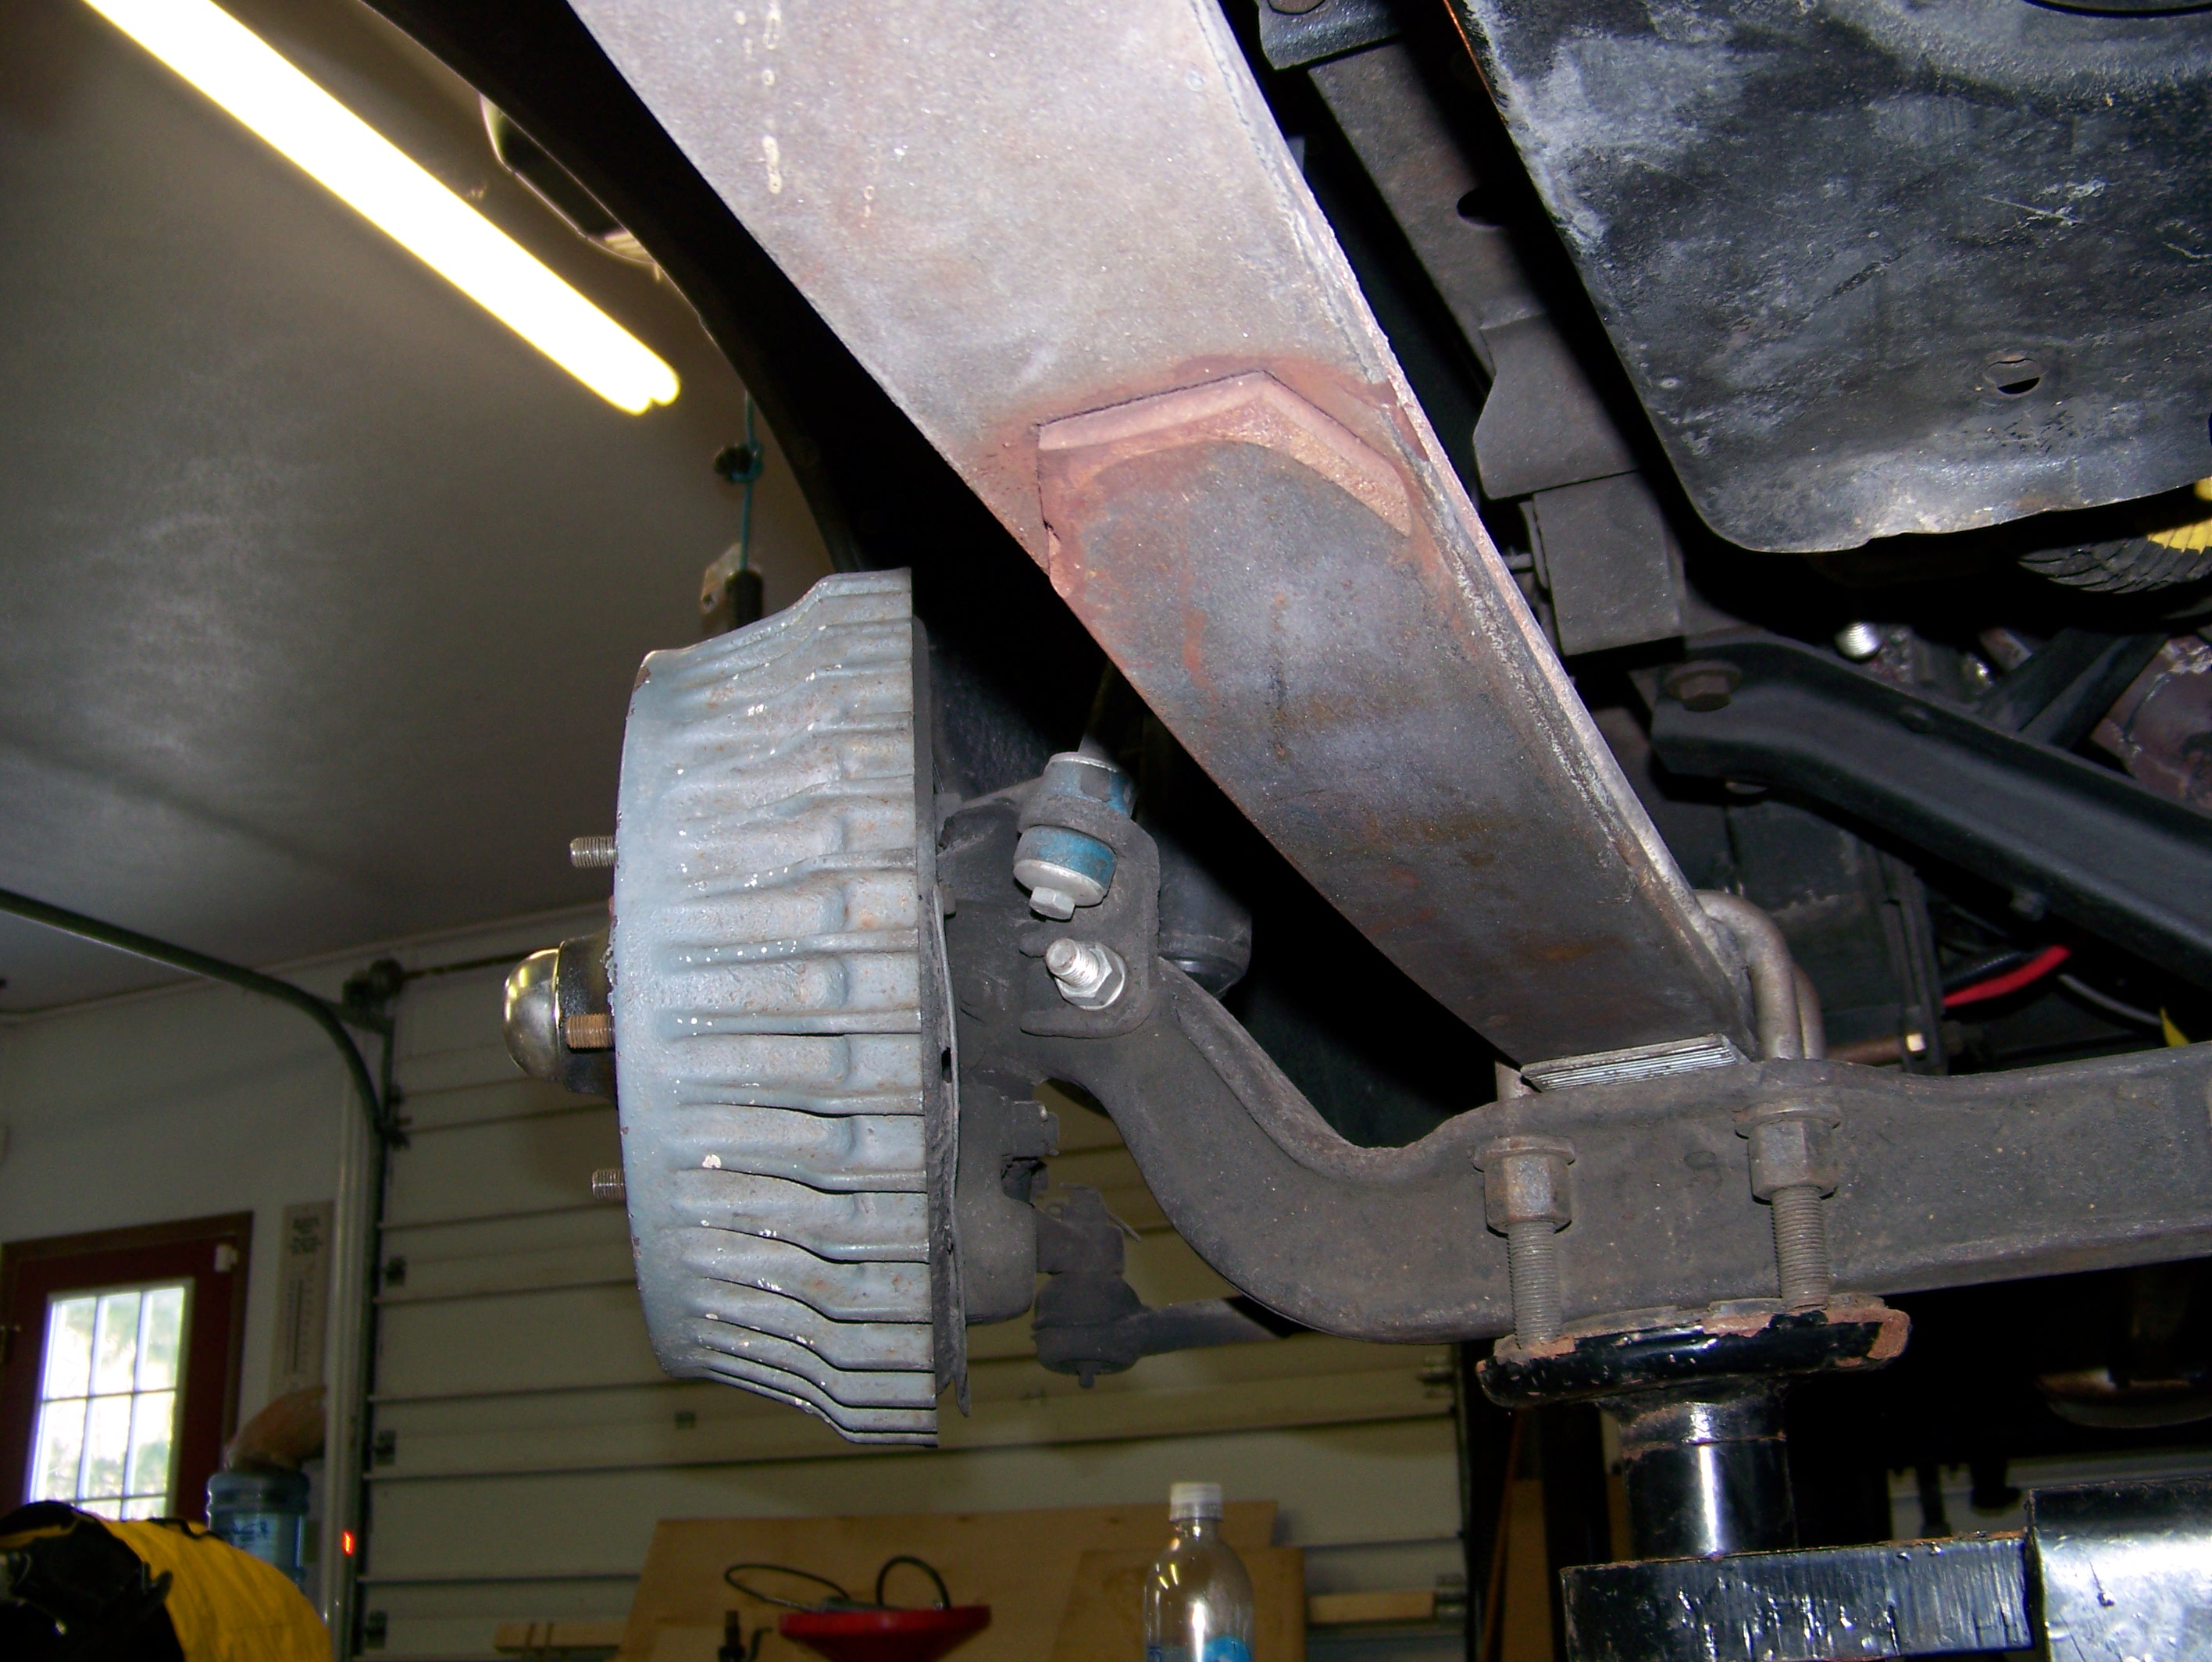 Click to Enlarge |
M1dadio Front
Brake Adapter Front view right turn Click to Enlarge |
M1dadio Front
Brake Rotor
Front view right turn Click to Enlarge |
M1dadio Front
Brake Caliper Front view right turn 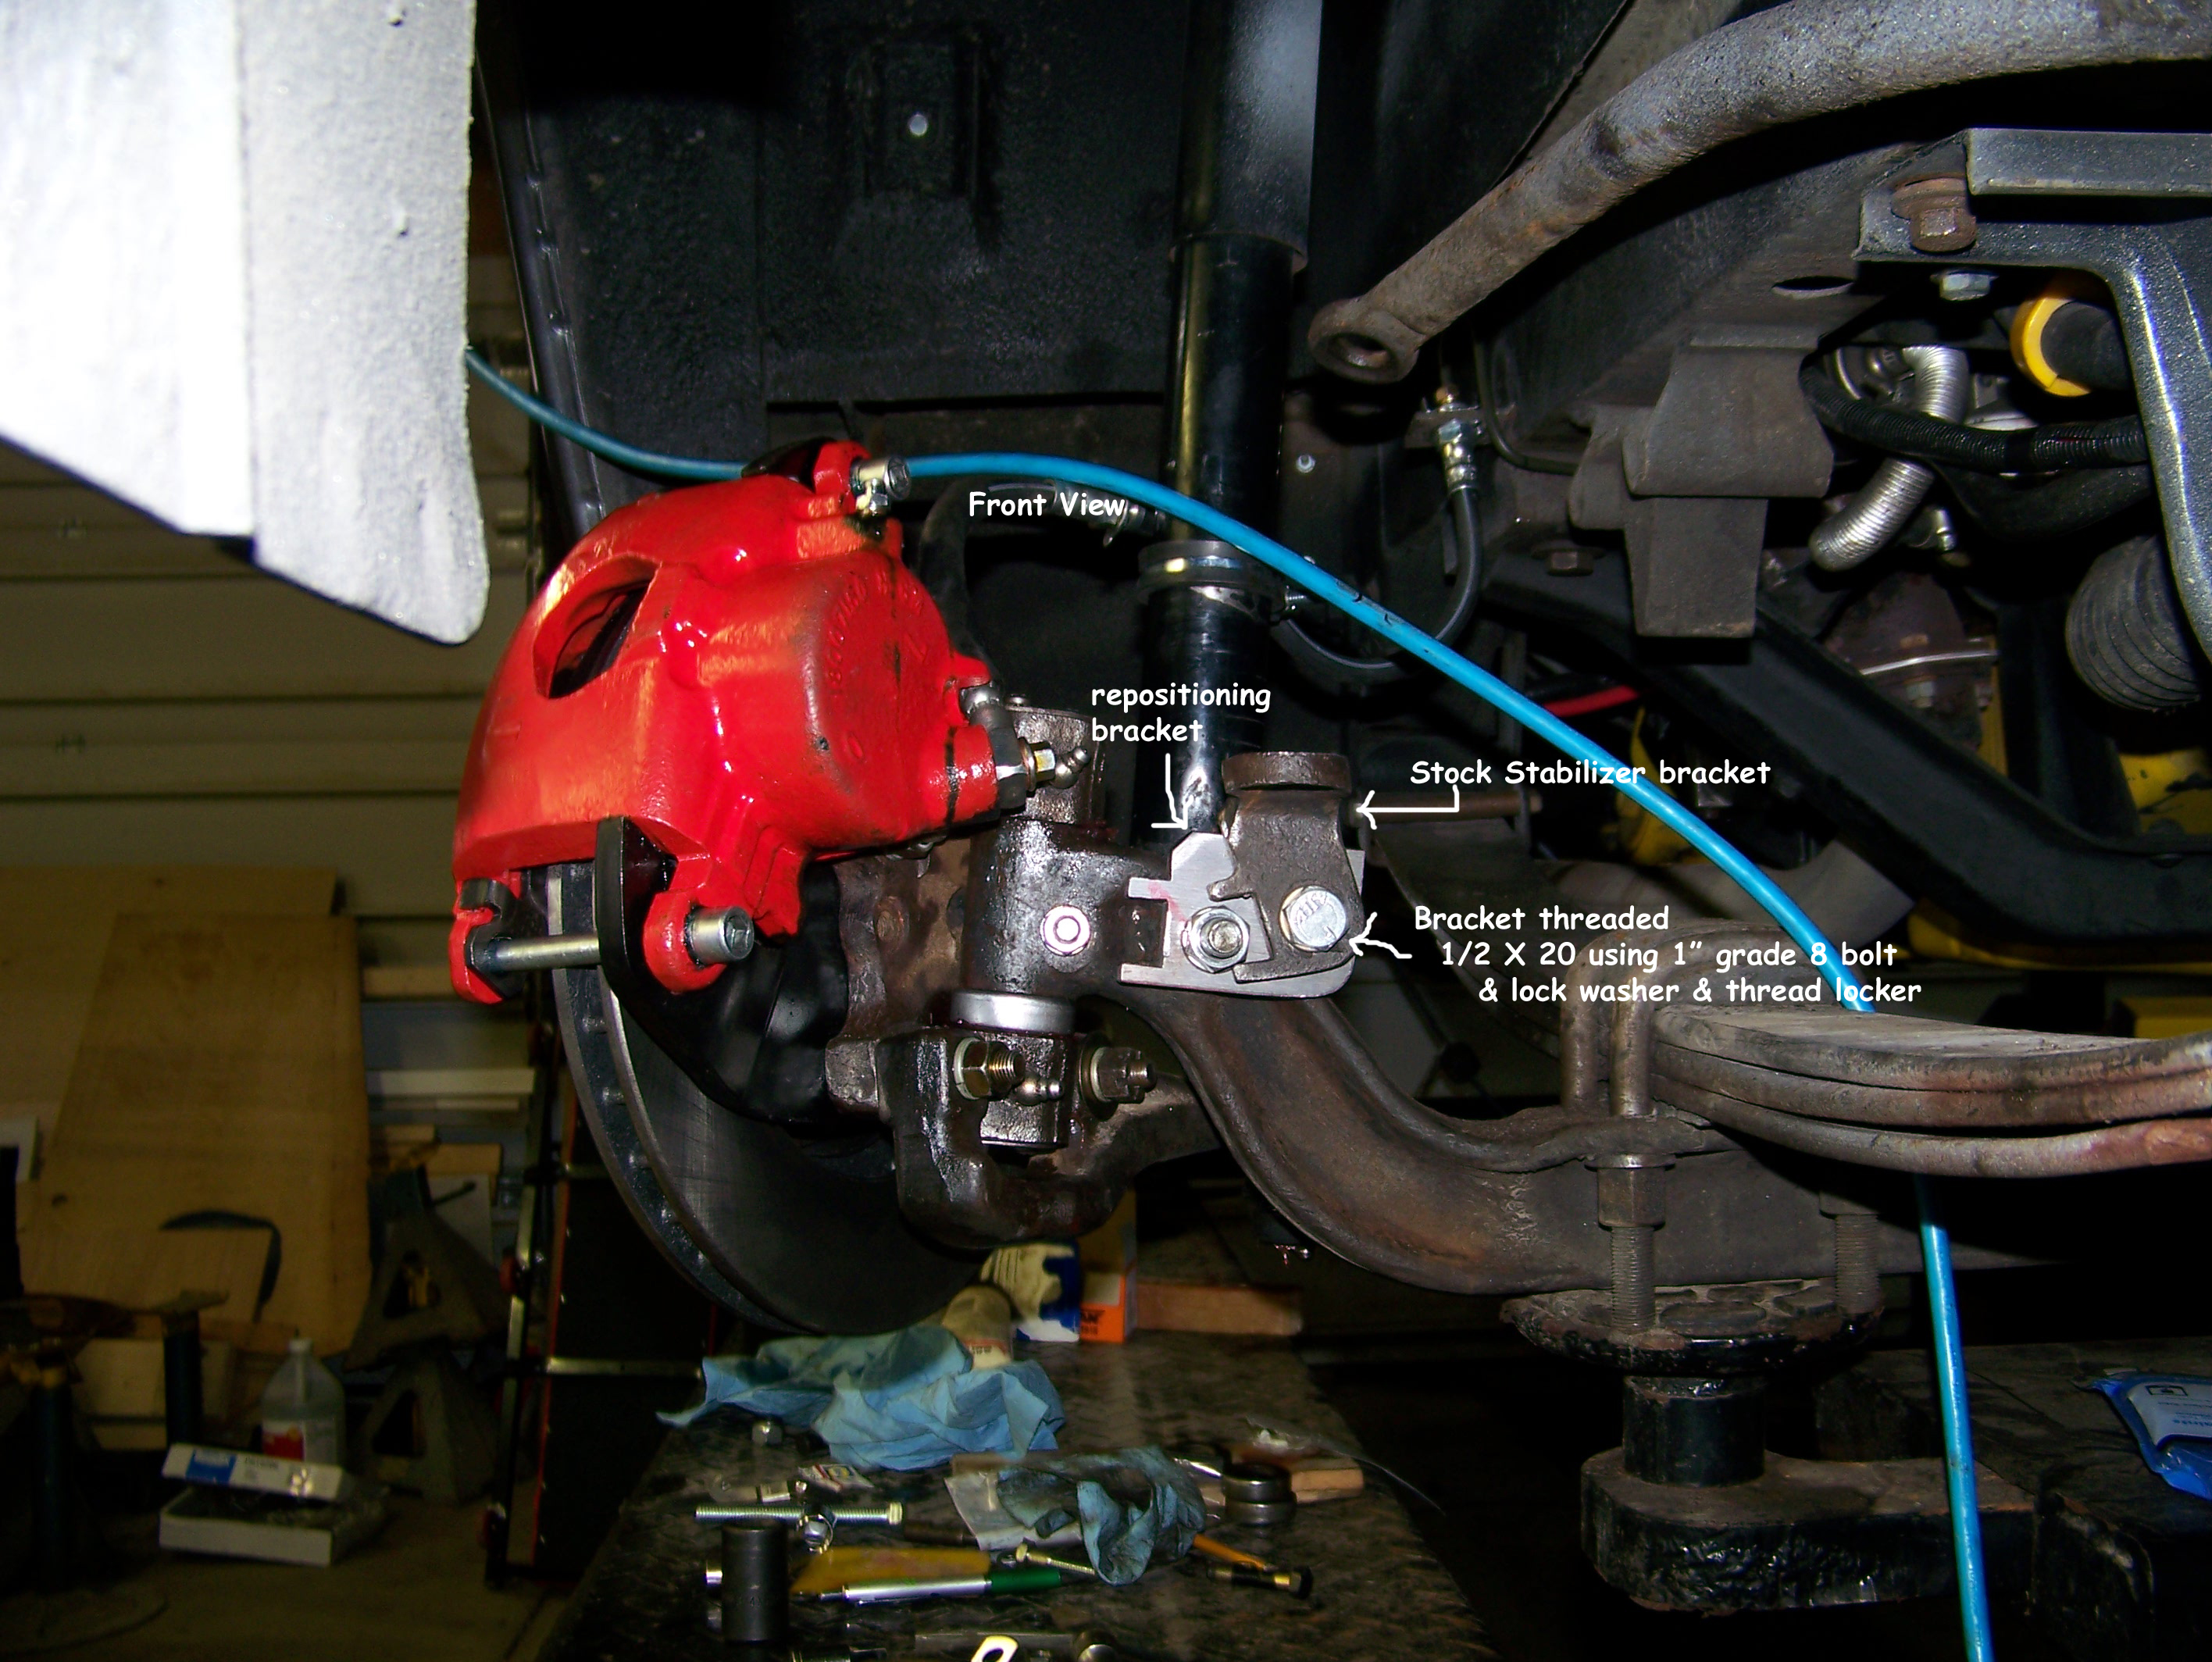 Click to Enlarge. |
| Stock
Front
Brake Front view Left turn  Click to Enlarge |
M1dadio Front
Brake Adapter front view left turn Click to Enlarge |
M1dadio Front
Brake Rotor Front view left turn Click to Enlarge |
M1dadio Front
Brake Caliper Front view left turn 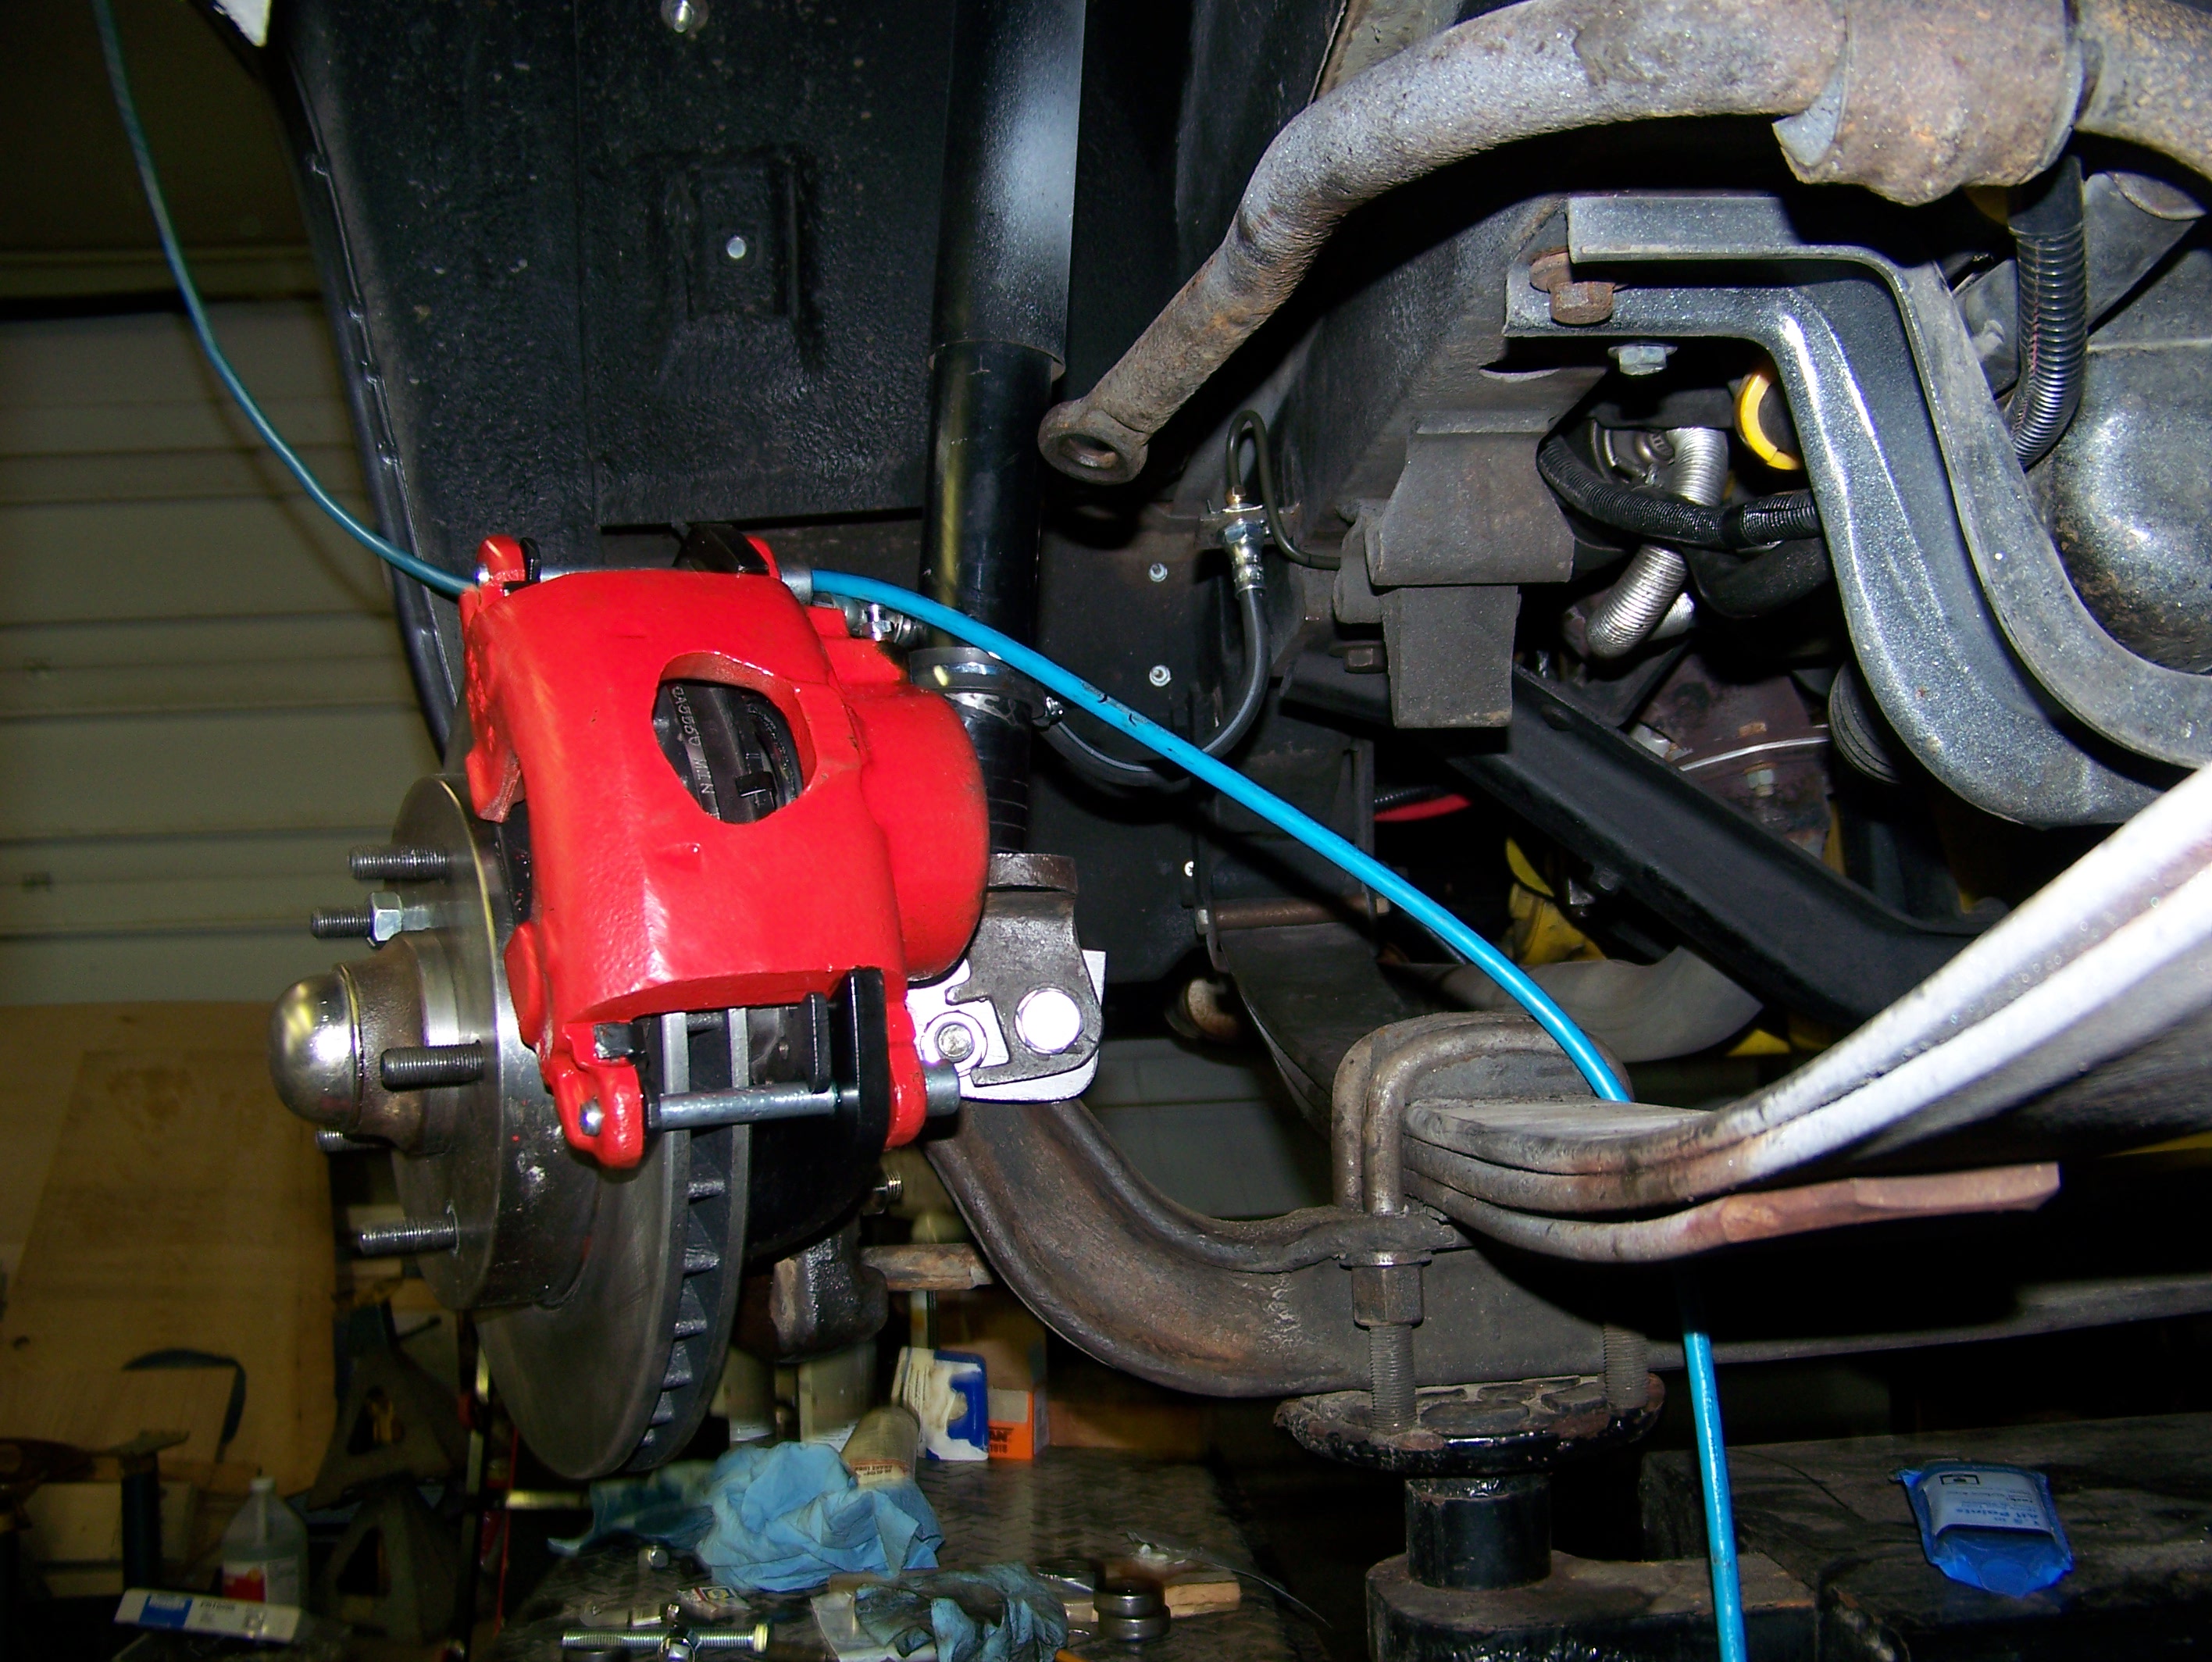 Click to Enlarge |
Stock Front Brake Rear view left turn  Click to Enlarge |
M1dadio Front
Brake Adapter
Rear view left turn Click to Enlarge |
M1dadio Front
Brake Caliper Rear view left turn Click to Enlarge |
M1dadio Front
Brake Caliper Rear view left turn  Click to Enlarge |
| . |
. |
. |
. |
| Stock
Front
Brake Wheel Installed 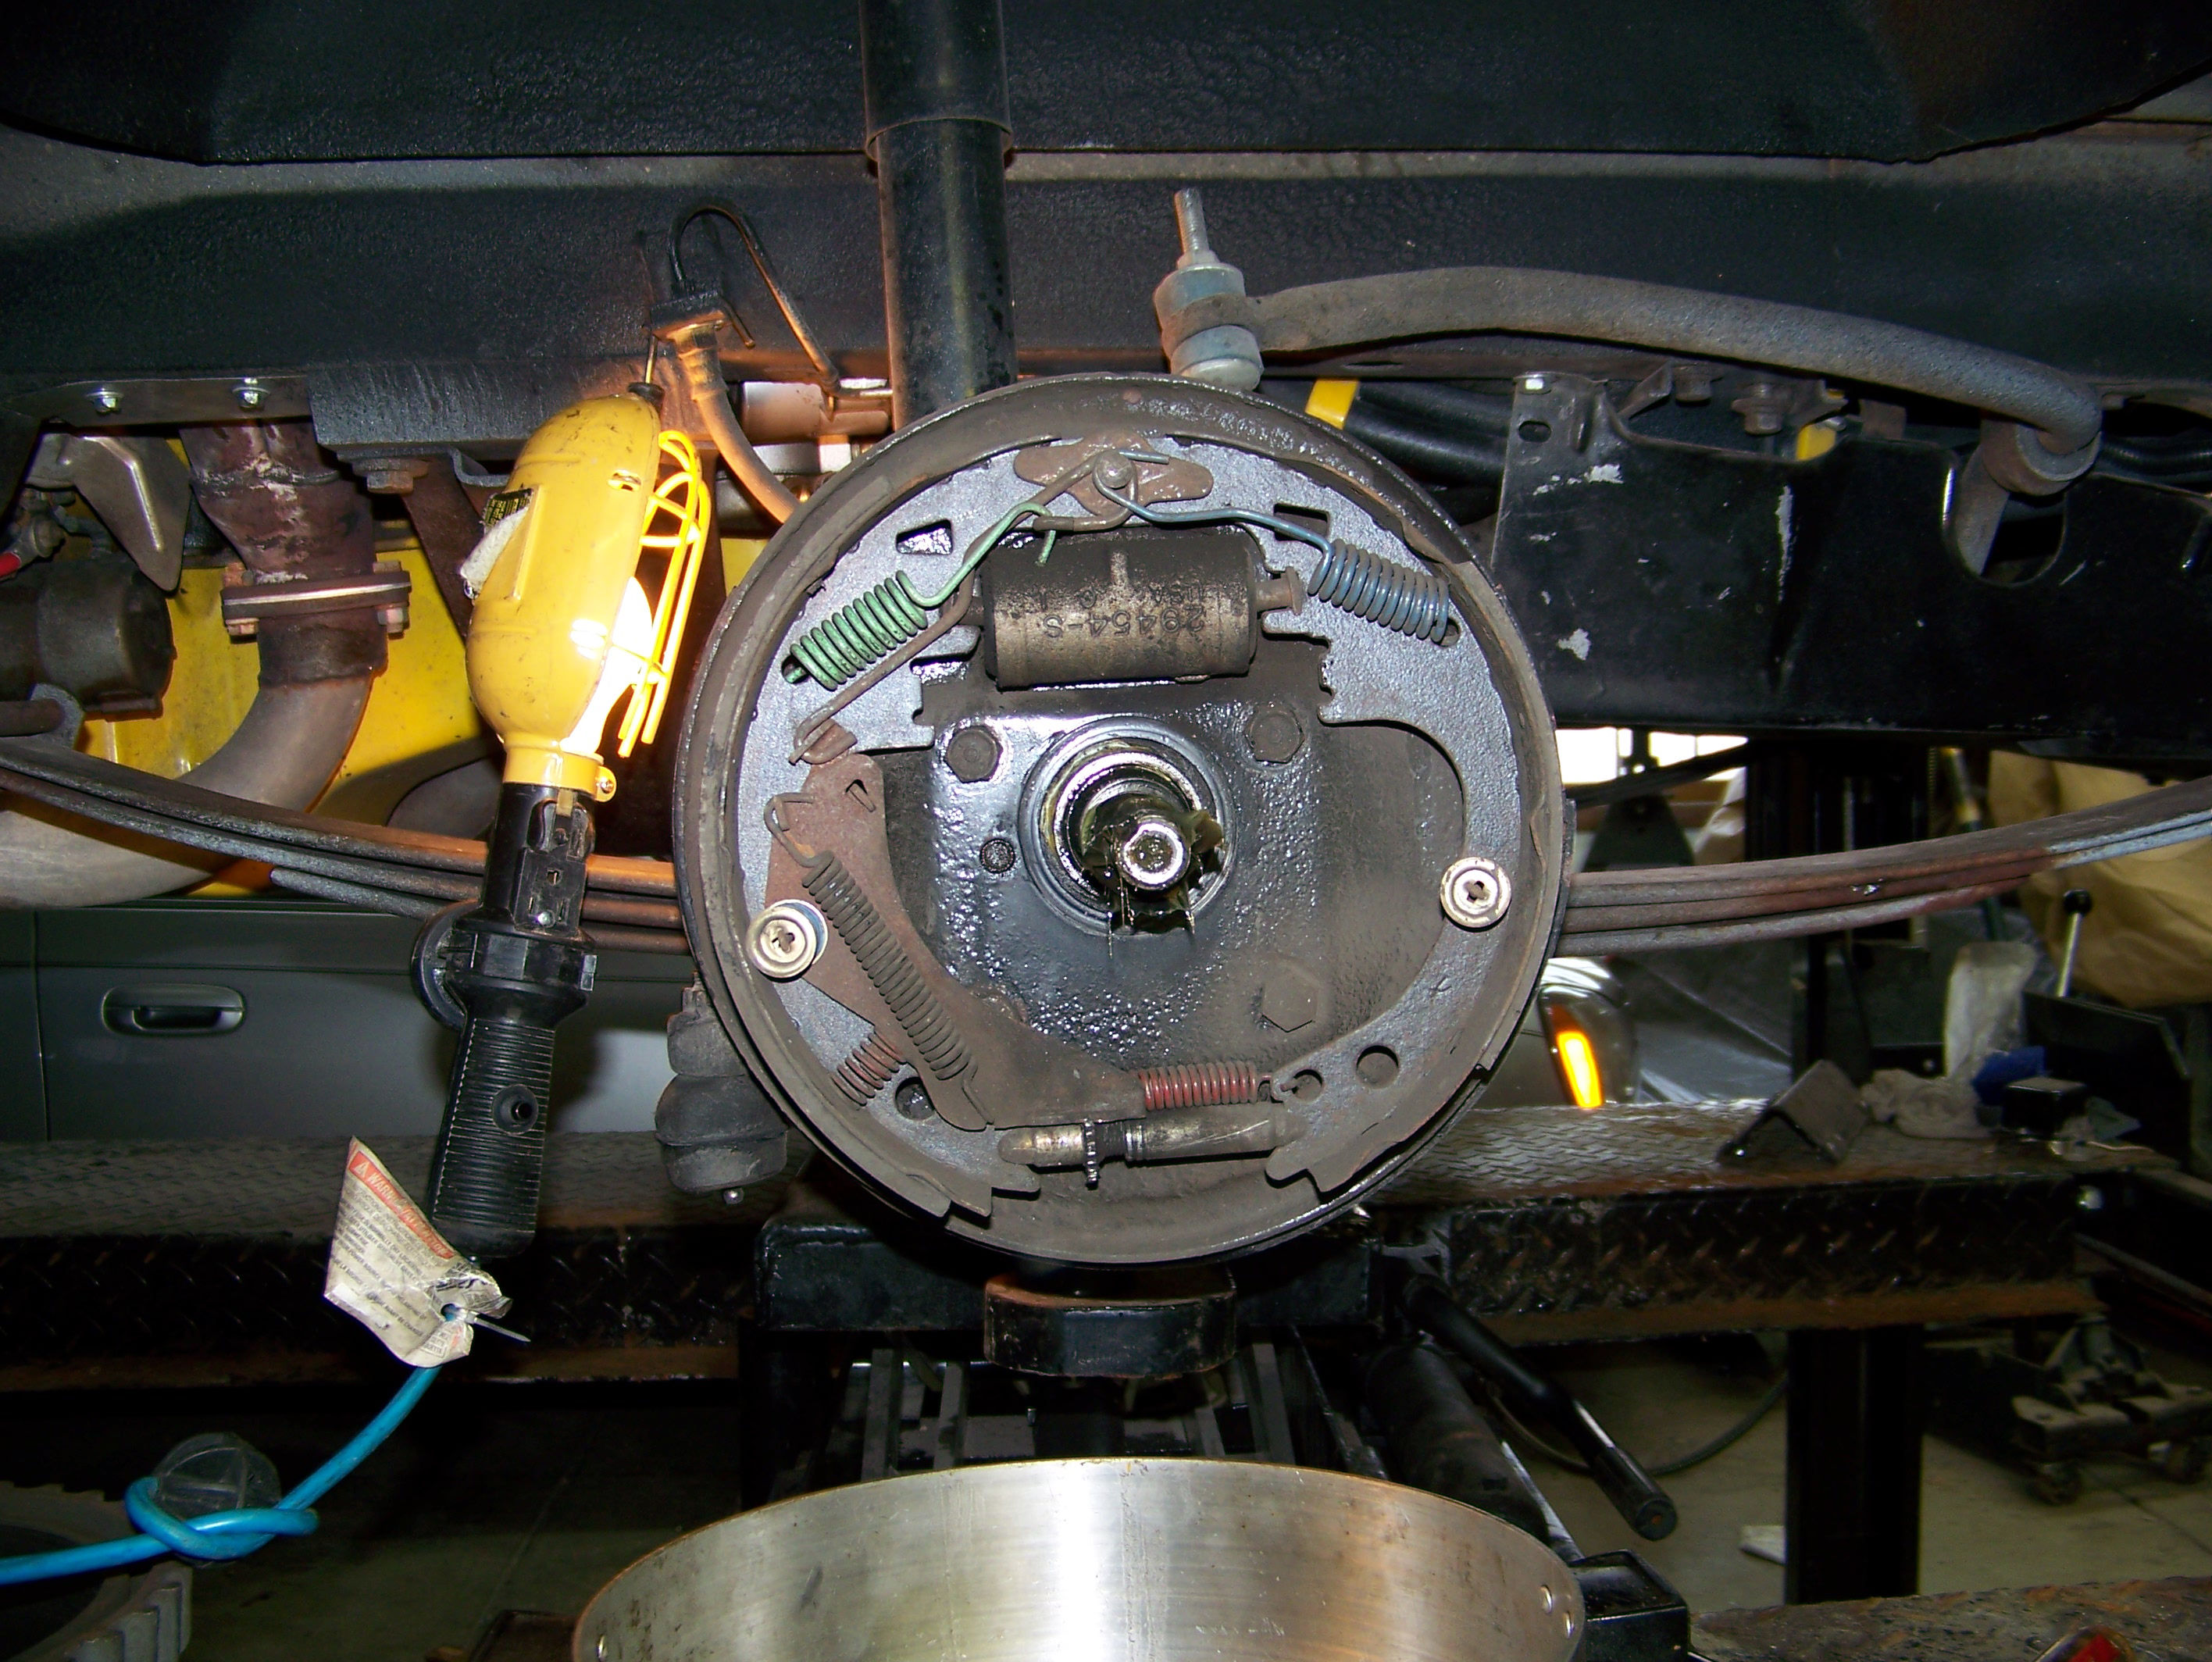 Click to Enlarge |
M1dadio Front
Brake Wheel Installed front Click to Enlarge |
M1dadio Front
Brake Wheel Installed left turn Click to Enlarge |
M1dadio
Front
Brake Wheel Installed left turn Click to Enlarge |
| .... | |||
| On my 1967 GMC 108, G 10
Van, when
installing calipers designed for a 1980's Firebird, both
stabilizer axle mounts need to be moved inward. On the driver's side the
stabilizer mount
also needs to be moved upward
to clear the steering arm. Below is what I did to accomplish both. As has been mentioned throughout this site. all the modifications, design changes installations & removals are what worked for me. Nothing on this site or links are meant to be recommendations. Stabilizer Bar Mounting Options Options |
|||
| . |
Stock Sway Bar Mount Front Click to Enlarge |
Stock Sway Bar Mount left turn Click to Enlarge |
Stock Sway Bar Mount right turn Click to Enlarge |
|
non-modified Sway Bar Mount (left side) for M1Dadio Caliper Bracket left turn  Click to Enlarge |
Modified Sway Bar Mount for M1Dadio Caliper Bracket Design  Click to Enlarge |
Modified Sway Bar Mount (left side) for M1Dadio Caliper Bracket left turn  Click to Enlarge |
Modified Sway Bar Mount (left side) for M1Dadio Caliper Bracket right turn  Click to Enlarge |
| Modified Sway Bar Mount (right side) for M1Dadio Caliper Bracket left turn  Click to Enlarge |
Modified Sway Bar Mount (right side) for M1Dadio Caliper Bracket right turn  Click to Enlarge |
Sway
Bar Mount (top) for M1Dadio Caliper Bracket left turn  Click to Enlarge. |
Sway
Bar Mount (rear) for M1Dadio Caliper Bracket left turn Click to Enlarge |
| Master Cylinder Updates |
|||
Stock
Master Cylinder
 Click to Enlarge |
Stock Pressure Differential Valve Installed  Click to Enlarge |
. |
. |
Corvette
Master Cylinder
 Click to Enlarge |
New
Disc/Disc Valving Installed Side view  Click to Enlarge |
New
Disc/Disc Valving Installed Bottom view  Click to Enlarge |
Power
Bleeding using a Moto Power Bleeder  Very difficult to fit !!! parking brake pulley must be removed Click to Enlarge |
Floor
Paint MUST follow instructions exactly Click to Enlarge |
Finished
New
Disc/Disc Valving Installation front view  Click to Enlarge |
Finished
New
Disc/Disc Valving Installation side view 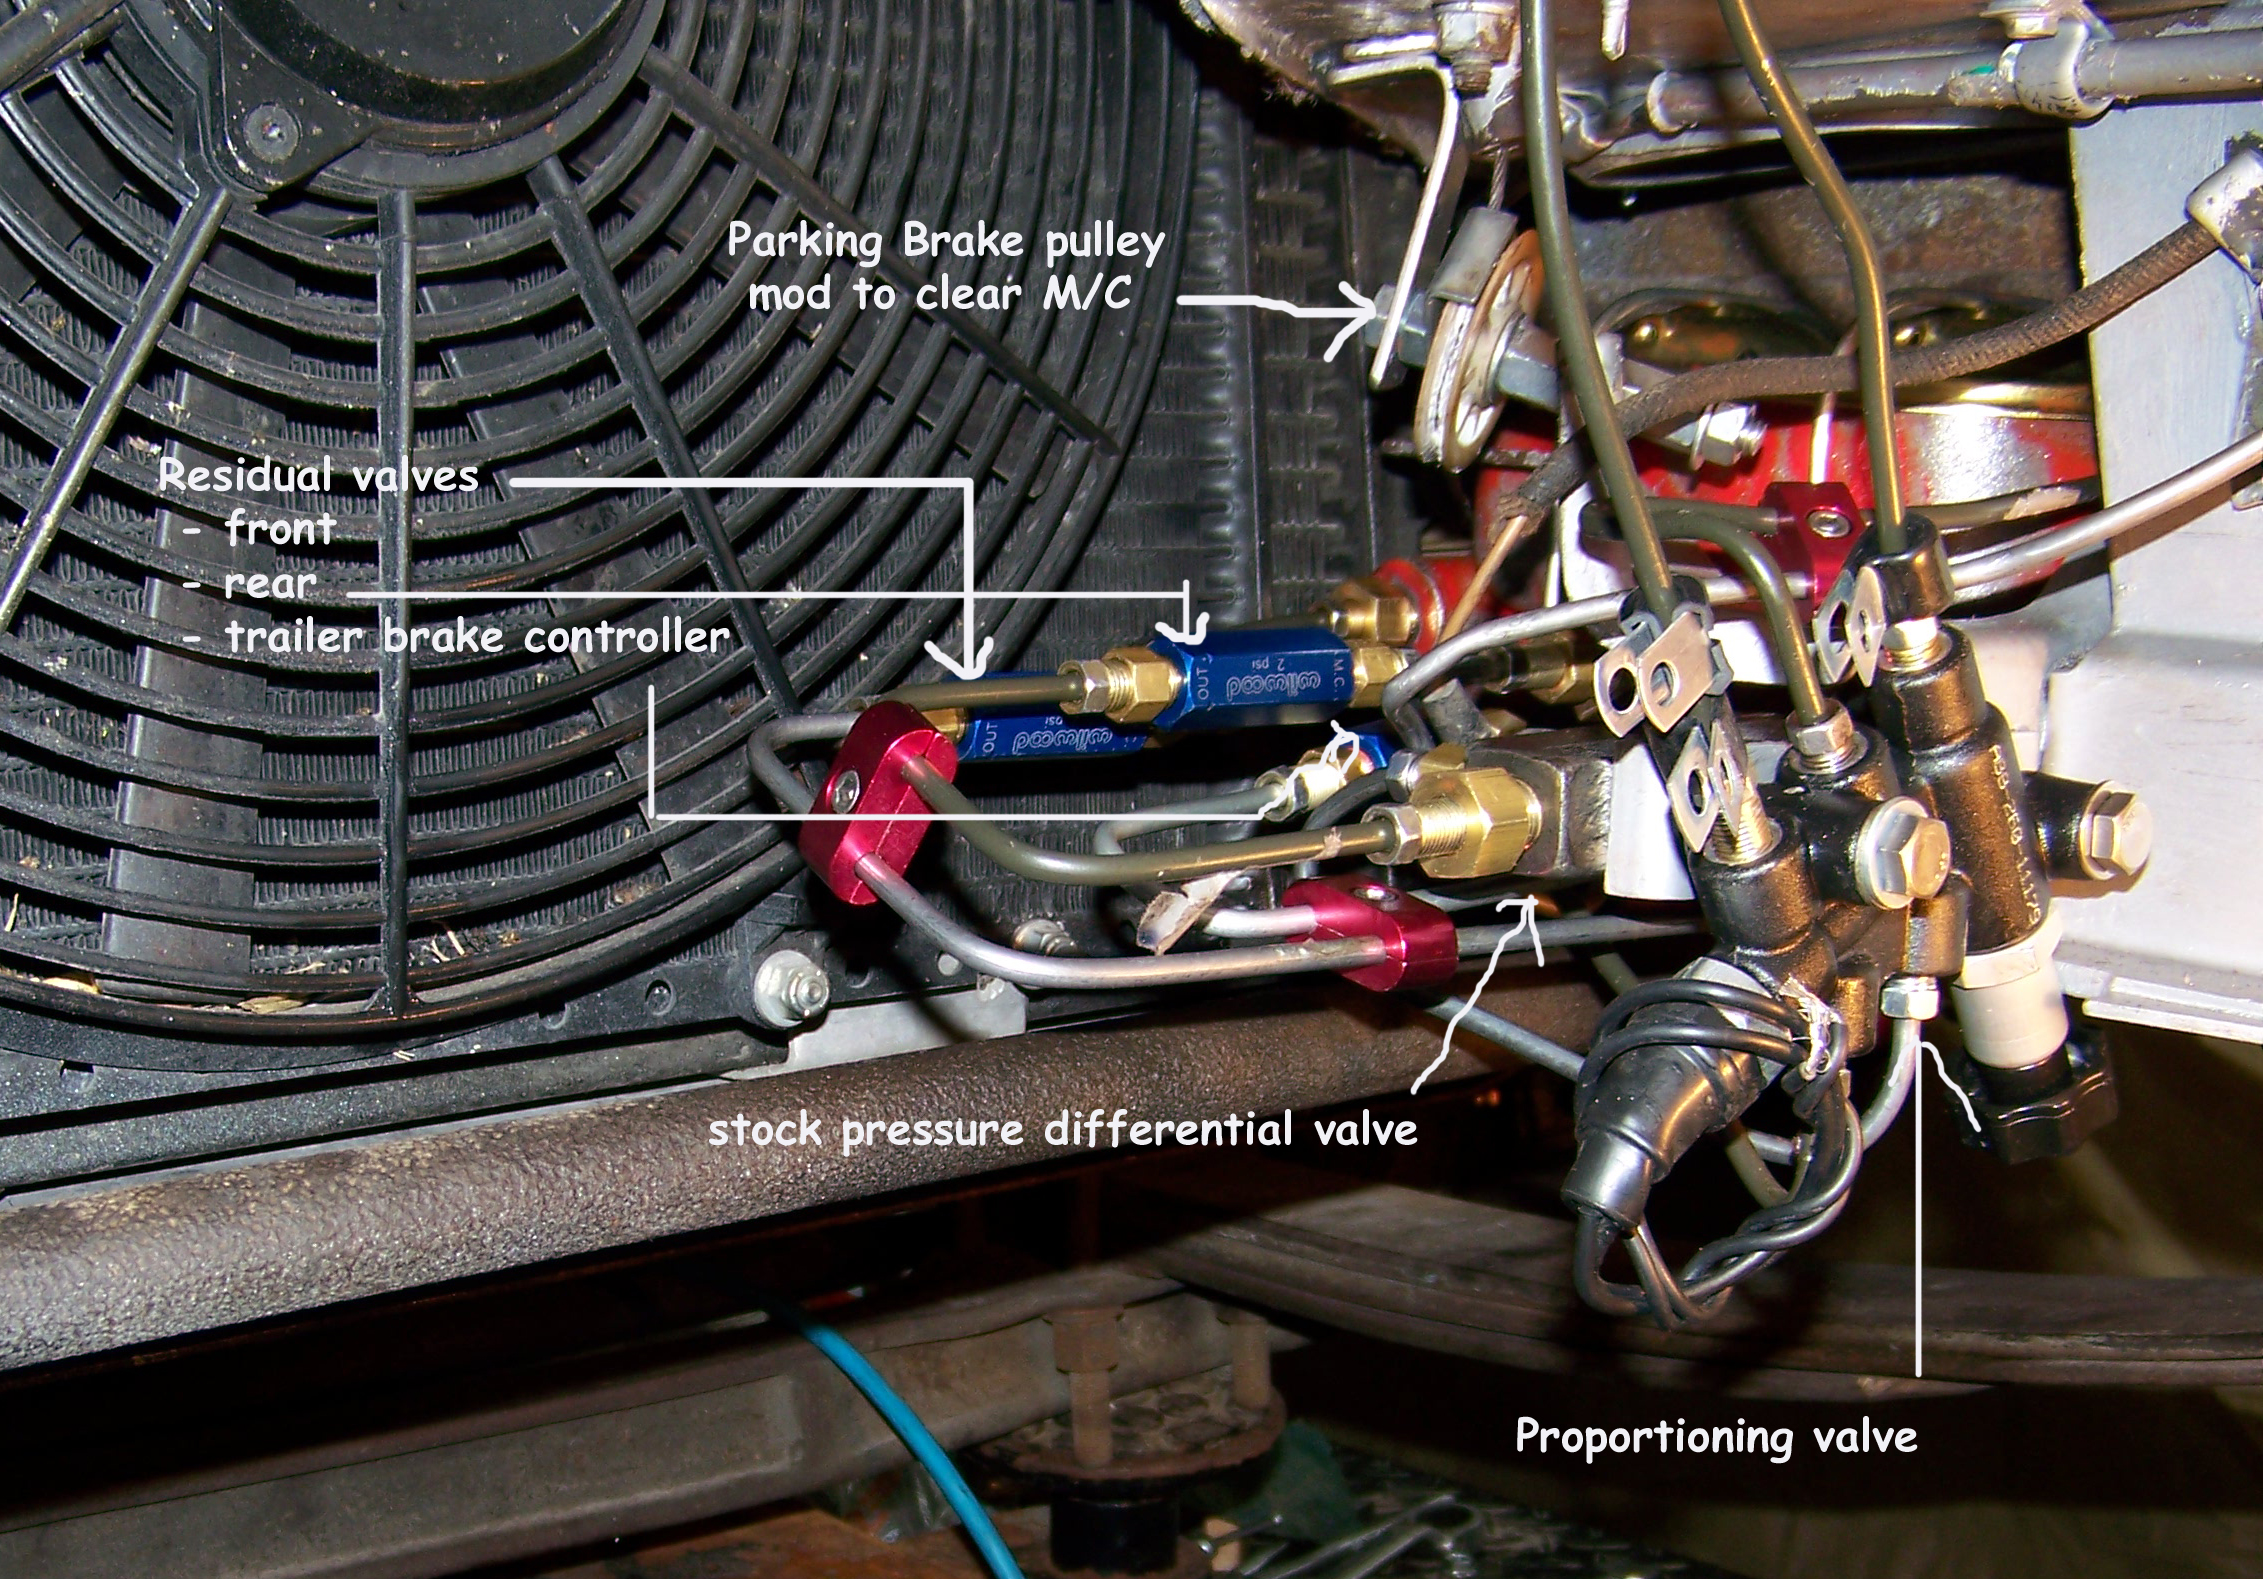 Click to Enlarge |
Finished
New
Disc/Disc Valving Installation bottom view 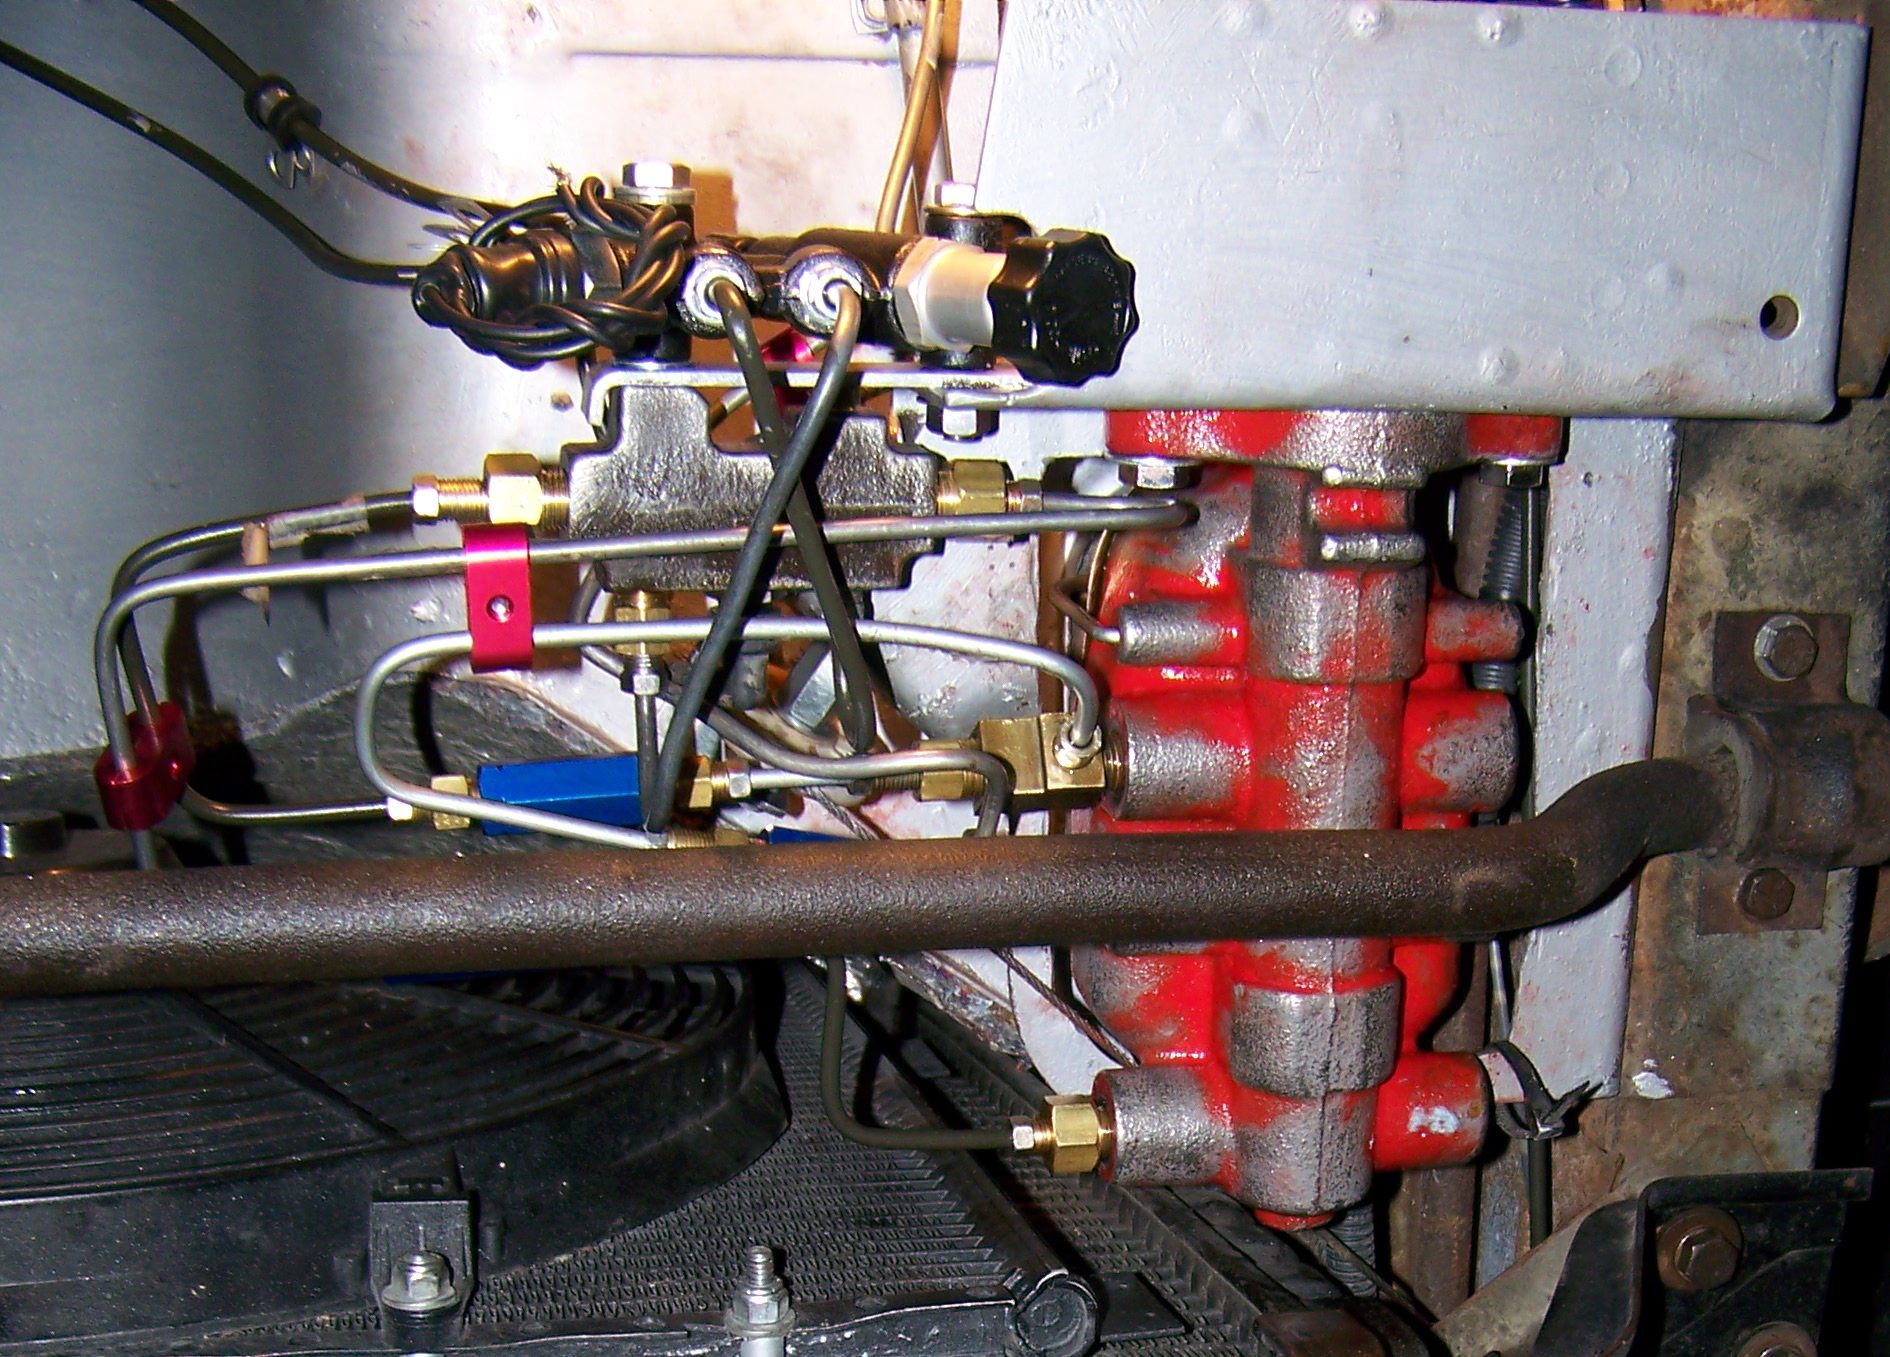 Click to Enlarge |
| Thread sealer The residual valves have National Pipe Thread (NPT). Adapters must be used to convert the the NPT to the 3/16" brake line fitttings, Be sure to seal the threads of NPT ends of the couplers NOT the brake line ends of the couplers. I used Rectoseal TruBlue Which can be purchased many places. |
|||
| . |  which comes in variety of sizes |
 Click to enlarge |
. |
| Installation
Suggestions - - scroll to end. |
|||
| . |
. |
. | . |
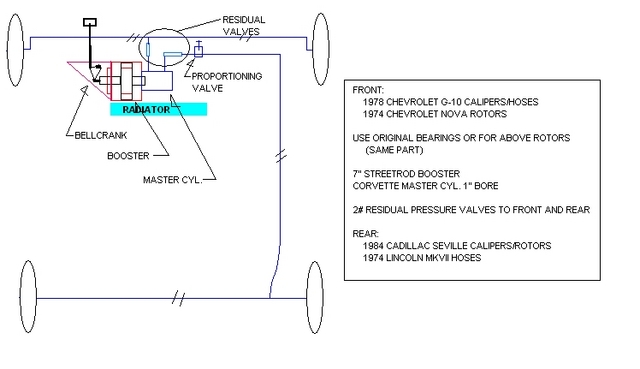
| Front Disc Brakes Parts
needed (with rear disc Brake Upgrade) |
|||
| Master
Cylinder Chevrolet Truck disc/disc Summit Racing 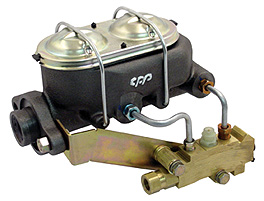 Click for info |
Proportioning
Valve Wildwood Summit Racing 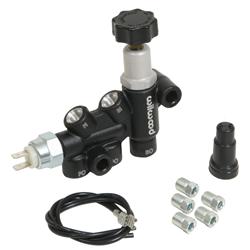 Click for more info INSTRUCTION SHEET |
Residual Valves (3) Front/Rear/Trailer Brake Controller Summit Racing 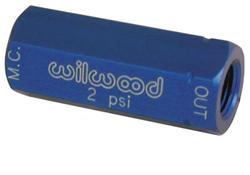 Click for more info |
Proportioning
Valve History/"one" source Click for info |
| . | . | . | . |
|
Parts used
in my
retro-fit. Your retro-fit
may have different requirements.
These part #’s are from a variety of sources. Because I live close to Summit Racing, I buy many of the specialized parts from Summit. I also comparison shop other parts, using Summit as a baseline. I often "shop" their clearance section, watch for sales, and use their free shipping option. The remainder of the parts are from either AutoZone.com or NAPA (some p/n changed - same parts). M1dadio has requested that the instructions for the caliper mount not be reprinted, or shared. For the most part, the reasoning for not sharing instructions are based in potential lawsuits, and copyrights, not to mention his 100's of hours of work, planning & money spent developing his front disc brake mounts. If you decide to complete this retro-fit, and buy M1dadio's mounts the instructions are very detailed and complete. Contact M1dadio If you do not have either extensive training and/or brake experience, please do not attempt this or the rear disc retro-fit. One mistake, or short cut can cost lives. All
the
fasteners are Grade 8.
|
|||
| . | . | . | . |
BvrWalley's
experience - ()
|
|||
| Good thing I decided to upgrade | |||
| Less than 10,000 miles Leading shoe 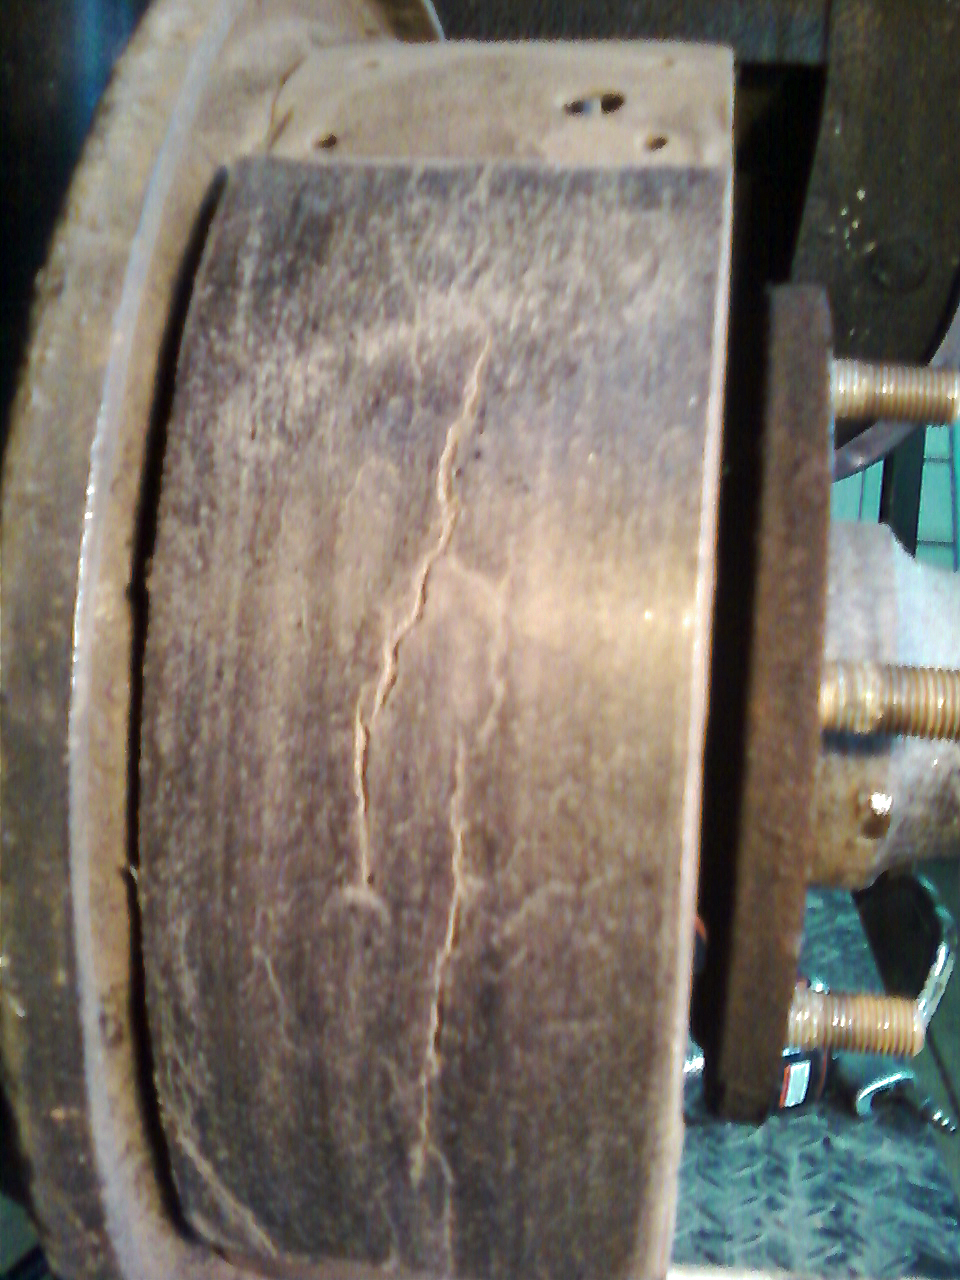 |
Less than 10,000 miles Trailing shoe 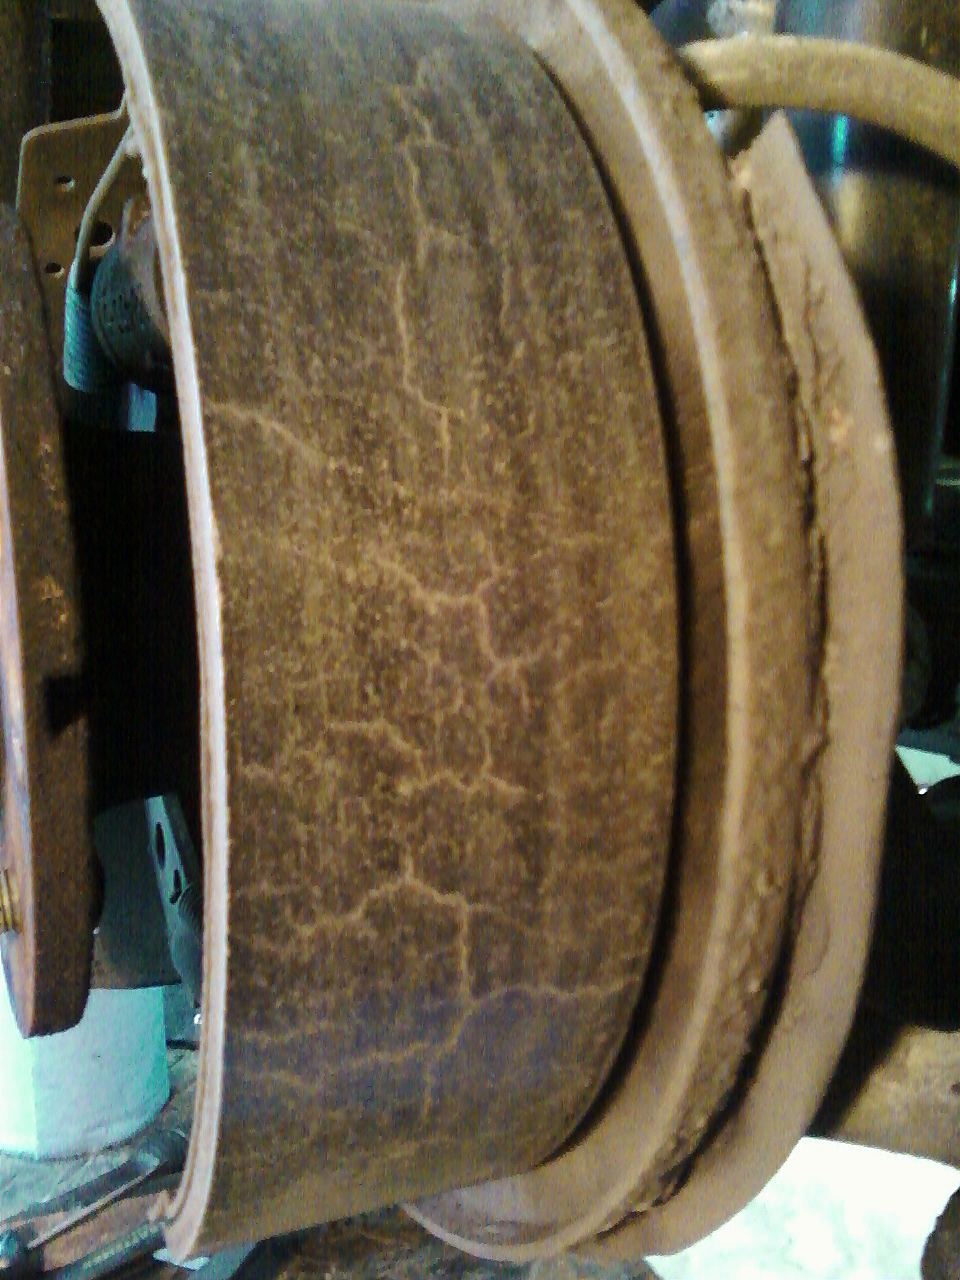 |
. | . |
| . | . | . | . |
| As
with the front
disc brake installation, the following is meant to be ONLY a record for me. If you decide to complete this install, there are several after market manufacturers who have rear disc brake kits available. Please use one of these kits. ALWAYS follow the manufacturer's recommendations and instructions. KIT Search Although I purchased the 1979 - 1985 Eldorado/Tornado/Riviera mounting brackets & calipers from an on-line kit company - CPP, both the brackets and calipers are available in many wrecking yards. After pricing rebuild kits, & pistons for the Caddy calipers AND the amount of work and time needed to clean and prep both calipers and brackets, buying new and refurbished was actually cheaper. The following is NOT an instruction procedure. |
|||
| Rear Disc Brake Thoughts | |||
|
3/9/2013
Words of Wisdom from m1dadio who has completed a rear disc brake conversion I have four wheel disc brakes on my 1st gen. I did not use that ('79 - '85 Eldorado/Tornado/Riviera) rear disc set up, but I believe it is the best option for early rear disc set up. That ('79 - '85 Eldorado/Tornado/Riviera) rear disc set up is available cheep in parts yards. Found on all those front wheel drive Cadillac Eldorado and Oldsmobile Tornado. I used the Camaro/Firebird rear disc set up which is drum because the calipers are the same both sides so they put one forward of the axle and the other behind the axle, but the main reason the Cadillac rear disc brakes are better is because the caliper piston size is smaller which makes for better proportioning on these vans . The Camaro caliper pistons are a bit too big and I have my proportioning valve maxed to one end and I still think I have too much rear brakes. You see a lot of hot rods with rear disc and the disc itself looks rusty all the time. This is shameful to see at hot rod shows not because of the rust or dark look but because it tells you the proportioning is wrong and that a the rear brakes are hardly being used at all or not at all. That is a seriously dangerous situation because if you have to slam on the brakes in an emergency, you front brakes are going to lock up and the rear wheel drive keep pushing from behind. Any of you out there who have driven on ice before know what I'm talking about. Its important to reduce the rear braking so they don't lock up on regular braking but its a very dangerous situation if the rear brakes are not used enough and the fronts lock first. A properly set up four wheel disc brake set up will have shiny rotors all around and will be producing corrosive brake dust and rotor fillings to stain your mags equally all around. So yea I've been there/tried that, I think that ('79 - '85 Eldorado/Tornado/Riviera) rear disc set up is the best choice. Don't forget you have to have your axles flange machined down to smaller dia, so they will fit into the rotor hat section. That's what GM did when adding the rear disc option. |
|||
| Before you start What others have experienced |
|||
| Jay Kopycinski | Speedway Motors | MP Brake Systems | Classic Performance |
| . | |||
| Rear
Disc Brake Information |
|||
|
Summit
Racing partial Parts available
If not using CPP kit. These are the caliper parts you will need. Fasteners:
(grade 8)
1979 - 85 Cadillac/Tornado/Rivera * Seville ('79 - '85 Eldorado/Tornado/Riviera) rear with internal E-brake (with pads and hardware) * Optional Sources * Wagner L- 107094 R- 107095 * Autozone - P4138 (Pair loaded) with all caliper parts
* from GM Cadillac parts counter
|
|||
| Caliper
Mount Brackets '79 - '85 Eldorado/Tornado/Riviera 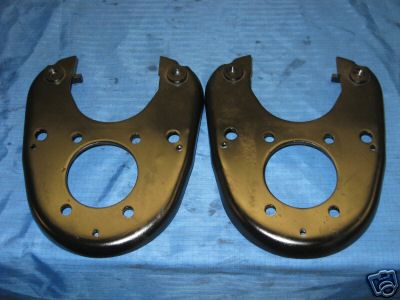 Click to Enlarge |
Rear Rotors '79 - '85 Eldorado/Tornado/Riverea Install on "machined" axle flanges  Click for more Info |
Rear Calipers '79 - '85 Eldorado/Tornado/Riviera 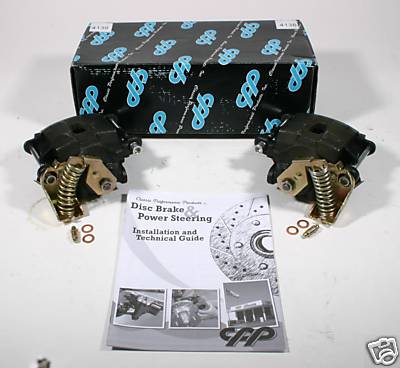 These are from CPP Click to Enlarge |
Long Wheel Lugs 7/16" - 20 X 1.75" |
Stock
Rear Brake
Axle Removed 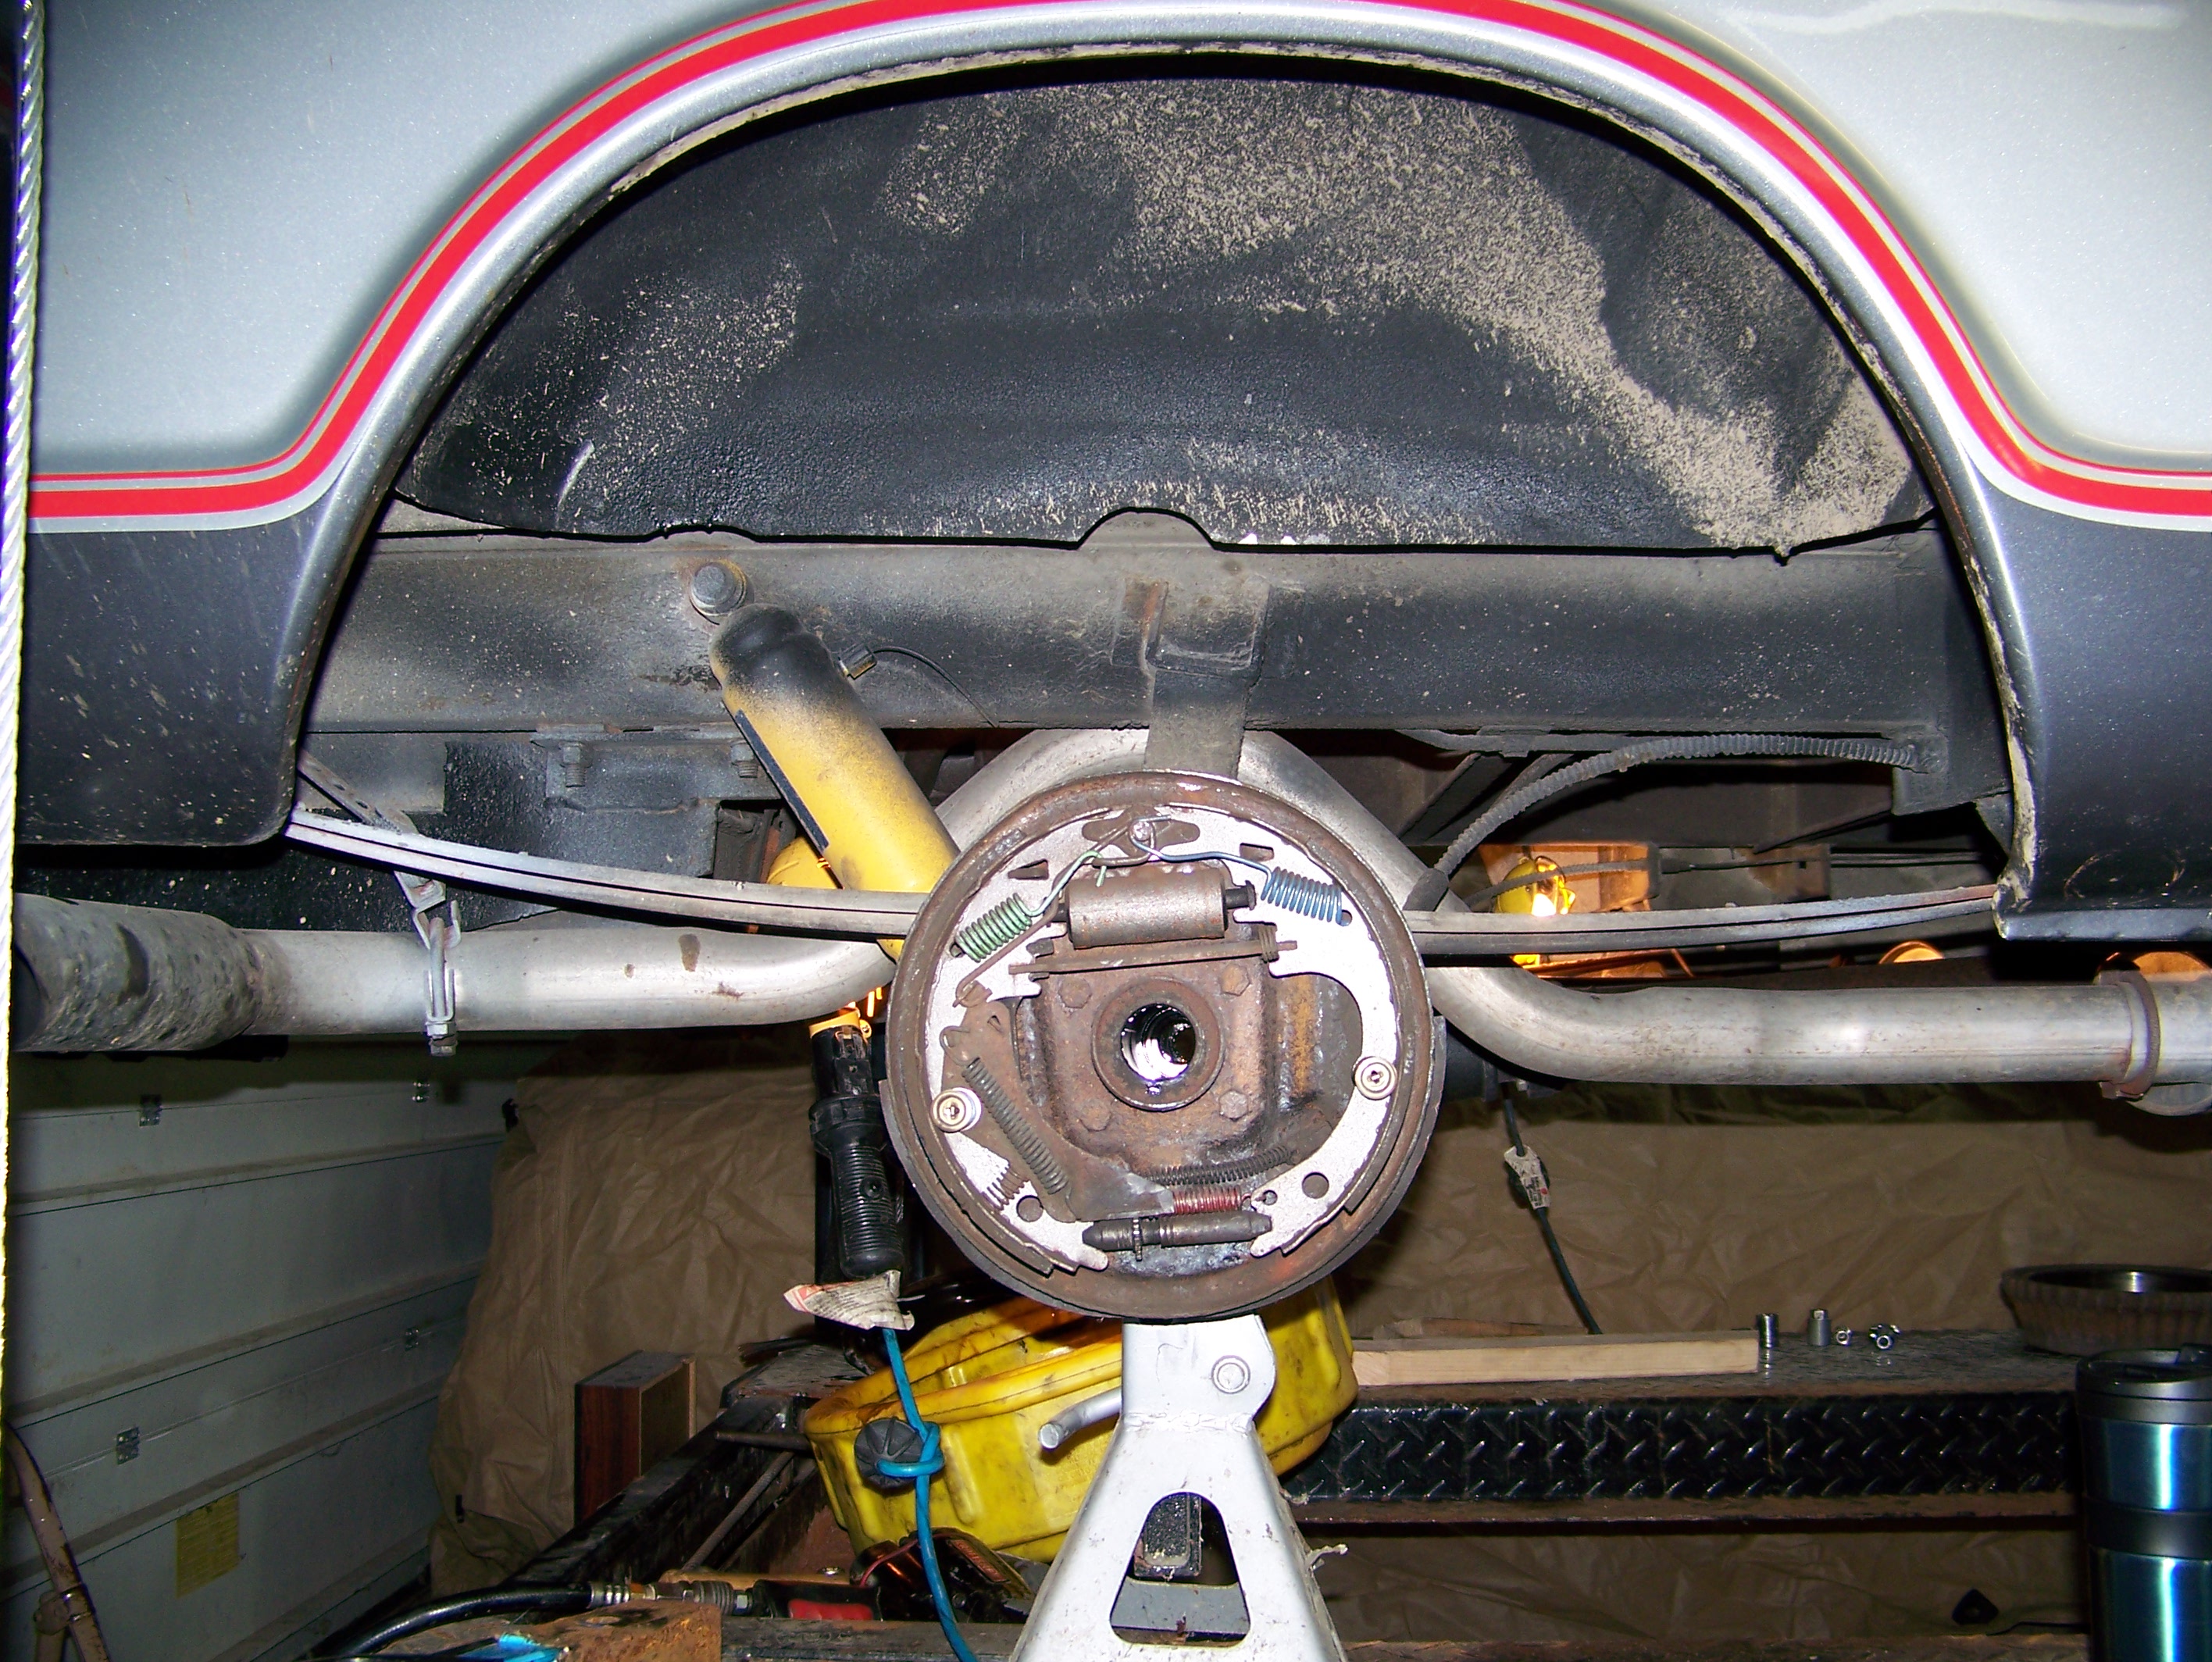 click to enlarge |
Rear
Disc Brake
Bracket
Axle Removed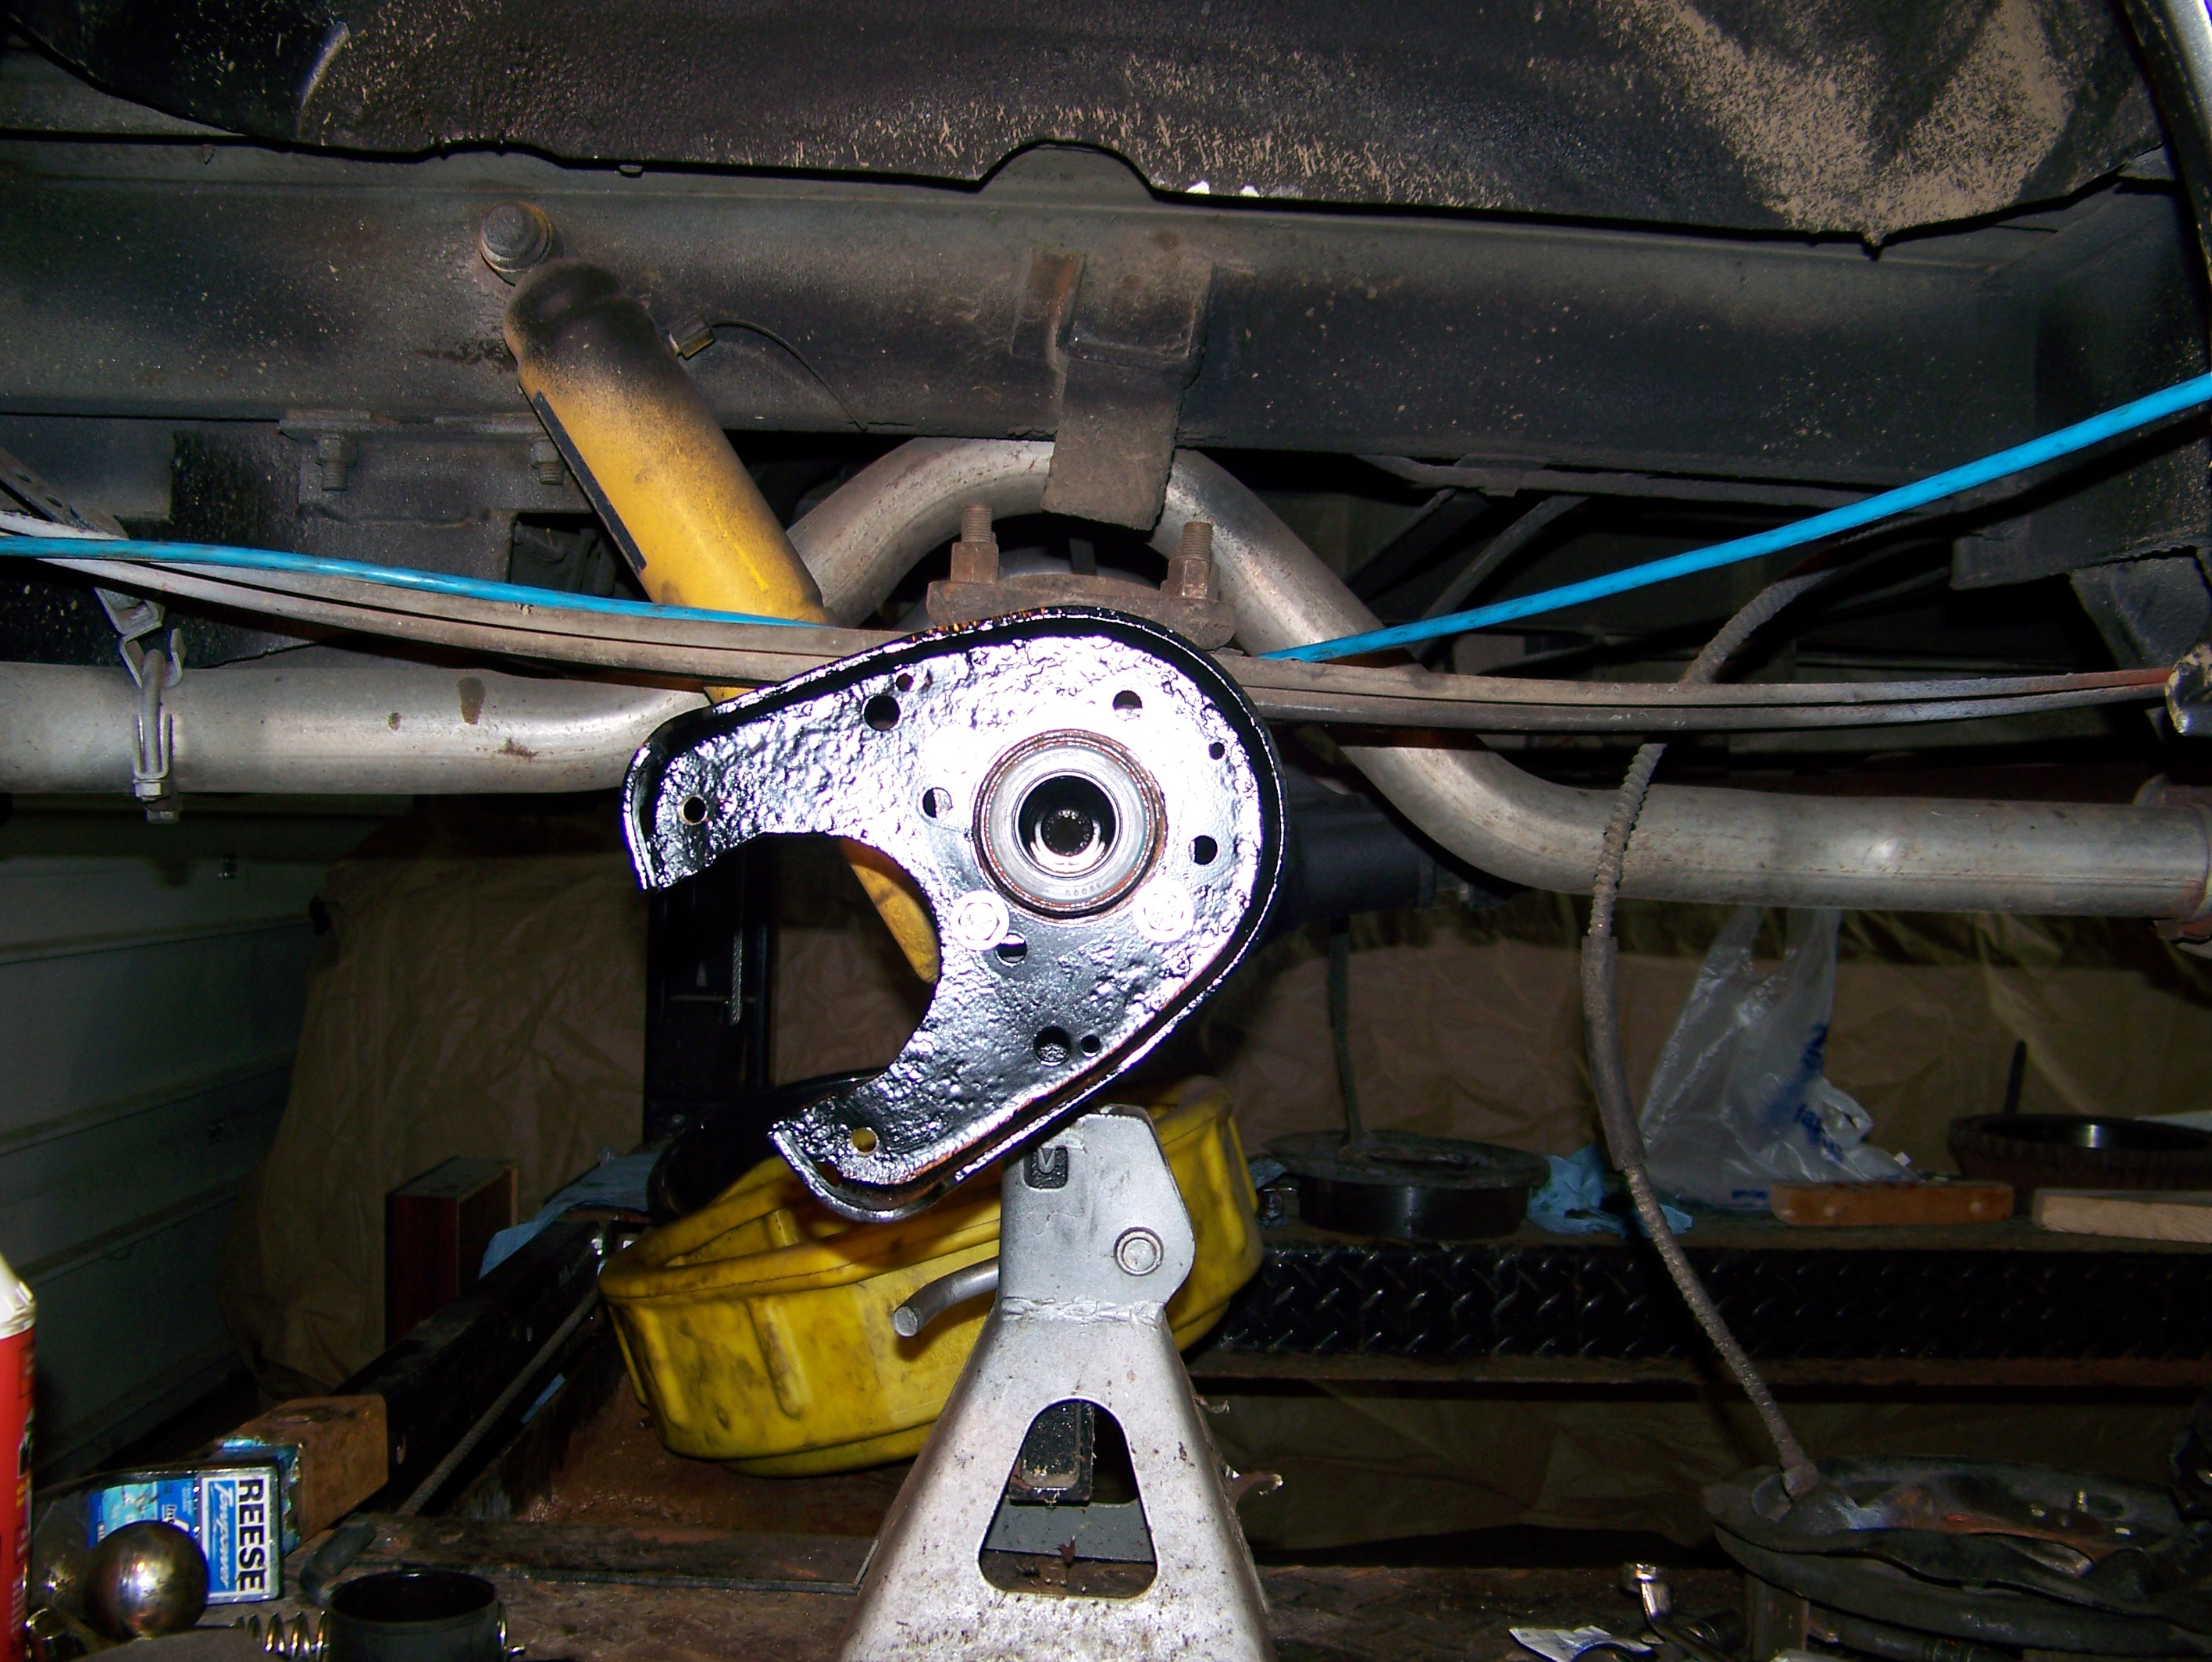 Click to Enlarge |
. | . |
'67 GMC Van Stock Rear Brake Side view click to enlarge |
'67 GMC Rear Disc Brake Caliper Bracket Side View click to enlarge |
'67
GMC
Van
Rear Disc Brake Rotor side view click
to enlarge
|
67
GMC
Van Rear Disc Brake Caliper side view  click
to enlarge
|
| '67
GMC
Van Stock Rear Brake Rear view click to enlarge |
'67
GMC Van Rear Disc Brake Caliper Bracket Rear view 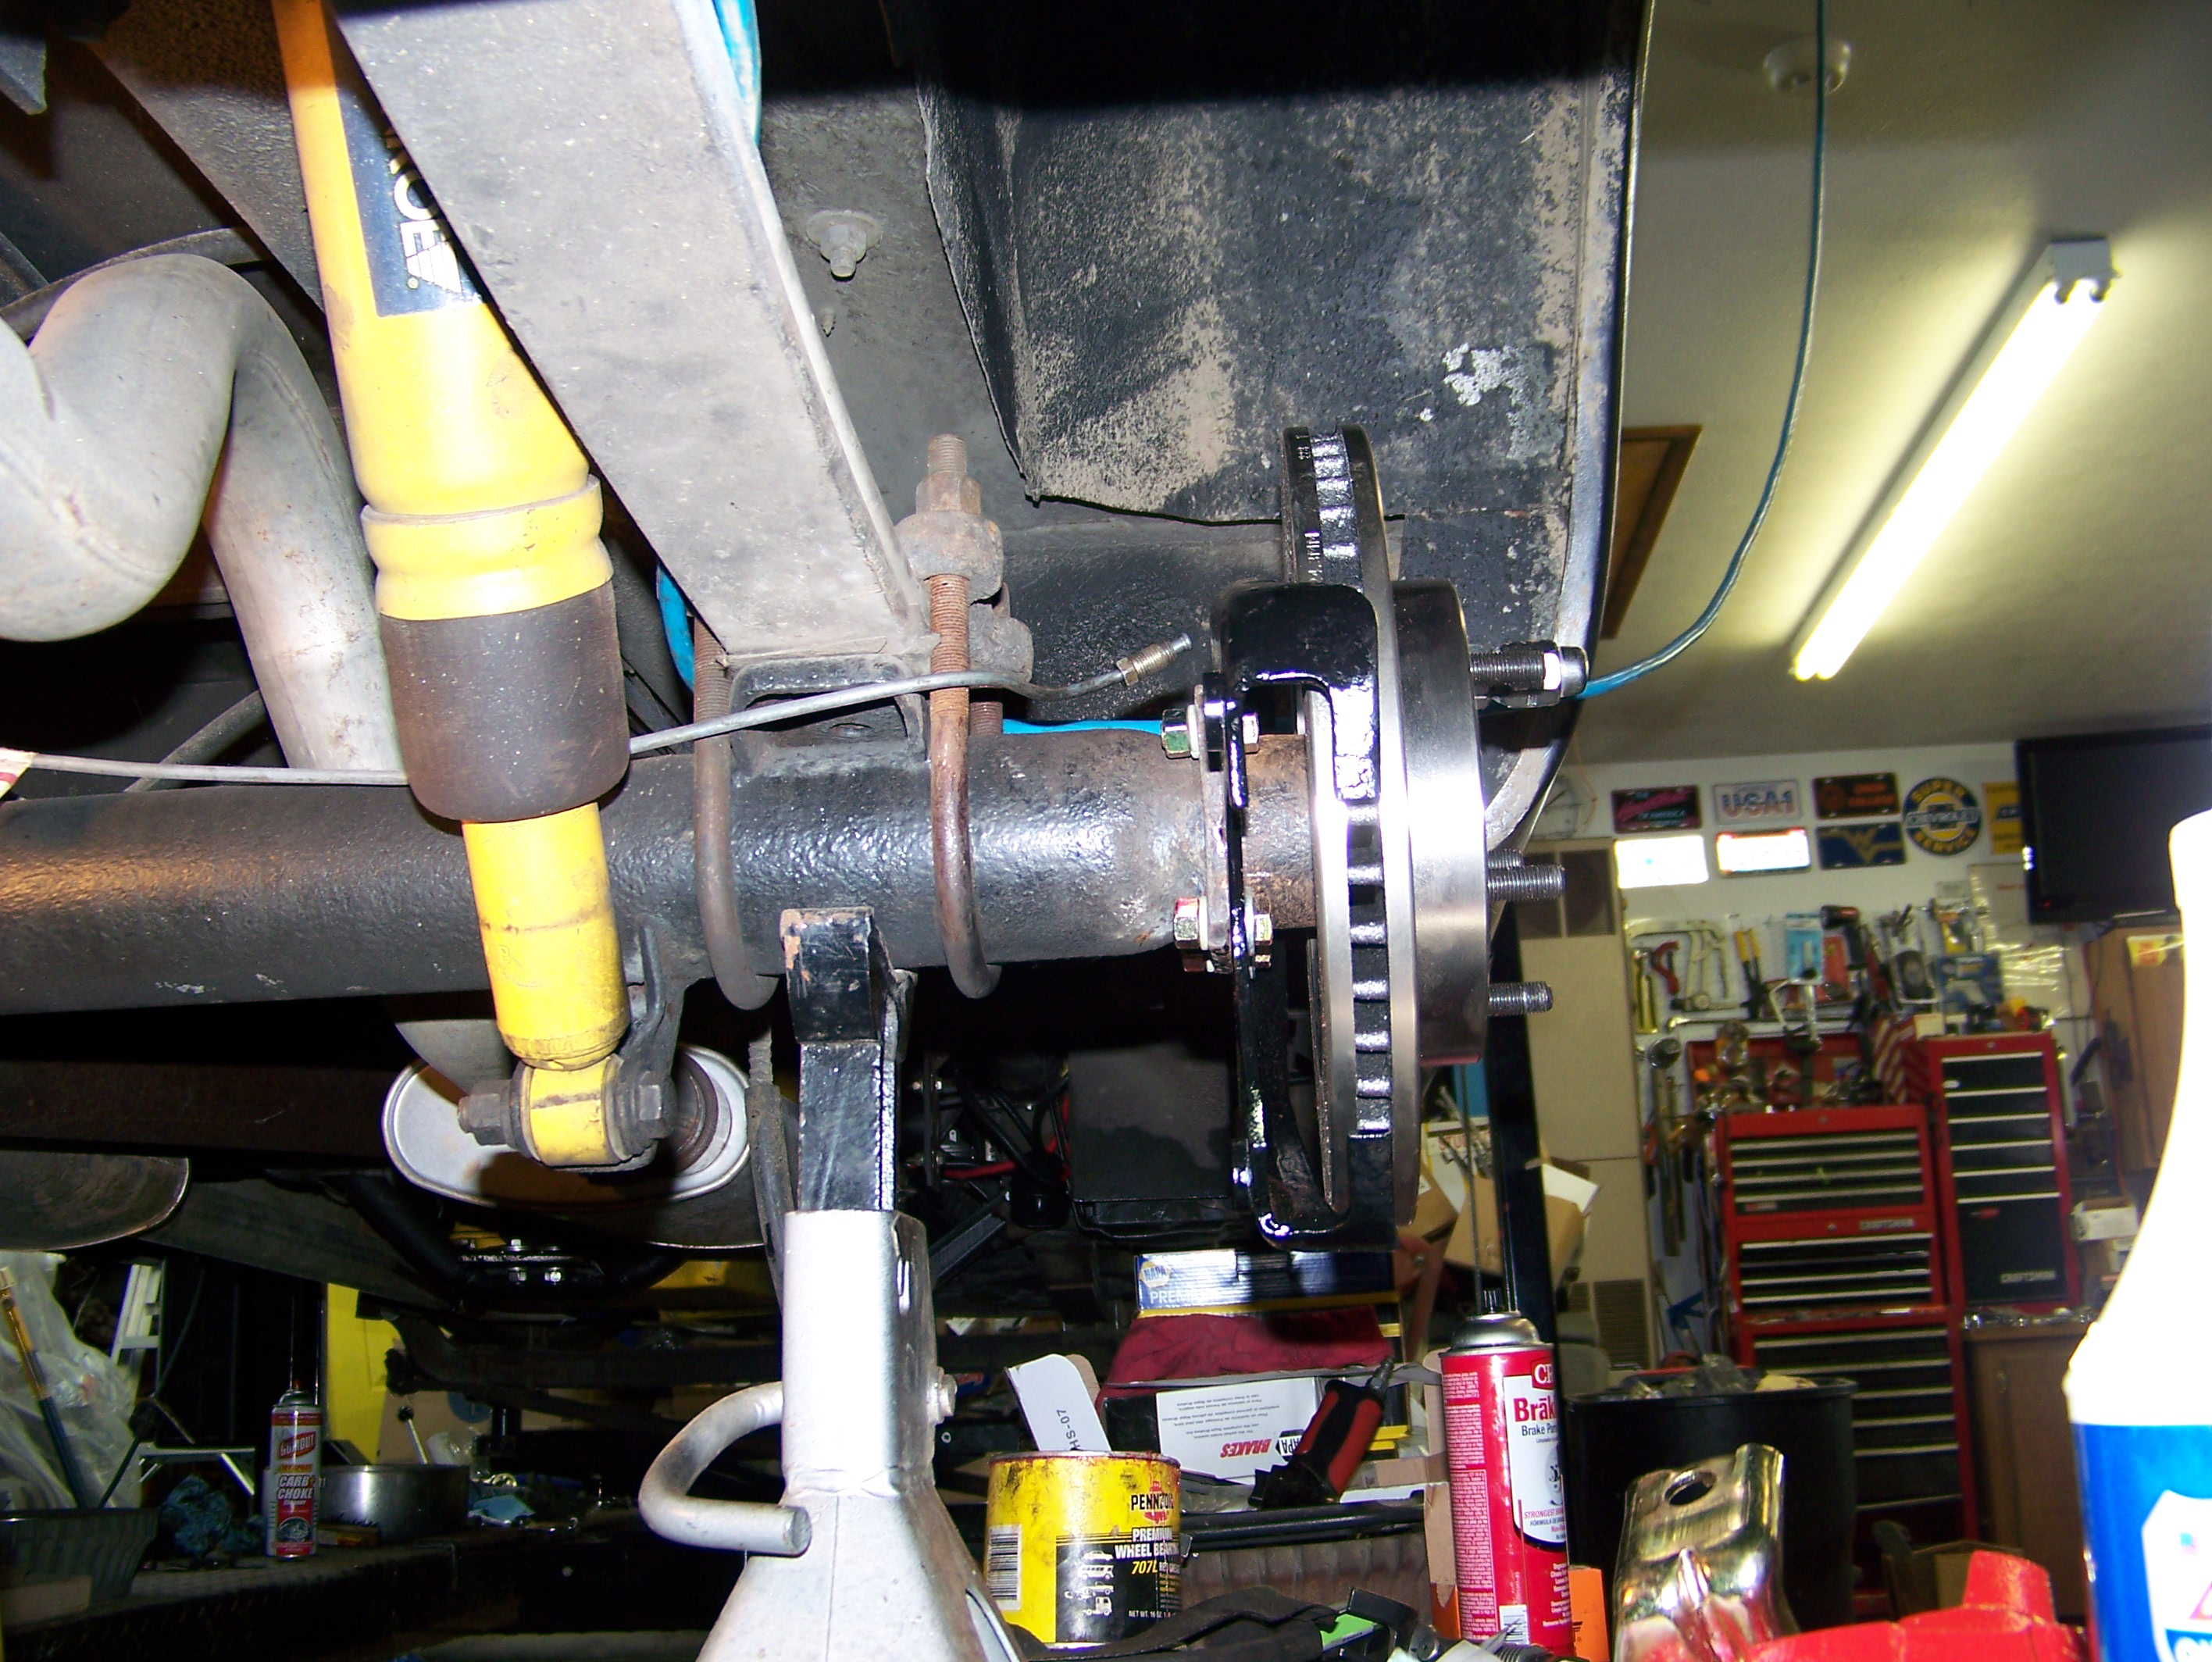 click to enlarge |
'67
GMC
Van
Rear Disc Brake Caliper rear view  click
to enlarge
|
'67
GMC
Van
Rear Disc Brake Caliper top view  click
to enlarge
|
|
'67
GMC Van
Stock Rear Brake Front view  click
to
enlarge
|
'67
GMC
Van
Rear Disc Brake Caliper Bracket front view  click
to enlarge
|
'67
GMC
Van
Rear Disc Brake Caliper front view  click
to enlarge
|
. |
| . |
. |
. | . |
| Right
side Brake hose - rear click to enlarge |
Right
side Brake hose - top  click to enlarge. |
Left
side Brake hose - Axle Mount  click to enlarge |
Left
side Brake hose - top  click to enlarge. |
| For
the rear brakes to operate properly the parking brake MUST operate fully, correctly AND properly. I modified the stock parking brake cable by:
Adjustments MUST BE CORRECT - - - period There are a number of methods that have been used o properly adjust the parking brake(s) . The factory suggested method is the "one" correct method. Below are others that have allegedly worked. |
|||
| Most
Informative (worked for me) |
Speedway | Master Brake Inc | sort of worked |
| Right
side Parking Brake rod re-thread  click to enlarge |
Right
side Parking Brake - central 1 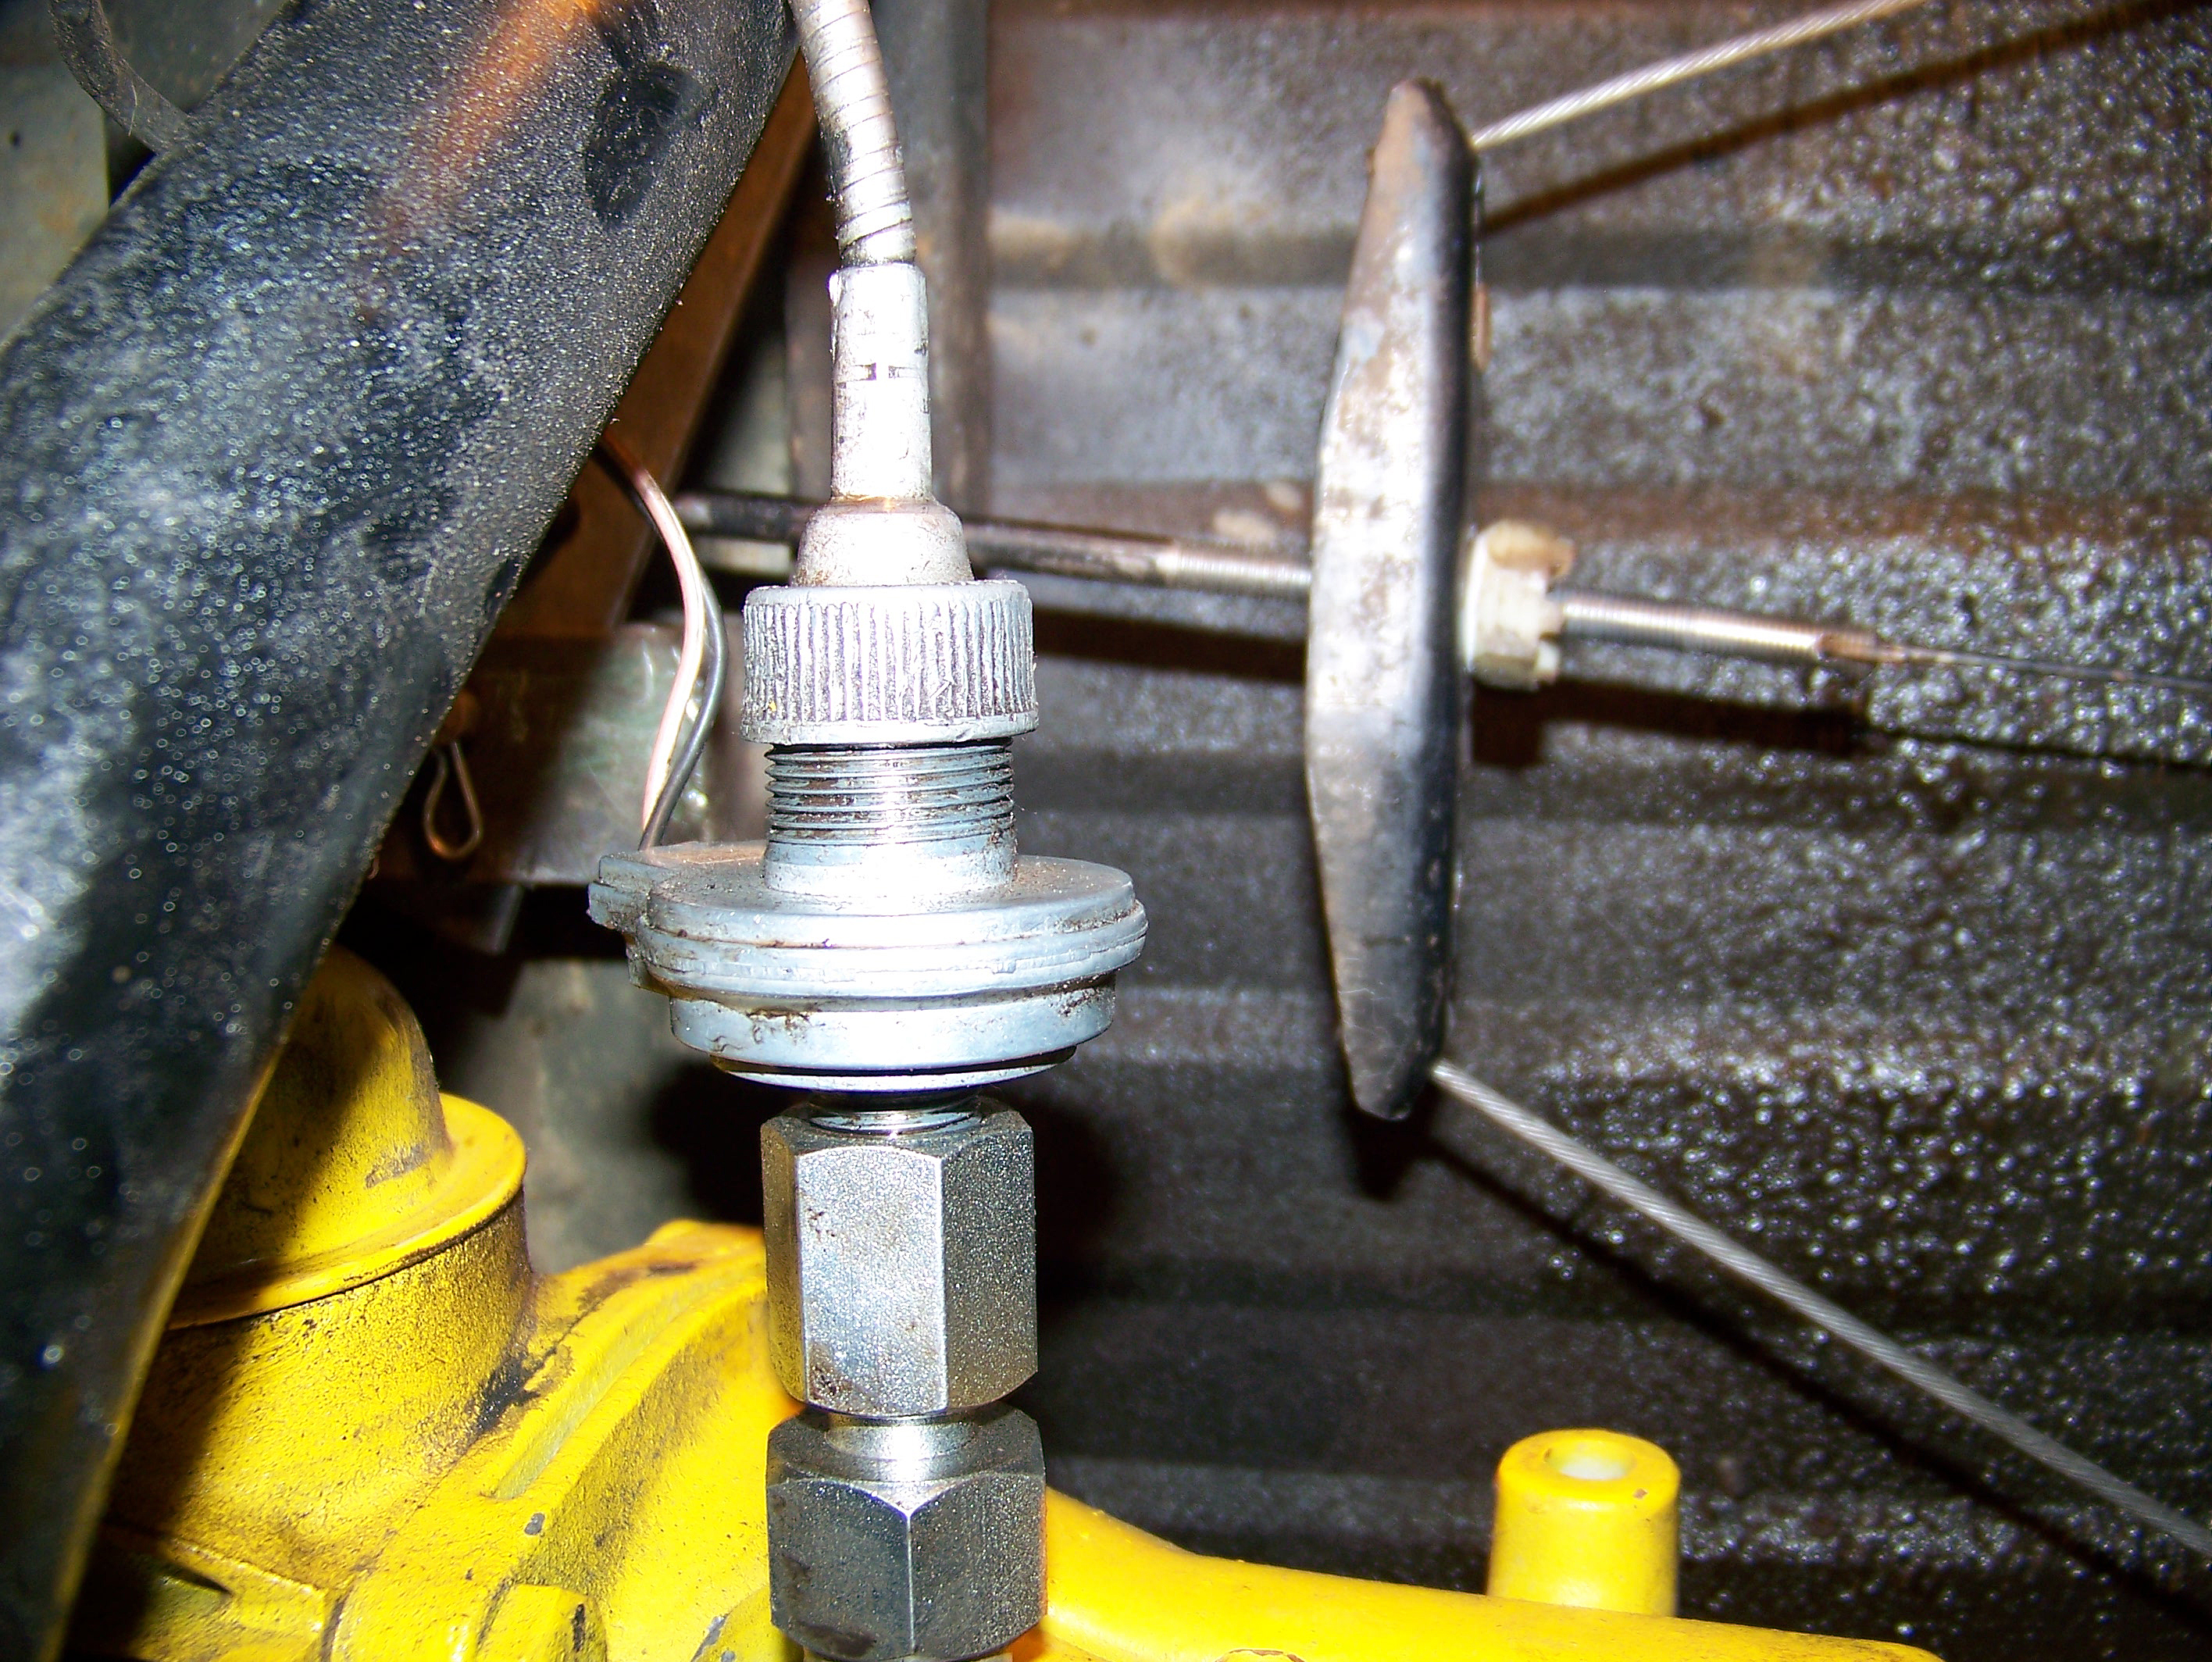 click to enlarge |
Right
side Parking Brake - bottom central  click to enlarge |
Right
side Parking Brake - click to enlarge |
| . | Parking Brake Cable Bracket & spacer  Click to Enlarge |
Parking
Brake Pulley Mod needed to clear Master Cylinder  Click for more info |
Parking
Brake Pulley Mod needed to clear Master Cylinder  Click for more info |
| For
the rear brakes to perform properly the following instructions MUST be followed *** note steps # 17 & 18 *** Rear Brake Adjustments & Bleeding Instructions another method Late '70's Cadillac rear Disc Brake Troubleshooting Site Site link A word of caution from a brake specialist "One of the biggest
problems with adding
rear disc (brakes) to these "C" clip type rear ends is axle end play.
Most factory vehicles with rear disc brakes have the axle type that bolts to the flange so it has almost zero end play. Check your rear end (axle end play) with a dial indicator. If you have .050" end play or more you need to do something to tighten that up. New C clips, spider gear shims and or spider gear pin. Too much axle end play will play havoc with your disc brakes constantly pushing the caliper piston in as your turn corners and the axles/rotors slop back and forth. Some times resulting in constantly needing an extra pump of the brake pedal to take up the slop. There are kits that convert your axles to a flange mount type. M1D |
|||
| Classic
Performance Kit Installation |
|||
|
The end play in my
Van
0.045  |
|||
| Stock Master Cylinder & Pressure Differential Switch Click to Enlarge |
Stock Master Cylinder & Pressure Differential Switch  Click to Enlarge |
Stock Master Cylinder & Pressure Differential Switch  Click to Enlarge |
Stock Master Cylinder Mount  Click to Enlarge |
| . | . | . |
Enlarge the master cylinder opening using the white line as a guide. |
| Replacement Master Cylinder & Proportioning Valve Click to Enlarge |
Replacement Master Cylinder, Residual Valve Proportioning Valve  Click to Enlarge |
Replacement Master Cylinder, Residual Valve Proportioning Valve  Click to Enlarge |
Parking Brake Pulley Mod Click for more info |
| . | |||
 courtesy of RipVanArkie http://www.vcvc.org/ubb/Forum1/HTML/004168.html (dead) http://vintagevans.forumup.jobs/viewtopic.php?t=5028&highlight=&mforum=vintagevans Must be a member |
|||
 Click to Enlarge |
|||
Troubleshooting |
|||
| Late '70's Cadillac rear Disc Brake Troubleshooting Site Site link |
Wildwood Brake FAQ site |
Wildwood Brake Troubleshooting Site |
Wildwood Brake Tech Tips. |
| Possible
used parts source e-Bay
-
Jeff_Vette Store- (fixed)
|
|||
| . |
. | . | |
| Finishing
thoughts |
|||
| . |
. | . | . |
| . |
Main
Page |
Vintage Chevy Van Club | . |
Thoughts???
you are visitor