
|
|
||
|
34. Cartoons - Leroy the Hawk - Part 3 |
||
 MODELER, BACK FEATHERS I do the two feathers on Leroy's back as I did the head feathers. Using the 'Right' viewport, I press CTRL-g for 'Select Points' mode, highlight the three back points which correspond with the widest extents of the front feather. I switch to Polygon Select mode with CTRL-h for 'Select Polygons' mode, highlight the four polygons, press 'k' to kill the polygons, CTRL-g for 'Select Points' mode, highlight center point, press DELETE to get rid of the central unused point. I enter 'Drag' mode with CTRL-t and arrange the angle of the back in the 'Perspective' viewport so I can see the 8 points. I turn on 'Symmetry' mode, dragging each point until they're arranged as an oval.  You MUST have Symmetry mode turned on when you do the Extend, however, or the mirrored points won't both move at once when you wish to reposition them. I use SHIFT-h to size the new circle of polygons smaller, 't' to move the new row of points so they align with the side-view, CTRL-t for 'Drag' mode to adjust each point individually. 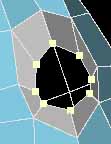  Each time that you do 'Extender' while in 'Symmetry' mode, it will forget the proper sequence of the points, and you'll have to exit from Symmetry mode, reselect them in a circle, re-enter Symmetry mode and 'Extender' again. It's a bug in LightWave, I'd say, but this awkward set of steps isn't too hard to do each time.  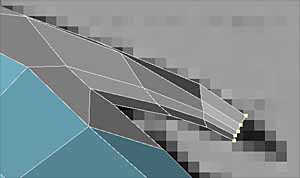 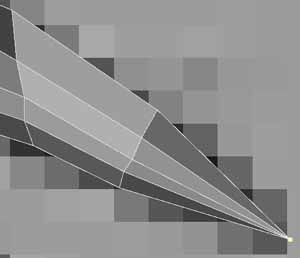 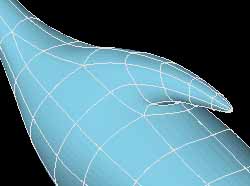 MODELER, THE SECOND BACK FEATHER I do the same thing to the set of four polygons just below the ones I just did, skipping one row of polygons. If you ever get into a bind where you have either created polygon segments which won't convert to SubSurface mode, try letting it convert the ones it can and while in 'Polygon Select' mode select all polygons and do 'i' for 'Polygon Info' panel. I select all polygons which are SubSurfaced and press the 'Deselect' button. Ensure that the only ones still selected say 'Face', then press DELETE. This will get rid of any offending polygons with less than 3 faces. Also, if at any time you find you've been working NOT IN SYMMETRY MODE, delete one side of the model, do a SHIFT-v to mirror those polygons, then an 'n' to fix it, and click on 'Polygon' mode with your mouse, then in the blank area above it to deselect all polygons (turning off mirror mode). I weld together points which had been on the juncture row of points (except the ones that were on the zero X axis, as those are automatically welded). Once I'm done, Leroy has two back feathers.  MODELER, LEROY'S WINGS I do an 's' to save the object, then 'File->Save Object As...' to start another version which will have wings. I'm now up to 'Leroy_7.lwo' I turn off 'Symmetry' mode and move to the 'Back' viewport. I thoughtfully place points by pressing 'Add Points' mode ('+'), giving three points for each feather so there will be four polygons to create them. I place corresponding points along the bottom of the wing. I move the arm plane in the 'Right' viewport so it lines up to the center of the side-view drawing of the wing. 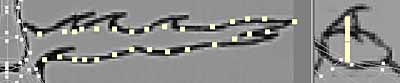 I create the center line points to be equal distant between the top and bottom points, moving them so they line up with the front of the wing in the side view. 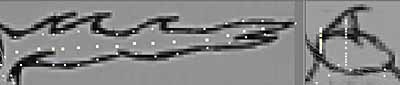 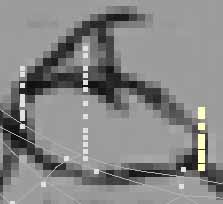 I do that one more time and position it between the top row and the BACK center row.  However, the mind has a way of putting together 3D points into their respective polygons when the view is rotated. Thus, I use ALT and the mouse to rotate it. I memorize which points belong to which polygons. Once you've got a row started, it becomes easier and easier to see which points belong with which polygons. I again use the 'select each point, clockwise, pressing 'p' to create a polygon' and create the polygons a row at a time.  I turn on SubSurface mode to see what it looks like, using CTRL-t to adjust the vertices. 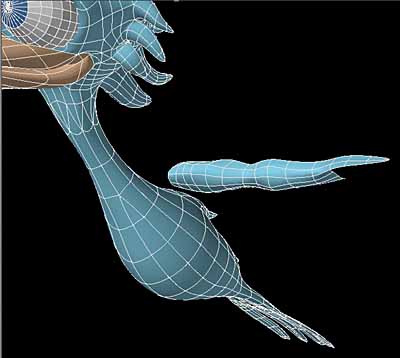 Once half of the wing is done, it is easier to hide the half of the wing that has polygons. I also hide the body by selecting one polygon, pressing ']' to 'Select Connected' and pressing '-' to hide them while in 'Polygon Select' mode. After all polygons are connected I start modeling the arm in the 'Perspective' viewport until I'm pleased with the shape. I select the wing, press 'SHIFT-v' to mirror it, 'n' to set it and deselect all polygons. I enter 'SubSurface' mode to view it. 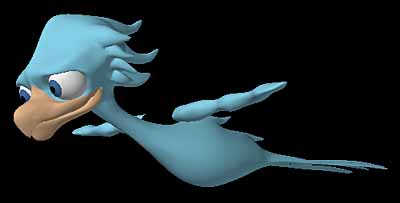 MODELER, LEROY'S SHOULDERS At the moment, Leroy's arms are way above his body. I could drop the wings down from what my drawing shows, but instead I will create shoulders which feel right with the positioning of the wings. I'll figure that I wanted that humpbacked shape and that my initial instincts were right. I delete the mirrored arm, turn off SubSurface mode, and see what I'll have to do to match up the wing to the body. I save the object with 's', then 'File->Save Object As...' and bump the number. Ensuring that SubSurface mode is turned off, I hide all polygons that aren't associated with the arm connection and body where the shoulder will attach by selecting them and pressing '-' while in 'Polygon Select' mode with those polygons selected. I highlight the six polygons which I'll remove in order to attach to the body to the wing. That will leave 7 points on the body and 8 on the wing to attach, which should do nicely. I'll just have to split a polygon on the body into three triangles, thus creating one more point. 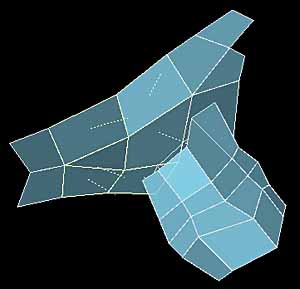 I select that center point and one back point and do a 'Split' (CTRL-L), select the center point and the other back point and do a 'Split' (Creating three triangles in place of the one polygon). I do CTRL-t to 'Drag' the corresponding points to where they will attach, leaving one polygon row between the points. 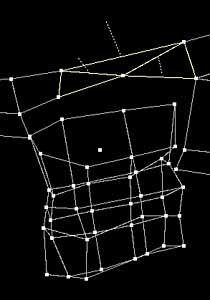 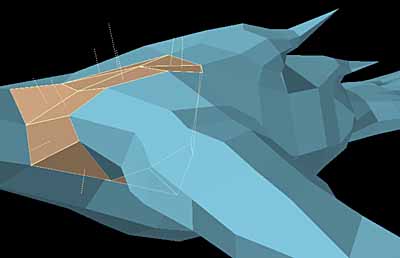 I re-assign them to the 'Head' Surface Name by pressing 'q' and selecting 'Head' from the drop-down menu (which removes those polygons from the 'Upper Beak' designation). 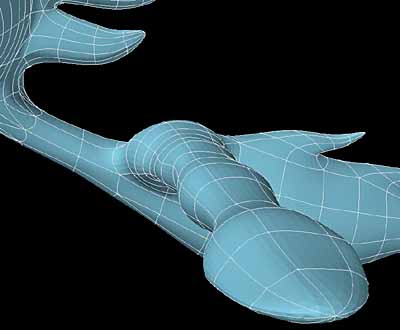 MODELER, MIRRORING WING & SHOULDER I delete all polygons which are no longer symmetrical (a polygon won't highlight on both sides if it isn't symmetrical. Since I've been out of symmetry mode for a while, I check the edge polygons one-by-one, deleting any that are no longer symmetrical. I select the tip polygons of the 'hand' and continually press 'SHIFT-]' to expand the selection down the arm. When I get close to the shoulder polygons, I select them one-by-one. 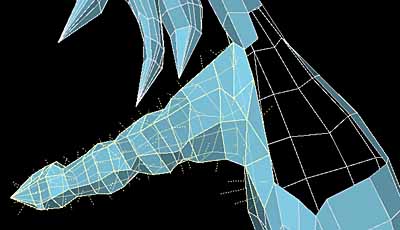 This will be a permanent mirrored section, so I will now weld the points which are along the polygon boundary (execept any points which are on the zero X axis). If you ever get to a point where too many polygons are no longer symmetrical, delete half of your model, up to the X Axis line. Highlight all points that should be exactly on the Zero X Axis, enter 'Point Select' mode (CTRL-g), press 'i' to bring up the 'Point Info' requester and put zero as the value of X [if it says (mixed). If it doesn't say (mixed), it's already correct]. I'll worry about the wing feathers, if I even decide they are necessary, after. 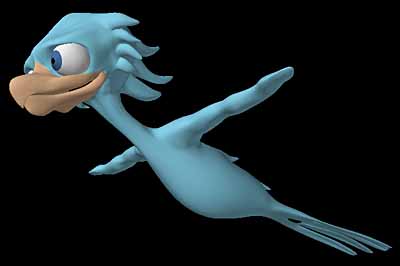 MODELER, LEROY'S LEGS Because there's already way too many polygons in that layer, I will select 'Layer 3' to do the legs. The legs are very similar to the wings, as far as how you'd construct them, so I won't linger. I draw an outline of points in both directions, not having any feathers to worry about so I can space the polygons further apart. I will create more polygons where the knee and ankle are so they'll be able to bend. I go to the 'Right' viewport where I try matching up the left and right dots. The feet were drawn in perspective, so the knees and feet might not match up as well. 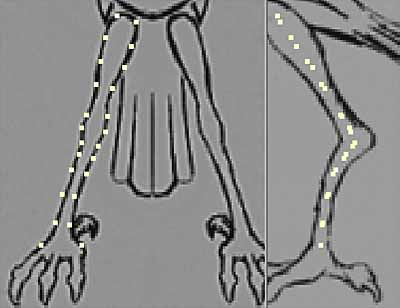 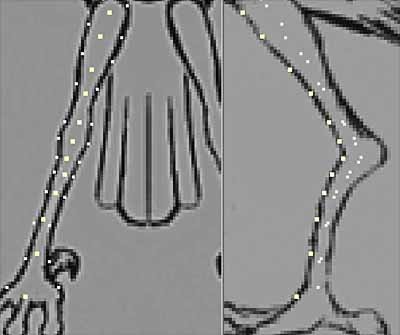 I will create a fourth set of points along the back edge of the leg, save it in case I want to add another set of polygons between those four rows, do a 'File->Save Object As...' to give it a new name and continue. After creating all leg polygons, I enter SubSurface mode with TAB and stretch the edges to equal the leg contours. I mirror the leg to see how it's coming. 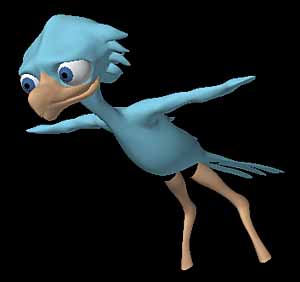 MODELER, JOINING THE LEGS TO THE BODY If I am to use the four polygons just above the leg, that will give me 8 points on the body and 4 on the leg. If I divide each leg polygon into three triangles, that will work well. I've shown you how to split polygons into three parts many times before. 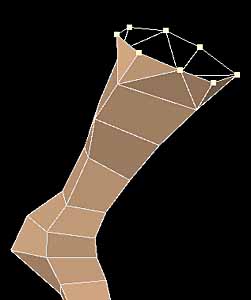 After I've joined the legs to the body, I shape the legs, deleting all polygons which are no longer symmetrical and mirror the leg, welding the points that are disconnected. 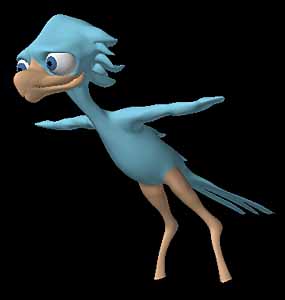 Aw gee... Modeler just crashed on me and I haven't saved it since I started doing the leg. Oh well. Since I have to do the legs again, anyway, I decide to redo the legs with 8 points around the leg instead of just four. This will eliminate the lumpiness at the top of the leg that occurs because of the triangle divisions I did. I do all previous steps, only create four more rows of points. 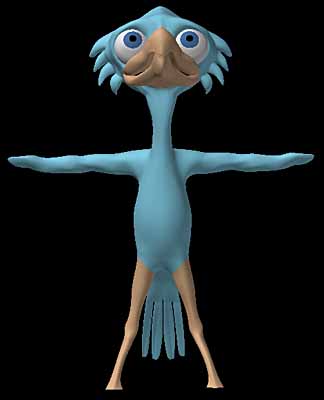 MODELER, LEROY'S FEET I outline the middle toe and back toe in the 'Right' viewport. I rotate it from the 'Top' view to better conform to the angle of the foot in the 'Back' viewport. 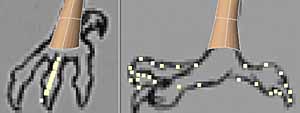  I clone, rotating rotate the middle toe twice to create the other two toes. 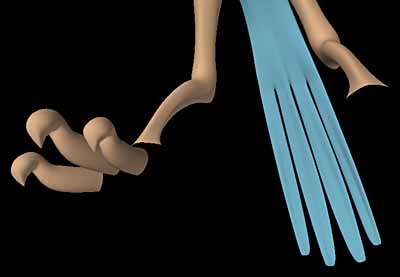 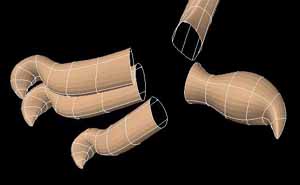 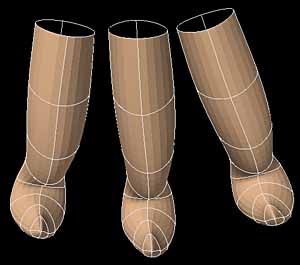 I split the polygons on the back toe making a bond of 5 points in the back to 7 points on the front, thus having to create two triangles. The selected points are the vertices of the new polygons. 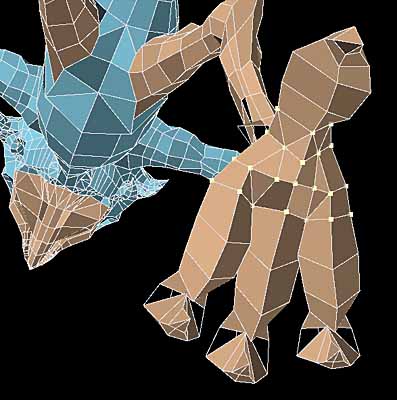 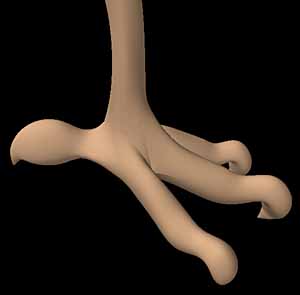 MODELER, MIRRORING THE FOOT You know how to mirror parts of an object, so I won't repeat it again. And, Leroy's body is now complete Next, I'll do the wing feathers and hands. Click for a Rotating 'Leroy the Hawk' done using the Blaxxun3D Applet |
||
