
Custom Cold Air Intake For 96-98 Grand Am 3100's.
Materials Needed:
- (1) cosmo racing cold air intake for a 99-00' civic LX.
- (2) 3" to 2.5" reducers (or just make a 3" coupling fit from MAF to 2.5" tubing like we did)
- (1) 3" 90 deg. rubber elbow.
- (6) plumbing fasteners (4 - 2.5" and 2 - 3") note: 4 2.5" fasteners come with intake.
- (1) breather filter
- (1) PCV valve (for breather)
- (1) day to install...
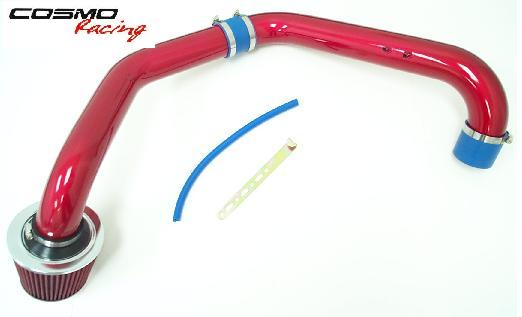
Here's what the intake looks like when you buy it
Steps to putting your cold air intake on the Grand Am!!!!!!
(notice, some steps may have to be altered slightly for the SE's, as this project was done on a GT)

1. Get all your tools and supplies setup (we had to make 2 extra runs to the local hardware store because we didn't quite do this step right!)

2. Here is the kit we got (you can get them in many other colors)

3. After taking out your air box, this is the hole that you will be running the new intake into.

4. Mark all the tubing off on where it needs to be cut and then cut using a hacksaw. This portion we cut was used for the bend around the battery.
CUTTING DIAGRAM

1 - behind battery, through hold, into fender. 2 - bend around battery from MAF, leave one end about 2 inches from the beginning of curve. 3 - the portion used from the throttle body to the MAF.

5. After cutting, make sure to smooth off the cut edges and take any snags out. This portion of the tubing was used for the hole to inside the fender wall. (EVOLUTION DETAILING ROCKS!)

6. Unscrew the plastic molding in the fender wall so you can access behind it to install the cone. (this may be different on Grand Am SE's.)

7. Turn the wheel all the way to the right (this picture shows it to the left) and prop the molding on top of the tire so it doesn't get in your way.

8. Take all the old hosing and detach all sensors. (notice the MAF in the left of the picture) and put the 2.5" coupling from the intake kit on the Throttle body, (don't use that supplied throttle body - to - tubing coupler, the coupling gets too small on one side)

9. By now you have taken everything off the old intake, you have the opportunity to knock the honeycomb screen off your maf sensor. just push on it with a slotted screw driver and it should slide out, and who cares if it breaks while you do it, it's a piece of sh*t.

10. The length of the IAT sensor is a little short, so we took the time to extend it. (see that moped in the back - it's a 50cc Honda elite S that stock did 30, and does 50 now!--this summer it's getting bored out to a 85cc and we should see even better speeds!)

11. This is what the tubing should look like after you have chopped it up to fit the car. The curve near the throttle body was a 90 deg. bend we cut short so it would make a slight curve back. (the connector used where the picture is circled is not the correct one, we later changed it to a modified 90 deg. rubber bend)
-- Rubber Bend
 Where the red marks are is where you should approximately cut. (thanks Jeremy!)

12. Now it's time to install, here's what the intake should look like up to the MAF sensor.

13. Here's the curve that leads down to the fender. You can see that rubber 90 deg. bend here, we cut off the flanges leaving 1/2 an inch on each side (hold onto one of these flanges you'll need it later).

14. As you can see we put bits of Velcro around the hole so we don't scratch the crap out of the tubing. Also you can see the cut up flange we used to shift the filter further away from the plastic fender wall.

15. Here's another shot to give you an idea.

16. Here's the relocated IAT sensor.

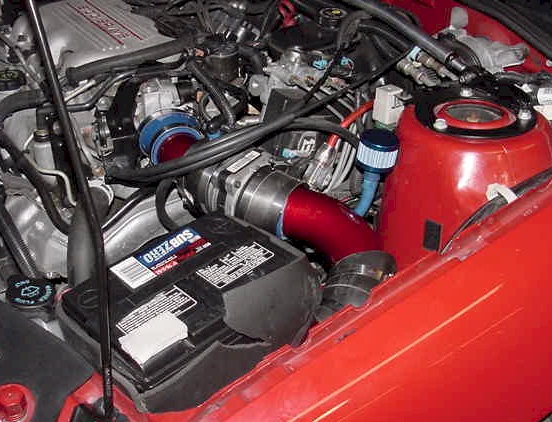
17. THE FINISHED PRODUCT!!!!! we used some silicone tubing to extend the length of the crankcase hose, and then velcroed it onto the strut tower.
This cold air intake was made by Green_Evolution (the guy doing all the work in the pictures) and 98GAGT (the loaf that owns the car).
more pictures...

Video Clip of the Car this was installed on in action!!!!!

This site was created by : Green_Evolution
