")
Walkthrough
Levels:
1.) The Shaolin Temples
2.) The Wind Element
3.) The Earth Element
4.) The Water Element
5.) The Fire Element
6.) The Prison of Souls
7.) The Bridge of Immortality
8.) Shinnok's Fortress
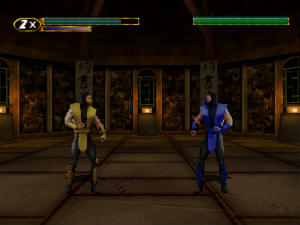
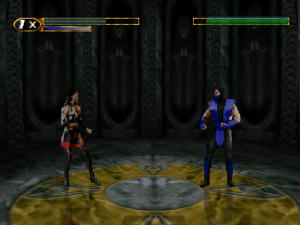
Level 1: The Shaolin Temples
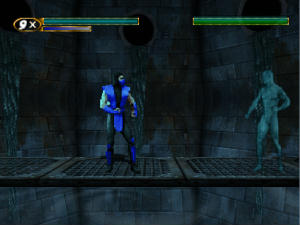
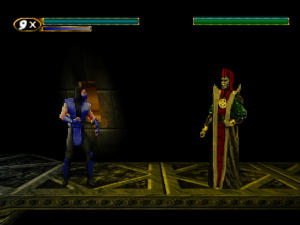
You start off by seeing Sub-Zero jumping through a window. Scorpion is standing
there and he says “You will fail”, then he laughs and runs off. Go to your right
and through the door into the next room, there waiting , are 2 monks, kill them!
(Use combos to defeat them so you will earn experience points) Walk through the
corridor, take the herbal healer. Walk through the next corridor and take the
tablet of truth. It reads:
“THE PILLARS CAN BE ACTIVATED WITH A CAREFULLY PLACED SWEEP KICK. YOU ARE FREE
TO RUN WHEN THEY ARE ON THE RISE.”
Follow the tablets instructions to pass the 2 pillars to your right, then
proceed through the door into the next room. There you will fight a monk. Defeat
him and take the herbal healer. Then fight and beat another monk. Walk out onto
the balcony and take the tablet of truth. It reads:
“USE THE BALCONY’S LEDGE TO CAREFULLY LAND ON THE TARP BELOW.”
Follow these instructions and you will make a safe landing to the ground which
is a checkpoint. Walk to your right and take the herbal healer (use if
necessary) By now you should have the power to throw ice and do the slide. Walk
to your left and into the building where you will fight a monk. Keep going to
your left into the door and fight another monk. Walk back to your right and then
left to find 2 more monks before going on. After killing 4 or 5 monks, proceed
carefully to your left into the room with the pillars. Trip the first and run
just past it stopping on the middle square on the floor. Trip the next pillar,
then run past it. (You may have to fight another monk). Go to your left into the
next room and kill the monk then take the herbal healer that is near the rope
(Don’t climb it!!). Keep going to your left into the next corridor and kill the
monk. Go left through the door and into the next room.
There you will meet Scorpion and he says: “The map is mine Sub-Zero.” Now beat
him using freezes and combos. When you beat him, the MK voice will say “Finish
Him”. Standing one step away, motion F, D, F, HP (this is the spine rip
fatality!). Go to the platform to your left and take the tablet of truth. It
reads:
“ONCE THE SACRED MAP IS IN YOUR POSSESSION, YOU WILL FIND ESCAPE AT THE TEMPLE’S
TOWER.”
Take the map, when you do a door will open in the tower. Go back to your right
to the room with the rope and climb it. When you get to the top, face the right
and jump onto the angled rope and slide down. You will see a cinematic with
Sub-Zero, Quan-Chi, and the Grand Master.
Pillars: The falling pillar traps in this level drop down when any object
move underneath them. To get past a pillar, do a LK at around sweep distance to
lure it down, quickly run past it when it's pulling itself back up.
BOSS - Scorpion: He can be easily defeated using freezes, uppercuts, and
combos. Avoid throwing him unless you freeze him first. You can finish him off
with your Fatality (F, D, F, HP) after you
defeat him.
Return To Top
Level 2: The Wind Element
Go inside the cave and kill the monk. Walk to your right and take the table of
truth. It reads:
“USE THE WIND GUSTS TO CARRY YOU TO THE NEXT PLATFORM”.
When you see the debris blowing up through the gap, jump to the right and the
gust of wind will take you to the next platform. Jump and grab the next platform
and pull yourself up. Kill the monk. Then jump down to the next platform and
wait for a gust of wind. Jump right and it will take you up to the next
platform. Walk right until you get to the next gap. (This spot is tricky). Jump
to the next platform, but instead of killing the monk, immediately jump to the
next platform because this one is crumbling. On the next platform, don’t worry
about the potion, jump to the next platform because this one is crumbling too.
Jump right to the next platform and take the herbal healer. Then jump to the
next platform and kill the monk. Proceed to the next platform and kill the monk.
(this is a check point). Take the table of truth. It reads:
“WHEN JUMPING ONTO MOVING PLATFORMS, TIME YOUR JUMP BEFORE THE PLATFORM IS IN
LINE. ALSO REMEMBER, YOU STILL HAVE SOME CONTROL OVER YOUR VELOCITY WHILE
AIRBORNE”
(This part is tricky, it may take a few times falling to get the timing right.)
After you clear all the rotating windmills, walk across the bridge until you get
to the next gap. Take the wind gust to the next platform, but be quick, because
the platform is crumbling. Jump on the first rope and climb down to the end of
it. Jump to the platform on the left and take the potion (its also a 1up). Then
jump on the ropes and transfer across them until the last one. Take the wind
gust up to the next platforms. Go left and follow the platforms all the way up
to get a key. (this is a checkpoint). Then proceed right. Go across the bridge
and kill the monk. Go right to the next platform and kill the monk. Take the
wind gusts to the next 2 platforms. While on the circle on this platform, use
the wind icon key.
Jump into the wind tunnel, but don’t let it take you too high up, direct
yourself to the platform just across the screen at the bottom. Go onto the next
platform, walk on the bridge and let it fall (you will lose a small piece of
energy). There is a key and a check point on the little platform to your left.
After getting the key, go back to the wind tunnel and take it all the way up and
to the right. Use the key to open the door. Fight a monk then take the tablet of
truth. It reads:
“PUSH A FROZEN MONK OVER THE FLOOR SWITCH TO ACTIVATE THE DOOR AND KEEP IT
OPEN”.
Follow the directions on the tablet and then take the key. As soon as you take
the key, run quickly to you left and back out the door, because it activates a
fan that will drag you in and kill you. Kill the monk and then go back to the
ledge. (check point). Carefully go back down the wind tunnel to the platform on
the right. Proceed to your right and up on the next platform. Jump into the cave
looking platform, then jump to the next platform and kill the monk. Now for some
tricky jumping. Make it across these swings the best you can. (I like to wait
for the swing that I am on to start coming back down and then jump to the next
one). After you make it past the swings, use the key to open the door. Proceed
across the platforms to your right, but be quick, because they are crumbling.
Now you are at more swings, jump across these and then jump across to the next
platform and kill the 2 monks. Jump to the next platform (this is a check
point). Maneuver across a few more rotating windmills (carefully), then jump to
the next platform. Go right across the swing and up on the next platform and
kill the monk. Go to the next platform and let the gust of wind take you up.
Now you face off with Fujin (By this point you should be able to freeze at an
upward angle, which comes in handy against the flighty Fujin. [angle freeze : D,
DF, F, LK] ). After you beat Fujin, get as far left as possible. When the wind
starts pulling you in, run the opposite way until the wind stops. Then you begin
to vaporize and you reappear underground.
Spinning Platforms: The small circular platforms on fans can be tricky to
get past, but is fairly simple once you get your timing right. Be sure to
control the velocity of your jump using back while you are in the air.
Swinging Platforms: The stone platforms swinging toward and away from the
camera view are also fairly easy once you get the hang of getting past them.
Your "3D" Z-plane position on the still- standing platform before the first
swing of each set is actually equal to the position of the swing when it reaches
its peak toward the camera view. So in order to land on one, your feet should
leave the platform just a slight moment after the swing has reached its peak
position away from the camera view. Also don't forget to control the velocity of
your jump for these as well, or you will jump right past the swing.
BOSS - Fujin, God of Wind: Fujin is the hardest boss in all of MKMS. As
soon as the fight begins, run in and throw. Try to keep throwing him as much as
possible before he starts to fly. If he flies, freeze him with a diagonal ice
blast as fast as possible and jump kick him to ground him again, then continue
throwing him as many times as you can. Once you have drained Fujin's energy,
quickly walk to the LEFT edge of the platform, while he prepares a tornado in
the center of the area. When the tornado begins, DO NOT run left, just slowly
walk toward the left or hold down+left to duck. After a moment, if you have
managed to stay in that position near the left edge, you will automatically hang
on to the platform and Fujin's tornado will cause himself to explode.
Return To Top
Level 3: The Earth Element
Right away, a monk will attack, beat him and then go right. A crevice will
appear in the ground, jump over it and go right. Jump through the 2 mechanical
crushers, then take the table of truth. It reads:
“NOT ALL CREVICE OPENINGS LEAD TO DEATH. SOME CAN LEAD TO WEALTH AND GOOD
FORTUNE.”
Jump past the mechanical crushers and fall into the hole. Take all the goodies,
then let the spring throw you back up. Go to your right. When you get to the
swinging axes, stop. Jump 3 times to get past these (time your jumps carefully).
Cross the hole with the rope (do not go down it yet!). Time your jump so you
miss the swinging ax on the other side. Then jump through the mechanical
crushers and over the developing crevice. The next part is tricky, you have to
get between the 2 swinging axes to get the key, but make sure that the crevice
is closed before you try and get it. Once you have the key, go to your right.
Jump through the first mechanical crusher and get the potion, then go back left
and to the shaft with the rope. Climb down the rope quickly and use the key to
open the door at the bottom (be quick or get crushed). Walk through the door
(check point). You will then meet up with 2 monks, fight and kill them. Go to
your right to the mechanical spring. Let it throw you up and to the left. Take
the Dit Dow formula. Jump through the mechanical crusher and get the table of
truth. It reads:
“USE YOUR FREEZING ABILITY TO STOP THE MEDITATING MONK WHEN HE’S IN TRANSITION”
Fall down in the hole to one side or the other and take both of the herbal
healers, then fall down to the bottom level. Take the spring back up but this
time go to the right. Watch out for the meditating monks! Jump the monk and the
crevice and stop where you see a rope hanging. Turn and face left and freeze the
monk just as he is in transition. Face right and do the same to the other
meditating monk. Then jump the crevice and proceed to the right. Go through the
door, and there you will meet the Earth God. To beat him you need to slide
between his legs then run to the right and get the tablet of truth. It reads:
“LURE THE EARTH GOD INTO THE CENTER OF THE ROOM. USE THE SKULL SWITCH TO DROP
THE CHAINED PLATFORM ON TOP OF HIM FOR GREATER DAMAGE”
Follow these directions and you should have him after a few drops!! After you
beat him, pull the skull switch one more time and run quickly and jump on the
chained platform. Ride it to the top and grab the key, then ride it back to the
floor. Go to your left to where the rope is hanging, while standing under it,
use the key that you just picked up to open the door. Climb the rope all the way
to the top and go left. (Be careful not to get hit by the mechanical crusher).
After going through the 2 mechanical crushers, go left. Jump past the 2 swinging
axes and over the crevice. Jump the next crevice and then jump through the
crusher, then past the swinging ax to the circle on the ground. This is a check
point.
Go left past the swinging axes until you get to the mechanical spring. Jump on
that and let it throw you up into the cavern. Go up to the right and beat the
meditating monk. Take the key and fall in the hole. Take the spring back up to
the other side of the gate. There you will find a monk. Beat him and take the
eye of invisibility. Jump across the hole with the rope. Go past all the
swinging axes and crevices. Jump through the mechanical crushers and take all
the potions. Go back left and go up the rope. Jump off the rope to your right
and fight all the monks. Then go all the way left and use the key to open the
door to the next mission. Once again you vaporize, but this time you reappear in
a underwater passageway.
Swinging Traps: A swinging trap will knock you back and take away a bit
of your energy if you stand too close to one, but will instantly chop you up
into pieces if you stand right in the middle of it. Get past it by running past
once it has reached its peak in the direction toward the camera. Be careful not
to run too far past though, since there may either be another trap or a ditch
right past it.
Floating Monks: The floating monks can easily be destroyed by freezing
them right at the moment they are teleporting.
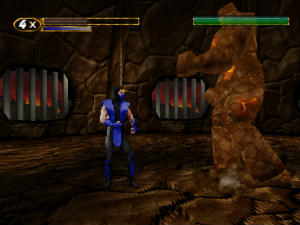
BOSS - God of Earth: The God of Earth is strong but slow. Get past him by
sliding; this might come in handy in case you may be cornered. To defeat him,
run in, uppercut, jump kick to the face, and jump away, then repeat. If he is at
the center of the room, you may also use the switch at the right end of the room
to drop the raised platform down on him.
Return To Top
Level 4: The Water Element
Start off by going to your right. Jump on the rope and then jump across to the
right. Fight the monk that is waiting. Take the herbal healer. Jump on the rope
and go up to the next level. Go your the right and fight the monk. Go to the
next rope and take it all the way to the top. Go right and jump on the next
rope. Climb it to the top and go left. Take the key (check point).
Now, go back down the rope. Go left and then down the rope to the bottom. Go
left and fight a monk (sometimes he’s not there). Then go down the rope to the
first opening. Go left (watch out for the electric eels). Then go down the rope
to the bottom and go left. Fight the monk. Use the key to open the door, then go
in. Jump on the platform in the middle of the room. Wait as the room fills with
water. When you float all the way to the left, jump off into the opening. Take
the key (check point).
Get back on the platform and ride it back to the bottom as the room drains. Then
go right out the door and up the rope. Go to your right (watch for the eels
again). Climb the rope. Go right and climb the next rope. Go right from there
and climb the next rope up to the first opening. Go right. (This part is
tricky!). Before using the key to open the door, face left. As soon as you open
the door, run left (the room is filling with water). Just before you get to the
door, perform Subbie’s slide (the door is quickly coming down!!). Make sure you
catch the rope after sliding out the door. You will then see a cinematic showing
water draining into another room).
Now, go down the rope. Go back to your left and down that rope. Go left at the
first opening. Then go down the first rope to the first opening and go right.
Wait for the floating platform and jump on it and ride to the other side. Jump
right, into the opening. Jump from platform to platform to avoid the eels. At
the far right take the key (check point).
Now go left and back across the water on the floating platform. Fight the monk
and then go left. Take the rope down to the bottom and go right. Wait for the
floating platform. Ride it across jumping over the pipes as you get to them
(take the formula). Then go right and climb the rope. Go right and fight the
monk. Continue right and use your key to open the door, walk in!!
Now, you must fight the Water God. Use you freezing ability along with combos to
do major damage (use your block button wisely to avoid his projectiles). When
you beat him he will explode (in a Shao Khan way). Then you vaporize again and
reappear in the stinking bowels of hell!
Floatation Devices: Use the wooden barrels floating in deep pools of
water to get safely to the other side. Time your jump to get on one and be sure
to control the velocity of your jump.
Triangle Key Area: In the area where you use the triangle key, be ready
to run out right after you use it. Water will begin to fill the area and the
door will begin to close, slide to get through the door before it closes, you
will automatically hang onto the rope right outside.
BOSS - God of Water: The God of Water is fairly simple, but be ready with
herbs. Freezes, uppercuts, and combos work well on him.
Return To Top
Level 5: The Fire Element
Start by grabbing the potion, then go right. Watch out for the really quick monk
(sweeps work good against these lightning fast Buddhists). Then go right. Beat
the big monk and continue right. Jump the first fire pit and grab the urn of
vitality, then jump the next fire pit. Jump up on the 2nd platform and grab the
herbal healer. Then jump back down to the left on the first platform. Pull the
skull switch and then quickly go right across the platforms and jump on the one
that’s moving up. Grab the key (check point).
Go right into the building and jump across the fire pits (watch for the spiked
logs). Continue right and fight the quick monk. Then go right and fight the big
monk. Continue right into the building and fight another quick monk. Jump the
fire pits and fight a big monk; continue right. Climb down the rope and go left
over the fire pits. Grab the herbal healer and the shield of invincibility.
Climb down the rope and go left. At the far left, grab the key (check point).
Go right and grab the urn. Go back up the rope and go right over the fire pits.
Climb that rope and go right. Jump on the chained platform and go across all
three (there is an urn on the last one). Go right into the building, there is a
big monk waiting, beat him. Go right across these dangerous fire pits and grab
the eye of invisibility. Go up the rope and go right. Jump the fire pits then
beat the big monk. Go right out on the bridge and fight another big monk.
Continue right across the fire pits and out on a platform. Cross the platforms
and go into the building and beat the quick monk. (This next part is tricky).
Pull the skull switch and then hurry back across the platforms and into the
bottom opening. Go left and grab the key (check point).
Now, pull the skull switch and run back across the platforms and jump on the
last one (be quick, because it is on the rise). Ride it up and go right into the
building and fight the quick monk. Then go right and use any key to open the
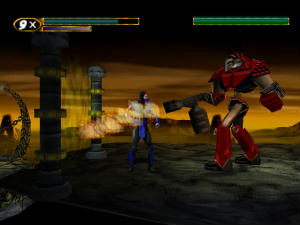
door (you must have all 3 in order to get in). There you will meet the Fire God.
It doesn’t seem as though you are able to freeze him, so use your skills as a
fighter to defeat the Fire God. He will explode when you beat him, and you are
treated with a cinematic starring Sub-Zero, Quan Chi, plus a guest appearance by
Raiden! Now off to the Prison of Souls!!!!! (but only if you are on at least the
normal level).
Platforms: There are a lot of switch-controlled platforms in this level.
When you hit a switch, you have to get from that end of the area to the other as
quickly as possible to reach the platform that has been lowered before it
returns to its neutral position.

BOSS - God of Fire: The God of Fire can't be frozen. Use combos often to
defeat him.
Return To Top
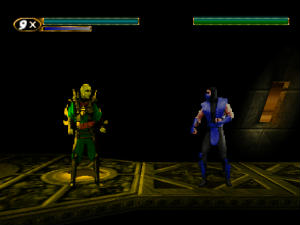
Level 6: The Prison of Souls
Sub-Zero will jump out of the portal that Raiden created. Quan Chi is there for
a split second, then he vanishes. Go right and out the door. There waiting will
be a guard. (these guards have staffs that shoot lasers and are much harder to
beat). After you beat the guard, go right. Take the potion and fight another
guard. Wait for a third guard to show up, then beat him. Jump past the first
mallet. Then jump past the next one and kick the guard on the way down.
(hopefully the mallet will crush him, but if not, beat him). Jump past the last
mallet and go right. Beat one more guard and grab the herbs. Go into the door.
(check point).
Fight the two unarmed guards that are in the room. Go right and out the door.
Outside there is a guard with a laser staff, beat him. Go right and wait for the
electric fence to stop, then jump over it. Fight the next guard and jump over
the last electric fence. Grab the herbs and go right. Sub-Zero will start
running and will get beat down by two guards and a huge guard with a saw blade
for an arm. You will now see a cinematic with Sub-Zero in prison with Shinnok!
Now the quest continues. Go right and out the door. When the door opens there is
a guard waiting for you that has a large laser cannon, beat him. Go right across
the platforms and face off with another cannon packing guard. Continue right.
Drop down on the first platform and grab the herbs. Then jump up on the platform
to the right and jump past the large mallets. Fight the guard that’s waiting.
Now you have to make a big jump to your right to the next platform. Beat the
guard that is there and take the Level 1 key. (check point).
Make the big jump back to the platform to your left. Stand on the elevator. Hold
the use button and hit HK to activate the elevator. Take it up to Level 1. Go
right and beat the guard. Grab the herbs and continue right. At the far right of
the platform you will find the Level 2 key, take it. (check point).
Jump right to the elevator and take it up to Level 2. Now you must face off
against the huge guard with the saw blade on his arm!! Use the Dit Dow Formula
(and any other resources that you may need) so you won’t take as much damage.
TIP: Run up to him and hit HK then immediately slide between his legs, do this
until he goes down. Once you beat him, grab the Level 3 key and go back left.
Jump on the elevator and then jump across to the platform on the left. Go left
and take the elevator down. (hold the use button and hit LP). Continue left past
the large mallets until you get to the next elevator. Take it all the way to the
top, then go right to the next elevator (you may have to fight some guards on
the way). Take the elevator up the Level 3. Beat the guard to your left and take
the Urn of Strength. Go back down and go right. Continue until you get back to
where you fought the huge “saw blade” guard. Jump on the elevator at the right
and take it up to Level 3. Go right to the end of the platform. Use the Urn of
Strength, and jump kick the large statue on the right. It will fall over and
Sub-Zero will run up it. Now, prepare to be treated to a great cinematic!

Scorpion Reincarnated: After you get past the beginning part of this level,
the Executioner Bot will attack you and guards will beat you and throw you in a
cell. You will then encounter either Shinnok himself or a reincarnated Scorpion.
If you talk to Shinnok, you won't have to fight him (at least in this level).
However, if you are confronted by Scorpion in the cell, you will have to do
battle with the specter. To defeat him here, just use freezes, uppercuts, and
combos, they all work fine.
Cannon Guards: The guards carrying cannons can be a pain. When their
projectiles are heard coming, duck until you see it go past. Sliding by then
should reach far enough to reach the guard and cause him to drop his weapon
(unless you're at the edge of a platform of course, in which case you should
just carefully time your jump). Without their cannon, these guards are nothing
more than another common enemy in this level.
Elevators: The elevators can only go to a certain level by the use of a
key for that particular level. When you have the key for the destination,
operate an elevator by holding the USE button and pressing High Kick to go up,
or Low Punch to go down.
BOSS - The Executioner Bot: Soon, you will face the Executioner Bot. If
he corners you, try to slide under him (you'll go past as long as he isn't
standing ready. ie. if he's attacking. Otherwise, he will kick you before you
get through). To defeat him, run in, roundhouse, jump kick to the head, and jump
away, repeat.
Shinnok's Statue: After you defeat the Executioner Bot and get the key to
the 3rd level, go left to find an elevator that leads up to a small platform on
the 3rd. There, you will find an urn that can give you superhuman strength. Go
back to the end of the stage until you reach the large statue of Shinnok, and
use the urn. You'll then have the strength to knock the statue down with a
simple jump kick.
Return To Top
Level 7: The Bridge of Immortality
Go right and fight the three guards. Go to the end of the platform and jump down
to the lower level. Go the left and jump to the next platform. Then continue
left down to the next platform. Go right to the platform underneath. Continue
right across the platforms until it looks like you can’t go any further. Drop
down and go left. Continue jumping across the platforms to your left. You will
now face the first Bridge Keeper. Once you beat him, grab the key (check point).
TIP: Jump kicks are very effective.
Go back right and all the way up to the top. Go right to the next platform and
grab the potion and the herbs. Jump to the next platform. Now you must face off
against the second Bridge Keeper. When you have defeated him, grab the key
(check point).
TIP: Use the same method that you used on the “saw blade” guard to beat him.
Go right and drop down to the small platform directly underneath and grab the
potion. Now, go right, make sure to completely clear these swinging blades when
you are jumping. Jump to the next platform and fight the guard. Jump to the next
platform on your right and then up to the next one. (I have not figured out how
to get on the higher platforms on the left). Now, it is time to face off with
the third Bridge Keeper. (This one is tougher than the previous ones, so use
your resources wisely). When you beat him, all you get is an Urn of Vitality,
but never the less, grab it. (check point).
Go right and jump to the lower platform (be careful of the two guards, they will
gang up on you). Beat them and then go right to the small platform and drop
down. You will meet the fourth and final Bridge Keeper there. (He fights the
same as the second Bridge Keeper). When you finish him off, you will see that
final key, grab it. Now you have all three of the Fortress Icons, onward to
Shinnok’s Fortress. (check point).
Go to your right and jump on the platform. Ride it up and go right. Jump to the
small platform, then jump to the next one (when you land, run and jump to the
next platform quickly; you will see why). Jump to the next platform and then do
the same thing again. When you jump up to the next platform, there are two armed
guards waiting. Do the Super Slide to disarm them, then beat them. Continue
right and fight the next guard. Jump over the first two sets of swinging axes
and duck until the guard takes a break from shooting. Jump across the next
swinging ax and beat the guard. Continue right. Jump across to the next platform
and beat the guard that is waiting. Jump over the next three sets of swinging
axes and then over to the next platform. Finish off the last guard that is
waiting and go to the far right. You are now at Shinnok’s Fortress. Use a key to
enter. (you must have all three or you will not be able to go in).
BOSS - Robots: There are three Bots in this level, two of which are
carrying keys. They can all be defeated using a jump in, roundhouse, jump kick
to head, jump away, and repeat pattern. The reason it is necessary to jump in
instead of running in for the Chain Gun Bot is because his bullets will hit you
if you remain grounded on your way in.
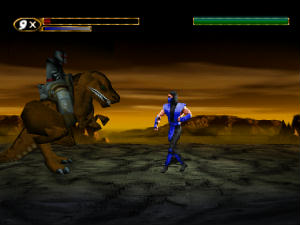
BOSS - Dinosaur: The dinosaur is as hard to defeat as he may have been
for you to find. He breathes fire, head butts, and his extremely dangerous. Have
lots of herbs ready, there is no way to avoid energy loss when fighting this
little monster. One way to defeat him with as little damage as possible would be
to give him a jump kick to the head, duck, and repeat.
Return To Top
Level 8: Shinnok's Fortress
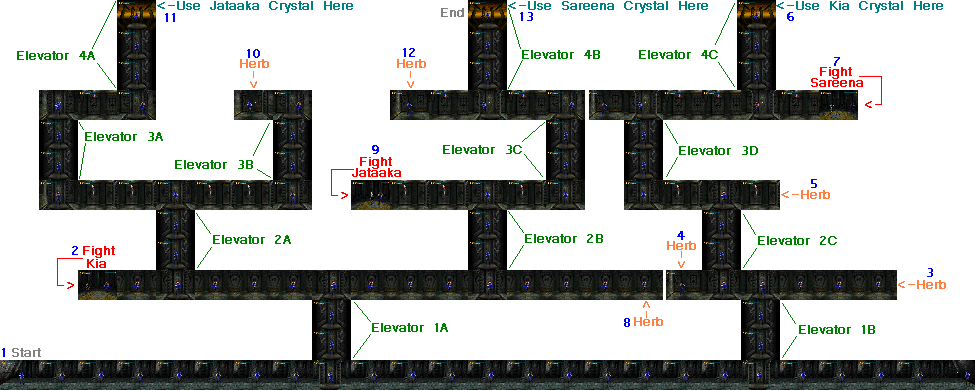
Reference Notes:
If you forget which floor you're on, pay attention to the walls.
Floor 1:
 Floor 2:
 Floor 3:
 Floor 4:
Elevators are not labeled in the game, so you'll
have to remember which one you're on. I have labeled them as so: The
number corresponds to the Floor number and the letter is the order for the
floor.
Meaning Elevator 1A is The First Elevator on the
First Floor,
and Elevator 4C is the Third Elevator on the Fourth
Floor.
There are many guards in this labyrinth of a level, you may choose to fight
them, or simply jump over them and avoid confrontation!
Go right, go up Elevator 1A.
Go left, past Elevator 2A.
Go into 2.) Kia's
Chamber. Fight Kia. Defeat her and take her
Crystal.
Go right, go down Elevator 1A to the ground floor.
Go right, go up Elevator 1B.
Go right, grab the 3.) Herbs.
Go left, past Elevator 2C and grab the
4.) Herbs.
Go right, go up Elevator 2C.
Go right, grab the 5.) Herbs.
Go left, past Elevator 2C, go up
Elevator 3D.
Go right, go up Elevator 4C.
Place 6.) Kia’s Crystal
there. (Bring up your items menu and hit use)
---Check Point---
Go down Elevator 4C, go right into
7.) Sareena's Chamber.
Fight Sareena.
Defeat her and take her crystal.
(I Do Not recommend killing her)
Go down Elevators 3D, 2C,
and 1B to the ground floor.
Go left, go up Elevator 1A.
Go all the way right, grab the 8.)
Herbs.
Go left, go up Elevator 2B.
Go left into 9.) Jataaka's
Chamber. Fight Jataaka. Defeat her and take her
crystal.
Go right, go down Elevator 2B.
Go left, past Elevator 1A, go up
Elevator 2A.
Go right, go up Elevator 3B.
Go left, grab the 10.) Herbs.
Go down Elevator 3B.
Go left, go up Elevator 3A.
Go right, go up Elevator 4A.
Place 11.) Jataaka's Crystal
there. (Bring up your items menu and hit use)
---Check Point---
Go down Elevator 4A,
Go left, go down Elevator 3A.
Go right, go down Elevator 2A.
Go right, past Elevator 1A, go up
Elevator 2B.
Go right, go up Elevator 3C.
Go left, past Elevator 4B, grab the
12.) Herbs.
Go right, go up Elevator 4B.
Place 13.) Sareena’s Crystal
there. (Bring up your items menu and hit use)
You will now use Quan Chi’s teleporter. You are treated to a short cinematic,
then you square off against Quan Chi (but you are not alone!). With Quan Chi
defeated, it is time for Shinnok to finally step in.
Now face off against Shinnok!
TIP: When Shinnok is about to shoot a fireball, freeze him. Then run and
teleport behind him and freeze him again. Run up to him and take his amulet!!
Then you will see him morph into a giant demon, run through the portal that
appears on the bridge and when you cross it Raiden will be waiting.....
BOSS - Kia: Weapon: Boomerang Blades. The first two of Quan Chi's female
assassins can be defeated using freezes, uppercuts, slides, combos, and
well-timed throws, but they can also be extremely dangerous.
BOSS - Jataaka: Weapon: Laser sword which fires blue bolts of energy. The
first two of Quan Chi's female assassins can be defeated using freezes,
uppercuts, slides, combos, and well-timed throws, but they can also be extremely
dangerous.
BOSS - Sareena: The third of Quan Chi's three assassins uses a hook sword
and is just as quick as her partners. She can also be defeated using freezes,
uppercuts, slides, combos, and throws. When you defeat her, you will be given
the chance to finish her off with your Fatality,
(F, D, F, HP) but if you do, it will be to your own disadvantage later
on.
Quan Chi's Teleporter: Once you have defeated all three of Quan Chi's
female assassins and have gotten their crystals, place them at the three outdoor
areas of the fortress at its highest peak. You must place the eastern and
western ones first, they point toward the center. Now use the center one, which
points upward. You will then be teleported into Quan Chi's sanctuary.
BOSS - Quan Chi: Quan Chi is the sub boss of MKMS. Freeze him when he
tries to pull you in. Use uppercuts, slides, and combos to defeat him. Avoid
trying to throw him unless he's frozen (in which case an uppercut would be more
damaging anyhow). Have some herbs handy too. If you killed Sareena earlier in
this level, you will have to defeat Quan Chi yourself. However, if you have
spared her life, she will use the teleporter when Quan Chi has around 10% energy
left and uppercut him with her hook sword into the pit.
BOSS - Shinnok: The fallen elder god Shinnok will be your final challenge
in MKMS. With the power of the amulet, he is protected by a force field. To
defeat him, you must first get behind him with him frozen, there are two ways to
do so: 1) Time an ice blast to hit him right when he fires a projectile in order
to freeze him (the amulet can't be used for his force field at the same time as
power for a projectile). When he's frozen, use the teleporter at the side of the
room. 2) Keep jumping at him, bouncing off of the force field repeatedly until
he fires a projectile (it doesn't harm you, just keeps you away). When he does,
you will jump right past him. Now freeze him before he turns around. Once you
are standing behind him with him frozen, simply walk up to him and press the
USE button to grab his amulet.
Return To Top
Mortal
Kombat Komplete