BUILDING A BARREL BARGE
We built a barrel barge for our hunting club. We have a little compound way down in the marsh where
we have a couple of houseboats that we stay in for duck hunting. We had a 12 kw generator down there, but one of the
club members quit the club and took his generator. His generator was inside a metal building, built on a raft of steel
pontoons. If I remember right, the thing was 24 feet long and 12 feet wide. He was asking $12,000 for it which were his materials costs. Well, steel pontoons aren't cheap, they rust and they leak, every few years they have to be drydocked, blasted and repainted. Aluminum pontoons are even more expensive and oxidize in salt water. We looked into foam filled polypropylene pontoons, but those cost a king's ransom. So,
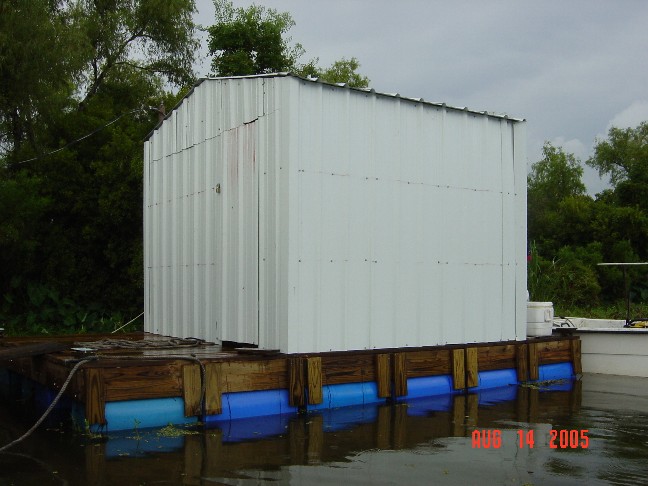
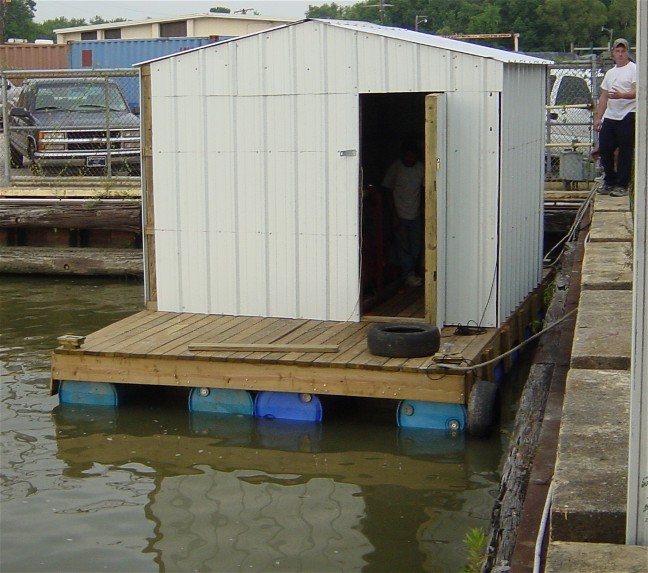
we looked for a less expensive, more reliable alternative that required less maintenance. We built a 12x20 foot barrel barge with a 12x12 foot galvalume shed.
There's a book out there called
"Handmade Houseboats: Independent Living Afloat" by Russell Conder. It details the building of houseboats
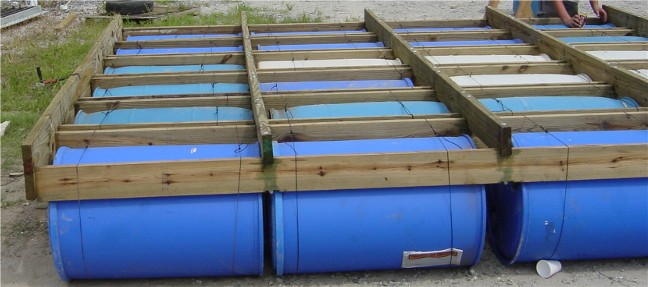
on barrel rafts. The barrels are 55 gallon polypropylene drums. Plastic drums last practically forever, they won't rust, are pretty tough, and even if they do leak are easily replaced. One leaking barrel out of 34 wouldn't even be noticable. The drums (now "polypropylene floatation pods") are held together by a grid of pressure treated lumber.
The barrels themselves rest on "bearers", in our case 2x6 lumber, that run longitudinally under the raft. The space between the
bearers is a little less than the diameter of the barrels. The barrels can't quite squeeze through the bearers and get up against
the floor boards. In our case, our barrels are 23.5 inches in diameter, and the space between our bearers is 19 inches. The
bearers are tied together with beams. The bearers and beams are notched so they lock together, and are joined with half inch stainless carriage
bolts that run from the top of the beams to the bottom of the bearers. All the fasteners used during construction of the barge were stainless steel.

Here's the first step after cutting the notches. The bearers rest on saw horses, and the beams are bolted on top of the bearers.

We've bolted all the beams to the center 4 bearers, and have tied the barrels under the bearers.
It's nice to have family that have access to heavy equipment to move your frame off the horses. Otherwise, you'd have
to get a bunch of guys to do it.

Now the frame is down, so we'll install the inner bearer, roll in a row of barrels, and install the outer bearer.

Before you know it, you're close to being finished.

Once the bearers are all bolted on, the front barrels are slid into the gaps. The barrels are tied to the bearers with trotline
cord.

Eventually, the weight of the raft and it's payload will force the bearers into their pockets and lock them into place.
The cord is just so when we lift it into the water, the barrels will stay put until the raft is floating. After that, the strings will not be needed.
Finally the end pieces are installed. I used 3/8" x 4" lag bolts, screwed through the end piece
and into the ends of the bearers.

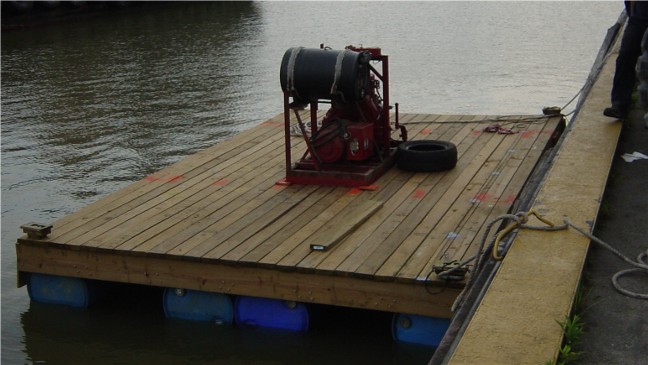
We nailed on the 2x6 deck. You see I put some 1x6x16" fingers over the sides to hold on the barrels in case of a big swell.
This turned out to be a waste of time and wood. After we launched the barge, it took some huge waves from ships in the Intracoastal Waterway. Those barrels did not budge one bit. I don't think anything short of a tsunami could dislodge them.

We had the shed framed up in no time.

Now after the galvalume sheeting was placed over the frame, it's time to see how we're going to move the shed.

Then
we braced the interior to keep the shed from collapsing during the lift, and added some tension with a comealong.


The trial lift after that was fine. Now to lift the barge, move it across the highway, and put it in the water.
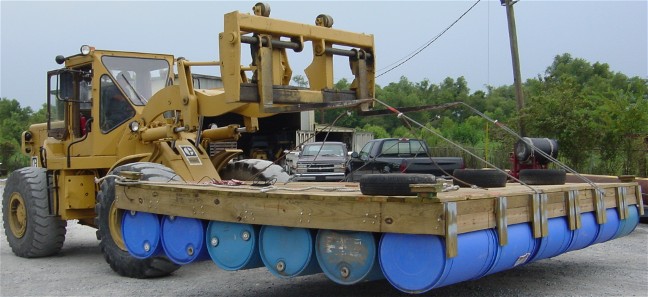


That went as planned. Now to put the 2,000 lb Lister-Peters air cooled diesel generator on top.
O.K. That worked out fine. Can we get the shed safely across the road and onto the barge?


It's down. We bolted her down to the deck. Turns out the barge was amazingly stable and had a lot more payload capacity than I thought. We later put up a gutter on one side to collect rainwater, and had a bunch of guys all leaning on one side of the barge. She went down a little on that side, but not much. Finally, we tied her up for the night. Early next morning, we'll take the long, slow
30 mile trip down to the camp.
We left the dock at dawn the next day, pushing the barge in front of one boat with a 100 hp outboard. The other boat just tied
along side. We made an average speed of 4.5 mph.

Here's the view from the front. It's a beautiful trip. We saw one bald eagle on the way down. Earliest I've ever seen one.

Here's the captain of the motely crew on the right, Captain Perry Poppins.

Finally we arrived and hooked her up, installed the corner pieces of the galvalume. We fired up the generator, cooled down the camp,
spent the night and left the next day.

Well, she's been a great little generator barge, surviving both Hurricanes Katrina and Rita without a scratch. The Lister has proven to be a reliable, trouble free generator.
We've moved her 28 miles from the original location the fall of 2007, across a long stretch of open water separated from the Gulf by a narrow barrier island, which is the location of our new hunting lease. She made a pretty rough passage intact, but we can see that it's probably not a good idea to move her back and forth, inside the protection of the marsh further inland for hurricane season, and then back out for the rest of the year, as we don't trust the barge to make the repeated semiannual trips of over 35 miles. So, she's therefor doomed. It's a matter of time before a massive storm will take her and everything aboard. With luck, we'll get several more years out of her.
EMAIL


