BEGINNER INFORMATION
I get a lot of interest in RC airplanes when people pass by during a flight.
I let people fly my RealFlight G2 sim
to get a taste of the fun they are missing. I also give them my email and send them to the Ezone website.
With all of the strides in motors, batteries, electronics and kits, there is an
overwhelming array of choices.
I take a couple of approaches when I recommend equipment to potential fliers:
If they aren't sure of their interest level and don't have any local help, I send them to the durable and complete T-Hawk. The reason for this is, all of the work is done for the beginner and they can concentrate on flying only, Also, the plane has reusable electronics that can move to another plane. There are enough spares with the kit to enable the new flier to crash frequently before the wallet has to come out. Take a look at the site and videos.
The other approach is to buy an inexpensive
GWS Slow Stick for approximately $35 and purchase a radio, charger and some batteries, seperately. This plane flys very well and is very popular with RC pilots of all skill levels, due to it's price, versatility and good flying characteristics.
Here are some good links for sites, vendors, and products that will be of interest:
Ian Pullar's good intro site for beginners.
Servo City: Radios, servos, receivers chargers, good service, free shipping.
Castle Creations: High quality, reliable speed controllers, that I have had good luck with for 5+ years.
Tower Hobbies: The popular, affordable Triton charger that handles: Nimh, Nicad, Lipo and lead batteries.
Cheapbatterypacks.com: Good batteries, great prices and customer service.
There many more great vendors/links that I will continue to add as I come across them..
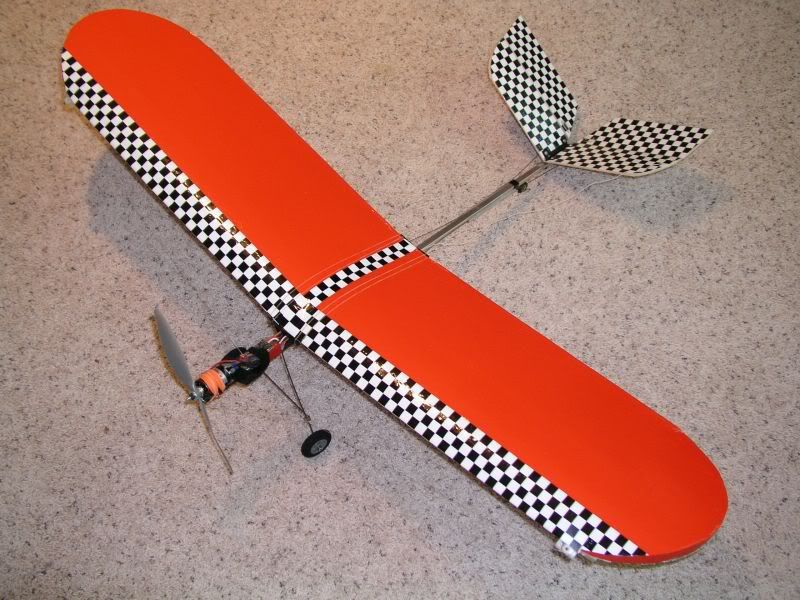
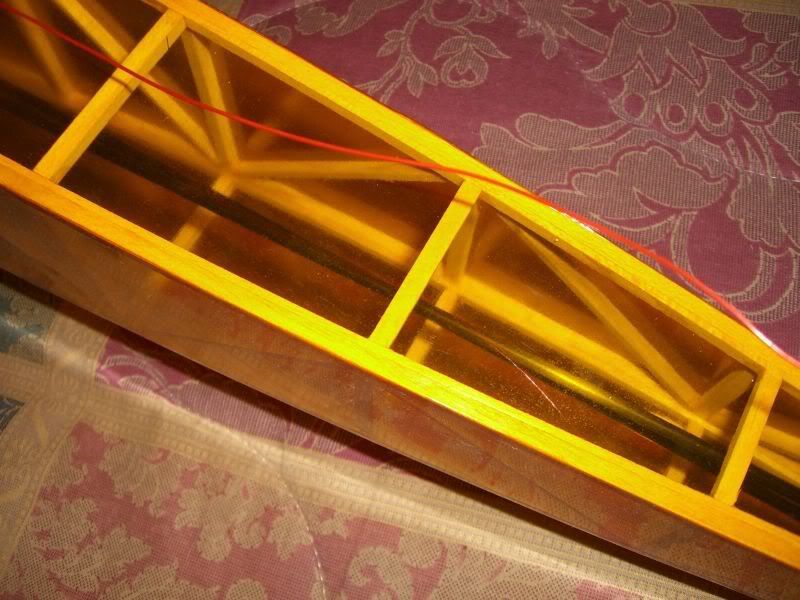
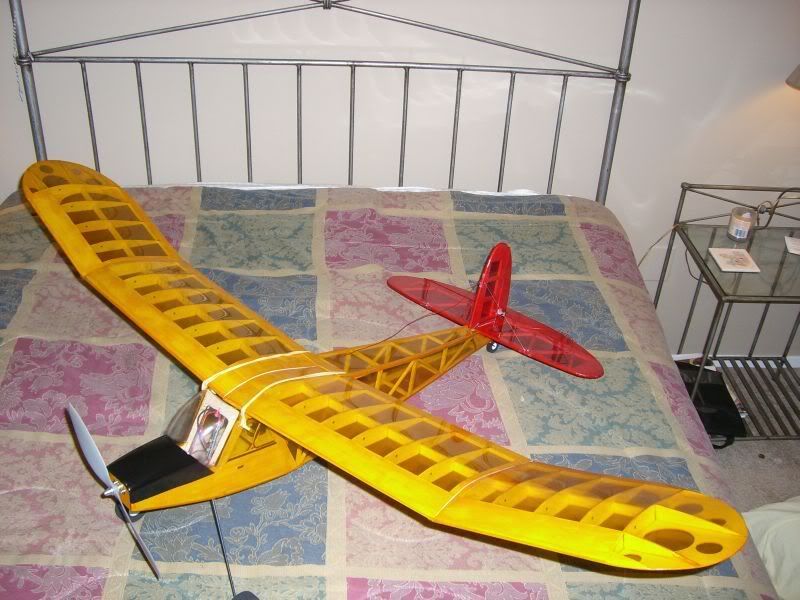
This is my Slow Stick with a Mega 16/15/7 brushless motor, Castle Creations 25amp ESC, 10X5 APC Slowflyer prop, KAN 1050mah 8 cell battery pack, DragonFly wing and fishing line reinforced wing/landing gear/ tailgroup. All in all, a very durable , fun to fly workhorse.
GLOW AIRCRAFT
My Hangar9 Easy 2 40 sized R/C trainer plane was the plane that started it all. With a lot of help from
John Lambert, I was "on the sticks" by the second flight. Also, thanks to the R/C AeroChopper Flight Simulator, I had a very successful first flight. I would strongly recommend a simulator
to anyone contemplating R/C flying as a hobby.
Click here for updated information on the trials and tribulations of the Easy2 R/C trainer experience.
I then took delivery of a new Kombat Airmadillo 40 Trainer from The Airplane Factory.Click here to read about it.
Scroll down to October 7th to read about the Kruizer Combo wing and tail feather conversion done to the Trainer 40.
APRIL 1999
After I had been flying R/C aircraft for approximately 10 months, I lost elevator control on the Kruizer in October 1998 and drilled it straight in at about 40-50 mph.
Fortunately the cost was not too high. The wing and tail feathers were serviceable (I elected to replace) but the Royal .45 was damaged badly (later repaired with JB Weld)
and the aluminium fuselage was ruined. The fuselage costs $24.95. I purchased the whole base kit on the Kruizer for $55.00 and had it back together in about 4-5 hours.
I installed a new OS 46 FX with a 11 X 6 Master Airscrew prop. All in all, the cost to restore the plane to flying status was not too bad,proving that R/C flying is not necessarily
outrageously priced.
JUNE 1999
The restored Kombat Kruizer has been flown several times and it is a pleasure to fly with the OS 46 FX. Unfortunately my flying buddy put a novice on the
sticks and it went in again! The good news is, the only damage incurred, was a scratched aluminium prop nut, broken prop, two nylon screws and very slight cosmetic damage to the wing.
The plane is definitely durable. It was a $10.00 afternoon. I would recommend the Trainer 40 version of this plane to new fliers and then they can upgrade to the Kruizer Kombo after some stick time the trainer.
SLOW FLYING & ELECTRIC AIRCRAFT
During the whole R/C learning process, I was very interested in electric R/C planes, but was dissuaded due
to low power, short flight times and high cost. After stumbling on the Ezone website,I discovered the $15.00 Blue Foamie and decided to give it a whirl.
Please check here for anyone considering electric RC for the first time.
SAFETY WARNING
If you are new to RC flying, you are going to hear it over and over. Be careful around props, especially e-plane props, as they can start unexpectedly if the motor is energized. Also, be careful with handling and charging of batteries, especially Lipo's!
Lipo's are very energy dense and will ignite if improperly charged. Also, do not used damaged lipo's, or this
will happen!
For anyone in the Central Texas area, please check out Discount Hobbies, right next to the Candle Factory on the N. bound feeder for I-35. As the name suggests, the prices are very competitive, selection good and the friendly service and atmosphere, make it worth visiting for that alone. Just passing this on, as a very satisfied customer.
Electrics appealed to me because of the simplicity of running an electric motor vs.
fighting a glow engine with it's picky needle valve and expen$ive fuel/glow plug appetite. Electrics have opened up all sorts of new flying sites for me that fit it's silent close-in flight characteristics. Also,
there is no clean-up and after run oil to contend with. My glow days have become severely curtailed.
After the Blue Foamie, I tried a
Wingo and would highly recommend it to experienced flyers as well as novices. It is very easy to assemble and fly. I have seen a 13 minute flight in breezy conditions and it can do touch and go's. They have since improved the Wingo and lowered the price.
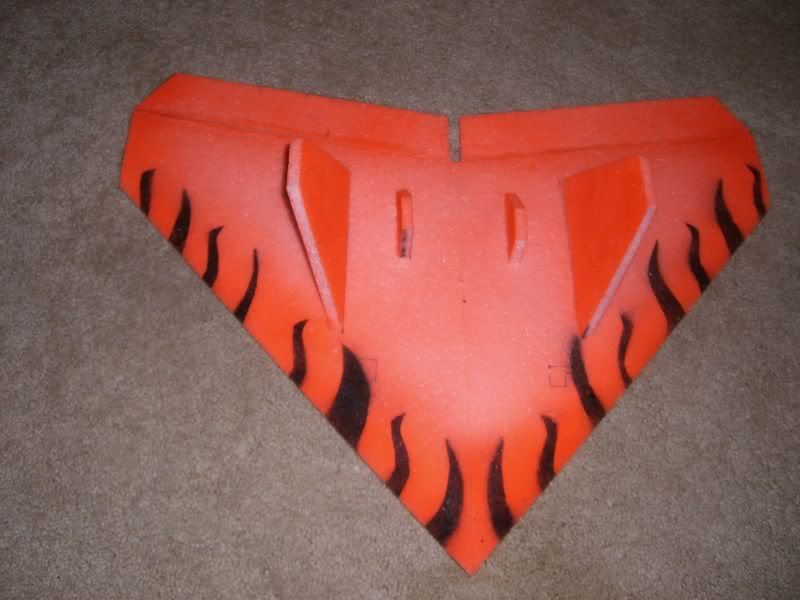
FLYING WINGS
Following the Wingo, I purchased an e-powered Zagi Flying Wing, after flying a friend's Zagi and being very impressed. The owner is a R/C beginner and he has had very good success with flying it. It has been durable enough to survive some brutal vertical landings.
TRICK R/C RAZOR
As you read above, I was pretty impressed with the Zagi 400. So much so, that I have been flying my own since May '99.
Well....Zagi went ahead and introduced their all EPP 30" span Razor at the beginning of September. Since I have had quite a bit of time on my 400, I decided to take the plunge. I had it finished in a couple of evenings.I went with the blue tape and yellow striping and fins. I was pretty pleased with the results.
The first flight was on 10/1/99 and was a mixed bag. It was VERY roll and pitch sensitive. I reduced the low rate on my JR 622 to 60% and 70% on the high rates. 1/2oz lead was added to the nose to get rid of the tail heavy condition. It does not fly "on the wing"
like the 400 but it is a very fast and fun plane, once you learn not to over-control it. It's very tough as it
experienced a few abrupt "landings" with zero airframe damage. The tray/canopy did receive a few small cracks though. I subsequently installed an extra FMA Razor canopy that I had on hand and it is MUCH more durable. These can be purchased from FMA for about $5.00
FMA RAZOR
I have been flying the FMA 48" wing for awhile now and for a quick, cheap, low emotional investment plane, I would recommend it too. I built one for a co-worker in two lunch hours...start to finish! It feels slightly heavier than the Trick R/C Z400, but it's pretty close. Mine is flying with an AstroFlight 020 brushless, .I'm pretty happy with the performance boost. I enjoy the flexibility of the AF 020 as I can fly 1100 NiMh's, 600AE's, 500AR's, 1500 Sub-C's and be rewarded with decent flights. I tried the cheap, under-$20.00 R/C car packs and can get longish sedate flights with the AF 020. I prop'ed it for 18 amps static with a Grish 6X4 nylon pusher prop. (19 amps is the ceiling). I back off the throttle as soon as I'm airborne to conserve power and stretch the flights. The FMA Razor makes a great testbed as it's battery cavity has taken every one of the listed batteries without modification. The first plane has held up to alot of abuse and was given away when I ready for the next one.
I built a second FMA Razor after pancaking, inverted on the asphalt. I only stripped a servo and cracked the motor mount. The plane was otherwise intact, I was just ready to assemble the new one I had, so I could incorporate some changes. Here is the top view.
Notice the trimmed down motor tray with an AF 020 mounted. The mount is velcroed on, resulting in much quieter flying and a breakaway, crash-absorbant platform . The FMA RX is velcroed to the AF's ESC.
I'm using Hitec HS85MG servos.I used colored tape to cover the elevons and coroplast wingtip fins that are
cut down to 2" tall. On the bottom I have used long wearing 3M colored electrical tape for over a year with very good results.
This has protected the keel very effectively. I find that this plane meets my e-flying needs very well, allowing me to reduce the collection of planes that I had been amassing. (Fast forward to the present...."yeah, right! I have more planes than ever..)
Superfly
I picked up this great EPP flying wing from Dave Halko of SuperFly RC in 2004. This plane fits in my suitcase and has gone to Salt Lake with me. Check out the details of his fine products here.
Here's my Superfly...
The idea of flying something close in and slow is very appealing vs. watching a speck in the sky all of the time. The flying wings do pretty good in the small school field by my house. They still cover a lot of ground quickly, so you are zipping around the field, pass after pass, over and over...
This was not very relaxing...
I purchased a Dave's Aircraft Works Park Flyer PF 6. This plane is a jewel!! It
has gracefully curved CF landing gear, very tough EPP wing and a cute laminated CF/balsa fuselage. It takes off in a few feet,will fly in a light breeze,and is very responsive for a rudder elevator plane. It will loop a few feet from the ground and will virtually change direction within one fuselage length. I flew it with a Tadiran battery and saw a 17 minute powered flight. It flys on 7-8 cell 720 nimhs now, as I killed the Tadiran by leaving it plugged in...
I have since built a CF stick version of the PF 6 with wire landing gear that I had laying around. It's very tough. I had a JR610M receiver induced 50 foot
crash with no damage. Check out the details of my homebuilt PF6. All materials are easily available and the wing is available from Dave's Aircraft Works.
I had a Dan Kriegh's IFO and this was one fun little wing. It does have to be pretty calm outside
as the wingloading is so low. It's very responsive and durable, most repairs are minor and it's ready to go flying again in a few minutes. I have replaced it with the newer Mini-IFO that uses ripstop covering. One of these days I'm going to finish it...
GWS SLOW STICK
I flirted with the Lite Stick and had a few close in
flights in low breezes until I folded the wing on a hard pull up. I never got around to rebuilding it after
the GWS Slow Stick came out in 2002. The SS is everything the Lite Stick should have been. It can fly in winds 7-10mph (I have) and it slows down enough to fly indoors. People are carrying heavy batteries, digital cameras, etc, on these planes with no ill effects.I have ton's of flights on my SS and have figured out a few low cost mods to make it bulletproof.
Here's what you need to do:
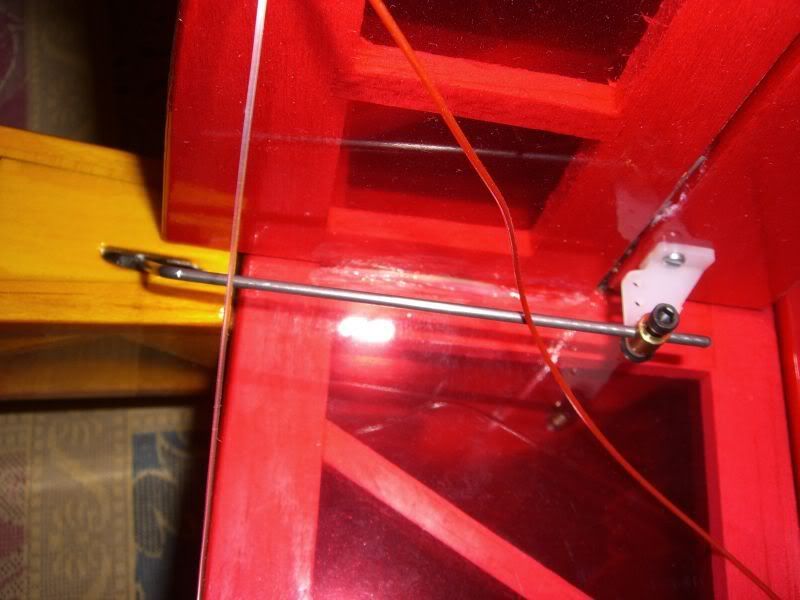
1)Install a fishing line brace on the tailgroup, it will save you a snapped tail fin when the wind flips it over.
2)Install a similar brace on the landing gear and a cross brace. This will save you the hassle of straightening out the LG all the time.
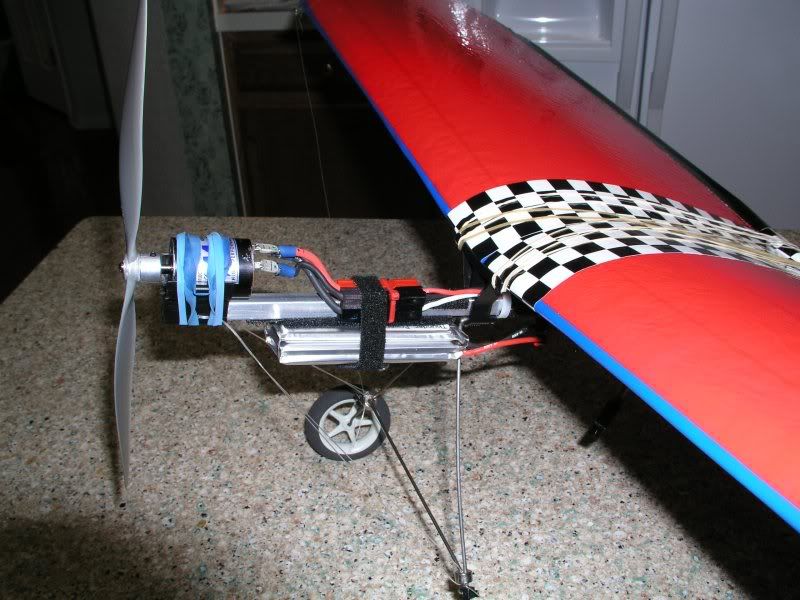
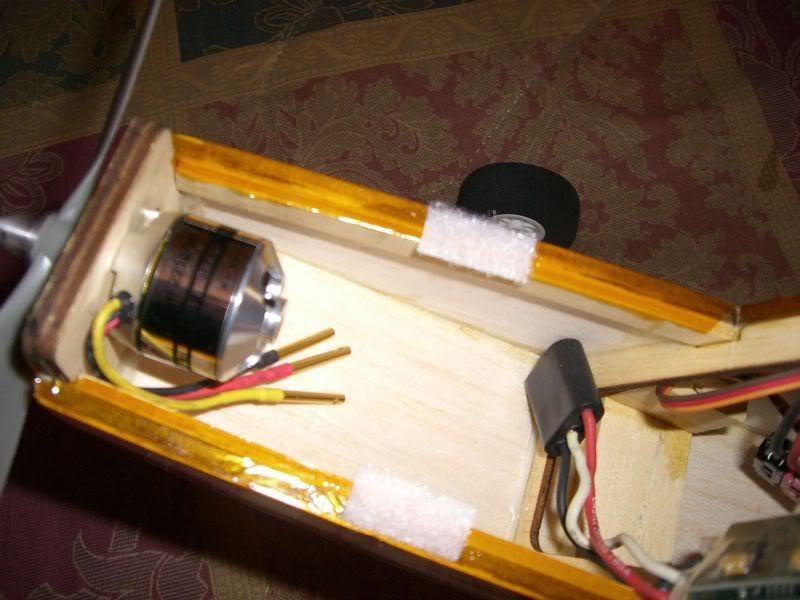
The one expensive upgrade I have done is to install an AstroFlight 010 brushless motor with a 3.3:1
SuperBox and APC 11X7 Slowflyer prop. It's a very efficient setup. My best flight to date is 26 minutes on a www.cheapbatterypacks.com 1600mah nimh. I know I will see a 30 minute + flight when the winds die down.
You will wind up replacing the stock motor after every 30-50 flights. I had a few untimely power outs in the neighborhood, which almost cost me the plane. I consider the quality and reliability of the Astroflight motor a worthwhile investment in fun and peace of mind.
Here is a set up, where I had upgraded to a Mega 16/15/7 direct drive motor with KAN1050 batterypacks:
As good as the stock wing is on the Slow Stik, I searched for an upgrade that was more durable and more able to hold it's shape. I ended up with the wing from the
Diversity Model Aircraft Dragonfly. I glued the EPS wing halves together and then I sprayed 3M 77 adhesive on the top, finishing with red colored packing tape.
It flies very well with this wing and slows down within 95% of the stock SS wing. It does not flex at all and the loops are much tighter and cleaner. It tracks straight and there is no trailing edge flutter at all. A very worthwhile upgrade for $20 + shipping.
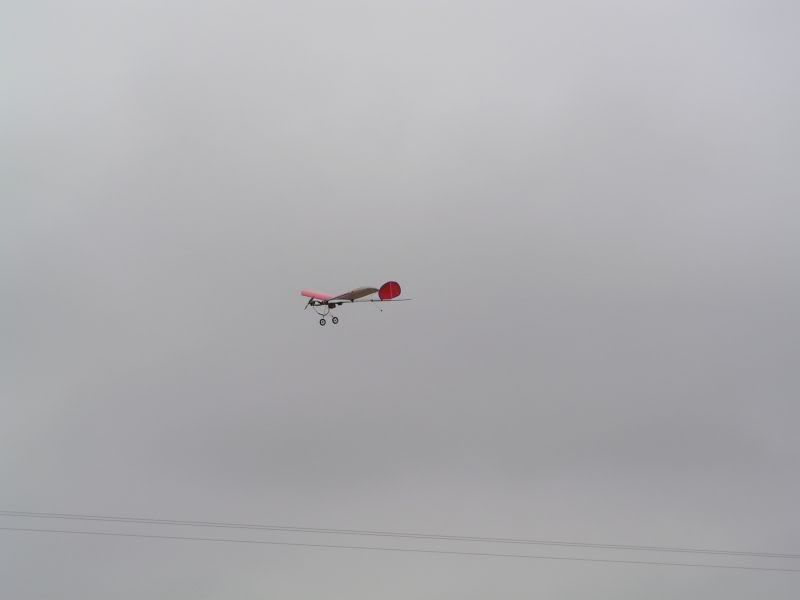
My Slow Stick in the air on 1/31/4.
THE SLOW STICK MODIFICATION SAGA CONTINUES....
I put the newly repaired Mega back in and will use the PJS on something bigger. I just strapped a Thunder Power 2100 3 cell Lipo battery on the very front and ran up the motor. The plane is lighter, so I expect great results in performance and duration.
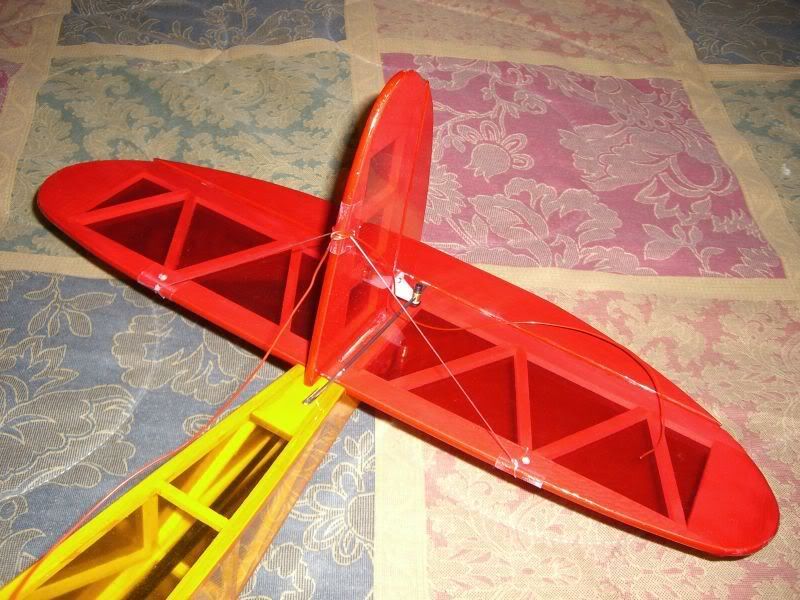
I installed a V tail from the Slo-V plane. This SS has never flown better! Turns on a dime and leaves change, tight loops and very stable, not twitchy at all. An added benefit is the speed increase. Do yourself a favor and do this modification!
9-11-2004
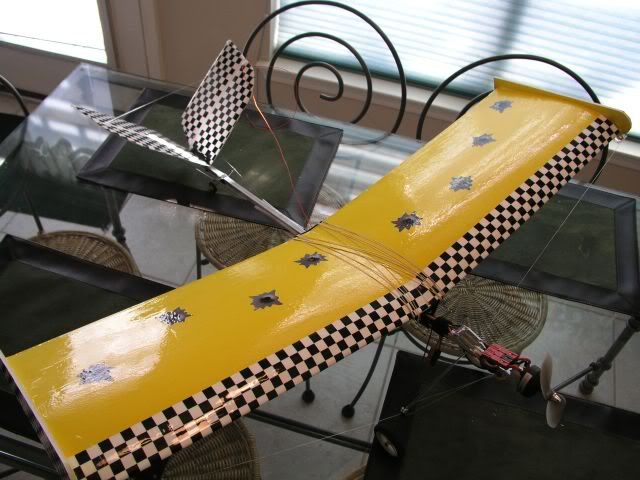
I guess I was enjoying the new V-tail too much, because I folded the wing AGAIN! (wing strut came loose on a loop). I had a spare wing available, so I built it without the rounded tips (8" shorter in span), then I added tip plates, two wing stiffeners and finished with low temp Econokote covering and checkered trim.
It is a lot more responsive and faster, but I admit, I miss the handling of the stock wing. I ordered another wing from www.flydma.com and left it pretty stock (see picture below). I now fly the SS with two wings, one for go-fast, the other for touch and goes and general cruising.
I built another full Dragonfly wing after the previous one folded from too much abuse.
Here's some shots of the SS with the latest wing:

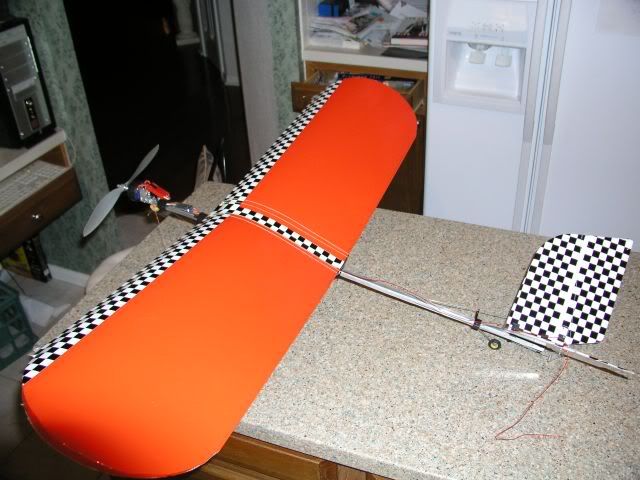
Here's the SS with an Aerobird wing and homemade V-tail:
MORE E-FLYING STUFF...
WIND BUSTER
I heard about this diminutive jewel on the Ezone and promptly ordered a RTF version from Brad (the builder).
AUW is a shade over 4 oz and it fly's in wind! With it's sleek, thin wing, it penetrates very well and with ailerons it maintains control, even in breezy conditions. It ROG'ed in 5-7 feet and was grabbing sky like crazy. I had very tame throws on the ailerons and elevator with 50% expo. I think I'll add more expo and keep the throws as they are. This plane sports a CD ROM brushless motor, CC 10amp Phoenix ESC and a GWS 4 ch RX. Do a search on "Wind Buster" in the Ezone forums, to read a great, looooong thread(s) about it.
Here's a couple of short clips of my Windbuster in action:
Windbuster video 1.
Windbuster video 2.
My daughter Stacie modeling the Windbuster

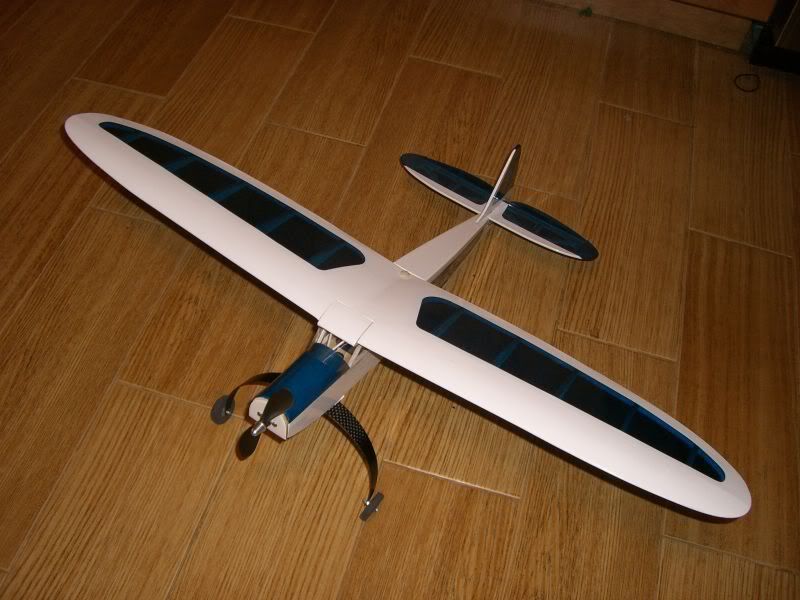
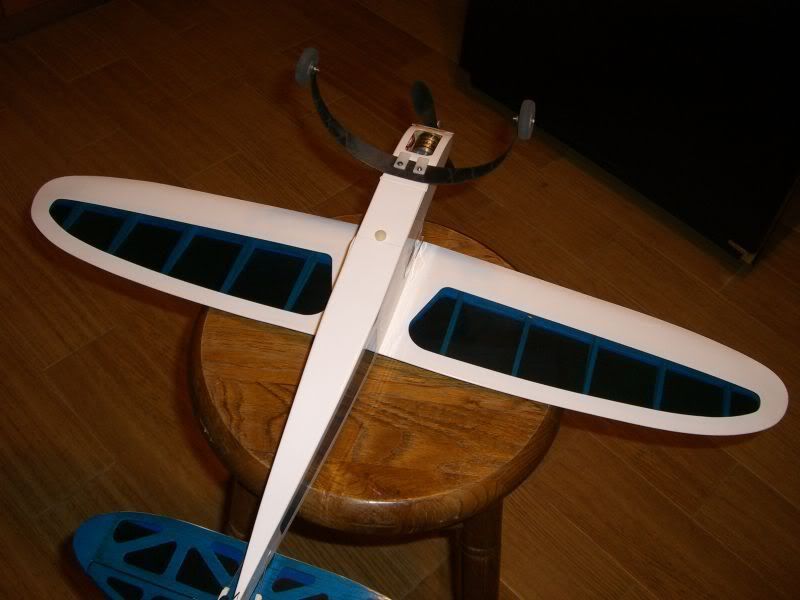
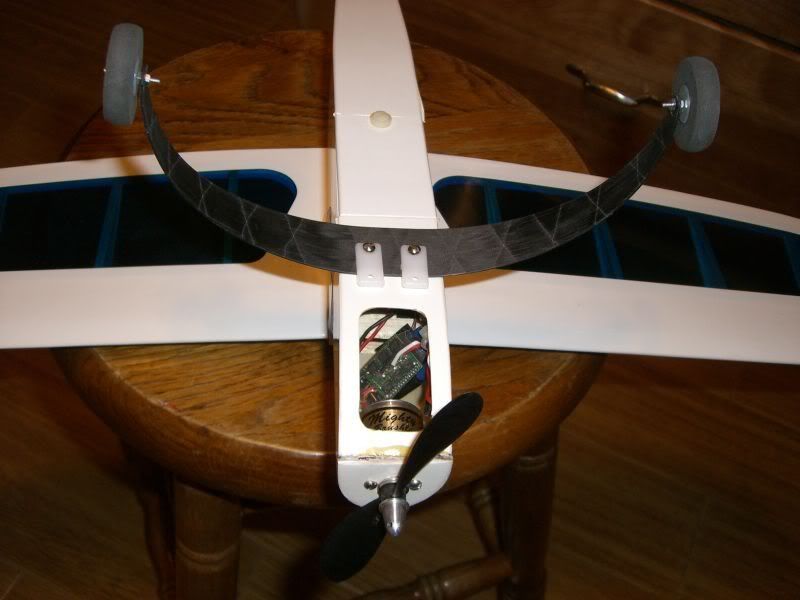
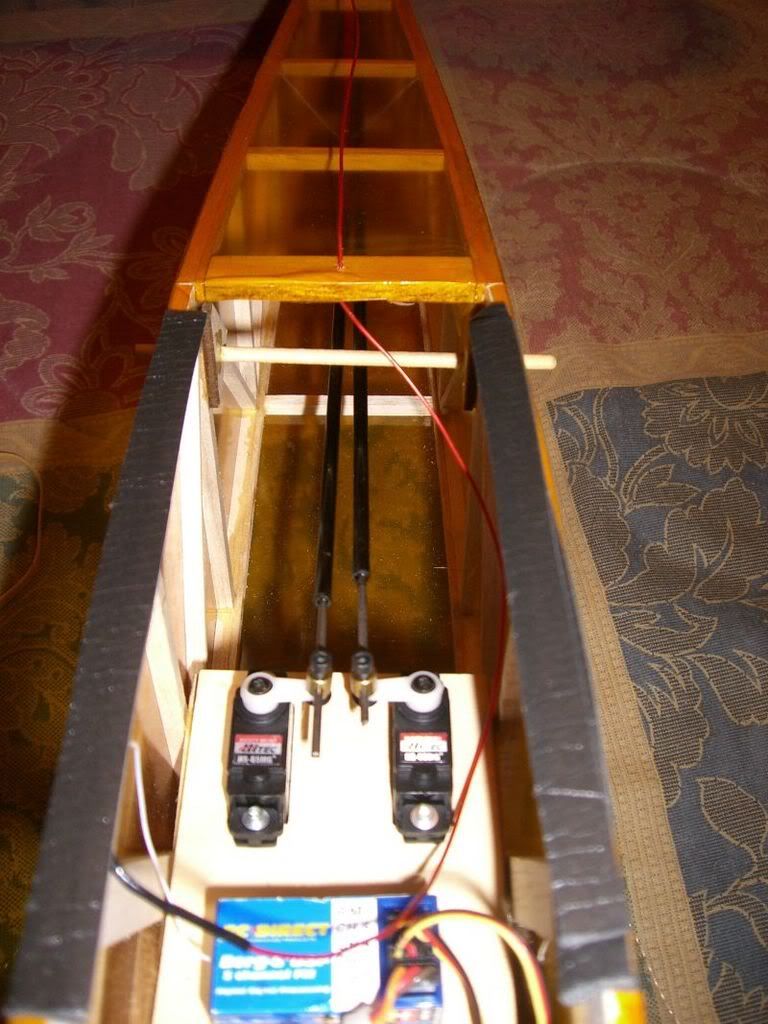
HOBBY LOBBY MISS2
This plane has been great! Been flying it since Summer 2000 and still going strong. A little wear and tear but a solid flyer
that can be counted on to fly in just about any wind. Here are a few pix to show what is
working for me. It sports a Velkom 2020/27 cobalt motor with an APC 11X7 slowflyer prop,
Hitec HS85BB servos, FMA Magnum 8ch RX (overkill) and a Castle Creations 40amp ESC.
Front view of Miss2
Miss2 battery, motor, Castle Creations ESC, and gearbox (3:1).
Miss2 servo compartment (Hitec HS 85 BB's).
Low cost, easy, non-steerable tailwheel, using a control horn.
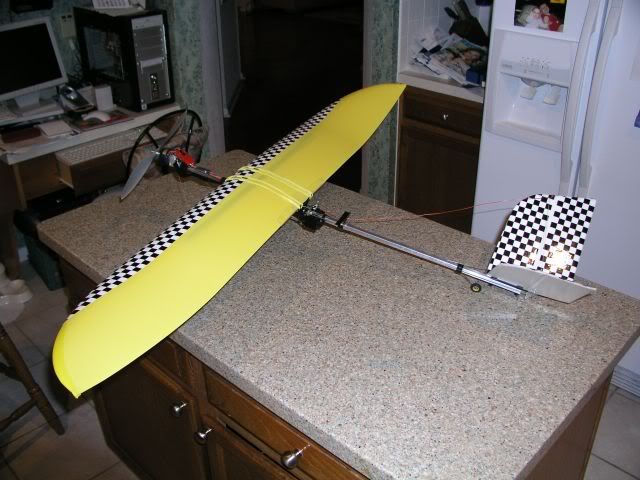
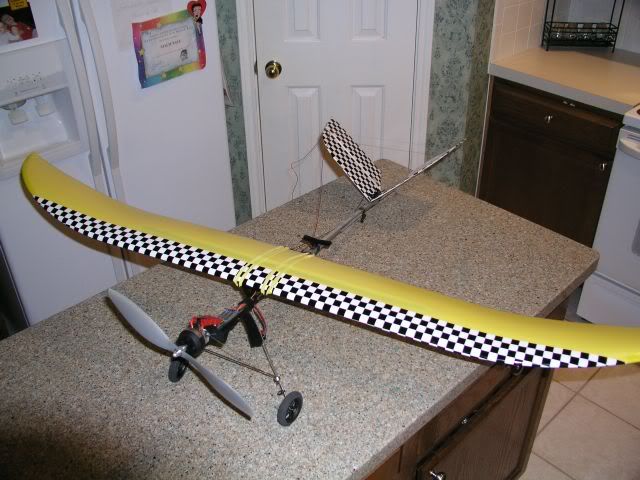
This is my Hangar 9 Cub with an 80" wingspan that I bought from a friend in 2003. I plan to electrify this bird in 2004. With so many brushless motors and battery choices available, it should be really exciting to see the final result.
PAUL BRADLEY'S SR CUTIE
I had a great lunchtime flying session with Paul Bradley, a fellow Ezoner. The breezes were up to 8mph, and the plane flew great. Very responsive, good climb and some nice spiralling spins. Here are a few shots from a thoroughly fun afternoon..Read Paul's very impressive review of the Cutie on the Ezone.
RADIO COLLECTION
When will this madness end!?! Be careful, R/C can be very addictive and you will buy lots of stuff you don't need. I guess it's like other hobby...how much does it cost? Answer: As much as you are willing to spend.
JR PCM10X, JR 8103 heli, JR 622 (2), Hitec Eclipse 7 with Spectra and an ACE Micropro 8000 single stick on 72mhz.
RADIO COLLECTION, PART DUEX..
I made a few changes since the top picture was taken. A friend from the Ezone liberated one of the JR 622's and has put it to good use. I then swapped the Ace MP8K SS radio for a dual stick unit in November, 2004. I was very fortunate to hook up with the individual as he lived in the Austin area. I feel like we were two happy campers after the transaction.
JR PCM10X, JR 8103 heli, JR 622, Hitec Eclipse 7 with Spectra and an ACE Micropro 8000 dual stick on 72mhz.
August 2007:
I have been in temp housing since Feb 2007 and been on a forced RC hiatus. Couldn't stand it anymore, so I dug out an old plane, the Sig lil Rascal and added the smallest cf lg I could find, (nesail.com) to replace the bendy stock wire lg.
I have to replace EVERY lipo I own as they have died and puffed up, so I'm going to try a 3S 1320 on the lil Rascal to see if it has more punch than the previous 2S. This plane has an Astroflight 010 and a Gunther (Zagi) prop. I will probably swap it to 6x4 APC Slowfly prop if I'm not happy with the one on now.
One of my two new projects is a new Miss2 (like the one above). Hobby-Lobby.com was clearing them out for $69 and they sport some improvements over the previous gen's. They now are set up to accept an outrunner brushless motor, have a better landing gear mount and a tailwheel. I learned some lessons from my first by added cf pushrods and a tailbrace. I'm thinking about a 3s A123 battery instead of a lipo for better life and safety.
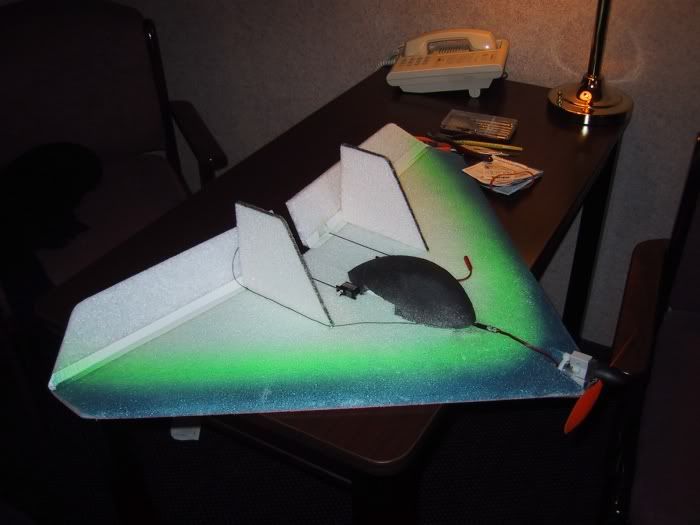
Finally, I'm building an EPP Superflea to carry with me on the road. It still needs electronics and a battery:
R/C HELICOPTERS
I have a Raptor 30, version I that has actually seen light under the skids awhile back. The stock engine (Thunder Tiger 36), was very tricky to get dialed in, so my heli mentor, Lynn installed a new OS 32 SX heli engine. The cheap gyro wasn't cutting it either, so a Futaba GY 401 was purchased.
As you can tell from my other RC links, I'm pretty much an e-flyer now, and my heli tastes are moving in that direction as well. An e-heli that's getting a lot of attention is the Lite Machines Corona. According to the info on the Ezone Forums, this helicopter is an ideal first heli as it is very tough and there are tons of upgrades becoming available. I have the servos, GY401 gyro, receiver, Mega 16/15/3 (3turn) brushless motor and a Castle Creations ESC waiting for the Corona kit. My friend John, and I are going to do identical heli builds and plan to either use a carbon fiber crutch or the upcoming aluminium crutch from Lite Machines.
The Corona build begins!..1/3/2004
I was bored Friday night and decided to start the Corona build on the aluminium crutch, with the parts I had on hand. I still don't have the actual Corona, but I have something that vaguely resembles a heli. Here's my progress as of 1/4/2004:
Update: January 31st 2004
I ordered my Corona kit from Roffee TV on 1/30/2004 so
I'm a big step closer to having the Corona in the air. The following day, I met up with one of my flying buddies, Lynn, to fly his Corona and my Slow Stick.
He allowed me to fly it and I went into a decent hover right off the bat! I have a fair amount of Real Flight G2 sim time, and some bouncing around with a Raptor, about 3 years ago, and that was it. He also demonstrated how tough it was by deliberately crashing it, and back flying in 15 seconds! (I have video proof of this).
Lynn's Corona in action.
Update: February 4th 2004
My new Corona arrived!! It was like Christmas, because my CF fin set from www.choppahedz.com arrived, along with my PJS1000 motor from Hobby Lobby. Looks like the build will begin tonight if I get home at a decent hour....
All my new Corona Stuff....
Update: February 5th 2004
The build continued on 2/5/4 as I started the rotor head, installed the JR gear with tiewraps and installed the main shaft. I think LMH must have seperated every single part that they could, almost to the atomic level!! You really learn every part on this heli by the time you finish it, which I guess is a good thing..
The build so far, Rotor head is 80% built. (not pictured).
Update: February 8th 2004
On Sunday, I continued assembling the Corona and it's starting to look like a helicopter. I swapped the two cyclic servos for HS85MG's to enhance durability.
Coming along....
Update: February 9th 2004
On Monday, I continued assembling the Corona and it's coming along nicely. I have to get the ball joints loosened up and the servo linkages connected. I snipped the battery clamps off of the JR gear and tiewrapped velcro straps to the underside. The battery received some velcro as well and it now mounts very firmly and in balance.
Battery mounted and rotor head almost done....
Update: February 17th 2004
I purchased ball links and metal pin clevises needed to upgrade the cheap nylon links from LMH. I also splurged on a CF rod for the tail rotor pitch. I need to attach the tail fin, finish balancing the rotors and tighten everything up. Lynn will help me on the final part of this journey, as I bow to his heli "guruness"
CF TR control rod and servo linkages installed....
Update: November 24th 2004
I finally flew it!!!!! Here's my post on the Ezone Heli Forum:
I'm so jazzed! I bought a Corona kit back in Jan '04 from Roffe, an alu crutch from LMH and proceeded to assemble it early on in the year. Well, along the way, it got put on the shelf as I moved on to less intimidating projects. Fortunately I had the G2 sim and I played with the helis a lot during the year.
Anyway, to cut to the chase, I got out my 95% completed Corona tonite and proceeded to get all of the equipment, manuals (heli/radio/gyro) together to take up to the LHS on Friday. I put in the last remaining bolt, hooked up the servos to work with a JR 8103 radio and was going to put it all up. I thought I would spool it up to see if everything was lined up right and the gear mesh was set ok. While the rotor was spinning up I thought to myself that it might actually fly! I had to reverse the left/right cyclic servo, then I went back to the patio and the darn thing took off, no tail wag at all. I did nothing to the gyro, except plug it in. It actually hovered for about 30sec-1min when the batt died. I threw in 2450mah and impatiently went back outside. I hovered the whole pack, keeping the heli in a tight spot between the house and two trees!
I couldn't believe how controllable it was. All I flew before that, was my Hummingbird (a squirrel!) a bit of hovering on my gen 1 Raptor (big motor problems back then) and the sim. I literally flew in the dark with no training gear! I have to say that the sim and to a lesser degree , the HB, conditioned my reflexes to enjoy a small measure of success tonight.
I guess I'm almost a RC heli pilot!
My son took this picture on Thanksgiving Day, on it's 3rd battery pack after the maiden. Even with my limited heli flying experience and strong wind gusts, the Corona was very controllable. I can't recommend this heli more highly!
I continued to fly in very high winds over the Thanksgiving weekend, which lead to a tipover resulting in a broken tailrotor gear case, as well as a ruined boom from a blade strike. I replaced the parts the following day ($18 total) and made a training stand, as well as a boom protector from silicon exhaust tubing. I later solved a sporadic glitch problem with a Berg 5DSP receiver. The heli is gradually being enhanced with improvements that bring value relating to durability and performance areas.
Here's a shot of some night flying in my back yard.
I recently installed the Chopper1 (link below) Ti tailboom, boom clamp and Delrin tailrotor gearbox, further enhancing durability.
Chopper1 boom clamp/gyro mount.
The Chopper1 Delrin tailrotor gearbox (Above, drop in replacement for the breakage prone stock unit).
Right side of my Corona (above) with the Berg 5DSP receiver. Highly recommended for glitch free operation!
Left side of my Corona (above) with labels.
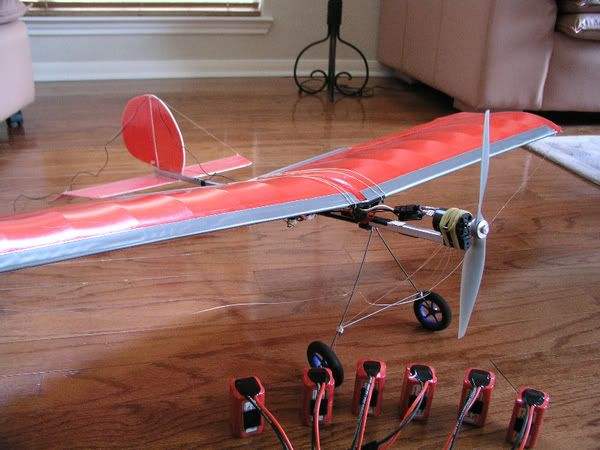
I'm using a number of chargers at home and I travel with a pair of chargers. I have found that the Hobbico MarkII chargers to be a great value, as each unit will charge up to 2 batteries simultaneously. They will charge NIMH,Nicad and Lipo up to 2amps (LIPO max = 1amp). I paid $55 each for my two. Here's my portable setup that I use at hotels or out of the car.

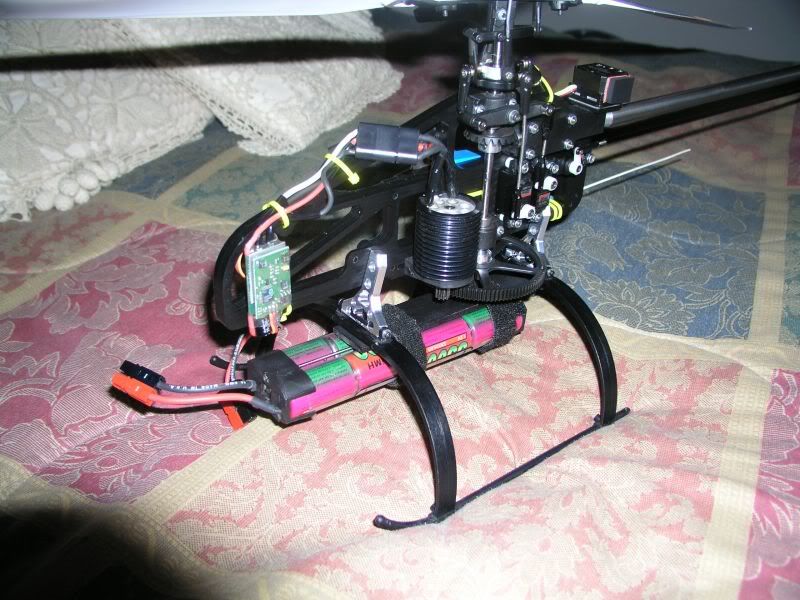
Here's my Blade heli, almost finished.
This heli has the following:
Ballistic Technology Blade carbon fiber crutch, dual belt drives,7mm Ti mainshaft and feathering plate. (link below).
Chopper1 Ti boom,Delrin TR gearbox (for belt drive), aluminium rotor head and boom clamp (link below).
Berg 5DSP receiver.
Castle Creation Phoenix 35 speed controller.
Mega 16/15/3 brushless motor with Hacker B40 heatsink.
Two Hitec HS85MG servos for cyclic and a HS81 servo for the tail rotor.
CORONA UPDATE: July 2005
More and more upgrades are becoming available every month for the Corona. I have added enough upgrades now, that it really isn't a Corona anymore. I just installed the Chopper-1.org 3/8" thick Delrin crutch.
It is stiffer and quieter and looks more stealth. I now have the Chopper 1 boom, boom clamp, TR gearbox and crutch. The heli is flying great!
Here's a 27Mb video of this chopper you can view.

I added the Align TREX heli canopy from www.allerc.com to jazz it up a bit.

Ballistic Technology Blade:
This heli is now complete, but has been shelved until the BT collective pitch head becomes available. At that time, it will be converted to a cp machine.


The Blade after it's first flights, Pic 1.
Pic 2.
Pic 3.
I have found a few vendors that serve the Corona market and have already ordered parts from them. Here are a few links to them:
Ballistic Technology
Carbon fiber upgrades, belt drives, ect.
Chopper 1
Upgraded replacement parts of stock parts that are easily damaged.
Roffee TV
Best price on Corona kits and stock LMH parts.
Micro Indoor Helicopters
There is a vast selection of micro helicopters available which are great for indoor and calm outdoor days. They are definitely harder to fly as I had a difficult time with the Hummingbird V2 below.
I wanted a small , inexpensive, RTF heli for indoors and to take with me on my travels. After a lot of research, I settled on the Century Hummingbird, Version II. It comes 95% assembled, 100% parts are supplied. (radio,servos, gyro, speed controls, and prebuilt canopy). It appears to be very durable and simple.
Here's mine , minus the flybar...don't ask!
I purchased the Hirobo XRB SR contra-rotating heli in Dec 2004. These are selling like hotcakes! RC'ers are discovering how stable and maneuverable they are. I literally opened the box, popped some nicad batteries (8) in the transmitter (supplied), charged the lipo battery (supplied) and flew! I did forward/sideways flight,hovers, spot landings and pirouettes by my second flight. Here are some pix taken when I got it. I have a duffle bag that will be used to let me take it with me in my travels.
Check out the flight report of the XRB on the Ezone, there are videos as well...


