
INTERIOR RESTORATION by Alan Seitz

This section is on interior restoration of Synergy #230. The 525's were
very similar with the construction techniques and woods used, but over
the years owners have customized the interiors to their liking. If the
boats have had many owners or gone for long periods abandoned, the interior
can be quite a challenge. I hope that the interior restoration section
is helpful from the ideas that you have should you desire to embark on
this project.
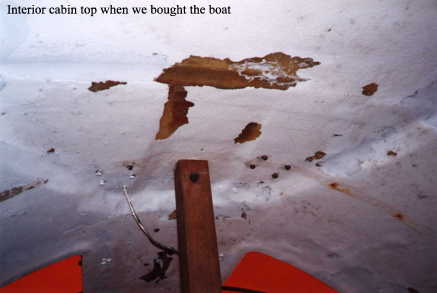 I found SYNERGY (previously HOT) in late January 98' and although she
looked a bit tired I knew she had potential. As you well know, the paint
used by SCHOCK for the interior of the 525's is notorious for flaking and
peeling. SYNERGY was no exception. The entire interior cabin top, from
bow to stern was an eye-sore. There were remnants of futile attempts at
cosmetic repair such as white spray paint over areas that had flaked off.
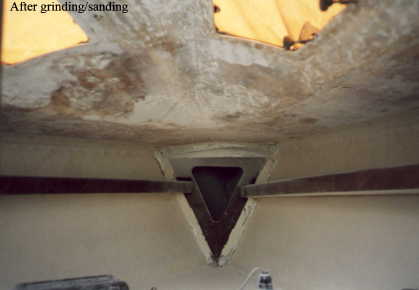
I decided the best approach would be to strip/sand/grind the entire ceiling
and start fresh. I looked into a product called" PeelAway", a supposedly
fiberglass safe stripping compound that removes all layers of paint in
one fair swoop neatly attached to paper. I decided that this product would
not work after taking a few flakes and soaking them in acetone, it had
no effect on the paint.
I found SYNERGY (previously HOT) in late January 98' and although she
looked a bit tired I knew she had potential. As you well know, the paint
used by SCHOCK for the interior of the 525's is notorious for flaking and
peeling. SYNERGY was no exception. The entire interior cabin top, from
bow to stern was an eye-sore. There were remnants of futile attempts at
cosmetic repair such as white spray paint over areas that had flaked off.
I decided the best approach would be to strip/sand/grind the entire ceiling
and start fresh. I looked into a product called" PeelAway", a supposedly
fiberglass safe stripping compound that removes all layers of paint in
one fair swoop neatly attached to paper. I decided that this product would
not work after taking a few flakes and soaking them in acetone, it had
no effect on the paint.
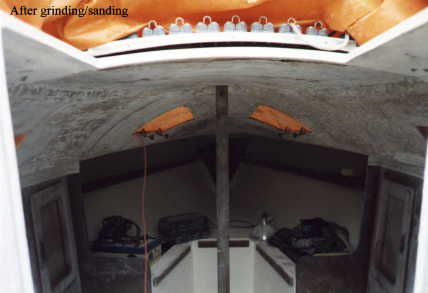
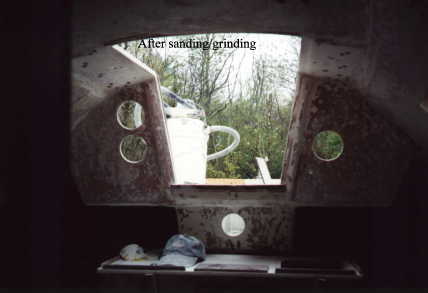
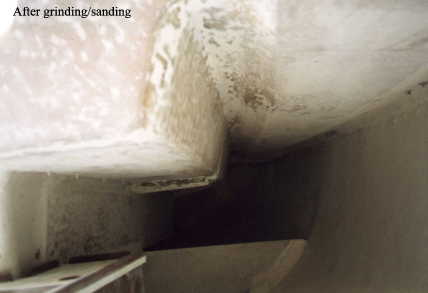
The only way to do it was to grind and sand, very labor intensive. First off I removed all the deck hardware that was through bolted that would be in the way, i.e.: winch bolts, jib/genoa tracks, etc.... My random orbital sander was good for less accessible areas and finish but was too slow for the majority of the work. I found that the only way to make headway was with 80 grit on the 4.5" disc grinder. Eye and ear protection and a good respirator are mandatory. The boat was completely covered in grinding dust, I must have taken off 50 lbs of paint. A shop-vac is a wise investment, but be sure to use a commercial grade filter for fine particulate matter otherwise you will just be blowing it around. I worked on weekends and some weeknights and spent approximately 60-70 hours grinding and sanding.
View looking Forward
View looking aft
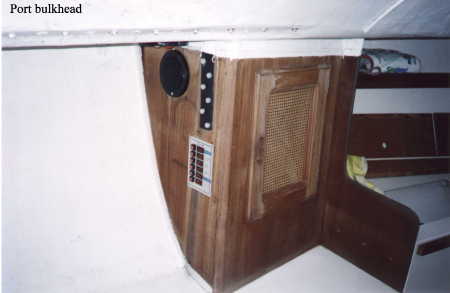
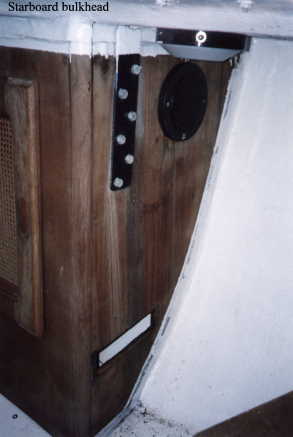
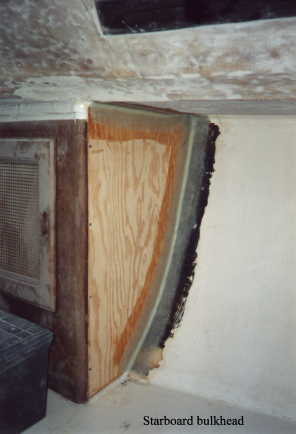
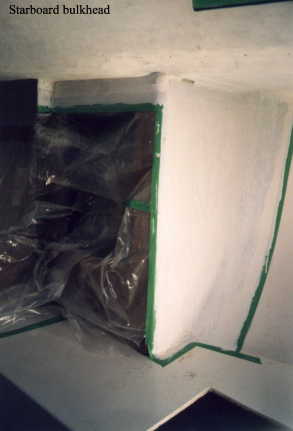
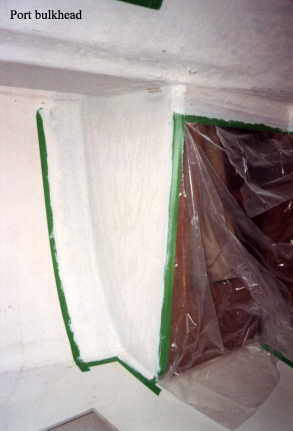
I also decided to replace the structural bulkheads due to the fact the
glass was no longer bonded to the plywood and there was some rot, not to
mention holes from previous stereos and speakers and a poor choice for
the placement of the fuse panel, directly underneath a leaky chain plate!!
They were relatively easy to remove in one piece and I used the the old
ones as templates for the new. I used 1/2" marine plywood and glassed them
back in with some mat cloth (90 and 45 degree directionals) I got from
a friend that builds Whitbread boats and Maxis, kinda overkill but the
price (free) was right. One note, several of the aluminum chain plate bolts
sheared with very little torque applied while being removed. I replaced
them all with stainless steel bolts.

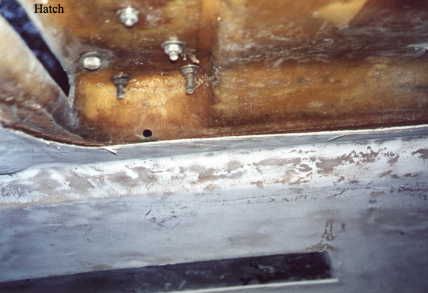
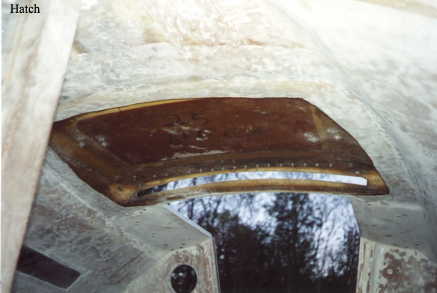
While I was at it I decided to get rid of all the rotted plywood inside
the hatch area. SCHOCK used some marine plywood as backing probably just
to make laying the glass easier. I used a razor knife and scored my way
through the panel keeping it in one piece. After removing the old wood
I sealed the seam between the cabin top and the panel with silicone caulk
to prevent water from seeping in between and glassed the panel back in
place with some 2" cloth. Note: while the panel was off I re-bedded all
of the deck hardware that was now easily accessible.
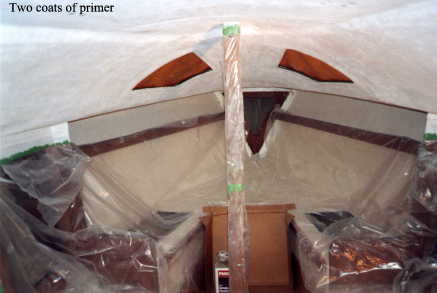
With all the repairs done I cleaned up the interior and got ready to
paint. I rolled and tipped on two coats of Interlux surface primer and
two coats of Interlux premium yacht enamel (semigloss white). I felt like
I was sitting inside a new boat, a remarkable difference. The pictures
only show it after primer, I haven't yet taken any of the interior after
paint.

Having taken the majority of the deck hardware off, it was an opportune time for maintenance, ie: repack the winches, rebedded all of the thoughbolts and chainplates, etc..... So far no leaks! It was a lot of work but well worth the effort. After buffing out the hull and applying her name SYNERGY was launched in April. We had a great season and are extremely pleased with the boat!!!!
11-24-98 Alan Seitz
