Getting Started with XS guide....
copyright MethLabs Productions
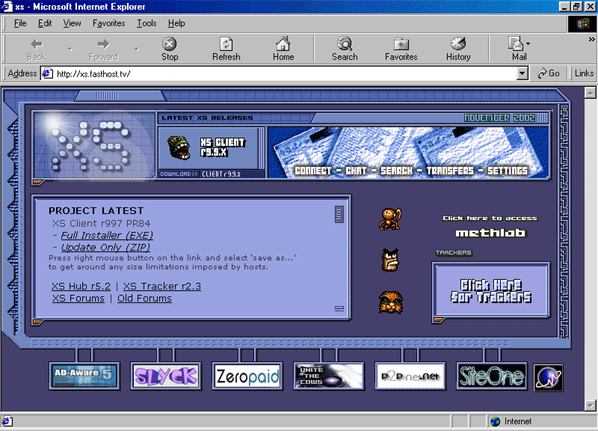
First off what is XS and where can I get it?
Well to put it simply, XS Client is a community based peer2peer file sharing program. Like Direct Connect, the client connects to the hub software and tracker to get hub listings and has the ability to share all file types.
The xs program can be downloaded easily from one of the following locations:
http://xs.fasthost.tv
http://xs.tech.nu
http://methlabs.org
What do I need to download from off the main site in order to use XS?
If you are new to XS and this is your first time ever using the client it is recommended that you
download and use the Full Installer (EXE) link from off the main site. The installer will ensure XS works properly for you.
If you have used XS before and are just looking to upgrade to the most recent version then you will only need to download the Update Only (ZIP) file. After you have downloaded the zip file. Unzip the archive to a folder of your choosing and simply replace the EXE in your XS program folder with the new file and update your shortcuts to reflect the changes you have made.
Installation....
And now the new begins...
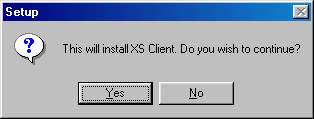
When setting XS up for the first time by running the full installer double-clicking on the installer will open a message box which asks you:
"This will install XS Client. Do you wish to continue?"
Click "Yes" to begin the installation process
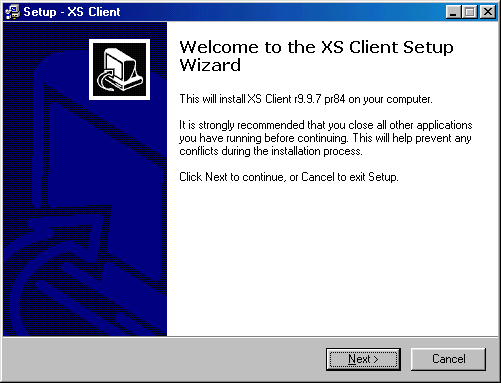
After click yes you will get the "Welcome to the XS Client Setup Wizard" which will tell you the version of XS you will be installing and will ask you to either continue or cancel the installation. Click "Next" to continue the installation or cancel if you are not ready to install XS at this time.
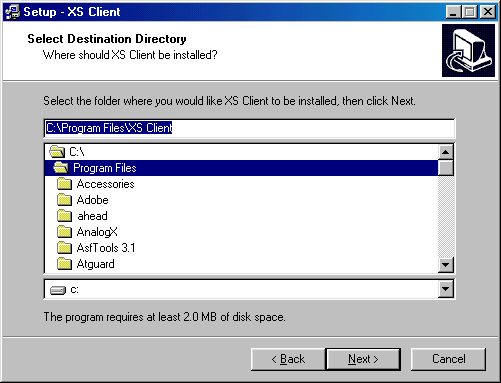
Clicking Next will bring up the "Select Destination Directory" dialog box which lets you choose where you would like to install the XS program to. Default installation path is usually C:\Program Files\XS Client but you may change it to another location if you wish.
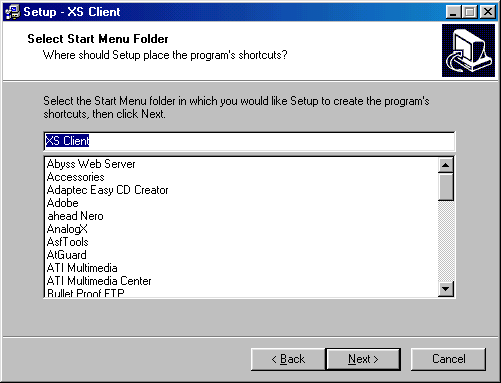
After choosing your destination folder and clicking next the "Select Start Menu Folder" dialog box comes up. Just click "Next" to continue. All this dialog box does is put a shortcut for the xs program into your Start Menu's Program's folder (This is default behaviour for most program installations)
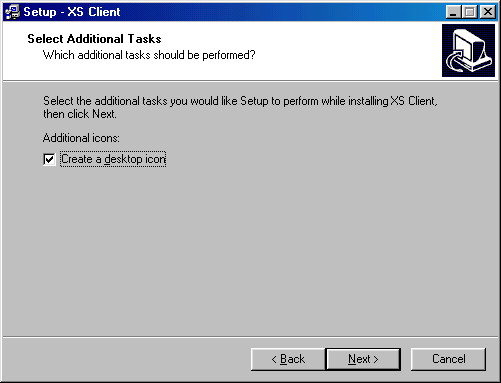
Next the Setup dialog will prompt you to make a Desktop shortcut for XS. It is recommended that you do so then click "Next" to continue.
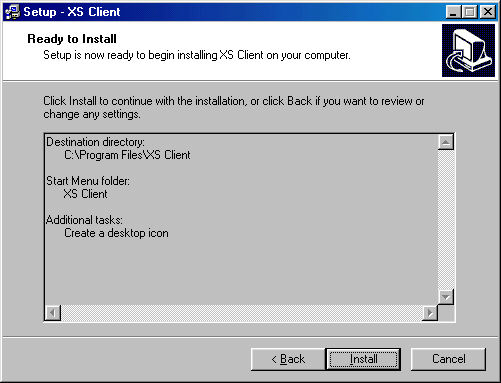
The next dialog to appear will just confirm your installation choices. Now press install to complete the installation process.
Now we get to the good part...actually starting the client. When this dialog box appears with the option to "Launch XS Client" make sure to place a check mark in the box and press "Finish"

XS Connection Wizard....
If you selected the Launch XS Client option in the installer then the XS Connection Wizard should begin (this will only appear once when you run the program for the very first time).
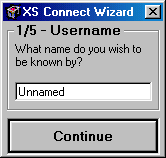
The XS Connection Wizard has Five Easy steps to get you on and connected to the XS file-sharing network.
First Screen of the XS Connection Wizard will ask your for a Username (this is the name by which others will know you by on the network so choose one that you like). The default username is Unnamed just change this to any name you would like and click "Continue"
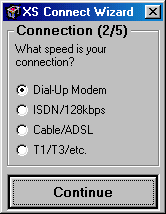
Next step is to select your connection speed. What type of connection do you have? If you connect using your telephone line then choose Dial-up Modem. If you have a Cable-modem choose Cable/ADSL and so on. Then when you are done selecting your connection type click "Continue" to go to the next step...
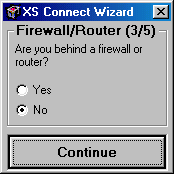
Step 3 of the XS Connection Wizard asks you if you are behind a firewall or a router. If you don't know then select "No" otherwise pick the answer that applies to you. This dialog box is intended for people who connect to the XS network from schools or universities or from work or that have a home lan.
Again if you are unsure of the right answer choose No otherwise pick whichever answer applies to you.
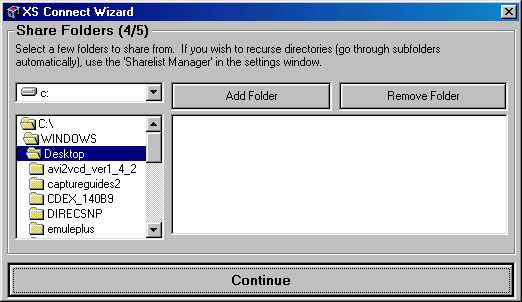
Step 4 is a very important one. In this step you get to choose which folders you want other XS users to have access to when connecting to the network. Choose only the folders you want to share by selecting the drive letter then highlight the name of the folder and press "Add Folder"
Folders that you choose to share will show up in the right pane of this dialog box. If you make a mistake and share the wrong folder...simply highlight the folder's name (in the right user pane) and select "Remove Folder"
Do this procedure for all folders which you wish to share the files in with others over the XS network. When you are finished choosing which files/folders to share click "Continue"....
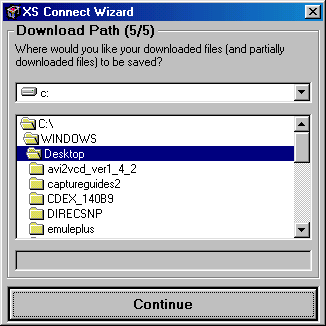
Finally the last step of the XS Connection Wizard is to choose the "Download Path". This is the location of where you would like all the files you download from off of the XS Network to go. After choosing the location for the files you receive to go press "Continue" to finish the wizard.
<-- Previous
Next Page -->


