 Here is where you start having the fun, bringing
your pic to life. First, just create another layer on top of your
tracing. You will be painting on top of a layer throughout this
whole project.
Here is where you start having the fun, bringing
your pic to life. First, just create another layer on top of your
tracing. You will be painting on top of a layer throughout this
whole project.Step ten: What do we do now...
Here is where you start having the fun, bringing
your pic to life. First, just create another layer on top of your
tracing. You will be painting on top of a layer throughout this
whole project.
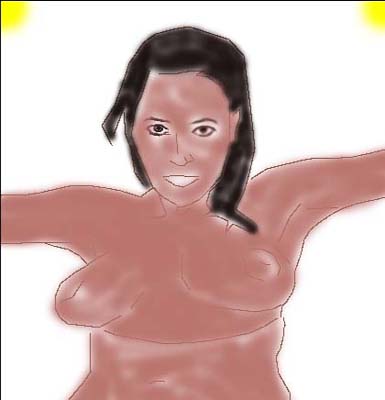
All I do at this point is block in the basic colors. There is no reason to worry about shading or anything at this time. And you certainly do not have to worry about building up multiple layers, naming them, and crashing your computer trying to render it in the final product. No no no.
I was once told, and in my case it certainly is true, that if you want to find the easiest way to do something, just put a lazy man on the job. Now, I certainly do not take shortcuts in my paintings. But all this building up of 10, 20, 30+ layers, to me is a real royal pain to me. If you know how to paint with oils and the like medium, you will certainly know that you can not possibly put a layer on your painting in real life. And, if oils can look spectacular without the aid of layers, then why must we use them in computer painted art works?...He he he...to be honest, I like layers, but not a lot of them. And this is why. My computer sucks. It can't handle all those layers...lol
Enough about layers, look at the pic on the right. Notice the two eyes. Both were roughed in but the right side *your view* has been smudged out.
Ladies and gentlemen, I now give you my secret weapon in my little world of CG art. The smudge tool. On a pressure setting of about 10 is where I usually keep it. And, speaking of the Smudge tool, I use it perhaps 70% of the time. The pencil tool is a close second. Details are my main concern in a painting. And, the details are the most "time consuming" of them all. Have a beer and relax. What took me about four days to complete, I will show you in a matter of minutes.
Step eleven: It's fuzzy but has a softer look...
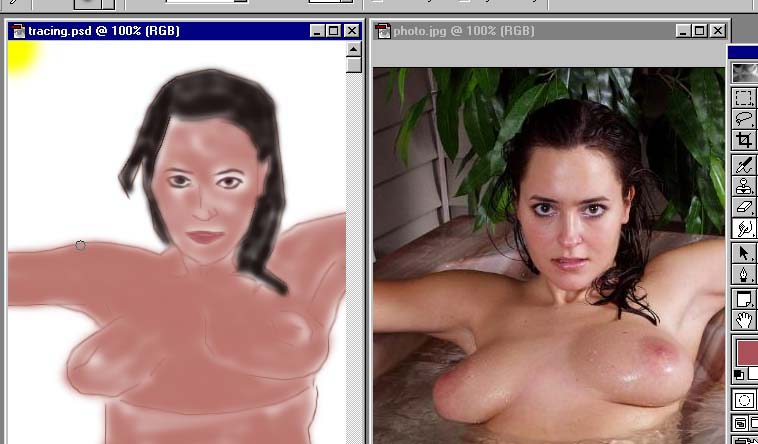
I paint with the two pics side by side. I have used my smudge tool to soften all the hard lines after I blocked in the basic colors. And now let me first tell you this, I am not trying to paint this pic exactly like the original photo. I certainly could do it. But then I have no self respect by doing so.
I am painting this pic almost like the original to show you how to use a photo as a reference. This painting will be painted with the same elements as the photo, but not an exact copy. It would be too time consuming trying to match each element perfectly. And in the end product, you will see that the face is not the same as the photo. But darn close...lol. I also recommend that you try to chose a photo as clear as possible.
As you get a little more used to the Adobe Program and a little more skilled in what you can do, then I would challenge you to pick out a photo with poor quality and use it to test your imagination when painting. That usually gives me the big head * pride, that I can actually use my mind in determining what actually is and what isn't due to the loss of details*.
Step twelve: Using your Air brush...
 Here I have used my Air brush tool, in order
to add a little more color and smother transition. I use my eye
dropper tool and grab pigments from the photo working using my
Air Brush from darker to lighter colors. You will need to chose
the size of the brush for the area that you are working with.
PLEASE REMEMBER THIS!!! As soon as you get to a stopping point
in your pic. I always flatten my pic and save it under a new name.
I save all my pics in succession. And I save about every 20 minutes
of work or when I feel that I will lose a great deal of work if
for some reason my computer freezes up. SAVE your work CONSTANTLY!!!!
Here I have used my Air brush tool, in order
to add a little more color and smother transition. I use my eye
dropper tool and grab pigments from the photo working using my
Air Brush from darker to lighter colors. You will need to chose
the size of the brush for the area that you are working with.
PLEASE REMEMBER THIS!!! As soon as you get to a stopping point
in your pic. I always flatten my pic and save it under a new name.
I save all my pics in succession. And I save about every 20 minutes
of work or when I feel that I will lose a great deal of work if
for some reason my computer freezes up. SAVE your work CONSTANTLY!!!!
Notice that I definitely start with the eyes first. That gives me a better sense of personality. As I work, I create a new layer one on top of the other as I create the eye.
In the next section below, I will use another example of layers, color, layer, detail, layer, and more detail. You will use the smudge tool in each step as you go.
Notice in the pic to the left, the details becoming in the face. I did not prepare a step by step guide in what I am talking about in this painting. Sorry, it just hit me to tell you about it now...so take a look at what I mean...
Step thirteen: Layers and Details...
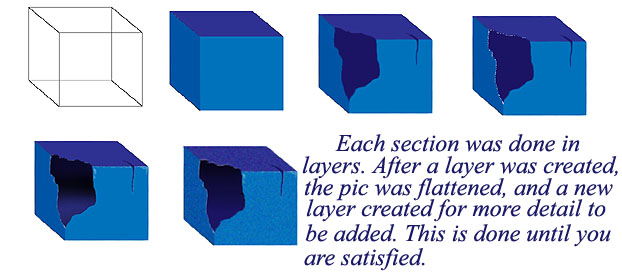 Notice the basic blocks in the pic to the right.
Each cube that you see had just one layer placed on it. I started
with a wire frame block in the first cube, then added color in
the second. The third cube had a layer placed on top of the painting,
and then added solid color for the crack and missing edge, drawn
in with the pencil tool and smoothed out, making for a more realistic
look. The fourth cube had another layer placed upon it and white
was used to highlight the edges of the missing corner. In the
fifth cube the same layer is still there but I smoothed out the
white using the smudge tool. The sixth cube had another layer
created and the texture was painted using the air brush set on
dissolve setting, then smudged out slightly.
Notice the basic blocks in the pic to the right.
Each cube that you see had just one layer placed on it. I started
with a wire frame block in the first cube, then added color in
the second. The third cube had a layer placed on top of the painting,
and then added solid color for the crack and missing edge, drawn
in with the pencil tool and smoothed out, making for a more realistic
look. The fourth cube had another layer placed upon it and white
was used to highlight the edges of the missing corner. In the
fifth cube the same layer is still there but I smoothed out the
white using the smudge tool. The sixth cube had another layer
created and the texture was painted using the air brush set on
dissolve setting, then smudged out slightly.
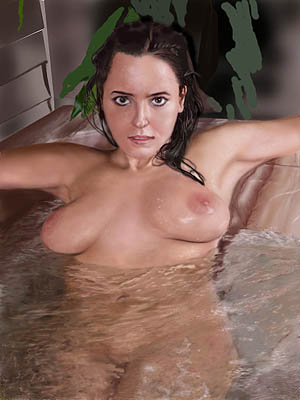
This is how I create the eyes, layer by layer adding a little detail here and there. I flatten the image as I go along and create a new layer for more detail. Not only are the eyes created in this way, but the whole pic. And if you could actually watch me while I'm working, you would notice that I move around different parts of the pic as I go along. I never stay in just one place. A little white here on the eye, then I might move to the water for more gray. Bouncing around the pic like I do just keeps me from getting bored on a certain task. Sometimes, I don't like how a certain part of the pic is going, so I work on another part and come back to the problem later on, usually the next day.
Step fourteen: The final series...
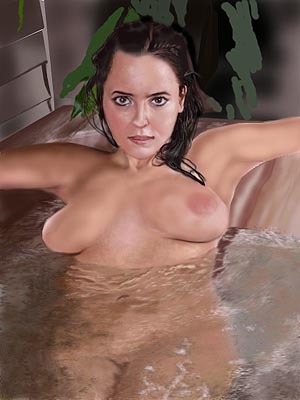
I can't possible show you how I paint as we go, because I move around the canvas so much. So, I have placed a few of the succession pics here for you to take a gander at, in order for you to see how the pic comes to life.
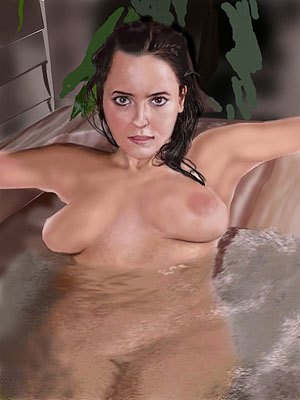
The basic blocking of all the colors to help me get the understanding and inspiration for the overall pic. As I stated earlier, the painting is not meant to be exactly like the photo. The face is a little wider, and the eyes will be more defined. The details of the background and hot tub as well as the water, will be similar to the photo, not exact. I use a photo to give the viewer an impression of what I'm trying to get them to see.
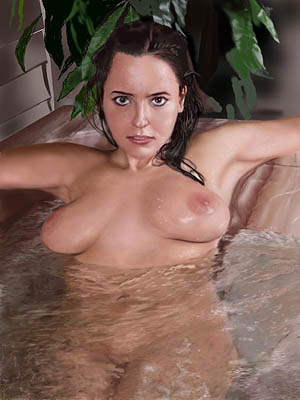
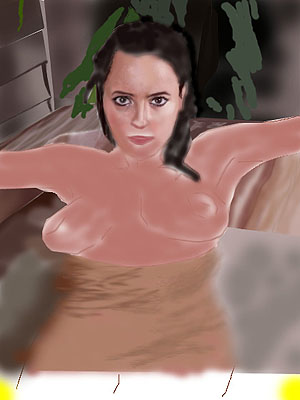
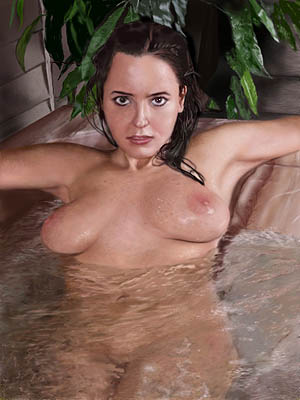 The final
product in the last stage. All that is left is for me to smear
my logo on the pic. Notice the freckles...the final texture. It
was done again by adding a layer to the pic, and using the Air
brush tool set on dissolve at about a 4 pressure setting, and
the Pencil tool just one dot at a time here and there. Once the
basic final details are added, the Smudge tool is used to blend
it all in. Then the layer is flattened.
The final
product in the last stage. All that is left is for me to smear
my logo on the pic. Notice the freckles...the final texture. It
was done again by adding a layer to the pic, and using the Air
brush tool set on dissolve at about a 4 pressure setting, and
the Pencil tool just one dot at a time here and there. Once the
basic final details are added, the Smudge tool is used to blend
it all in. Then the layer is flattened.
I had a lot of fun doing this painting. I realize that in this so called tutorial, you still have some questions not answered here. The trick to the whole thing is patience. The work that I produce is not on a professional level. But, then again, I do it for myself. This is my world.
I post these pics on the web for viewers to see, hopefully get inspired, and share a comment or two.
The world of art is a fun place to be. We get to escape the real world for a while, and let our imagination run freely.
I hope that you had a good time seeing how I do my stuff. It's nothing special I know, but it is fun...Take care and enjoy the beer now, you've earned it...