Becky's Magnetic Needlebook Instructions
I have had so many e-mail over the past few days for finishing help on the A Bird in Hand Stitcher's Book...thought this is NOT the exact finish I did for the stitcher's book-it's basically the same technique. I have put together this tutorial for a SIMPLE Magnetic needlebook to assist you.
Please note that this is only a guideline as
I kind of do my own thing when it comes to finishing. This in NO way reflects how others may finish the same item.
You will need:
Your stitched piece
Finishing fabric of your choice
ribbon to match
batting
Cardboard
Glue
Magnetic strip
Needles (to add to your book)
Determine the size you wish for the finished needlebook to be.
Trim the stitched piece allowing the amount of seam allowance you wish to have around the design.


Cut 2 pieces batting the same size as the outside of your needlebook.
Add the batting to 2 pieces of the cardboard.

Center and pin your stitched piece to one of the batting lined cardboard pieces.
Lace the back snuggly adjusting as needed to center.


Cut 3 pieces of finishing fabric to the same size-enough to pull around the remaining 3 cardboard pieces and glue in place (I usually LACE these as well-but I wanted to keep this tutorial simple. I WOULD RECOMMEND lacing them).


Cut a piece of finishing fabric wide enough for the spine of the book and fold it so there are NO RAW edges and glue it on the front/back of the book. It will be sandwhiched between the two layers of the book. Space the front and back as far apart as you would like them before glueing the fabric for the spine in place. PLEASE note you have to leave some space or your book will not close.
Cut a long length of ribbon to make the tie closures for the needlebook and lay it on top of the spine fabric you just glued to your book.


Add glue generously (I usually blind stitch these pieces together-but again for those that do not have any sewing expericence I have used glue) over the two pieces that you have added the spine and closure to and line up the remaining 2 fabric covered cardboard pieces on top of the front/back pieces of the needlebook (these will be the inside of your book) that you have just added the spine and ribbon closure to. I use clothespins to hold in place until completely dry.

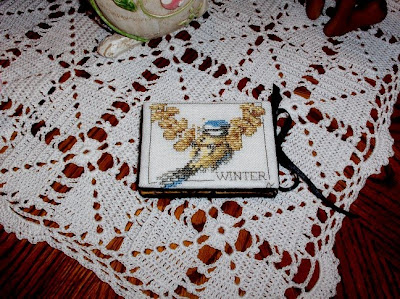
Once dry I added a magnetic strip to the inside of the book to hold needles.
I also added a braid around the outside of the book-you do not have to add this. I used a blind stitch to add the braid. You can also glue this braid onto the book-but be VERY careful as the braid will show any glue residue that touches it.


I hope this tutorial helps those that emailed me :) As always thank you for reading my blog :)
Questions, assistance -Email Me


