
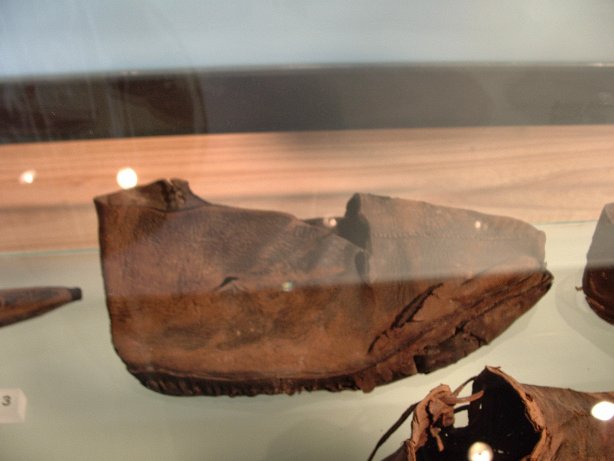
It’s a shoe. It’s a medieval shoe. It’s probably in the Museum of London’s “Shoes and Pattens” book. I don’t know a lot about shoes, so I won’t linger here too long, except to note that it does appear to have a center seam up from the toe, which, as far as I am aware, is a bit unusual in a turn shoe.


Here we have a second shoe, this time without the center seam. It laces together on the side, which you don’t see often (have I ever?) in reproduction shoes. I know it’s featured in “Shoes and Pattens”. And, apparently, the side-lacing shoe was not uncommon.

Ah, now here is an interesting shoe. This was most definitely an open-backed slipper (mule) originally. I wondered at the time how they got the leaf pattern onto the shoe, but “Shoes and Pattens” supplied an answer for me when I got back home: medieval leatherworkers scraped the leather to produce an image. Mind you, this is a reverse image; the white parts are where they scraped the leather down, and the brown leaves represent the original color of the leather (or, at least, the original dye color of the leather).
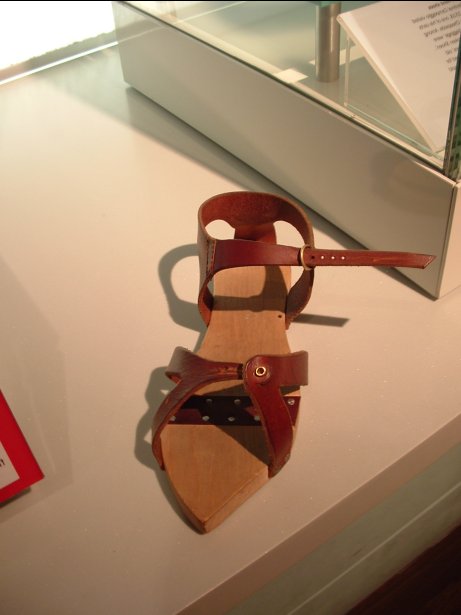
At the end of the medieval section, the Museum of London had a small exhibit with a few things you could try on. They had a hood and, I think, a maile coif, plus an adult and child’s patten. This is a reproduction of the same extant pattens they have on display, so copy them to your heart’s content (I did).
A note about the toe-strap. That round, gold piece you are seeing is like an eyelet, and it is set on a little circle of leather that has been partially cut out of the strap. The strap on the other side of the shoe slides through this cut place and the holes in the strap line up, as needed, with the eyelet. But how does it stay together? There were no answers as I played with the patten; clearly something was missing. Later, at the Re-Enactors’ Market in Coventry, I found these same pattens at a German lady’s table and the answer was there as well. They should have a blunt nail which passes down through the eyelet, through the strap hole and lays to the outside of the other strap. It works quite well, but I didn’t see how that was any better than a buckle (especially since the nail so obviously has a tendency to disappear), so I have to confess that I made my pattens with buckles on the toe-straps.
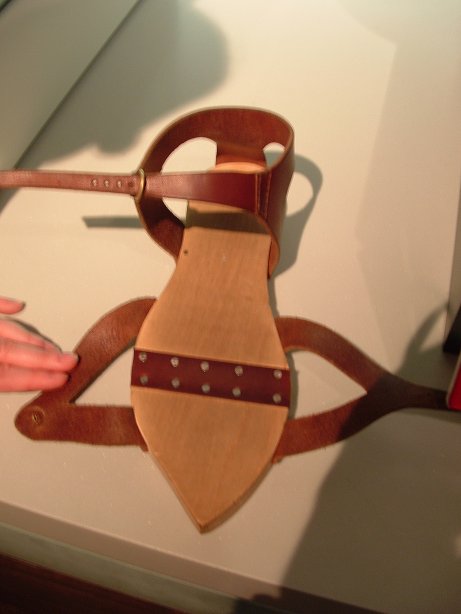
A picture of the hinge. Also note that the strap at the ankle is double-stitched; I’m afraid I rather missed that part when I made mine.
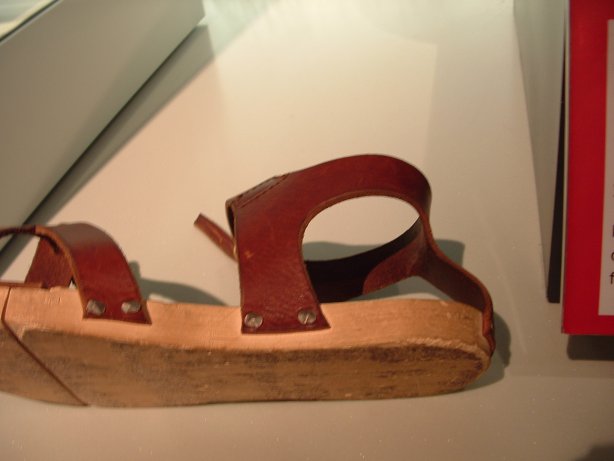
More of the same patten. Carpet “tacks” have roughly-shaped, irregular heads on them and give you a good, hand-forged look. You can find them at Lowe’s (or wherever) in the nail section. The back piece on this patten has been set forward slightly so that your back-center piece of leather isn’t perpendicular to the sole. Don’t do that. I did that to a lesser degree on my pattens, and it just means I can’t get the heel of my shoe all the way back into the patten.
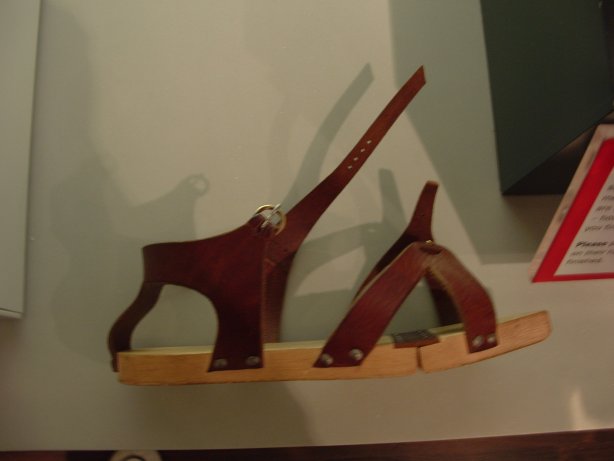
Last view.

Glove from the Museum of London. Per the exhibit card: “Leather glove 1400s. This well-worn glove, with a tear that had been repaired, probably belonged to a laborer working on a site near the river. From Bankside, Southwark.”
You can see from the holes around the tear that it was probably just mended with an overcast/whip stitch; no patch material necessary. It is just a very simple mitten, made from two pieces (in close-ups, I can see the far-side seam next to the thumb), with one piece slit and a thumb inserted (I think the thumb is just one piece; the side closest to us appears to not have a seam, meaning that it was cut on a fold and seamed up the outside).
I think this piece is most interesting because it is the first simple mitten/glove that I have seen; all of the pictures I have seen of gloves feature the split-finger or two-finger mitten. This is much easier to make. In fact, it doesn’t appear to be out of a very heavy leather—probably what we would call “garment split” today—which means making a pair is within the reach of any seamstress; no leatherworker required. This (coupled with the knit sock, hat and misc. pieces) also lends support for my knit mittens for winter wear. Clearly, not all mittens were split-fingered.
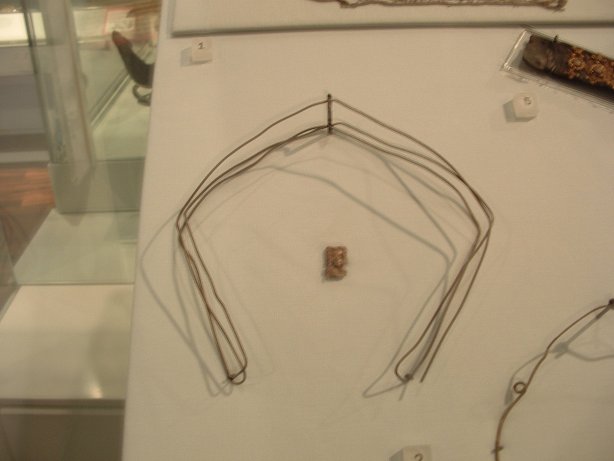
A headdress frame in the Museum of London. I would estimate it was about the thickness of your average metal coat hanger (go raid the closet!). There is a tiny little piece in the center, which is a woman’s head, carved from something. I’m not sure what this piece is supposed to have been originally (part of a pin?), or if it’s something the museum has made to illustrate the purpose of the frame. In any case, the woman is wearing a veil (appears to be your standard ruffled-edge veil), but it sits quite squarely upon her head, indicating that it has some sort of framework to support the odd shape. And here is your framework. When I saw this piece, I originally thought of the steeple hats worn in the Tudor period, but after seeing a close-up of the woman, it may very well be that this frame was not originally bent in the center, but was square, just as the woman’s veil is in the carving.
My next question is how, or if, the veil was attached to this frame? Did it just sit loosely on top of it, was it just tacked on in a few places so you could remove the frame if you didn’t want it anymore (plenty of women wore their ruffled veils without a frame), or was the entire veil made onto the frame? Women’s headgear seems to be one of the last great mysteries of costuming, since nothing has survived in tact to show us how they managed to wear some of the colossal and unusual creations they had.

Another frame. This one is one single wire, so perhaps it wasn’t meant to support as much weight or bulk. It’s also possible that it was just meant to shape the veil around the face, whereas the other frame gave it shape further back on the head. Something peculiar, though, are the two loops made into the side. They clearly would have set opposite one another back when the frame was in its proper shape. What were they for? The only thing that comes to mind, at the moment, is that they make a firm place in which to stitch the veil to the frame; stitches through those loops won’t slide or bunch up on the frame.
Also note the two metal balls on either end of the frame. I know exactly what these were for, as I happen to own a decorative wire headband which also has little metal balls on the ends of the wires: it’s to keep the frame from digging into your skin. The question that arises, however, is was this frame worn behind the ears, like a modern headband, or in front of them? I am actually leaning to the theory of it behind the ears. Of course, most veils frame the face and fall to the shoulders, but I think you can still get that look with this frame. I think the loops would be right above the ears. This is the last place where you attach the veil to the frame, so the rest of the veil can hang freely in front of the ears, even while the frame goes behind them.
Of course, you know I’m going to have to try this theory out. It would explain how women kept those ruffled veils on their heads without a wimple or forehead band that they used in the 1200’s to pin their veils to.
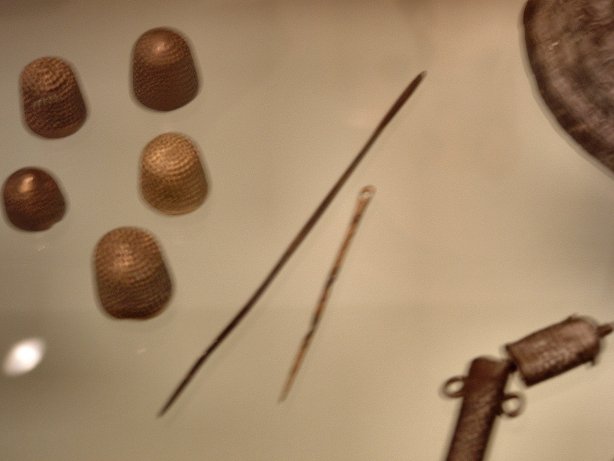
More from the Museum of London. A couple of needles (yes, the small one has a rather large eye—I can’t remember if the bigger one had an eye still or not), a collection of full thimbles (just like modern ones, you’ll note), and a metal needle case. I believe you can find descriptions of these items in the Museum of London's "Dress Accessories" book.
Go to another section:
Medieval and Roman Jewelry
Medieval Fabric Pieces (including knit)
Medieval Shoes, Pattens and Misc. Wearables
14th and 15th Century Clothing (representations only)
Late Medieval Armor (as it relates to fabric only)
Medieval Home Furnishings
Main Page
