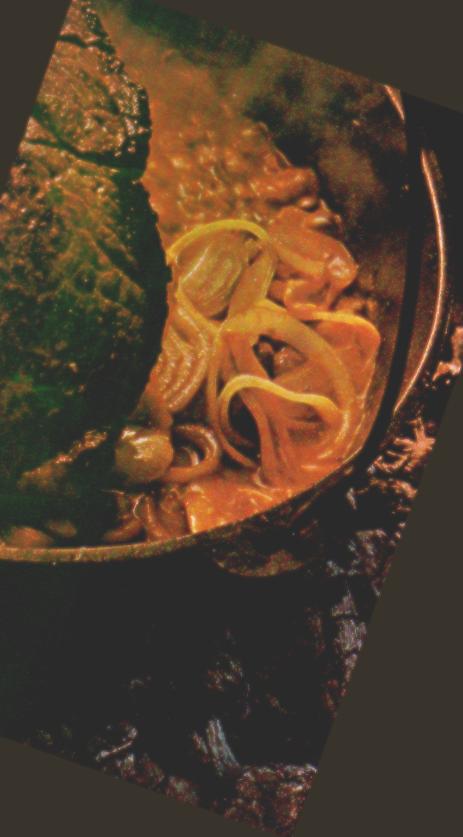
Open two large cans of pie filling (our favorites are: cherry and apple).
Place Dutch oven on level ground with 17 coals underneath and 15 coals on lid.
Melt two sticks of butter. Empty ziplock bag into Dutch oven and immediately pour pie filling in on top (pour in center). Allow to bake for 40-45 minutes making sure coals cook top and bottom evenly.
If done properly, you'll have a light brown crust on top with no sign of fruit until you dig in. If fruit does show through, well, you've still got an awesome taste treat. If you can top this off with vanilla ice cream.
Dump a Cherry Chip cake mix over the top.
Open a can of Cherry 7-UP and take 2 swallows.
Add some to the cake and take 2 more swallows.
Add the rest and cover and bake.
This should take about 25 min. At 350 degrees.
For a 10" Dutch Oven you should have a total for 21 briquettes.
On the top you will have 13 and on the bottom you will have 8.
Remember only Kingsford briquettes.... they are the best.
Remember this is a Scout recipe.... they said they had to test the 7-Up to make sure it was good so that the Cobbler would turn out ok......!!!!
This recipe was sent to me from The Happy Camper
The next 5 recipes were sent to me by Star from Texas
2 1/2 Lbs cubes meat (5 cups)
1 table all-purpose flour
1 table paprika
1 table chili powder
2 teas. salt
3 table lard
2 sliced onions
1 clove, minced
1 28 oz. can tomatoes
3 table chill powder
1 table cinnamon
1 teas. ground cloves
1/2 to 1 teas dry crushed red peppers
2 cups chopped potatoes
2 cups chopped carrots
Coat meat in a mixture of flour, paprika, 1 teas chill powder & salt, Brown in hot fat in a large Dutch oven. Add onion & garlic & cook until soft. Then add tomatoes, chill powder, cinnamon, cloves & peppers. Cover & simmer 2 hours, Add potatoes & carrots & cook until vegetables are done, about 45 min.

1 lb. dry pinto beans
6 lb. rump roast
1 table. lard
1 cup banana peppers or green pepper strips
2 deiced onions
1 cups tomato juice
1 8oz. can tomato sauce
1/2 cup water
2 table. cider vinegar
2 table. brown sugar
2 table salt
1 teas. each of dry mustard & thyme
Wash beans: drain, cover with cold water & let soak overnight. Bring beans to a boil and cook a hour: drain, discarding water.
Brown roast in hot fat in large Dutch oven. Add peppers & onions & cook tell tender. Add beans and remaining ingredients.
Cover & bake at about 350° for 2 1/2 hours or tell beans are tender & meat is done.
2 lb chopped meat
1/2 cup chopped onion
1 16 oz. can red beans
1 16 oz. can refried beans
1 8oz. can tomato sauce
1 cup water
1 teas. chopped red pepper (hot)
1/2 teas. each salt, garlic,, black pepper, & cayenne
3 table. chili powder
2 table molasses
Brown meat with onions in dutch oven: pour off any fat: Add remaining ingredients: Cover & simmer for 1 hour, stirring occasionally.
1 cup Strong black coffee
1 cup Worcestersauce
1 cup catsup
1/2 cup cider vinegar
1/2 cup brown sugar
3 table. chili powder
2 teas. salt
2 cups chopped onions
1/4 minced hot red chill peppers
6 cloves garlic, minced
Combine all ingredients in a saucepan. Simmer 25 mins. Then put in a blender, blend until smooth.... makes 5 cups.. Place 8 lbs meat in sauce ....over night to marinate.... be sure the the meat is coated. Place in Dutch oven ...next day ..cook at 350° about 3 hr.
1 lb. butter
1/2 cup onion, minced
2 cloves garlic, minced
1/2 cup whiskey
1/4 cup Worcester sauce
1 table. pepper
1 1/2 tesp dry mustard
1 teas salt
1/4 teas Tabasco
Melt butter in a saucepan, add onion, garlic. cook slowly until soft & tender. Add remaining ingredients.... mix.... makes 3 cups. Add 5 lb. meat add 1/2 of one shot sauce over meat in Dutch oven. Cook at 350° for about 1 hr. turn meat over cook 1hr. more. Thicken the remaining sauce .....and use as a gravy.
 Home Page
 Email: mountainman@enter.net
or pa.mntman@angelfire.com

|
Caring for your Cast Iron Cookware |
How to 'Season' Cast Iron Cookware Seasoning is the process of allowing oil to be absorbed into the iron, creating a non-stick, rustproof finish. Here's how to do it: 1. Wash with hot, soapy water and a stiff brush. Rinse and dry completely. The New Utensil Wash thoroughly with mild dishwashing liquid to remove the wax coating used for protection in shipping. Rinse with hot water and dry completely with a soft cloth or paper towel. NEVER ALLOW TO DRAIN DRY, OR WASH IN A DISHWASHER. Oil the utensil on the inside thoroughly with a LIGHT COATING of solid vegetable shortening. Do not use salted fat (margarine or butter). Treat all cast iron lids in the same manner as the pot. Place the oiled utensil in a 250°-300° oven and bake. After 10-15 minutes remove from the oven and drain off all excess oil. Return to the oven and bake for 1 hour. Allow to cool naturally to room temperature while in the oven. Your utensil is now ready to use. Rust Spots If your old or new cast iron ware gets light rust spots, scour the rusty areas with steel wool, i.e. SOS pad, until all traces of rust are gone. Wash, dry and repeat seasoning process. Metallic Taste If your food gets a metallic taste, or turns "black", it means one of two things are wrong. Either your pot has not been sufficiently seasoned, or you are leaving the food in the pot after it has been cooked. Cast iron utensils are NOT to be used as storage vessels. Remove food from the cookware as soon as it is cooked. Always clean your utensils immediately with boiling hot water and brush. Rinse and dry thoroughly. Prior to storing, oil very lightly with vegetable shortening, such as Crisco or spray with a shorting spray, such as Pam, then wipe dry with paper towel. Store in a dry place uncovered. This is especially important in humid climates. If you put a lid on a pot for storage, condensation could occur causing rust. Give your pot clean, dry air in a place where the temperature is fairly stable. Expert Tips It is recommended that you cook foods with high fat and grease content the first few times to expedite seasoning. This would include cooking bacon. sausage, hamburger, or deep frying potatoes, chicken, etc. Soups, stews, etc. (foods with high moisture and acid content) have a tendency to remove seasoning from a cast iron utensil and may want to be avoided at first, or be aware your utensil may have to be re-seasoned after use. After regular use, clean, oil lightly while warm, then wipe dry with paper towel or soft cloth before storing. Your ironware will darken with use and improve with age. A well used piece of ironware will develop a patina that truly is the ultimate in non stick cookware. Bakeware In the case of a cast iron cake pan, corn stick pan, popover pan or muffin pan, if seasoned properly, as previously stated, you should have great success with no sticking occurring. Prior to cooking in these utensils oil well, or spray heavily with Pam or other similar spray shortening. It could be said that Pam is cast iron bakeware's best friend. NOTE: Before baking in any cast iron utensil, oil and preheat before pouring in the batter and bake in a preheated oven. Serving from a Cast Iron Black Pot If you are camping out or having a western party at home and want to serve beans, stew or chili from the cookware, a few rules are to be followed and no metallic taste will be imparted. Keep food simmering in the pot until ready to take to the table. To protect the table from the hot pot, place it on some form of trivet. After food is served, cover the pot to keep food hot for second helpings. As soon as the meal is finished, remove food, wash utensils, dry and prepare for storing. Just for fun, watch everybody's face light up when they see food just as it comes out of a beautiful cast iron utensil. It never fails. There is something special about food in a black pot. Nutritional Benefit of Ironware You may not be aware that iron cookware imparts a significant amount of dietary iron to your food, which is absorbed by the body. In other words cast iron is the healthiest cookware on the market. Energy Savers Cast iron cookware is the original waterless, energy saving cookware and served this purpose in the sparse life of the pioneers. The most tender of roasts, cooked in a variety of sauces can be simmered while on low heat on top of the range in a dutch oven. Very little moisture and/or juices are lost, and top- of-the-range cooking is very inexpensive. Temperatures Cast iron cookware evenly distributes heat. It discourages "hot spots". If your food burns, it means only one thing - you got the pot too hot. Less heat is needed with cast iron. However, searing, etc. needs to be done on medium-high heat, with temperatures lowered for slow cooking. You will learn the techniques of this cookware as you become experienced with its nature.
|
 Mark Zanolini