Body Repair Page 2

34.Hood mounted to make the lower cowl panel repairs as close as possible.
35.Cowl patch panel checked before welding in.
36.Cowl & Door alignment checked all along durring the repairs.
37.Grill Shell jig made to support the hood.
38.Door was welded in place to minimize the chance of a non fit after welding.
39.Held in alignment with clamps durring welding and removing clamps occasionally to check fit and swing.
40.Shrinker/Stretcher used for making curves in the forming of panels.
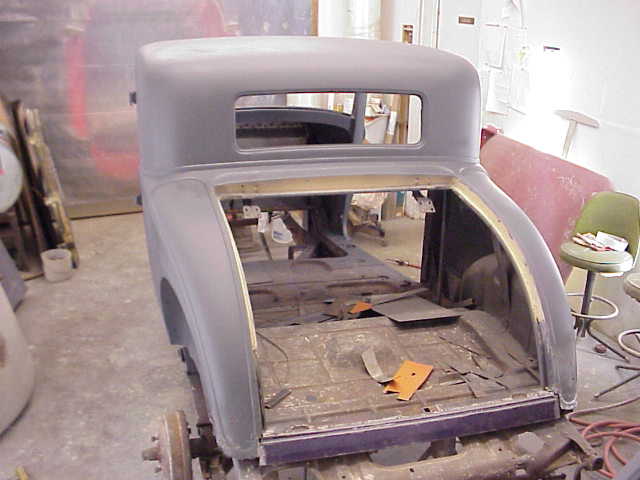
41.Template made Inside floor pan corners were made for the repairs of the rear floor area.
42.Rear Lower Deck Lid Panel being hand formed. This metal was ripped out of a late model hood. Then sheared in strips. I buy damaged hoods by the truck load for around $20 from the body shops. Endless supply of sheet metal and CHEAP!
43.Luckey enough to have some metal inside left to get angles from.
44.Inside floor fit. Just a patch enough for a mold. I guess paper and plastic would work also but if it gets bumped in the floor or against something it will hold up well this way.
45.It also gives something to weld the lower deck lid patch panel too.
46.Lower deck lid panel was short so I made a piece to extend it.
47. Something to weld to. There is a body reveal that I am forming using this bar welded to the skin to form the reveal with.
48.Deck lid clearence is checked several times through the process. Metal always moves when welded on.
49.More Spot Welds
50.Now the corners will be finished and the fenders will be mounted a few times again for the final fitting.
51.Measurments are checked over and for the final welding.
52.Both sides are compared.
53.Blank Panel put in place to give mold rigidity when made. Lower deck lid panel ready.
54. Lower corner Close up.
55.Primer1
56.Primer2
57.Primer3
58.Primer4
59. Guide coating with black spray laquer. Then sanding started.
60. Since I had help we also polished out the panels and started waxing the body with mold release.
61.Sanding with 1500 grit & rubbing/polishing out with machine compounds.
62.Waxing takes longer than wet sanding. Even with 3 people.
63.Roughly 6 1/2 Hours are spent here.
64.600 grit sand paper was used in some places to speed it up then changed to 1200 or 1500 grit sand paper for the final before polishing.
The rest of the process/progress is on the "Tin Man's" Hot Rodder site. So if you want to see the mold building process Click Here.
Home
