'87
Mustang turbo four cylinder notch
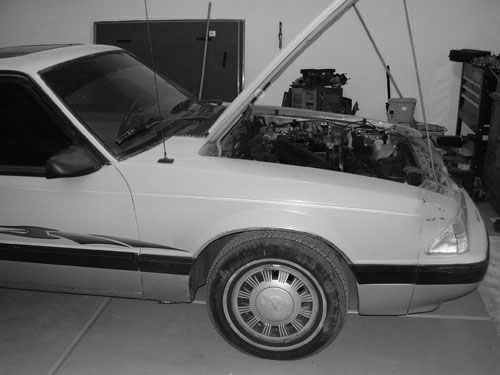
This is my second turbo project. I sold the Pinto hoping to
build
something that was a better street car (better ride, quieter, air
conditioning, etc...). The idea is to arrive at the same power to
weight ratio as the Pinto (12.4 lbs per horsepower). To do this in a
2800 lb Mustang, I'll need about 225 horsepower, or coincidentally the
same that V8 Foxes were rated in the late eighties.
The first car had 2.3 liters of displacement, stock valve sizes, open
chamber turbo head (mildly ported), Ranger roller cam and a stock
Garrett T3 blowing 10 psi into a weber carb. Here is an explaination of why carbs and
turbos do not work too well on the street.
This engine will be a fast
burn head with oversize valves (heavily ported), roller cam, 2.5 crank,
Garrett T04 blowing at least one atmosphere into a megasquirted, gutted
upper/ported lower EFI intake. I'm going to do it in
two stages, building and installing the head and electronics first, and
adding the forged short block and turbo components later.
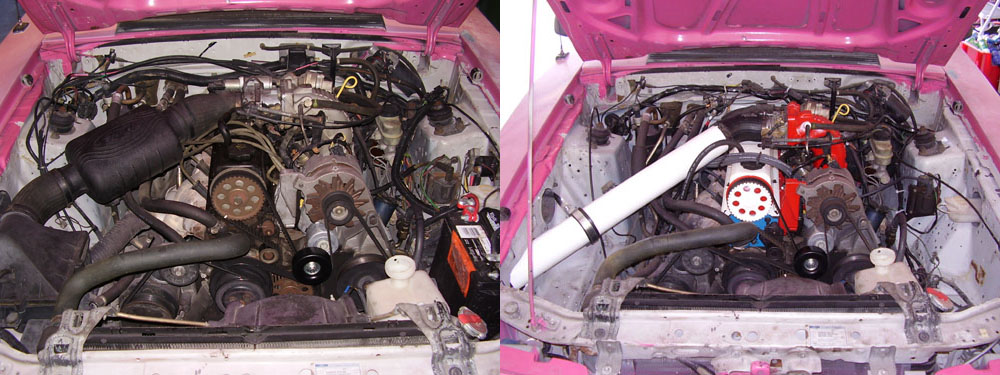
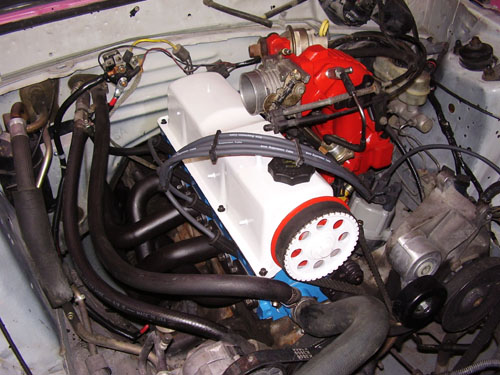
A before and after shot of the engine compartment. The airbox was
removed in
favor of a cold air kit, and the battery relocated to the trunk to
clean it up a bit. This car ran weak before dissassembly, acting lazy
on the timing and showing lean on the oxygen sensor. I was going to
blame the PCM after checking the fuel pump and replacing the O2, but
then found the problem was a bad previous repair on the cylinder
head....
Yes, the car was painted pink by the previous owner...
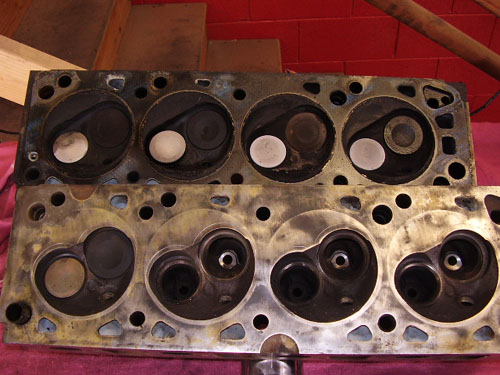
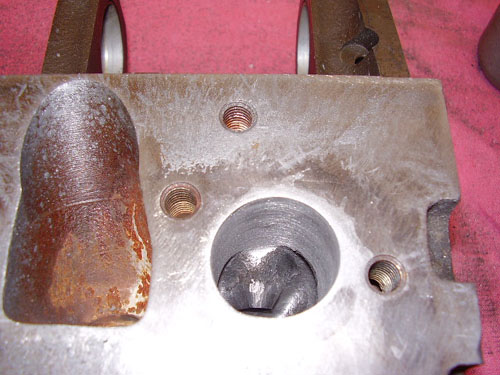
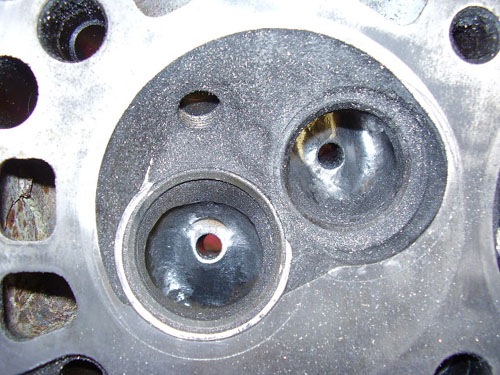
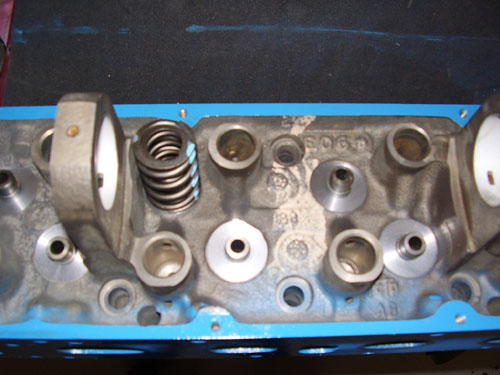
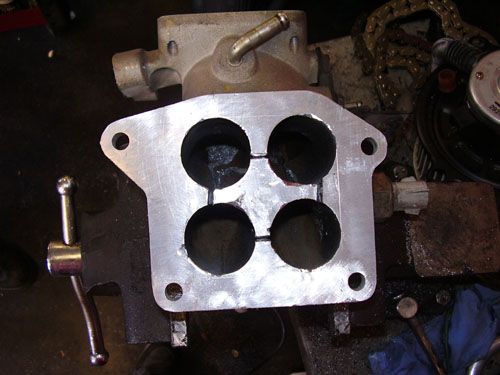
The top cylinder head is an oval port open chamber, as used on Pinto
and Mustang up to 1982. This is the head I removed from the Mustang.
The lower is the correct 'd' port fast burn head for the car, out of my
spares pile. Notice the valve shrouding.
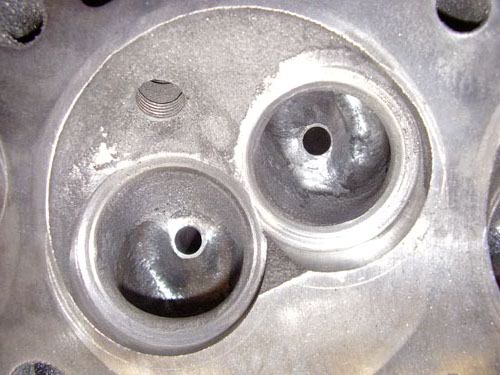
The open combustion chamber of the Pinto head requires about 38 degrees
of total ignition timing to build maximum power. The fast burn heads
require
significantly less, something on the order of 32 degrees. The stock
Mustang pcm was set to this figure, causing the car to run lean and
lazy.
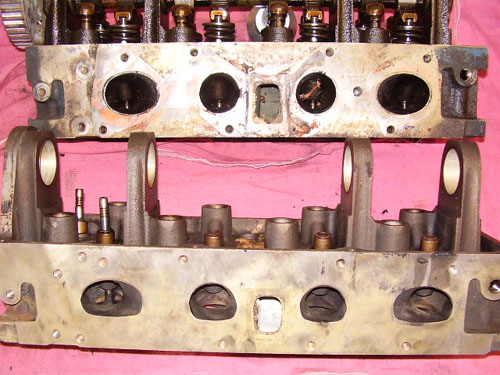
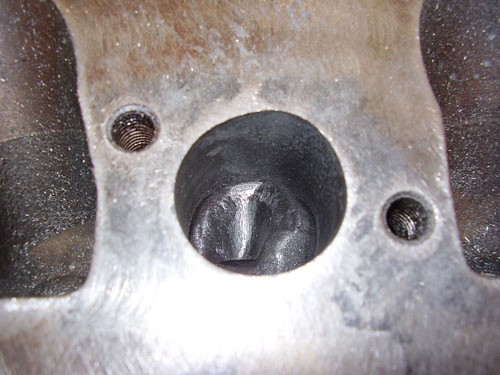
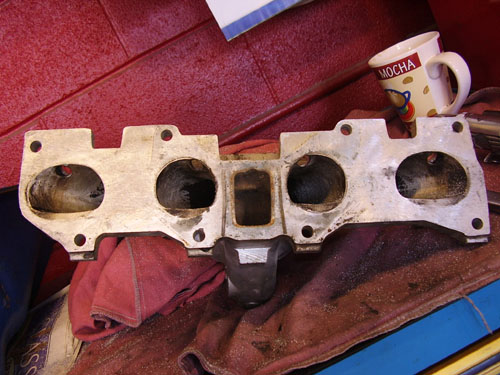
A shot showing the difference in the oval and 'd' intake ports...
The stock turbo head combines the open combustion chamber with the 'd'
intake port.
Turbo 2.3 engines have always been sensitive to ping and detonation.
The solution in the past was to drive the compression on a serious 2.3
lower by opening up the combustion chamber, and let the turbo make up
the difference. In a big, heavy car, this can accentuate turbo lag, as
the engine is weaker off boost. My idea is to use the more efficient
fast burn chamber and keep the compression up. Normally aspirated four
cylinder Mustangs are rated above 9.00:1 and burn regular unleaded with
no ping.
The fast burn head can be big valved and ported within 15 cfm of the
turbo head. The last turbo engine I built would not tolerate more than
31 degrees of total timing before severe ping set in, which is close to
where maximum power is achieved in the fast burn chamber. A fast burn
head with 9.5:1 static compression with a turbo blowing one atmosphere
(14.7 psi) should make very good power, get better mileage, and have
better off boost response than the open chamber turbo.
If it still pings, I'll set a fuel map for E85 fuel and run it instead.
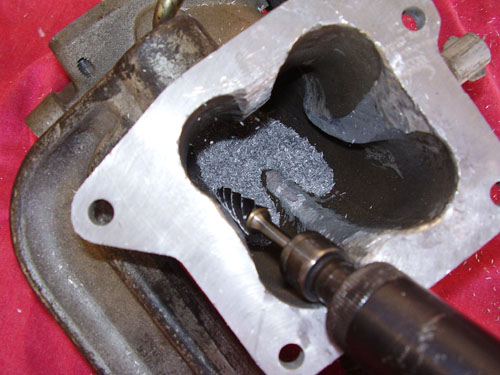
The first thing I do is hone the exhaust ports round with a brake wheel
cylinder hone...
Then raise the roof slightly with a die grinder...
The valve guide boss was already previously narrowed, but I finished
that operation...
Then I cut the seats for Esslinger/Manley 1.89" intakes, 1.59"
exhausts and opened up the
bowls...
The local machine shop cut the spring pads for dual springs...
The intake side was opened up to match the lower slightly. Do not
gasket match. More on that later. Ready to assemble...
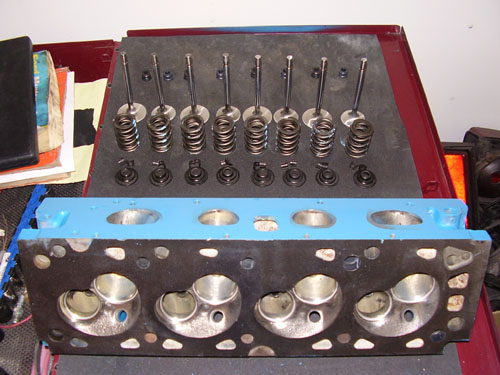
Valves in...
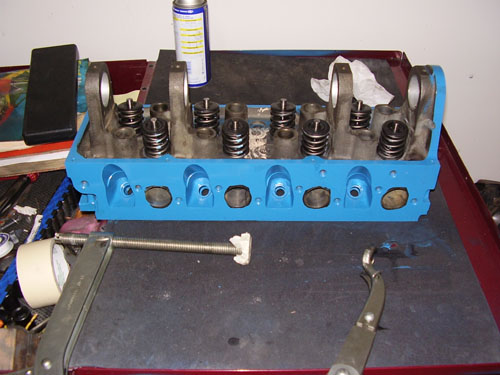
Cam, lifters and followers in...
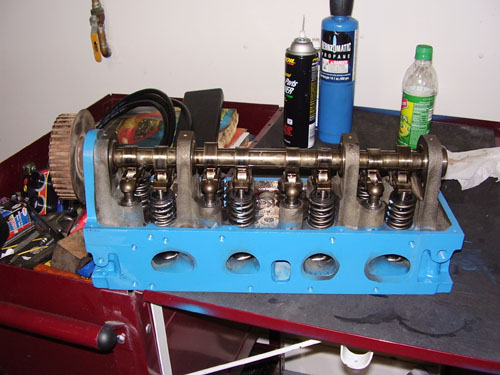

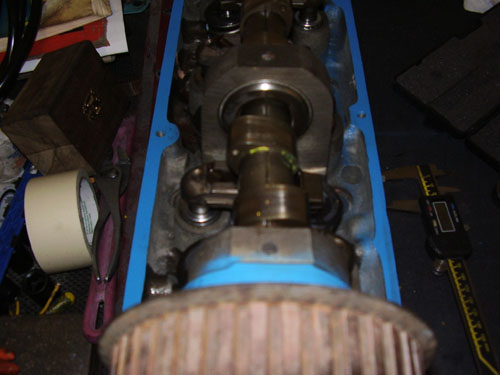
Below is what you want to see in the front two cam lobes when setting
TDC. Just measure down from the cam towers and make sure they are
equal. The Ranger roller cam has a line that ends up straight up...
Radiusing the lower intake...
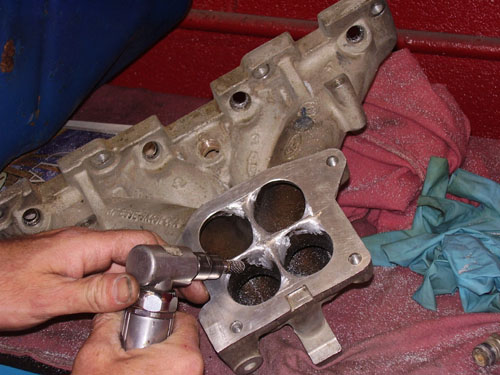
I prefer radiusing over knife-edging...
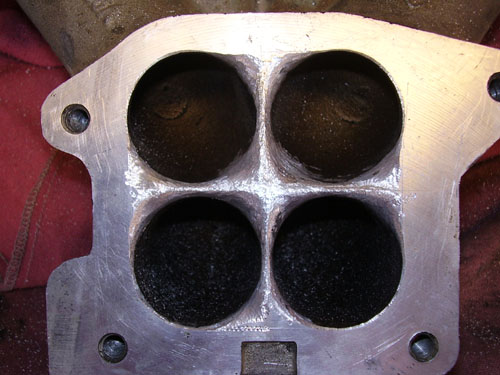
Below is an example of how NOT to port match the lower intake. If you
take it out to the gasket, then you'll have to grind too much on the
head face and you may hit water...
The one that went on the car was matched to the head, not the gasket.
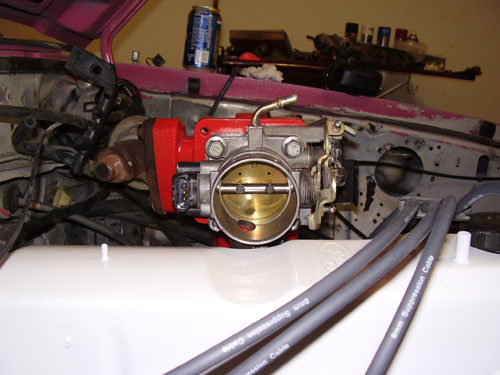
Gutting the upper...

Bolting it all on the car. I adapted a 4.0L Explorer throttle body...
Upon starting the car for the first time, I immediately heard a loud,
rod-type knock from the lower end on accel. What the.....
I hadn't planned to get into the short block so soon. I had known the
bottom end was loose, as it rattled slightly when starting cold until
the oil pressure built up. It never made noise after that, though. It
was scary loud now. Something had to be done. I started
weighing my options.
The short block was going to cost over $1000.00 in parts and take the
car off the road for a couple of weeks. Other options? I then thought
about the 2.3 cranks and their durability. I've reused many of them
with a simple polish job on the journals. The nodular iron in these
cranks is very hard. Maybe if I pull the pan I'll get lucky and be able
to slip in some new bearings...
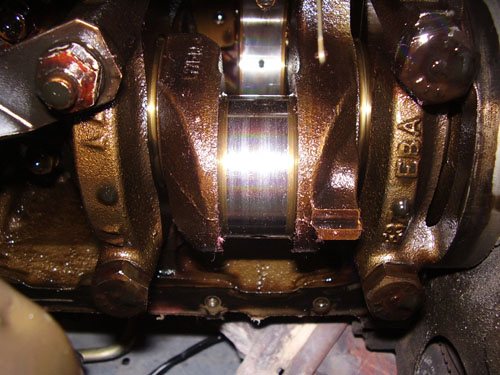
Number four was the loudest knocker of them all. The bearing was wiped
out, but the journal was acceptable.
The bearings were mostly into the copper. Number four is on the right.
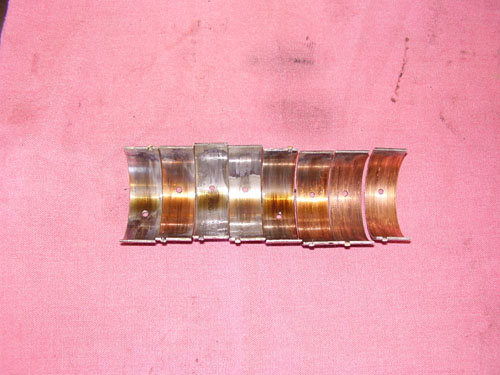
This is consistent with oil starvation or extreme wear.
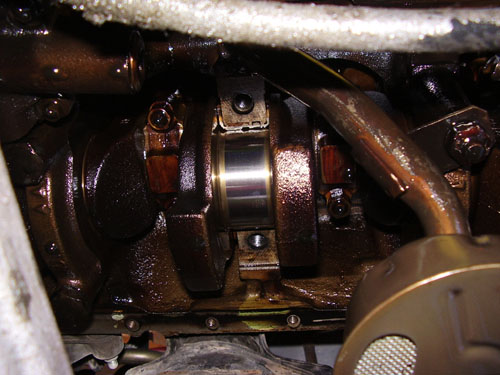
The mains were fine, not even into the copper yet.
I slipped in standard rod bearings only, bolted the pan back on and
tried it again. It was as quiet as a church mouse.
But why did it not knock before? My only guess is that it's due to the
characteristics of fast burn chambers. The air/fuel mixture apparently
burns fast enough to shock the bottom end and make noise.
Driving it was an eye-opener. All the lost power was back, and more,
and with no
loss of bottom end.
Time to start cleaning up the wiring harness in preparation for the
Megasquirt...

That big pile of tape and convolute and the small pile of wires is what
I took out...
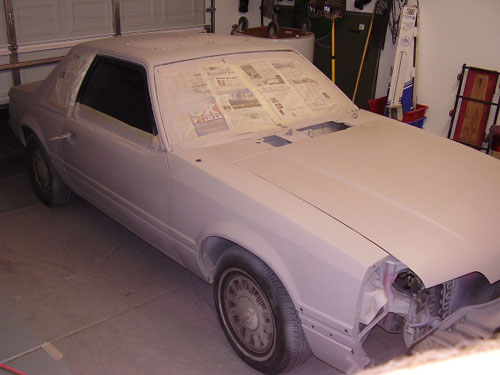
Car in primer...
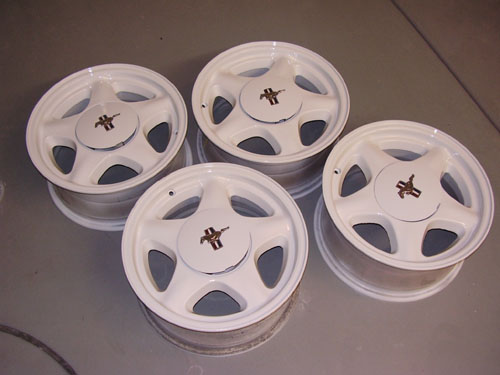
Used set of Ponys painted to match the car...
And finally painted. Still have to color sand and buff, but at least
the pink paint is gone.
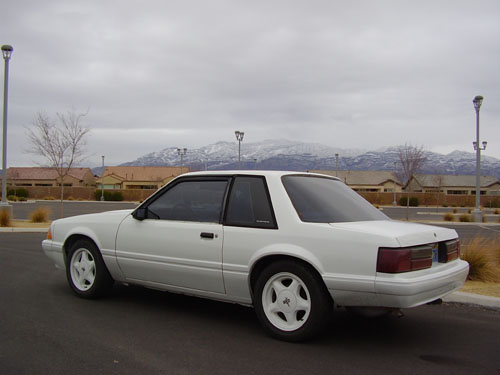
The snow-covered mountain in the background is Iron mountain, part of
the Nellis Air Force Range in Vegas.
Time to build the shortblock. The key ingredients for a cheap 2541 cc
stroker is a small main block, used after 1990 in Mustangs and Rangers,
and a 2.5L crank, an option in Rangers after 1997. I found one in a '93
Ranger that fit the bill...

Piston options were limited. Esslinger and Racer Walsh list forged,
dished pistons for turbo use for the 2.5L crank and aftermarket
connecting rods in various lengths. Racer Walsh lists Wiseco forgings
for use
with stock 5.205" rods, but all those options were a bit pricey. TRW
forged pistons for a 2.3L turbo would work if .100" or so were milled
from the piston tops. Although this practice was risky, I'd already
found out (from Esslinger) that the 2.5L crank was the weak link in my
combo. 300 horsepower was a realistic limit. The TRW pistons were thick
decked and heavy. Milling should not be an issue, so I ordered four
from
Summit. Three weeks later, I found out the pistons were on back order
with an unknown delivery date. I cancelled the TRW's and ordered the
Wisecos.
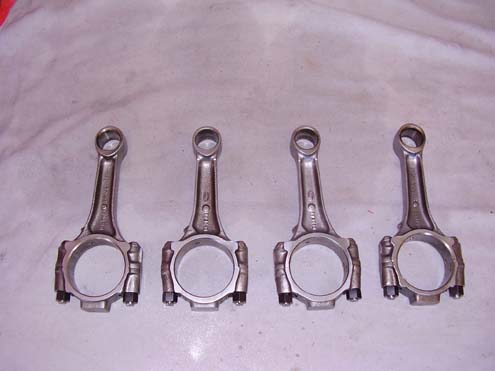
I prepped a set of stock rods instead of buying aftermarket
replacements. The stock rods will easily withstand 300 HP, and I like
the oil squirt hole that helps cool the pistons. First step was finding
four that did not require resizing on the big ends. I had plenty laying
around, and four passed. Starting weight was 638 grams.

I polished the beams, removed the balancing pad on the small end, and
deburred them. Then I weight matched the big ends, small ends and total
weight. Next, I bead-blasted and installed ARP waveloc bolts.


The 2.5L crank was an Ebay item. The seller stated that the crank could
be run 'as is', and upon delivery, after measuring it, I found he was
correct. I sent the block to a local machine shop who had a torque
plate for the 2.3/2.5 Lima engines and had it bored .030" over.
Assembly was straightforward.

The dished pistons were selected after cc'ing the head. Wiseco lists
flat top pistons which would have had better quench characteristics,
but the fast burn heads rely on swirl instead of quench anyway. The
final compression ratio ended up 9.5:1. It's a little high for a turbo
motor on gasoline, but fine for E85, which has an effective octane
rating of 105 or so. I really want to run dual fuel.

Stock 2.3L engines have a 3.123" stroke. The 2.5L crank extended that
to 3.4".

With the 3.810" bore and the 3.4" stroke, the final displacement is
2540.8 cc.
Installed an Esslinger windage tray. They are supposedly good for 10 HP.

The oil pump is a Melling high volume unit. It's a good idea for a
turbo motor, as part of the oil pump volume feeds the turbo, but bad
for a Lima engine running stock rod and main bearing clearances. The
oil pump driveshaft will twist off on a race motor running thick oil
(ask me how I know). My turbo was not on yet. I dodged the bullet by
running the motor on 5w-20 oil until the turbo was installed.

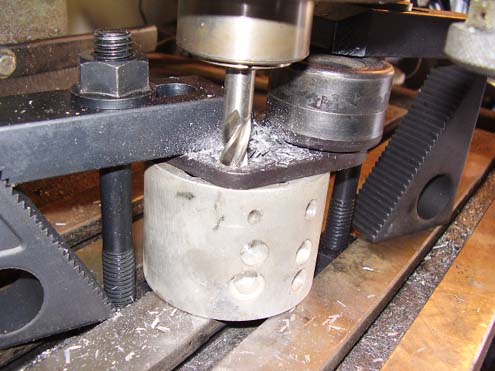
Time for final assembly. For some strange reason, the timing belt
tensioner did not have enough travel on the small main block. I
extended the slot on the mill.

One other minor snag...the P/S bracket used four mounting holes, but
only three were on the block. I drilled and tapped it.

Starting to look like an engine again...


I spent a bunch of time on the flywheel. I had gotten the idea that it
would be neat to lighten it as much as possible. I ended up chucking it
in a lathe and removing over four pounds of metal.


I sent it out and had it neutral-balanced, and then found out it was
drilled for the smaller 8.5" disc. My Centerforce plate and disc were
9.5". Bummer. I got one from the boneyard, had it surfaced and bolted
it in. The trick one went to a lucky Ebay'er in Pennsylvania.
Bolted it in the car...

...and it fired up on the first try. I was surprised how much noise the
Wisecos made until they were warm. It's a negative side-effect of
short-skirt pistons with .004" cold clearance and a crappy rod ratio of
1.53:1.

I was originally going to build and install the Megasquirt before
diving into the shortblock, but I ended up saving it for later. I was
intimidated by the prospect of whacking the stock harness for the
install (you can't easily go back!). The kit lay dissassembled on my
workbench for about a year before I finally got it finished. In the
beginning, I had planned to run an adjustable fuel pressure regulator
to allow switching between gas and E85, but in the year since the kit
purchase, the Megasquirt Extra code added a switchable VE table mode
that was a simple mod (switching 5 volts to a pin on the board).
I added a toggle switch for the mod.
I installed the Megasquirt, swapped in some 24lb. injectors (the
largest I have at the moment, the engine will require 42lb. injectors
with the turbo), loaded the Megatune software, set the VE and timing
tables, then set the second VE table for E85. It went very smoothly,
and the Megasquirt functions perfectly.

I set up the Megasquirt to control the cooling fan. That way, I could
set the on/off points in the tune instead of relying on the factory
switch. It required adding a clamping diode to protect the Megasquirt
from inductive kick. I added it to the fan controller that is attached
under the steering column on four-cylinder Mustangs.


Time for the turbo install. This particular T3 had a cracked exhaust
turbine. I heated it up on a camping stove and welded the crack with
the mig welder.

The centersection I rebuilt with new bearings and seals. The parts came
from Gpopshop www.gpopshop.com.

I had to modify the wastegate mounting because I'm using a Tbird
intercooler and the compressor housing had to be rotated a bit to line
up. I drilled an extra hole to rotate it back into position.

The exhaust manifold needed some cleanup. I smoothed the sharp edge in
the left side of the outlet and port-matched the manifold to the turbo
inlet (black marker).

Completed turbo...

Next up, plumbing!

