

The Dyna-Diggr is a one-man show, and the ideal work-mate for tree farmers, landscapers, nurserymen, etc., or to anyone who needs a helping hand!
The Dyna-Diggr is a (Patented), Automatic Spade-Shovel that can save you time, energy, and money!
This new innovative tool works great for digging or planting trees, shrubs, as well as digging ditches or fence post holes, etc.!
This little machine takes the "dig" out of digging! No More "brute force" or "sweat of the brow" techniques. Life just simply doesn't have to be so hard! "Work Smart, Not Hard"!
If you would like to place an order, or would like additional info, please E-Mail your requests to: (dynadiggr@yahoo.com)
----------------------------

Where There's Heat, There's Fire Ants
It is rare that I get the pleasure of sharing gardening chores with my darling husband, aka The Couch Potato. He does mow the lawn each week, however, and I especially enjoy those moments when I can glance across the lawn at him huffing away behind our heavy Scott's mulching mower, and cast a loving smile in his direction.
A couple of weekends ago, I got to watch him dance. Flitting about, waving the arms and jumping up and down are not movements commonly seen in our yard, but I myself have done this dance a few times. It's called the Funky Fire Ant.
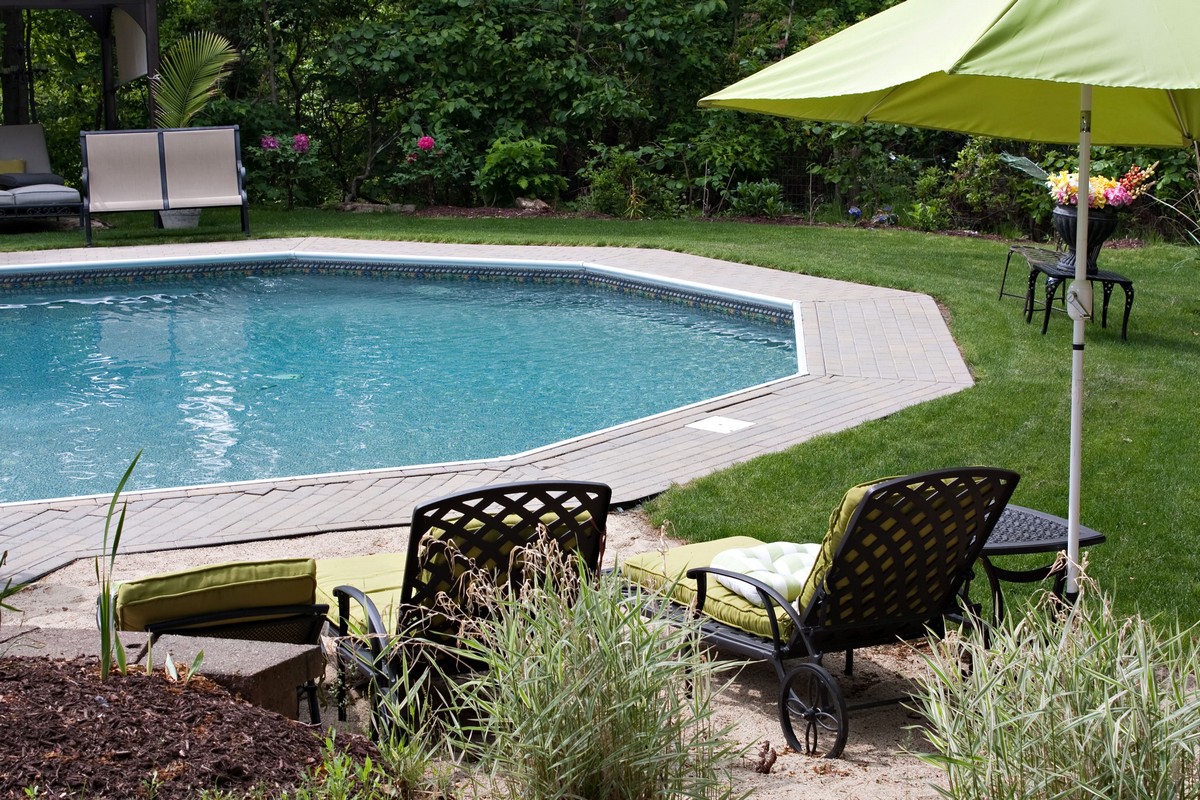
As he ran past me and headed for our swimming pool, howling in pain, I noticed my poor hubby's sandalled feet were covered with ants from a hill he'd unknowingly mowed over. He came away with only about four bites on each foot, luckily. Needless to say, he'll not be mowing the lawn in sandals any longer.
Let me assure you that I do not take the subject of fire ants lightly. "Fire ants are originally from South America, where dozens of fire ant species exist. There have been two introductions of fire ants, which have led to current problems. The first was the black imported fire ant, Solenopsis richteri, which was likely brought from Argentina in ship ballast to Mobile, Alabama, in 1918. A second and by far the most damaging species, Solenopsis invicta, known as the red imported fire ant, arrived in Mobile sometime in the late 1920s or early 1930s, probably also in ship ballast.
"Over the last 76 years, imported fire ants have spread to infest over nine southern states and over 275 million acres within the United States. However, the spread is only part of the problem. As they spread, the number of mounds, each containing several hundred thousand stinging ants, reaches densities of up to 1,000/acre."
Kiss My Grits
If you've ever been stung by a fire ant, those statistics will make you shudder. Not only for the sheer number of ants in each mound, but the fact that individual ants can administer several stings like a wasp. The wound usually forms into a painful, pimple-like pustule. While the majority of stings are not severe, some people are allergic and can suffer a serious reaction including hives, swelling, nausea, vomiting, and shock. People exhibiting these symptoms after being stung by fire ants should get medical attention immediately. My own fire ant experience has lessened in the last three years since I switched to total organic gardening. The few mounds we do get in the yard are always either right on the border of our untreated neighbor's yard, or along a sidewalk. So what did I do? In the fall of 2002, I purchase a packet of 10 million nematodes from Gardens Alive! and sprayed them on our front lawn. These nematodes are a "toothed", aggressive variety called Neoaplectana carpocapsa, and the difference has been noticeable. So, if you've got problems with fire ants in your yard, I suggest you make beneficial nematodes your first step. (They'll take care of flea and grub problems too!) The only points to remember with nematodes is that you must use them immediately after purchasing, and you must keep the lawn moist for a few days following application. Ok, so that took care of the front yard. But what about treating individual mounds? Well, in the last couple of years I've tried just about every organic method without much success. Boiling water did ok but is dangerous and kills the surrounding grass. A powdered natural diatomaceous earth with pyrethrin mixture didn't do much and was messy, plus it is toxic to beneficial insects. Orange oil drench just made them move the mound a few feet over. Heck, I even tried instant grits. To kill a fire ant colony, you have to kill the queen, and these methods just didn't do that.
Do the Texas Two-Step
These days, my husband and I are doing a new yard dance: the Texas Two-Step. Nope, it's not the traditional country jig. It's a relatively new fire ant treatment plan, proposed by researchers at Texas A&M; University a couple of years ago. The effectiveness comes from the one-two punch in eliminating fire ant populations. The toxic method involving the application of bait first, then chemicals, had been the standard, but now the school is endorsing an organic method that uses something called Spinosad. Saccharopolyspora spinosa is the fermented bacterium produced by Spinosad. Similar to BT (a familiar organic caterpillar warrior), Spinosad attacks the nervous system. Paralysis and death result in about 24 hours. Best of all, when applied at recommended rates, Spinosad poses less risk than most insecticides to mammals, birds, fish, and beneficial insects. Little did I know I already had this great fire ant treatment in my garage? A bottle of Bioinsecticide was on my shelf for the past year as a hopeful weapon in the perennial battle I have with squash vine borers. Spinosad is the main ingredient of Bulls-eye, so I gave it a try. I mixed 2 ounces of Bulls-Eye with a gallon of water and applied to the mound my husband stepped in, being sure the drench the entire area. To my delight, the mound was gone the next day. Not relocated a few feet over…gone. Since then, I've treated a couple of other small mounds with similar, stunning results. The second part of the Texas Two-Step can be a drench or spraying of orange oil, but so far, I haven't needed it.
So stop doing the Funky Fire Ant, and cut the rug to the Texas Two-Step.
For more information on getting your garden maintenance, trees and shrubs planted by a team of professional experts, click here.
----------------------------
Ginkaku-ji was created by the Ashikaga shogun, Yoshimasa (1436-1490). Yoshimasa was the grandson of the third Ashikaga Shogun Yoshimitsu (1358-1408). Yoshimasa’s father, the shogun Yoshinori, was assassinated by a vassal who was afraid that the shogun was going to take away his lands. Yoshimitsu may have retired from office as early as 1394. In 1397 he began the creation of his place of retirement, his garden was inspired by the paradise garden at Saiho-ji (begun in 1339). The garden at Saiho-ji is dominated by a large pond which was known as the “Golden Pond”, along shores of this pond were a loose scattering of pavilions. The main pavilion was on the pond’s west shore, it was known as the Ruriden, this pavilion was the model for the main pavilion in Yoshimitsu’s garden. The exterior of Yoshimitsu’s pavilion was gilded, because of this it was known as the Kinkaku (Golden Pavilion). The original Golden Pavilion was burned down in 1950, the present pavilion is a reconstruction.
Yoshimasa became Shogun when he was in 1449 when he was 14 years old . He was a talented artist and was a patron of the arts, he never had much of a taste for politics, he preferred the company of artists and priests. Yoshimasa did more than just encourage artists and intellectuals, he had a deep appreciation and enthusiasm for Zen esthetics. Japanese culture is still strongly influenced by Zen and this is partially the result of Yoshimasa’s taste. In 1464, when he was 29, Yoshimasa announced his intention to retire and relinquish the shogunate to his brother. Yoshimasa’s wife, Tomi-ko opposed this because she wanted her son to be shogun. This was the pretext for the Onin civil war which lasted from 1467 to 1477.
The retirement villa which Yoshimasa created for himself was begun before the civil war, but construction ceased during the war. Construction was resumed in 1482, and the main pavilion probably dates from around 1482. Like his grandfather’s retirement villa, both the garden and the main pavilion of Yoshimasa’s retirement villa were inspired by the garden at Saiho-ji. The roof of the main pavilion in Yoshimasa’s garden was intended to be covered with silver leaf, this was never carried out, but the pavilion has always been known as the Kinkaku or Silver Pavilion. It sits on the west shore of the pond, and was intended to be used as a meditation hall. It is called a Kannon-den because it houses a statue of Kannon - the Bodhisattva of Compassion.
The Ginkaku was not the only pavilion in this villa/garden complex. There was another pavilion called the Togu-do or East-seeking Pavilion, this pavilion still exists near the Silver pavilion. Along with Yosimasa’s personal living quarters, the Togu-do contains a tiny 9-foot-square tea room which is the prototype for all future tea rooms. Yoshimasa’s tea master, Murata Shuko (1423-1503) is regarded as the first true tea master. Under his influence the tea ceremony began to take on the form which would be codified by 16th century tea masters. Some of the features of this pavilion, such an alcove (tokonama) for displaying hanging scrolls and flower arrangements and sliding screens of translucent rice paper (shoji), became standard features of both later tea huts and Japanese homes.
The villa/garden complex became a temple immediately following Yoshimasa’s death and was named Jishoji but it is better known as Kinkaku-ji (Temple of the Silver Pavilion). The villa complex and it’s gardens were severely damaged during the civil wars which followed Yoshimasa’s death, but the Silver Pavilion, the Toguda and the pond survived. In 1585, an impoverished nobleman, named Konoe Sakahisha took possession of the silver pavilion and restored it. On his death, the garden and it’s surviving pavilions came under the care of the Shokokuji Temple and in 1615 a major restoration was begun. The garden was so radically restored that only a few of the original stone arrangements survived unchanged.
The most famous features of the Ginkaku-ji probably date from after this restoration. These are the bed and cone of white quartz sand which lie to the north of the pavilion. The flat-topped cone is known as the Kogetsu-dai (this means ‘opposite the moon platform’), it nearly two metres (6 feet) and 4.9 metres in diameter at it’s base. The bed is a large flat mound of sand which is known as the Ginsadan (silver sand sea), it is about 75 centimeters (2 feet) high, the perimeter of this plateau is irregularly shaped and it spreads to the main hall of the temple compound (or hojo) which was built during the 1615 restoration. The surface of the Ginsadan is raked into strips so that areas of smooth, firmly beaten sand alternate with strips of furrowed sand. While it has always been compared the the Western Sea, a famous Chinese lake, there is no attempt to represent the undulating waves of the sea, the furrows are severely parallel. The result is an abstract work of art which is at it’s most beautiful in moonlight.
The flat topped cone is also designed for moonlit nights. It is probably taller now than it was in the 17th century, it’s resemblance to a volcano may not always have been so pronounced, but esthetes have always admired the way that it reflects moonlight into the Silver pavilion, this seems to have always been it’s primary purpose. This cone of sand is not unique among Japanese gardens. Heaps of sand (sunamori) are sometimes erected on the graveled areas of both Buddhist temples and Shinto shrines, their meaning is not fully understood but they are believed to illuminate the heart of the visitor, perhaps by reflecting divine light.
The white gravel of these features contrast strongly with the dark conifers covering the steep wooded slopes of Mount Higashima, which enclose the east and south sides of the garden. The slopes next to the pond contain a waterfall which was inspired by a similar waterfall at Saiho-ji. It is believed that this waterfall and the stone arrangements around it are still basically unchanged from Yoshimasa’s time, survivors from his garden.
If you want to do some garden maintenance, give Portland TT and their team of experts a try.
----------------------------
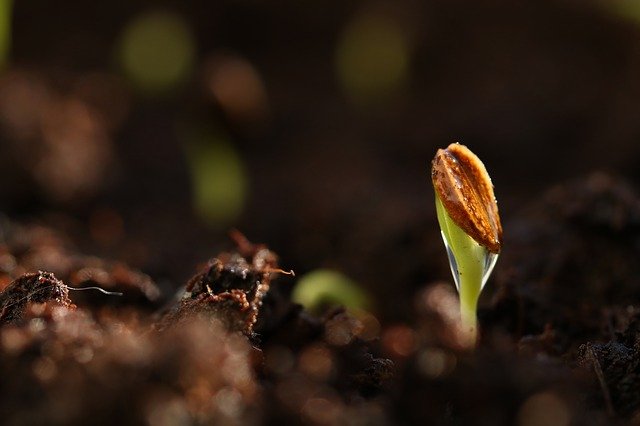
Growing flowers and vegetables from seeds is intimidating to some organic gardeners. Retailers are making it easier for gardeners to experience success with growing plants from seed by offering a large variety of seed tapes and seed mats that take the guesswork out of gardening.
Benefits of Seed Mats and Seed Tapes
Although seed mats don’t provide an instant garden, they are a shortcut to growing plants from seed:
A biodegradable paper strip or mat embedded with seeds spaced at just the right distance means that gardeners don’t have to thin plants after germination, and no seeds are wasted.
All of the seeds are easily planted at the same depth, to ensure faster germination. Gardeners can cut the mats to custom fit any area in the landscape.
Seed mats and seed tapes make it easy to work with tiny seeds that are difficult to see, such as lettuce or petunia seeds.
Rain won’t wash the seeds away.
Birds can’t pluck the seed from the ground.
To achieve the best results with seed mats, gardeners must provide the same preparation and aftercare they would with any new seedbed. Do not lay a seed mat on a layer of hardpan soil and expect the seedlings to thrive. Work a 3-inch layer of compost into the top six inches of soil to provide a fluffy medium for new roots to penetrate. Cover the seed mat or tape with ˝ inch of soil, and keep this consistently moist until germination occurs. Apply a 3-inch layer of organic mulch around the seedlings to suppress weeds and retain soil moisture.
Vegetable Seed Tape
Look for vegetable seeds tapes or mats that provide the gardener with a collection of plants that complement each other, such as a salad garden seed mat embedded with several kinds of lettuce seeds. Use vegetable seed tapes for plants that are notoriously difficult to space correctly, such as carrots. An herb garden seed tape is a good choice for a window planter beside the kitchen.
Flower Seed Mats
Use seed mats to protect seeds that commonly fall prey to birds, such as sunflower seeds. Gardeners can cut seed mats to custom fit each container on the deck. Wildflower seed blends are popular seed mat choices, and deliver a custom blend of flowers like coreopsis, painted daisies, baby’s breath, and cosmos.
Make Seed Mats
Retailers are increasing the seed varieties available as mats and tapes, but gardeners can create a seed mat with unusual flower or heirloom vegetable varieties to grow at home or give as a gift. Mix flour or cornstarch into a thick paste, and spread on a heavy-duty paper towel. Following the spacing directions on the package, sow individual seeds onto the paper towel. Allow the mat to dry thoroughly, label the mats, and store in a dark place until planting time.
If you’re in need of a cleanup or maintenance for your garden, click here.
Sometimes plants grow poorly for no apparent reason. A healthy plant can be set in what seems to be a good soil, can receive plenty of sunlight and water and still look sickly and perform poorly. If you have areas around your home where plants react this way, check for a soil problem, especially the wrong soil reaction or pH.
Now, your next question--what is pH? Well, pH is nothing more than a chemist's shorthand for describing the amount of hydrogen in the soil. The capital letter "H" is the chemical symbol for hydrogen and pH is a figure describing the concentration of hydrogen in the soil, which in turn determines the acidity of the soil.
A simple numerical scale is used to express soil pH. The scale goes from 0.0 to 14.0. The midpoint, pH 7.0, is the value for pure water, which is called neutral--pure water, is neither acid nor alkaline. Figures below 7 on the scale indicate acid or 'sour' soils and the lower the number the more acid the soil. Each whole number drop in pH denotes ten times the acidity. For example, a soil having a pH of 5 is ten times more acid than one having a pH of 6. Numbers above 7 indicate alkaline or 'sweet' soil. Again, the higher the number the more alkaline the soil.
Two good examples of acid and alkaline liquids are orange juice and seawater. Orange juice has a pH of about 3.7 (very acid) while seawater has a pH of 7.9 (slightly alkaline). Soil pH is very important because it influences several soil properties that directly affect growth of plants. Soil pH affects soil bacteria and nutrient leaching and availability.
Most plants have a range of tolerance to pH. Plant nutrients are generally most available in the pH range of 5.5 to 6.5. This is also a good range for soil bacteria. And, most important, this is the best range for most plants.
Certain plants thrive best on acid or alkaline soils having pH values out of the usual "best" range. For example, azalea, bougainvillea, croton, dogwood, gardenia, hibiscus, ixora and magnolia grow best in acid soils having a pH below 5.5. These plants grow poorly and many have yellow leaves in areas where soils are alkaline. In contrast, cabbage palms, yucca, sea grape and many other plants grow quite well on alkaline soils.
A pH determination will tell whether your soil is within a range that produces good growth but it is not an indication of fertility. If the pH is not optimum, it can be raised or lowered using chemicals available to all homeowners.
If excess alkalinity exists near the house, the only solution is to remove the soil and replace with a more suitable material. If the soil is too alkaline because of liming or a minimum of natural alkalinity, several acid-forming materials can be used to reduce the soil pH.
Elemental sulfur can be used to acidify a soil. About 10 pounds of sulfur applied over a 1000 square foot area will decrease a sandy soil one unit in pH=like from 7.0 to 6.0. Sulfur must be washed into the soil immediately after application or it will severely burn grass or shallow plant roots. Even with the utmost care some burn may occur after an application of sulfur. The best approach is to apply an acid forming fertilizer such as ammonium sulfate. This material applied at the rate of 5 pounds per 1000 square feet of area will acidify the soil without burning the grass.
Normally, lime or dolomite is used to increase the pH or sweeten the soil. Lime contains calcium carbonate while dolomite contains both calcium and magnesium carbonate. Another material, hydrated lime, can be used for quick change in soil pH but it can severely burn plants and is seldom recommended for home use.
To increase the soil pH one unit, say from 5 to 6, apply about 50 pounds of dolomite or lime over a 1000 square foot area. Lime materials are slow to react so six months may be required before the soil pH rises.
To sum up the pH problem follow these steps. First, find out the pH value of the soil where planting is planned (labs or kits are available for pH determination... contact your local extension office). Second, learn the pH preference of ornamentals to be planted. Last, if necessary, raise or lower the pH of the soil to best suit the plant. Or if this isn't possible, select a plant which will thrive at the natural pH of the soil.
If you’ve made it this far and you’re trying to do some maintenance in your garden or cutting trees and need help from specialist experts? Then check out Portland TT, they provide great service by a team of professional experts.
Depending on your experience, geraniums are either colorful annuals bought at garden centers in spring, or reliable free flowering plants in the perennial garden.
This is because the common name "Geranium" is often used about two different groups of plants. This article is about growing the annual type from seeds.
If you are still not sure of the difference, allow me to summarily detour into the area of taxonomy, which is the branch of biology which names and groups organisms according to their characteristics and evolutionary history.
In the mid 1700 a system was devised, which is still in use today, which catalogues all living organisms into a hierarchy of classes from the broadest “kingdom” (such as the kingdom of bacteria, kingdom of animals, kingdom of plants, etc) to more specific classes such as "order", “family”, “genus”, and “species”. The further down in the classes you go, the more in common the plants will have.
Both types of Geranium belong to the same hierarchical class called “family”: Geraniaceae, which covers 6 different genera of plants. The two largest genera in this "family" are “Geranium” and “Pelargonium”.
To illustrate in terms which may be easier to understand: humans belong to the "animal" kingdom. In this kingdom, we find the order of "primates" which again consist of various families. In the family "hominidae", we find several genera.
We belong to the genus (plur: genera) "Homo" (humans are a species in this genus). Other genera in the "hominidae" family are "Pan" and "Pongo" (great apes).
However, as some of these latin names can be quite difficult to remember, we often use common names instead, such as human beings instead of homo sapiens and great apes instead of pan or pongo.
Common names are also used with plants. The common name “geranium” is used as a description about plants of both the genus 'Geranium’ and of plants belonging to the genus ‘Pelargonium’ (in the same manner we commonly refer to both Pan and Pongo as great apes).
Plants of the genus “Geranium” are hardy outdoor plants, usually called “hardy geraniums” or cranesbills. They are typically mounted plants with many small flowers covering the plant. You may also have heard them referred to as "true geraniums". This is not because they are better or superior to pelargonium, but simply because the common name "geranium" is the same as the genus "Geranium".
The other genus “Pelargonium” covers several individual species, but includes the very familiar garden geranium (zonal geranium). Think of plants with scalloped foliage with dark zonal markings and with pom-pom like flowers held above the foliage by flower stalks (see pictures). Another popular type of pelargonium is Martha Washington, or Regal, Pelargonium which are typically grown as a house plant.
This article will deal with the growing of zonal geranium from seed. We will refer to these plants as geraniums, but for clarification we are talking about “Pelargonium”, and specifically the bedding plants with the zoned foliage (”Pelargonium x hortorum”). Now back to the topic of this article.
Geraniums used to be entirely propagated by cuttings as these cultivars were superior to seed grown hybrids. However, in recent years great strides have been made in the cultivation of seed produced plants.
Today seed grown plants are no longer limited to plants with small flower heads with petals that scattered easily. Several very good series are now available. Cutting grown geraniums will have the darkest and most consistent zonal markings, however. Some hybrid seed series, like Pinto, have come a long way, but generally, cutting grown cultivars excel in this respect.
Geranium seeds are oval with a hard seed coat. If you purchase the seeds from a supplier, the seeds should have been scarified, e.g. the seed coat damaged to allow water uptake. Without scarification, the thick, hard seed coat can prevent or delay germination. If using seeds harvested from their own plants, the seed coat can be penetrated with a nail file, nicked with a nail clipper, or soaked overnight in a moist paper towel.
Germinate seeds in a good quality seed starting mixture. For best development, space seeds one seed to a plug, in plug trays no smaller than 72 cells, or no closer than 1 inch apart in flats. Cover the seeds with a light layer of germination media. Since the seeds tend to swell as water is imbibed, make sure they are fully covered (about 1/8 – 1/4” deep). Use a good quality seed starting mixture which has pH adjusted as pure peat moss sphagnum may be too acidic and can result in micronutrient toxicity. Too high pH (above 6.5) can also result in uneven germination.
Keep the media slightly damp, but not soaked, until germination which should be in 10-14 days at 72-78 F. Target 73 F. Most seeds germinate within the first 3-5 days, but there is always the individual few that takes their time. Fresh F1 Hybrid seeds generally have very high germination percentages: 85-100%.
If the seed starting mixture contains a seedling nutrient charge, you can't wait to fertilize until the first true leaf expands. Fertilize with 150-200 ppm nitrogen from a high nitrate based fertilizer. Seed geranium are sensitive to high levels of ammonium and prefer high calcium levels. If you use regular soluble plant fertilizers, such as Peters or Miracle Grow, then consider alternating with Calcium nitrate, or instead feed entirely with the mixture of Flora Grow and Flora Micro mentioned in a previous article. I am not trying to advertise their brands, but this particular combination does provide a high nitrate, high calcium fertilizer.
Grow geranium at minimum temperatures of 60 F (nights). Any lower and the plants can take a very long time to flower. On the other hand, temperatures below 75 F (days) generally produce better quality plants.
Transplant geraniums into larger pots before they become overgrown, e.g. leaves start to touch. Once leaves touch, plants tend to grow taller and become less attractive. Transplant into intermediate 2.5” or 3” pots, or directly into 4” pots after 4-5 weeks in plug trays. In the pots it will take another 6-7 weeks to flower. Most seed geraniums should flower within 13-16 weeks (90-110 days) from sowing. Sow in February for May transplanting dates.
In the young seedling stage, the growing media should be kept uniformly moist, and not allowed to dry out. Still, a well draining media which does not stay too wet is preferred. After the plants have rooted into the pots, the soil should be allowed to dry thoroughly on top before watering again.
Over watering can be a big problem. Keeping plants on the dry side can help alleviate many problems and produce short and stocky plants. However, do not let the media dry completely as the lower leaves will turn yellow on the margin and the plants can be put several weeks back. Note, that as plants grow, they consume increasingly greater amounts of water, and therefore do not be surprised if you need to water more frequently after the first month. Do not wait for seed geraniums to wilt before watering, as they are slow to show wilting symptomes, and once they wilth, the damage is already done.
Seed Geraniums do not need pinching, but one optional pinch after 4-5 weeks will result in a substantially bushier plant with more flowers. Note, that pinching will add another few weeks to the time-to-flower, and after pinching plants can take 8 weeks before developing flower buds. Therefore, do not delay this pinch more than necessary.
Pinching small plants may not be physically possible, and is therefore often done after transplanting into finishing pots (at weeks 4-5) when the stem starts to elongate slightly. Cut the main flower stem just above a pair of leaf petioles (the stalks which attach the leaves to the plant).
Geraniums do equally well in the ground, patio planters, or in pots. Do not plant outdoors until night temperatures stay consistently above freezing, and make sure to harden off the plants first.
The plants flower best in full sun, e.g. at least 6 hours of full sun per day. However, in our experience, even 4-6 hours of sun is enough although they then bloom less prolifically.
Once a month apply a garden/vegetable fertilizer, or 2-3 applications per growing season of a slow release fertilizer, such as Osmocote, Nutricote, Multicote, etc.
If growing in pots, choose suitable large pots to avoid the soil drying out too quickly. 2-3 plants in a 20" planter makes for a nice display.
Deadhead spent flowers by breaking off the withered flowerheads. This will prompt the plants to continue flowering.
At the end of the season, let the flower heads stay on the plant and let the seeds mature. These can be harvested, dried and stored cool until following January when more plants can then be grown.
Several good choices are available in various colors, such as pink, orange, white, and salmon. I personally prefer red, however. Most seed geranium cultivars perform well, but those that have particularly impressed me are:
• Elite (best)
• Orbit
• Ringo2000
• Pinto (zonal foliage)
Good luck.
If you need help maintaining your garden or clearing trees, be sure to visit Portland TT to know more about their professional services.
Low-maintenance plants are top choices for DIY landscape gardeners in designing a feasible landscape. They are no-nonsense picks for memorial and meditation gardens.
Small trees and shrubs recently introduced to landscape gardeners save maintenance time, effort and money. They are smaller than their normal-sized relatives, relatively disease and pest resistant, and offer three-to-four season color.
Memorial and meditation gardens are usually small and intimate spaces. Typical landscape trees and shrubs can overwhelm such spaces. Below are suggestions for up-to-the-minute low-maintenance landscape plants to border walks and patio areas in a small memorial garden.
Both Sides of Walk
Oso Easy™ Rose 'Fragrant Spreader' Shrub Rose
• Size: 1 to 2' tall and wide; spreading to four or more feet wide;
• Disease Resistance: black spot or mildew;
• Bloom Time: peak bloom in early-summer, blooming intermittently all summer;
• Bloom Color: vivid pink with a white center and golden stamens.
South and West Side of Patio
'Bangle'™ Genista lydia
• Size: 2' tall and 24" wide, mounding characteristic;
• Bloom Time: mid-spring and persists for 3-6 weeks;
• Bloom Color: electric yellow;
• Winter Interest: bright green stems that provide interesting year-round texture and color.
Behind and Both Sides of Benches
Lo & Behold™ 'Blue Chip' Buddleia or Butterfly Bush
• Size: 24" - 30" tall forming a tidy 30" mound; does not need pruning or deadheading;
• Bloom Time: continuous blooming, mid-summer to fall;
• Bloom Color: blue to purple-blue;
• Foliage Color: grey-green;
• Special characteristics: drought resistant and deer resistant;
• Fertilize: early spring - a slow release fertilizer specialized for trees & shrubs; follow label recommended rate of application.
Set Back from Curve in Walk on East Side
'Carol Mackie' Daphne x burkwoodii
• Size: 2-3' tall, 3-4' wide rounded with mounding habit;
• Bloom Time: April – May;
• Bloom Color: pale pink and very fragrant;
• Foliage: grayish-green with cream-colored margins; foliage may persist through December;
• Needs: summer mulch or ground cover needed to keep roots cool; soils should not dry out.
Three Plants in Triangle to East and Slightly North of Curve in Walk
'Diana' Hibiscus syriacus
• Size: 5-8' tall, 4-6' wide, erect multi-stemmed shrub; may also be trained as a single trunk tree;
• Bloom Time: early-summer to autumn;
• Bloom Color: pure white flowers (4-6" diameter) with no eye, hollyhock-like, 5-petaled, stay open at night;
• Soil Type: prefers moist, organically rich soils, but tolerates poor soils and some drought;
• Light: full sun to part shade, better flowering in full sun, tolerant of summer heat and humidity.;
• 'Diana' is a sterile triploid that produces very few if any seed pods.
East and North of Patio
Sarcococca or Sweetbox - Sarcococca hookeriana var. Humilis
• Size: height 12 to 24", mounds to approximately the same width;
• Growth Rate: slow to moderate, spreading by stolons;
• Flower/Fruit: clusters of fragrant white flowers in later winter to early spring, .04 inch round black fruit;
• Foliage: lustrous dark evergreen lance-shaped leaves;
• Soil Type: prefers organically rich, well-drained acidic soil, but tolerates high pH (alkaline) soils;
• Light: partial shade to shade.
Shady Edges North and West of Patio
Early Spring Bulbs and Brunnera 'Jack Frost'
• Leaves are silvery white with green primary and secondary veins and a thin green rim around leaf edges;
• Forms a 20" wide hosta-like mound of heart-shaped 3-5” wide leaves which remain attractive throughout the growing season.
If you’re planning to renovate and decorate your garden, planting trees and clearing lots, be sure to check out Portland TT to know more about their professional services and staff.
Many people are intimidated by the thought of starting plants from seed. It is true that it takes a little more work than buying ready-grown plants from the nursery, however the rewards are great when you have nurtured plants from seed to flower and fruiting. Also, the variety of vegetables you can find ready-grown is just a tiny portion of the varieties that are out there.
There are several reasons people don't start vegetables from seeds. They have either tried it before and not met with success, have friends who have tried it and had the same results, or feel that they don't have the time or space to do this. But this doesn't have to be true. You can start a few seeds on window ledge and it doesn't have to take as much time as people assume. Here I will go through a brief introduction to seed starting- from the supplies needed to a brief step-by-step guide to how to start your seeds.
First, you will need a few items, and a few pieces of information. Here is the list:
- a good light source- a well lit window or grow lights will do
- seeds (of course)
- seed starting mix (this will be lighter than garden soil and is not the same as potting soil)
- warm water
- seed starting trays (usually in three pieces- seed trays, reservoir, and clear plastic dome cover)
- you also need to know the following:
- last projected frost date for your area (found by contacting the local county extension office)
- seed planting depth (found on seed packet)
- recommended time to seed indoors (or out) - (found on seed packet)
- optional equipment: heating pad
Once you have all these together set them out on a table that you have covered with a cloth to make it easier to clean. Now here are the steps to planting your seeds:
1. Mix your seed justrting mix with just enough warm water to make it feel like a damp sponge when squeezed. It should not leak water but just be damp enough to hold its shape when squeezed.
2. Fill seed trays with your damp mix all the way up to the top of the sides of the trays so as to prevent "damping off".
3. Plant seeds to recommended depth.
4. Cover with medium and tamp lightly to eliminate air bubbles in your seed holes.

Landscape garden hedges can be formal or informal. They provide shelter, privacy and barriers. They should complement landscape designs for which they are planned.
Landscape garden hedges can provide:
• shelter from prevailing weather patterns,
• privacy from invasive noise or views, and
• psychological as well as physical barriers.
Hedges should complement the buildings and garden landscapes for which they are planned. They may be:
• Formal: represent enclosure, symmetry, and tidiness; hark back to early European gardens; are high maintenance landscape features; and are trained by close shearing of plants.
In large formal gardens, especially Japanese and Chinese styles, hedges are works of art. In European-type gardens, finely clipped hedges demonstrate human power over nature, define paths and ornamental spaces, and provide structure to the landscape garden. Both styles require diligent maintenance.
• Informal: represent freedom, openness and accessibility; appear spontaneous; however, planning for both structure and function is essential; pruned to encourage plants' natural habit and texture. Informal hedges complement contemporary homes and landscapes worldwide.
Hedges may be psychological and physical barriers:
• Psychological barrier hedges: usually one to three feet high. They outline areas or serve as visual traffic stoppers. In reality, humans and animals can easily step over or through them. At the lower end of this height range, psychological hedges are in reality ground covers.
• Physical barrier hedges: range from three to over five feet high. These hedges actually stop through-traffic. At the upper end of the height range, these close-knit hedges also provide visual barriers.
The two pruning methods for hedge maintenance demand slightly different tools and skills. They are:
• Shearing: predominantly for formal hedges. Young shoot tips are headed back (cut off) resulting in regrowth of tips and dense bushy plants. This technique is best for small-leaf evergreen shrubs. Shearing plants that produce conspicuous flowers, instead of trimming and thinning them, leads to loss of next season's flower buds.
• Thinning: removing plant portions and entire branches at their points of origin. Thinning can reduce a shrub's height and spread, and its density. However, the shrub keeps its natural shape. This technique primarily uses manual clippers and therefore takes time.
• Power hedge trimmers: physically easier to use than manual ones, and pruning takes less time. Usually, power tools should not be used to shape or maintain informal hedges. Often, formal hedges benefit from proper use of manual pruning tools.
Using power shears often results in an exuberance that ends with hedges sheared too closely. This causes little to no flowering the next season, and produces gaping holes that show the hedge's leafless interior. Another result is raw jagged branch cuts that show on the hedge surface.
• Manual hedge shears and pruning saws: allow for fine close trimming that avoids gaping holes and jaggedly torn branches. Finely sharpened hedge shears permit a great degree of control over the shearing process. Knowledge of plant structure and function are prerequisites for obtaining superior effects. The horticulturist needs upper body strength to continuously manipulate even the lightest of hedge shears.
These are the best tool choices for pruning informal hedges composed of individual plants whose best features are open forms or attractive juvenile growth.
Choose power or manual hedge-trimmers, or a combination of both, to initially form and then maintain formal hedges. Shearing several times within a growing season is labor intensive, but avoids the "shaggy dog" look and is necessary to preserve the formal hedge structure.
If you need help maintaining your garden or clearing trees, be sure to visit Portland TT to know more about their professional services.

Your walkway design can be as simple as placing some stones in a natural way or you can get as extravagant as creating an intricate pattern with pavers. When it comes to how you go about designing your walkway, it all comes down to the purpose of the area. This will dictate the type of walkway you will need to lay.
If your walkway will be leading towards a porch or deck you need a minimum of two exit points from the patio or deck and an exit point that leads into your house. If you have gates, you want your walkways to go towards them as well.
You want your walkway to be made from the same type of material that your deck or patio is made from. Design a walkway that will lead your guests to points of interest such as unique plants or an outdoor living space. If you are creating a walkway for low traffic areas you can use ground covers or stepping stones.
You can make your walkway as formal or informal as you like. The materials used all depend on whether you are making a formal or informal walkway. Your options include flagstone, wood, loose fillings, tiles or paver stones. Stone pavers are a great choice if you are also doing a driveway or patio.
Don’t forget to consider your landscape when doing your walkway. You may need to illuminate your path for night time pedestrians. There are a lot of choices for you when it comes to landscape lights and you can find a number of solar options so you don’t have to worry about running underground wires. You will find them available in a number of different colors and styles and will be able to find deck lighting and lamp posts that are solar powered as well.
You can of course go the traditional route of wired lighting. If you are going this route be sure to do the pre-wiring before you install your walkway material. This is essential since you may need to run wire underneath the walkway.

Brick pavers are the most common material used to create a walkway. Brick pavers are different from brick since they don’t have those holes you find in bricks. You will find these pavers available in a number of sizes but typical pavers used for walkways measure 4” x 8”.
Your first step is to determine how much walkway you need. As a general rule, your walkway should be between 32 and 36 inches wide. You should measure width times length to find the soiree footage of the walkway. This will help you to purchase the right amount of pavers to get the job done. You should purchase more than you need just in case you end up breaking or chipping some pavers.
You also should consider additional pavers that will be necessary for edging. For edging you will need to determine the linear foot of the open edges. This is the area that is not touching any solid objects.
You will need a bed of sand or crushed stone to build your walkway on. The amount you need will be determined by the depth of your bed which should be determined based on the amount of traffic your walkway will see. Typically a depth of 4” will work just fine. With all this in place, you are now ready to build your walkway. Here are the steps you will need to follow to complete this task yourself.
When you decide on your pattern you can go ahead and place your pavers. You can anchor one side of your edging now. Drive spikes every 8 inches into the base and remove the temporary pavers.
If your edging is made from wood you should drill homes before driving in the stake. If your edging is brick, dig deep enough so the top edge is flush with your walkway’s surface. Remember at this stage only one border should be anchored.You want the other border to remain loose in case you need to do any adjustments if pavers are not fitting right.
Over time, the sand in the gaps will settle and you will need to sweep another layer of sand into the gaps. You can inspect your walkway annually to see if and when it is necessary to do so.
The same steps above can be used to build a driveway. You would just need to use a deeper base of your crushed stone since your driveway will be handling heavier traffic.

If you have a natural area your best choice is a pathway. This can be used to provide a space to walk to view the landscape without damaging it. A pathway is ideal as a guide through a wooded area. If you ever need landscaping maintenance help you can always reach out to us at Portland Tree Trimming Services
For an easy to create pathway you can use stepping stones. You can purchase stones or collect some stones from the bed of a dry creek if you have any nearby. Your other option is to get from a rock quarry.
To create your pathway you start by outlining the area you choose with string. You won’t need a formal edge like that of a paver walkway. You can use gentle curves which will guide you through the pathway. With the pathway outline you can now outline the area. Remove sod so you don't have grass growing in your pathway. Once the pathway has been cleared you can create a border that will prevent the grass from growing into the area of the path.
Your best bet is to choose a plastic edging as this will be more flexible so it can make curves. With your edging laid you can now cover the area of the pathway with sheeting. This will prevent weeds from growing. You can use landscaping material or plastic sheeting for this part of the project. With all this done, you can now place your stones along the pathway. You don’t want to place them too close together and you don’t want to place them too far apart. Create them with spacing that allows for a natural walking gait through the pathway.
You can opt for stones with carvings and special shapes to provide some level of visual interest throughout the pathway. With all your stones in place you can now fill in any exposed area with mulch of your choice. Fill with enough mulch to be flush with the stones but don’t cover them. This will make walking through the pathway more natural and you won’t have to worry about tripping on the stones. Your backyard pathway can be as complex or as simple as you like. It really all depends on the amount of space you have to create your pathway. You can add other elements to make your yard more enjoyable such as bridges, water gardens, arbors and even a gazebo. And remember to contact us whenever you need some help from the experts!
A patio design project will take a good amount of time and energy. Once your project is complete though, it will add not just beauty to your home but also value. Typically, traditional patios are made from concrete but over the years this has changed. You can find patios made out of brick and flagstone as well as other materials. Here are a couple of helpful tips for you before you start that patio design.
First things first, what materials will you need? To decide this you should carefully consider your backyard and how much of it your patio will take up. Will you need to remove any trees? How much spacing do you need to give trees? You can use spray paint to mark the ground so you can measure the width and length. These measurements will help you determine how much materials you need to purchase. Unique geometric shapes may make this harder to determine and that may just require you to call the professionals.
Materials needed include;
You will need enough sand to cover 1 inch across the bottom of the design area. If you live in a colder climate you will need more. You will also need additional sand to fill the cracks on after laying your brick or patio pavers. If you are building a stone patio you will need stone.
Once you have decided on all you need, it's now time to go shopping. Someone in the store can help you calculate how material you will need using the measurements you took of your patio area. Remember to add in extra material in the event you need to cut some to fit or if you break or chip anything or if something goes wrong when mixing your concrete or sand if working with those materials.
This is quite possibly the most important part of getting your patio design done the right way. Done correctly, this is the step that ensures that your patio will hold up to mother nature. But before you start digging it is important to call your local utility companies. You want to check for wire and cable placement so you don’t damage anything and get yourself in heaps of expensive trouble.
You also want to keep into consideration the grade and slope and how water drains in your yard. You don’t want to do any digging that will change water’s course causing it to be directed at your home. You need to have water draining away from your home and have at least a slope going away of Ľ inch for each foot of patio.
There are two ways you can start your excavation. First way is to remove the grass and lay your frame with 2 by 4’s then put your sand and stone in place. The second method is to dig and remove around 2 ˝ to 4 inches of sod depending on how level your yard is and the thickness of stones or brick that you will be working with.
Once you have done your digging, you can start laying your base materials followed by your choice of stone, brick or concrete. Of course you don’t have to do this all by yourself.
If you need a team of professionals, the people here at Portland Tree Trimming Services would love to be of service to you.

There are many products available on the market that can help when our plants are under attack. Depending on what is ailing your plants, you can choose between pesticides, fungicides, and even weed killers.
Pesticides are also known as phytosanitary products. They are used in agriculture to get rid of or ward off pests that can destroy crops.
Active ingredients in pesticides can be either natural or synthetic.
There are a variety of different pesticides that are commercially available. For example, there are the Organochlorides. These are among the most powerful pesticides available, as their active ingredient is chloride. Organochlorides are dangerous as they have been shown to contaminate the soil long after their use. For this reason, they have been banned in the United States.
Nowadays, the majority of pesticides used in the United States are known as organophosphorus pesticides. These pesticides degrade more quickly than their organochloride predecessors.
As their name suggests, fungicides attack any fungi that are affecting your plants.
Modern fungicides have largely replaced the traditional Bordeaux Mixture, which was a copper-and-lime based mixture traditionally used to fight against a variety of plant diseases.
Modern commercial fungicides come in a variety of formulas. Active ingredients in modern commercial fungicides can include:
• Carbamates
• Derivatives of benzene
• Derivatives of phenol
• Quinones
• Amines
• Amides
• Triazoles
• And others
There is growing concern surrounding the carcinogenicity of some of the active ingredients commonly used in fungicides.
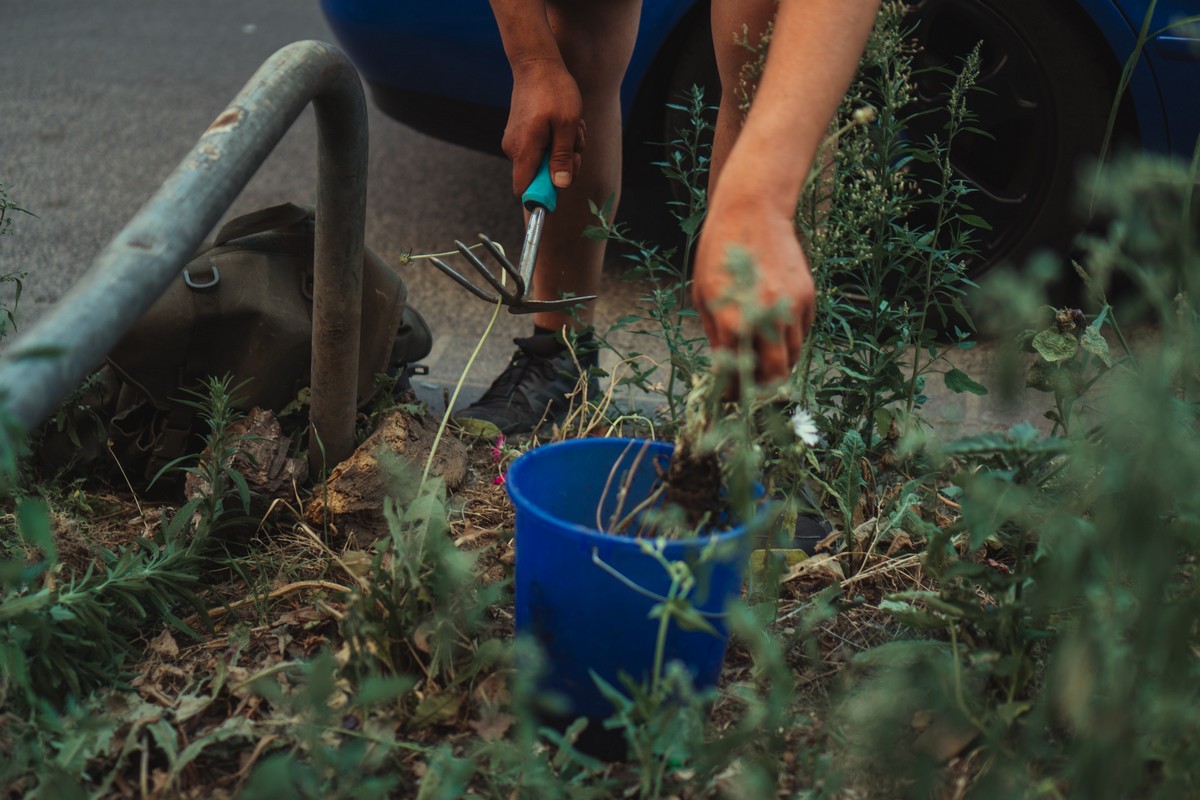
Herbicides, also known as weedkillers, are used on plants that are damaged by weeds.
There are many options to choose from when it comes to commercial herbicides. Some of the most common include:
• Phenol nitrate
• Amides
• Benzonitriles
• Urea substitutes
• Triazines
• Sulphonates
• Ammonium
• And more
As with fungicides, there has also been concern regarding the carcinogenicity of the active ingredients used in many commercial herbicides.
If you want to link texttake care of your garden the safe way, consider hiring a professional tree care service such as Portland Tree Trimming Services.
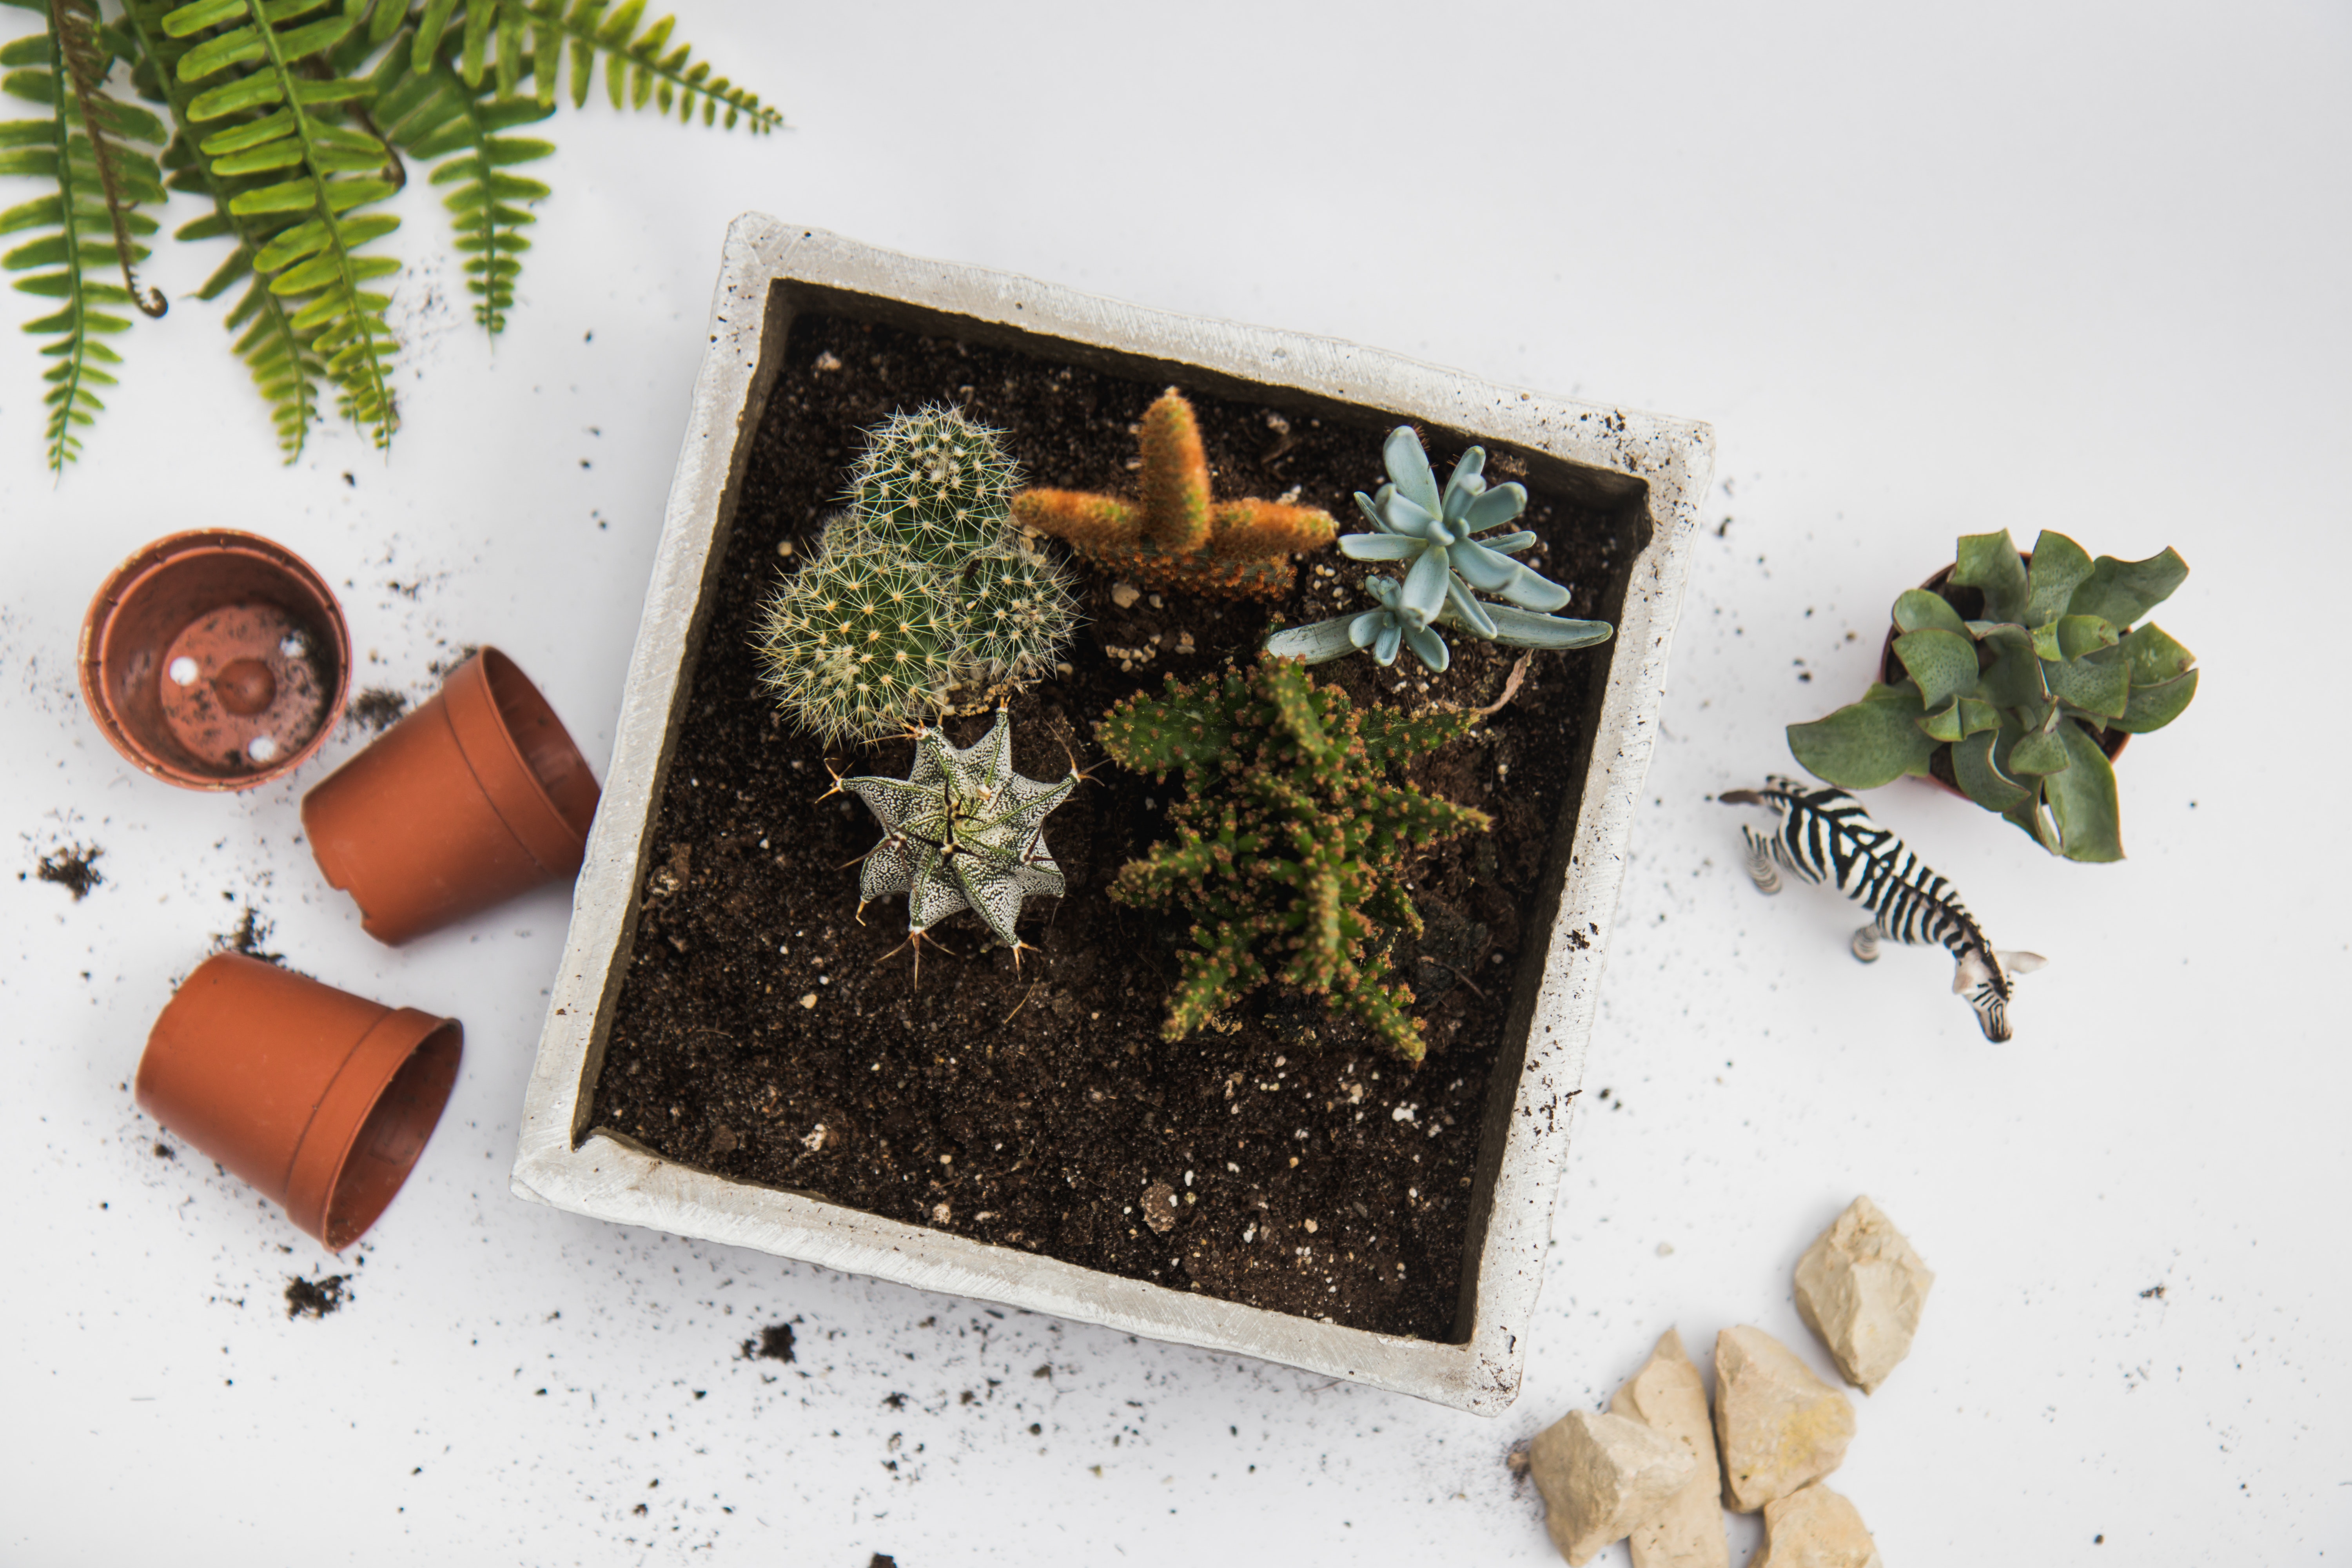
You can grow healthy plants in a container garden each garden season. You just need to know how to do it the right way. Let’s help you grow healthy plants with two crops per container for your next season.
When you have a container garden, you have to care for the plants a little bit differently than in a regular garden. But you’d be surprised to see just how you can be growing vegetables in containers when you have the right tools and techniques. The tips we will include here apply to both vegetables and flowers and will help promote vigorous growth and healthy plants.
You want to ensure that the containers you choose are suitable for the plants that you will be growing. They should be deep enough so they can accommodate the plant's roots. If they are too shallow, the dirt will dry out quickly and this will cause stress on the plants.
All you need is a container that is deep enough and that has drainage holes or allows you to add drainage holes in the bottom. To keep the potting soil from leaking out when you water the plant simply add in a layer of coffee filter or newspapers.
Before adding your potting soil to the container you will want to mix in a slow release fertilizer. Ensure your potting soil mix is top quality. You can find some potting soil with premixed fertilizer. Once planted you can add more fertilizer according to the plant species needs.
By mid-season the slow release fertilizer should be all used up and you will need to reapply fertilizer to the plants. You can flush the plant by running water through the container to flush the soil. Continue to pour the water out until it is coming out of the drain holes at the same rate that you are pouring it in. Once you have flushed the old fertilizer out you can add more slow release fertilizer to the top soil. Just be careful not to allow the plant fertilizer to touch the plant base.
If your plants are not performing well and are becoming leggy you will want to prune them to encourage better growth. Once you cut the plants back, go ahead and apply some water soluble fertilizer. Remove any ripe fruits or vegetables and remove all the spent flowers as soon as you can so you can encourage the growth of new flowers or vegetables. Be careful not to overprune your plants thoug has this can be detrimental. If you need the help of experts you can take advantage of our maintenance services.
When your spring and summer crops are done, remove them as well as all roots from your containers. Run clean water through the potting soil to let out any fertilizer that may still be hanging around. Follow by adding in new fertilizer into the potting soil and replanting in the container with items that are ideal for cool weather. Consider planting cabbage or
If you don’t want to do a container garden, you can go ahead and plant a tree or two. Trees are very rewarding and they can really add aesthetics and value to your yard. If you need any help or guidance or just want to hand the job off to the professionals you can give us a call.
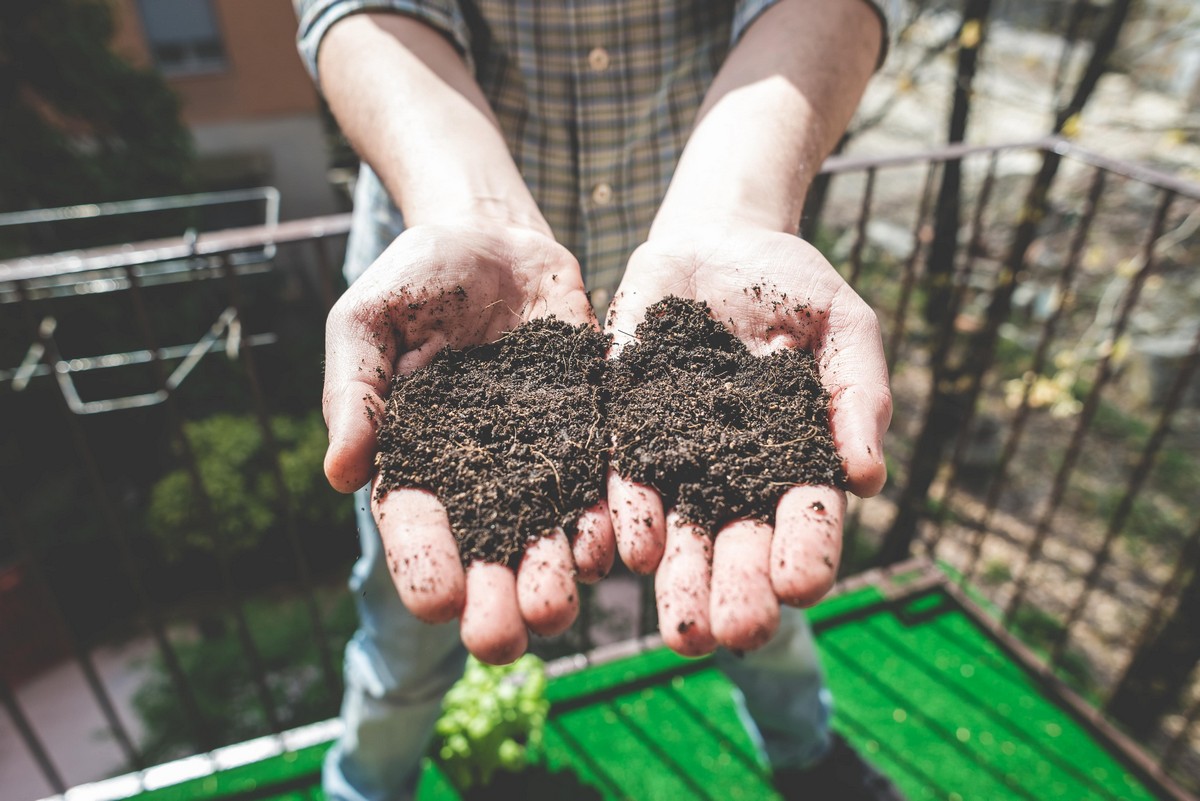
You may be familiar with soil testing kits and chemicals but these are not the only way to test your gardening soil. With the senses you can test and see how successful your soil can be for gardening purposes. Using smell, touch and sight are among the most economical methods for testing your soil. You can use your senses to test the dirt type, pH and soil quality. pH levels can be observed from the color of the soil and also by the smell.
If you are looking for a more accurate and complete analysis of your soil you can invest in soil analysis services or kits. But if you just need to estimate for your own gardening needs the senses will provide you with a good estimation once you know what to look out for.
The color of your soil can tell you a lot about water filtration. A soil that is dark and rich like that in the left of the image is ultimately the best soil for your garden. This type of soil is called humus or loam.
A grayish yellow soil that is sandy will drink and filtrate water quickly so this will leave your plants thirsty and dying. Soil like this will require thick mulch of 4 inches or more. It can be any type of organic material including garden clippings, leaves or store bought wood chips. This will trap moisture which will help nutrients stay around the roots of plants. This will also over time build the soil.
You can smell your soil for richness and freshness. Smelling your soil can reveal if it is from a garden shop. If you have topsoil mixed with compost it should have a fresh smell and should not be moldy. You don’t want it to smell sour or have that ripe manure smell. Fresh manure can burn your plant roots. You can add fresh manure in the fall, ensuring it is well tilled and left for winter. This will make great food for plants that love to feed on acid.
You can determine what type of soil you have and its makeup by paying attention to the trees, plants and weeds that are already growing. You can check your local library or Google plants or weeds you don’t know. Finding out what type of soil these grow in will help you determine the soil type.
For example clay soil is great for sorrel, thistles, buttercups and chicory weeds. Dry areas with poor soil will have clover. Cattails will make it in boggy and wet soils.
We do not recommend this but we are aware our ancestors used to use it. There are some farmers who may still tates the soil such as the Amish. Tasting the soil is used to check pH; acidic soil has a sour taste and alkaline soil has a sweet taste.
Touching soil can tell you a lot about it. If you take up a seed packet you will see it recommend a certain type of soil for each vegetable or flower. You can run your fingers through the dirt, toss some out to the wind, feel for moisture or grit. This should give you an indication of the soil you have and you can tell if it matches the description of the packet.
Remember if you need help you simply can reach out to us here at Evergreen Tree Services Ltd. We’d love to hear from you, and we would love to help you achieve healthy plant growth. Let our experts work for you.
Houseplants are often impulse buys. It's easy to see a nice plant and put it into your cart without giving it a second thought. The next thing you know you are on your way home with a brand new houseplant. Then what happens? You end up with multiple dying plants at home. The best way to avoid this is to think before you buy your next houseplant. With just a few minutes you can decide what you really want from your houseplant. With just those couple minutes you can increase the likelihood your houseplant will be in your home, for you to enjoy for many years to come. In addition to that, here are a couple tips that can help you in choosing a houseplant.
Purchasing a houseplant can be very rewarding and the entire experience can be fun. Take the time to think it through before making that purchase in store. This way you are sure you will be better able to enjoy your new houseplant for the log run.
Already have the perfect spot in your home for a houseplant? Fill that spot with the right plant by following the above tips. For more tips on houseplants and just plants in general, give us a call at Evergreen Tree Services Ltd. Let’s help you build your green thumb.

With the right care and attention, roses can provide you with beauty for many years. But even with the best care your roses may sometimes fall prey to pests and diseases they cause. Oftentimes there is something that goes wrong causing your plants to become attractive to pests. It could be a lack of nutrition, a lack of water, inadequate drainage or poor soil conditions. These issues can encourage pests and diseases to take over your roses.
You will find that roses can either be affected by living pathogens as well as by environmental conditions. When the damage to your roses is uniform it most likely is a cultural or environmental problem. But if you see damage that is not uniform then chances are your problem is a living pathogen.
Symptom - Small insects on leaves and buds Cause - Aphids. These are usually black, red or green bugs approximately ⅛” long. They are often found in clusters and mainly seen on new growth. They tend to appear in spring and can stick around until summer.
Treatment - Start off by hosing off the plant with water. This will remove the insects. If they keep coming back you can try a mixture of water and dish soap to spray the bugs. The next step in treatment would be to find an effective commercial insecticidal spray. You can also look out for aerosol insecticides that are specifically for killing aphids. You can find all you need from your local garden center.
Symptom - Distorted buds and discolored bloom tips. Cause - Thrips. These are small light brown insects that are ⅛” long. They tend to appear inside petals and are spread by the wind. They move quickly so you have to stop them in their tracks fast!
Treatment - Look for a systemic insecticide that targets Thrips specifically. Apply this with your new growth when it grows to 1” or more in the spring. You can rotate your treatments when your rose buds are still pea sized.
Symptom - Stuck together leaves and holes in unopened buds. Cause - The omnivorous leaf roller. This is a moth larva that makes a cocoon with rose plant leaves.
Treatment - Remove all the cocoons from the rose plant. You can further treat leaves with a systemic insecticide that targets these leaf rollers. Apply to plants when new growth is 1” or more in the spring. You can use contact treatments on a rotational basis.
Symptom - Yellow and fuzzy leaf surface with small red specks, webbing and spider like insects on the underside.
Cause - The Spidermite. These are microscopic but you can still see them with the naked eye. They tend to thrive in hot weather.
Treatment - There’s quite a number of treatments for these. Use horticultural oils, insecticidal soap, a high pressure hose with water or miticides. Apply treatment to the undersides of leaves. In hot weather, keep your plants adequately watered and don’t allow dust to sit on the leaves.
For more tips on treating pests in gardens and landscapes, visit our website. We have certified arborists along with tree and plant care specialists on staff to help you take care of the plants in your surroundings. We cater to both residential and commercial clientele and would love to help you maintain your plants and landscape.
