
Soldering and making your own cables Part One
Here, I will show you how to solder and make you own cables, do simple repairs to guitars etc.
First off you will need some of the following items:
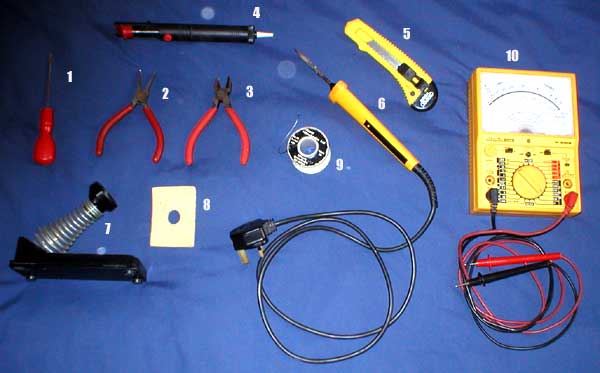
1. A small flat blade screw driver, this is handy for poking things and taking stuff apart - like the back of your guitar.
2. A small pair of needle-nose pliers.
3. A small pair of wire cutters, these are essential.
4. A 'solder-sucker', this is for sucking up excess solder when it's hot, can be handy for de-soldering things or just when you've got into a mess.
5. A craft knife of some sort, pretty much essential for making cables.
6. A soldering iron, for those who don't know this gets very hot and melts the solder so it can be used like 'glue' to stick metal together, this is essential for soldering of course. More on soldering irons further down the page.
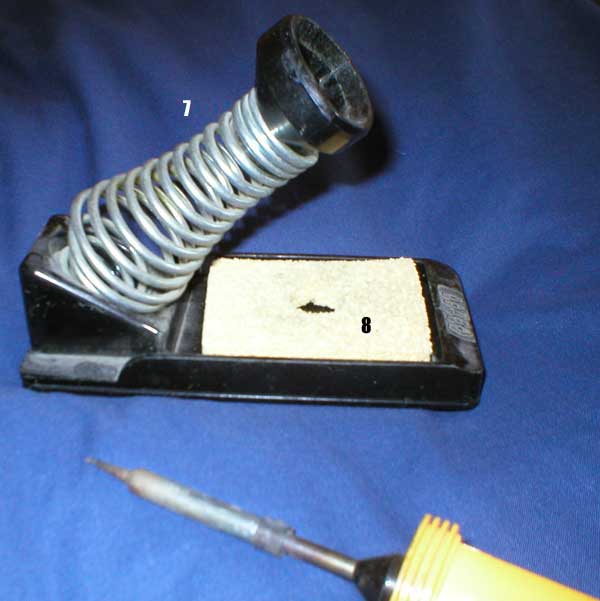
7. A soldering iron stand, optional but a sensible thing to have as the iron gets very hot.
8. The sponge that fits into the stand, more on that later.
9. Solder, 40 / 60% Tin / lead, this is what we will use as 'glue'. Make sure you buy 'multi core' solder that contains 'Flux'. This is nothing to do with time travel, Flux is a cleaning substance that will make soldering easier. 'Plumbers solder' does not contain Flux.
10. Another optional item, a 'multi meter'. You can get a cheap one for less than £10, this is useful for testing connections and measuring voltages.
Soldering irons
There are several types of soldering irons that you can buy:
1. 'Trigger' or 'gun' type. These are very high powered and get hot instantly, however they are not good for fragile work.
2. 'Constant heat'. These are the most common type of iron, they have a heating element and just get hot. However, if you do a lot of soldering in one go, or solder large bits of metal the heat will dissipate and you will have to wait for it to heat up again. Also if you leave it on for a long period of time when it is not is use it will get hotter and hotter. These come in several ratings like 12, 18 and 25 Watts. If you buy one of these get 25Watt iron as we will be soldering metal connecters which are quite big chunks of metal.
3. 'Temperature controlled'. This is what I have, it has a thermostat built into the handle, some have bases that they sit on with the gubbins in. Mine is 40Watts, so if I do lots of soldering it will keep at the same temperature. If I leave it on all day and don't use it it still stays at the same temperature.
When you buy the iron make sure it comes with, or purchase a 'bit' that is quite fine, mine comes down to a point. Some cheaper irons have a flat 'chisel' bit which you may find is too large to use for some connecters etc:
You can see the point of the iron there, the 'bit' is the end of the iron that you melt solder with, they are normally interchangeable.
You can see the sponge (8), in the stand (7) above. This is made wet and used to keep the 'bit' clean whilst soldering. More on that in the 'technique' section further down this page.
***WARNING*** - Before you go out and buy your new soldering iron, bring it home and plug it in. BE CAREFUL - it gets VERY hot. Most soldering irons get to over 200 degrees C and more. It's hot enough to melt metal so only hold it by the handle.
Soldering technique
I will now show you how to solder something simple. We will solder a wire to a bit of metal:
Turn on the the iron and wit for it to heat up. It should only take a few minutes until it's ready. REMEMBER keep the iron in it's stand if you have one or somewhere that it won't fall down and burn anything (or anyone, pets etc).
Take a piece of solder wire and melt a bit on the end of the iron. You should see a bit of smoke, this is the flux burning off. This action is called 'tinning' the 'bit'. This will clean it (using the flux in the solder) and also make it easier to melt solder, wipe it a bit on the wet sponge (8) and 'tin' it some more until it is silver-shiny at the very end:
Tin:

Wipe:

Now, get hold of what you want to solder. I am going to solder one piece of wire to a connecter. NOTE: If you really making an audio lead you would need cable with more than one conductor, this is detailed in Part Two. For now I am going to use a single bit of wire to show technique only.
This is the process for soldering something:
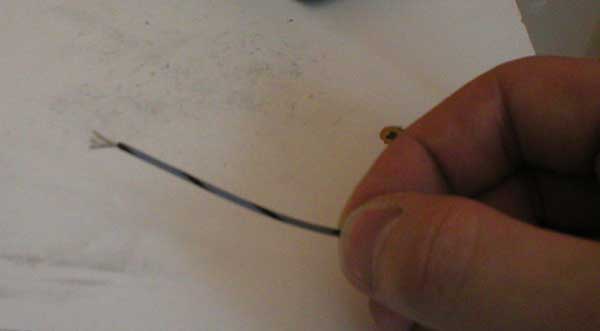
Firstly I have removed a piece of the insulation from the wire with my wire cutters (3) so you can see the metal core, twist the end so it all stays together and doesn't 'fray'. You could also 'tin' the of the wire before joining it to anything to make it easier, in this example however I didn't. To 'tin' the wire, simply melt some solder onto it.
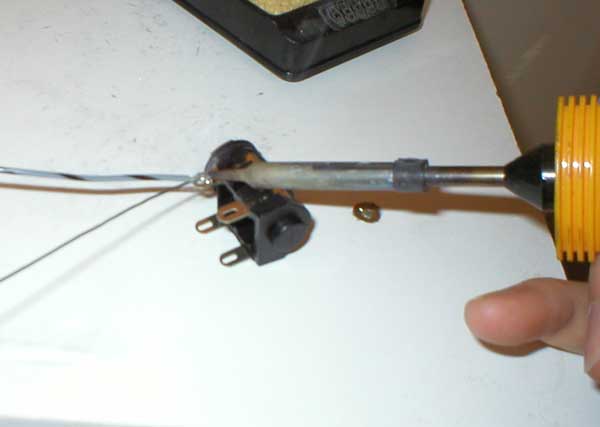
Make both bits of metal that you are joining hot, so apply the iron to both. The black thing is my connecter, it has metal terminals to attach the wires to. That isn't rust on the terminals, it's the reflection from something (not sure what). Anything that you attempt to solder must be clean and shiny:
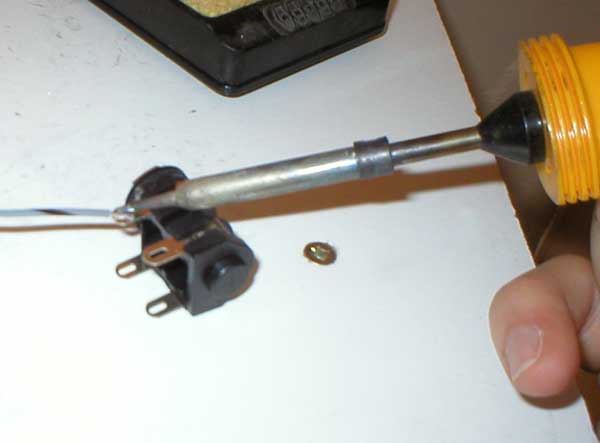
After a few seconds apply the solder as well and let if 'flow' around the joint, keep the iron on for a few seconds until everything looks shiny:
Next remove the solder but keep the iron on the joint:
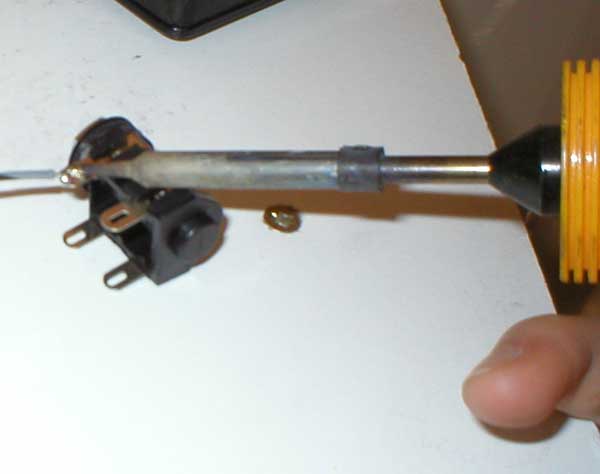
The remove the iron, all done:
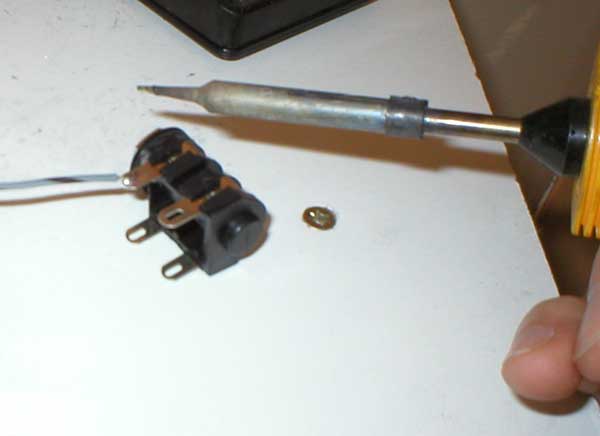
Make sure your finished solder joint is bright and shiny. If it is dull then it has air gaps in it, this called a 'dry joint' it will not be reliable and probably won't work very well.
To make it easier you might want to get some 'helping hands' to hold everything in place, as it takes two hands to hold the iron and the solder:
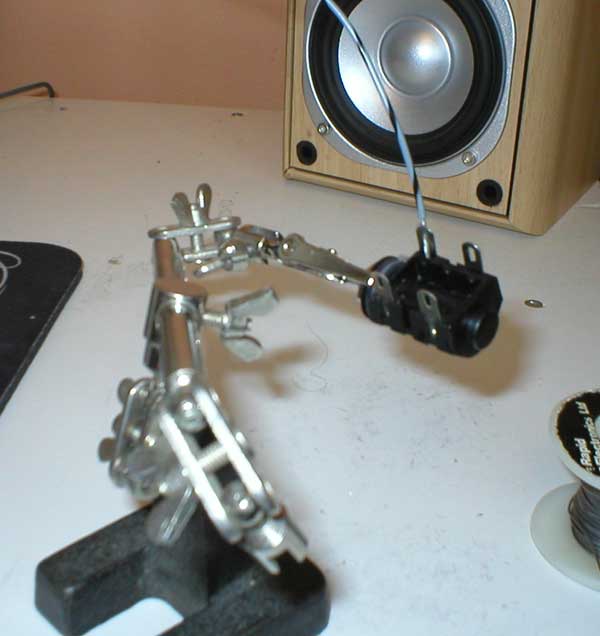
You could use also a wooden peg glued to a piece of wood, or just get your friend to hold something (they will only be your friend until you burn them).
Now that you know how to solder, the next section deals with specific audio cables and guitars:
***Soldering and making you own cables part Two***
