
After having the Intrax springs for 25,000 miles and 1.5 years, I decided I wanted something stiffer that would handle better for autox. I didn't like the balance that the Intrax springs gave since my car tended to understeer more than the stock springs did.
The Research...
I should have bought the Ground Control springs from the start so that I could have specified what rates and lengths I wanted for the 2.5" ID Eibach ERS springs they use. Then I saw a posting on the Probetalk UBB asking if anyone had tried the Weapon*R Circuit Pro coilover springs for the PGT/MX6/626. I had seen a few good reviews on other forums, so I decided to try them.
After numerous emails and a phone conversation with Weapon*R (WeaponRtec(at)aol.com or 650-992-9669), here's the data I got, along with my data:
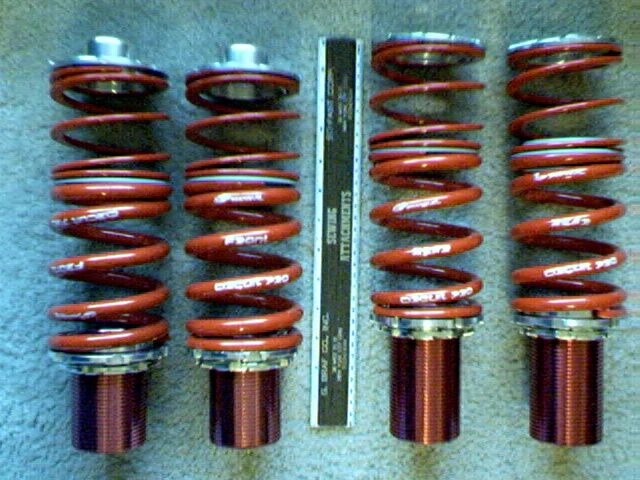
Probe GT / 626 / MX6 Circuit Pro Coil-Over spring kit: Part#821-128-101
Rates: main - 500f/450r; helper 100f/100r.
Lengths: 5" main; 3" helper
Range of Adjustment: 3.25" for 2 sleeves (rear I think); 2.25 for 2 sleeves (front I think)
Adjustment mechanism: threaded spring perch with 2nd locking lower ring (not pinch screw)
ID of springs: 2.75" (I wish they were 2.5" like most normal springs)
I ordered my springs from ImportUniverse.com for $300 shipped. Not bad for a dual spring setup.
Calculations...
I found a really cool web page that has a Calculator for designing compression springs (courtesy of Efunda) and got some rough measurements off of my springs to check the data. The reults of the data are below (designated front/rear).
Inputs:
| Diameter of spring wire, d: | 12/11 mm |
| Outer diameter of spring, Douter: | 95/92 mm |
| Free length of spring, Lfree: | 5 in |
| Number of active coils, na: | 4 |
| Youngs modulus of material, E: | 200 GPa |
| Poisson ratio of material, v: | 0.3 |
| Density of material, p: | 7500 kg/m³ |
Answers:
| Spring constant, k: | 498/378 lbf/in |
| Maximum load possible, Fmax: | 1080/908 lbf |
| Maximum shear stress possible, tmax: | 103/109 ksi |
| Maximum displacement possible, Ldef: | 2.17/2.40 in |
| Length of wire required to make spring: | 61.9/60.4 in |
| Solid height: | 2.83/2.60 in |
| Distance between coils in free spring: | 1.25 in |
| Rise angle of coils: | 6.94/7.11 deg |
| Lowest spring resonant frequency, fres: | 128/123 Hz |
| Shear modulus of material, G: | 76.9 GPa |
| Mass of spring: | 1.33/1.09 kg |
Comments...
So, from the calculations from the webpage say that the rates are closer to 500/375 (what Import Universe told me) instead of the 500/450 rates that Weapon*R told me. I wish I had a real caliper to measure the spring wire diameter closer.
One number that I don't like is the maximum load possible numbers since the PGT front end weighs 1900-2000 lbs already. That could possibly take up 2" of travel of the 2.17 available... not good! But, this doesn't take into account the helper spring or bump stops. I'll definitely have to watch for coil bind.
The Install
I installed the rear Circuit Pro coilovers earlier this week and just installed the front ones today. Here's a synopsis and tips on the whole procdure:
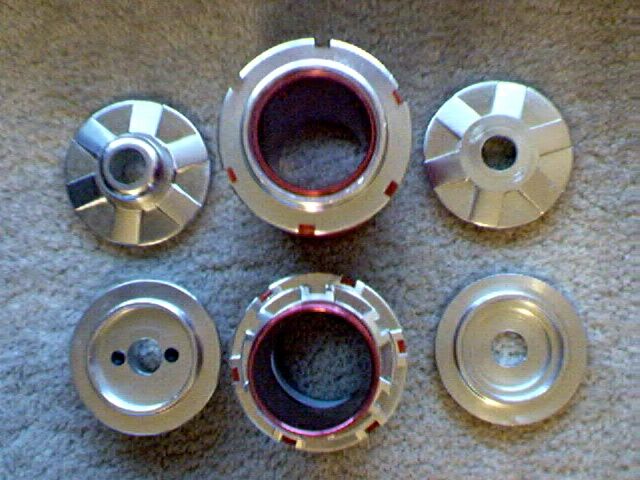
Grinding the Tokico tops: Wow... grinding is a pain. Took about 2 hours for 2 struts just to grind. The sleeves fit perfectly on the Tokico struts though... no need for the supplied plastic inserts to put under it. The sleeves have holes drilled for 3 included set screws. The rear collars are taller than the front ones. After riding on them a couple of days, the sleeve has slid down a little into its own little groove, so it made it hard to adjust the perches at the lowest settings. I would advise to not lower them all the way until they've settled in.
I used my Dremel tool for the grinding and think the silicon carbide (green) bits work better than the aluminum oxide (orange) ones. Ideally, I think a tungsten carbide would work best. I used about 4 stones and 6 sanding drums on the grinding. To protect the strut rod from debris and misgrinds, I wrapped a damp paper towel around the rod and secured it with a rubber band.
I originally didn't cut any of the rear bumpstops. With the perch threaded about a half inch below the top of the sleeve, the ride height was really close to stock! The tender spring compresses completely, as suspected, and I measured the other compressed heights and fender clearances, data below.
Next, I lowered the perches all the way down. Rear ride height is just a tad lower than Intrax. Ride height is like Intrax springs with luggage in the rear. With the perches all the way down, the car is sitting on the uncut bump stops! I think this is because the upper spring perch is flat, so the bump stop can't hide in its recess like it normally would. The main springs are hardly compressed.. probably an inch... with a lot to go (data below). I think that's about how much travel is left before the Tokico would hit the upper spring perch as well.
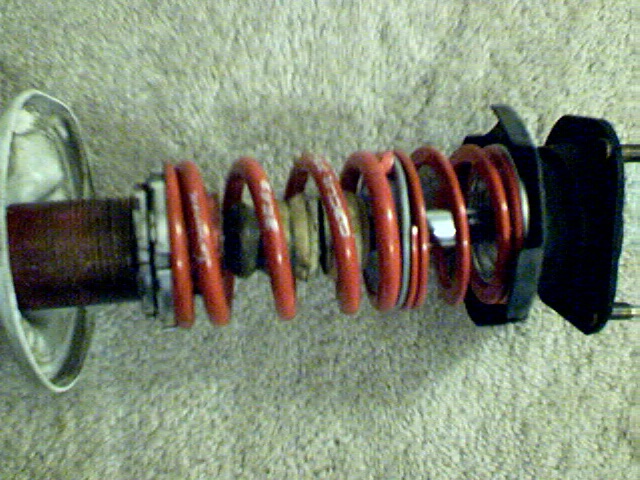
Preliminary test drive with just the rear springs: The rears are very stiff with complete bump stops. So, I definitely think I need to remove some. After removing the rear bump stops and reinstalling only the top 1" (as W*R's instructions say), the rear was much less bouncy and ride quality was improved.
I finally got around to installing the front springs. Much easier since you don't have to pull out the trunk panels. The front Intrax springs did require a spring compressor to take off. I grinded the 2 strut tops... 2 more hours there.
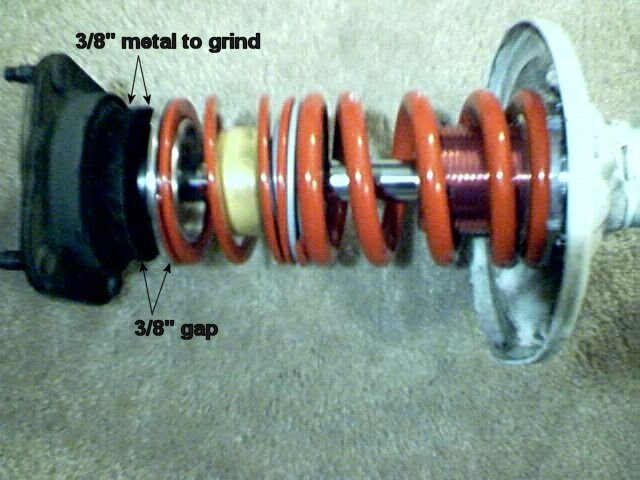
Now the complicated part: W*R says to use the thrust bearing in between the upper spring perch and the strut mounting plate. But, the thrust bearing has a positioning lip on it to fit in the stock upper spring mount so that it doesn't fit flush with the Circuit Pro upper spring perch. So, I got my Dremel tool and used a cutting disc to make the thrust bearing flat on both sides, then assembled it. The caveat to this is the upper CP spring perch could be about 3/8" closer to the upper strut mount and a similar lowering of ride height. I only put in the top 1" of bump stop back in. When putting the springs on, I actually had to compress the helper spring with my hand to get the strut nut all the way on. After reinstalling everything and letting the jack down, the front sat higher than with Intrax springs! This is a disappointment. However, the front springs do have more travel than I thought they would, so I don't think coil bind will be a major problem as I anticipated earlier.
While installing the fronts and reinstalling the rears, I got an old bicycle tube and cut into 6-8" sections and installed over the strut rod to act as a semi-dust boot. I'd like to find some larger 2.5" diameter tubes to be able to cover the threads of the sleeve though.
Results...
Test drive: The rears definitely feel better. I set Tokicos on 4f/4r. Body roll and dive/squat is inperceivable. Handling is more neutral. Steering response is very much improved over my old Intrax + Tokico 3f/5r setup. The car seems more predictable on smooth pavement. However, on rough pavement, traction is tricky and the car skips and dances more. Ride quality is worse, as expected. The limited suspension travel means bumps are transmitted more to the body, so going over rough bridge junctions toss my head back and forth pretty good. Even at Tokicos on 4, the front spring might be a little underdamped. The rear seemed fine at 4 though. But, given a smooth road and tight twisties, the car feels really good. I've been testing the limits in safe areas to see how easy oversteer is induced and if oversteer is dangerous when it occurs. With the stiff springs, I think attention to bumps is critical. I need to adjust my corner weights because I'm spinning my passenger side front tire more than normal on hard launches. Anyone know how to do that without scales?
Spring Height data:
Spring lengths (uncompressed, compressed, additional travel (est), rate):
Front - 5" 3.75" 0.90" 500lb/in
Rear - 5" 4.25" 1.60" 450lb/in
Helper - 3" 1" 0" 100lb/in (including plastic spacer)
So, removing the helper spring would lower the car another 1".
Ride heights (fender down to wheel center with perch at lowest setting):
Front (before grinding upper strut mount) - 14.50"
Front (after grinding upper strut mount) - 13.75"
Rear - 13.50"
Torque settings (lb-ft):
Upper strut rod top nut (for non-Tokicos): 66-86
Upper strut rod top nut (for M14 Tokicos): 38-49
Strut mounting plate nuts: 34-46
Lower strut mounting nuts: 68-86
ABS sensor bracket: 13-19
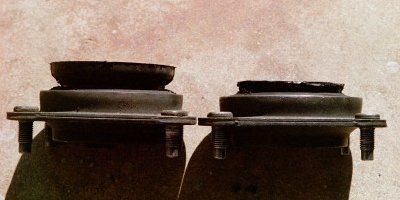
Here's how I got the extra 0.75" of lowering from the CP's by grinding the OEM upper strut mounting plate down. The extra lip is only about 3/8" higher, but the CP top hat is a full 0.75" higher. So, by grinding those down and removing the top hat, it gets you max lowering before you cut off your spring perches:
I replaced my 14mm strut mounting plate nuts with 17mm flat ones ($2 for 8) so that I have threads all the way down for better fastening. It's an M10x1.25 thread.
After driving on them more, I really like them. I just will dread long trips on bumpy roads. Therefore, I will probably be more selective to what roads I travel now. If you can live with your car on Tokicos at 5 all the time, you could live with these springs.
