

How to Make Tubes
(for beginners to advanced)
Written by Angie (Kalamity Kat)
There have been several tutorials written on making tubes. I have been asked by numerous people to write one that is easier to understand. I will try to accomplish this but at the same time hope to give some tips on how I make mine which is what everyone seems to want to know how to do.
I will use this graphic as a demonstration for you.

This is a basic graphic with a white background. If you have a white background and it is perfect (which most are not) You can take the magic wand

as a new selection.
I won't proceed with this further because you are not going to run into many perfect graphics. The picture above looks like this when you do this.
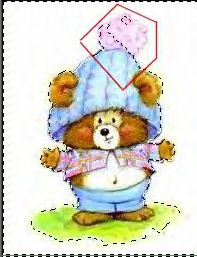
as you can see by my red marks all of it did not select. This is why I don't recommend making tubes in this manner.
So to tube this graphic and any graphic no matter what color the background this is how I do it.
Go to view, image information and find out the size of your graphic. This one is 195 x 294 pixels.
After I know the size go to file-new image.
You can see I am making the new image larger than the original and also choosing a red background. Never work on a white, black or transparent background.
These colors are the colors most backgrounds or shadings are too difficult to make good, clean tubes off of. You will make it transparent later. I always choose red because it is easier on my eyes.
After I have my new image I go to my graphic and edit, copy, then edit paste as a new layer on my red background.

You can then close your original and Save this image as a paint shop pro image(*psp) image. I do this because you may have to quit for a while or something may happen to the computer and this way you can always go back to it. This will save it so it will still be a layer and movable.
I use the freehand tool

On the tool bar go to the toggle layer, pallet, click on it and it will open it up.

These are the setting I use.
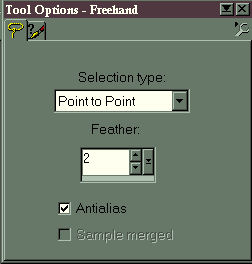
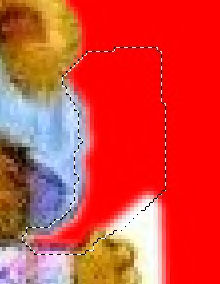
I then take the freehand tool and begin cutting away a lot of the excess background that you don't want.
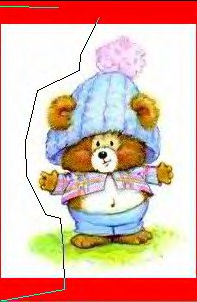
Till I get something like this.

Then go to File, save. Its a good habit to save your image several times during your work. I can't tell you how many times I didn't and had to start all over.
Use your zoom tool and zoom in to where you can see.
This is a personal preference as to how much. I zoomed in 4:1 for now but I may change that several times. Sometimes you can't make out the image to far out and sometimes you can't tell what's what better.
I then take my freehand tool

and begin cutting.
Try not to cut to much out at one and if you mess up remember you can always undo. I place my line on the lines of the graphics and left clicking around the way. Then go out around the white up to the beginning part and right click and they will all join together. Then click on the scissors to cut or go to edit cut.
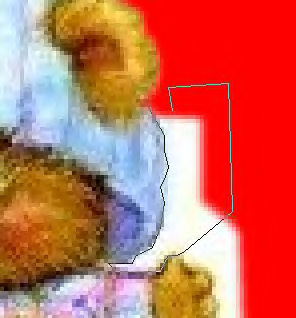
it will then look like this
On this one I didn't get the freehand tool exactly on the line so you can see a little white around the image. This is why I tell you not to use a white background. If this were white you wouldn't be able to see this. No problem, just go to the scissors tool again and hit cut again until the white is gone.
*The freehand tool set at feather of 2 will move the lines in 2 pixels. This is what keeps you from getting the jagged edges no one likes. You can keep the ants marching and hit the cut as many times as you want but remember each time you do it cuts away another pixel.
So sometimes its better to start again with the freehand tool if it looks like you are cutting away to much of the image.
At this point take the freehand tool and move it to the center of the image and it will change appearance to look like a cross. Left click on this and it will float move the selection to look like this.
This part is important because it takes away all the blur left behind that you missed my cutting and lifts the
extras from the edges. This is something I discovered by accident one day and I believe it really makes a difference when using the feather technique.
Then just go to cut.
This technique is the same on no matter what background you use. Do not color the backgrounds white. This is what we are trying to get rid of. There is nothing prettier than a nice clean tube. If you do a lot of beveling and shading its important to have a clean tube.
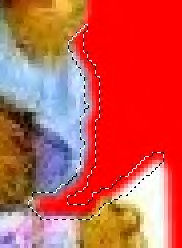
*If you have a part that is too pointy I fix it by taking the

and going almost touching the tip you want to cut off and the joining. Then cut. This will barely take off the tip and will round it out.
Another tip is you can take the dropper tool and selecting a color close to what you want to fill and fill in any booboo's that aren't to bad.
When satisfied with you image then just go to image, copy. Then image, paste as a new image.

*Most images need a little boost to their color. I then go to Colors, Adjust. Gamma Correction. I usually keep mine set at this and if it needs more just do it again.

This will add a little more depth to your colors. Also most images need to be sharpened.
That's all there is to it! Easy, just take your time and enjoy. You can either save this then as a PSP file which is a tube or you can export it through PSP naming it there. There is nothing more rewarding that a nicely cleaned tube! If you feel you need to resize-please remember to sharpen.
Happy Tubing!

Updated: Sunday, 15 February 2009 11:37 AM EST
Post Comment | Permalink | Share This Post