|
Often times people ask me how I get such detailed pictures of my customs. Here's a tutorial that should help you get decent results and ramp up your picture quality. Your budget will come in to play however, like if you can afford a higher end digital camera, and light tent. Keep in mind these are just the steps I take for my photos and there are all sorts of different ways of going about taking pictures. I'm not professional photographer and if you know a friend who happens to be one get their input on the subject. If you need a great digital camera for taking close up photos (and all other depths) of your figures I can recommend these two. They're favorably priced and available from Amazon with free shipping. Buy the Canon Powershot A2500 Camera Buy the Nikon COOLPIX L26 Camera Now let's tale some pictures!
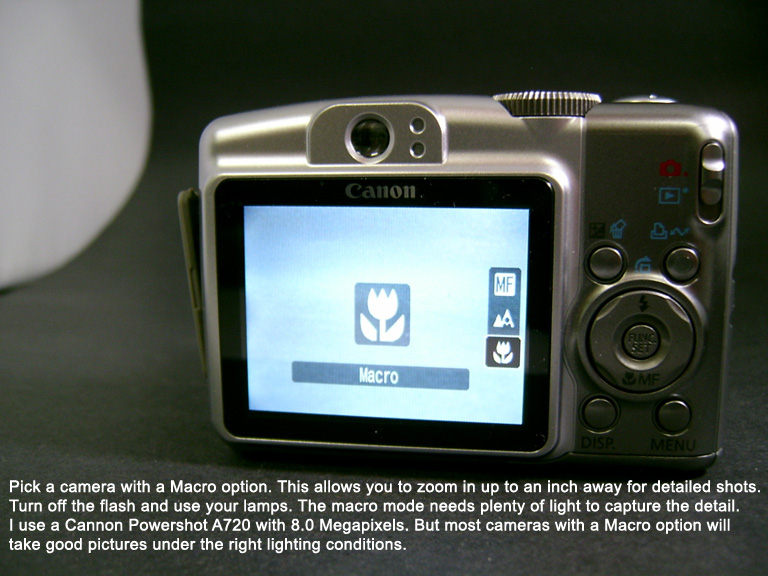
Step 1: Get yourself a Camera with a Macro feature
The brand of camera is usually a personal choice and can be limited by your budget. My rule of thumb is to go with a company that has experience in making lenses such as Canon, Kodak, Nikon, etc. That way you know you're getting a great lens, as just about any company can make the rest of the camera. Back to the macro feature. It requires two things, lots of light and a steady shot. That brings us to the next steps.
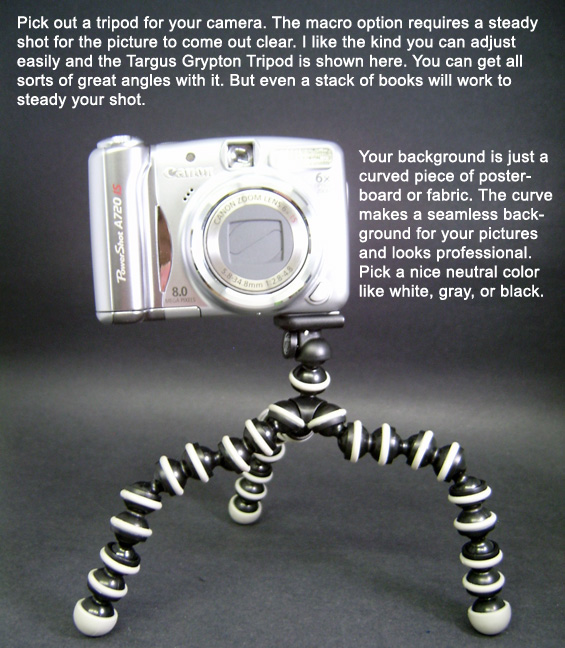
Step 2: Tripod and Background.
Technically you can set your camera on a stack of books and call it good because all you need to do is keep your camera perfectly still while taking a macro shot. But if you want to get good angles and different perspectives, you'll want a tripod. What tripod you get will depend on what setup you'll be doing. I take my pictures on a table and have room in front of my light tent so I don't need a tall tripod. However if you're taking pics on a workbench up high you may want a full-sized one with extending legs. Fabric can also be used as a background and almost all quality photocubes or light tents have an assortment. Black felt works really well and you can even use a black sheet.
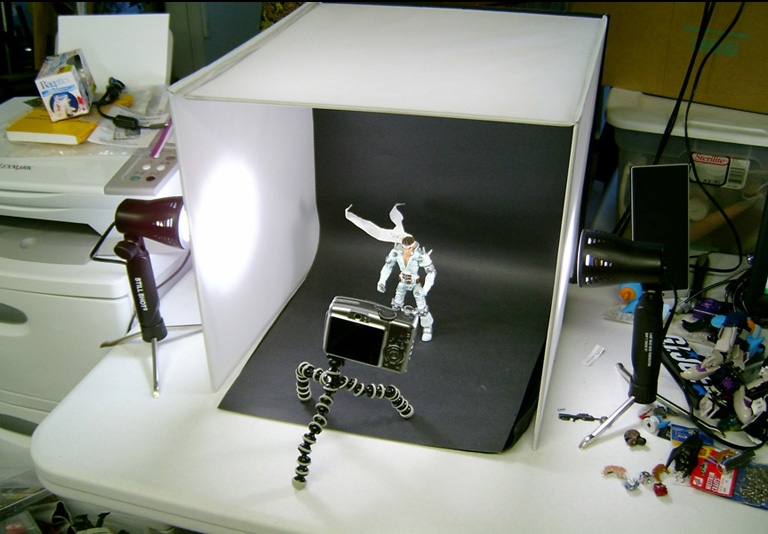
Step 3: Buy/make a light tent and lamps.
Remember I said your macro shot needed a lot of light? That doesn't mean you need to set up tons of 100 watt lights everywhere around it. A light tent or photo cube is a very simple way to achieve this. You can build yourself a tent like this one and I had one similar that I made for a very long time. Or snag a light tent on amazon/ebay and they work really well as they are made of special reflective photo material and come with an assortment of backgrounds, lamps, etc. It all depends on your budget. Your lighting is very important. Try to find bulbs in the 5000 kelvin range as that's the color-corrected 'daylight' lighting. The bulbs are usually tinted blue in color and won't give your photos a yellowed tint like regular incandescent. The lamps you see in the above picture came with the light tent but you can easily buy two 100watt daylight bulbs and two clamp lamps at Walmart to get the same effect.
Step 3: Photo Editing Programs. Now that you've taken a picture it's time to download it into your computer and edit it. You will need a photo editing program of some sort. Free ones like GIMP, Photoscape, Picasa, and the free Adobe CS will work, you can even crop and resize photos with MS paint. The basic edits you will want to make on your photos are: Crop Photo: Resize Photo: Brightness/Contrast: Alter Color: Advanced Techniques/Tips There's all sorts of lighting tricks you can use to take some unique pictures. Check your camera's options, some have night-time mode, fireworks mode, etc. Turn off the lights and use a flashlight shining down over top your figure like a street light. Or hold up a red piece of colored plastic to the lamp on one side. There's all sorts of ways to experiment with lighting. Also depending on your photo editor you can create your own lighting effects, add borders, words/titles to the picture, and create a unique shot of your custom.
And that's about it for the guide! So a camera with Macro feature, a good background, tripod, 5000k bulbs, light tent, and photo editing program will set you up for taking professional looking pictures. Remember you can make an amazing custom but if the picture doesn't do it justice, nobody will truly appreciate it. This is especially true when sending your customs photos into ToyFare or hosting them in an EBay auction. A great picture means great results! Looking for other custom action figures made by awesome customizers around the world? Click your favorite series below to be taken to this week's offerings!
|