Navigation
Jim's Garage
Back to the Garage
Rear Fuel Tank Installation for my F-series Pickup
View N.E. Ohio Slick Chapter Sign In
Sign N.E. Ohio Slick Chapter Sign In
Rear Fuel Tank Installation
Contact
Slick 60's
Rear Fuel Tank Installation for my F-series Pickup
View N.E. Ohio Slick Chapter Sign In
Sign N.E. Ohio Slick Chapter Sign In
Recently,I came across Skip Porterfield's article on installing a Mustang fuel tank in a 60's vintage F-series Pickup. I found this to be great information for Carb. pickups, but I wanted the looks of a vintage ride with the Performance of Fuel Injection!
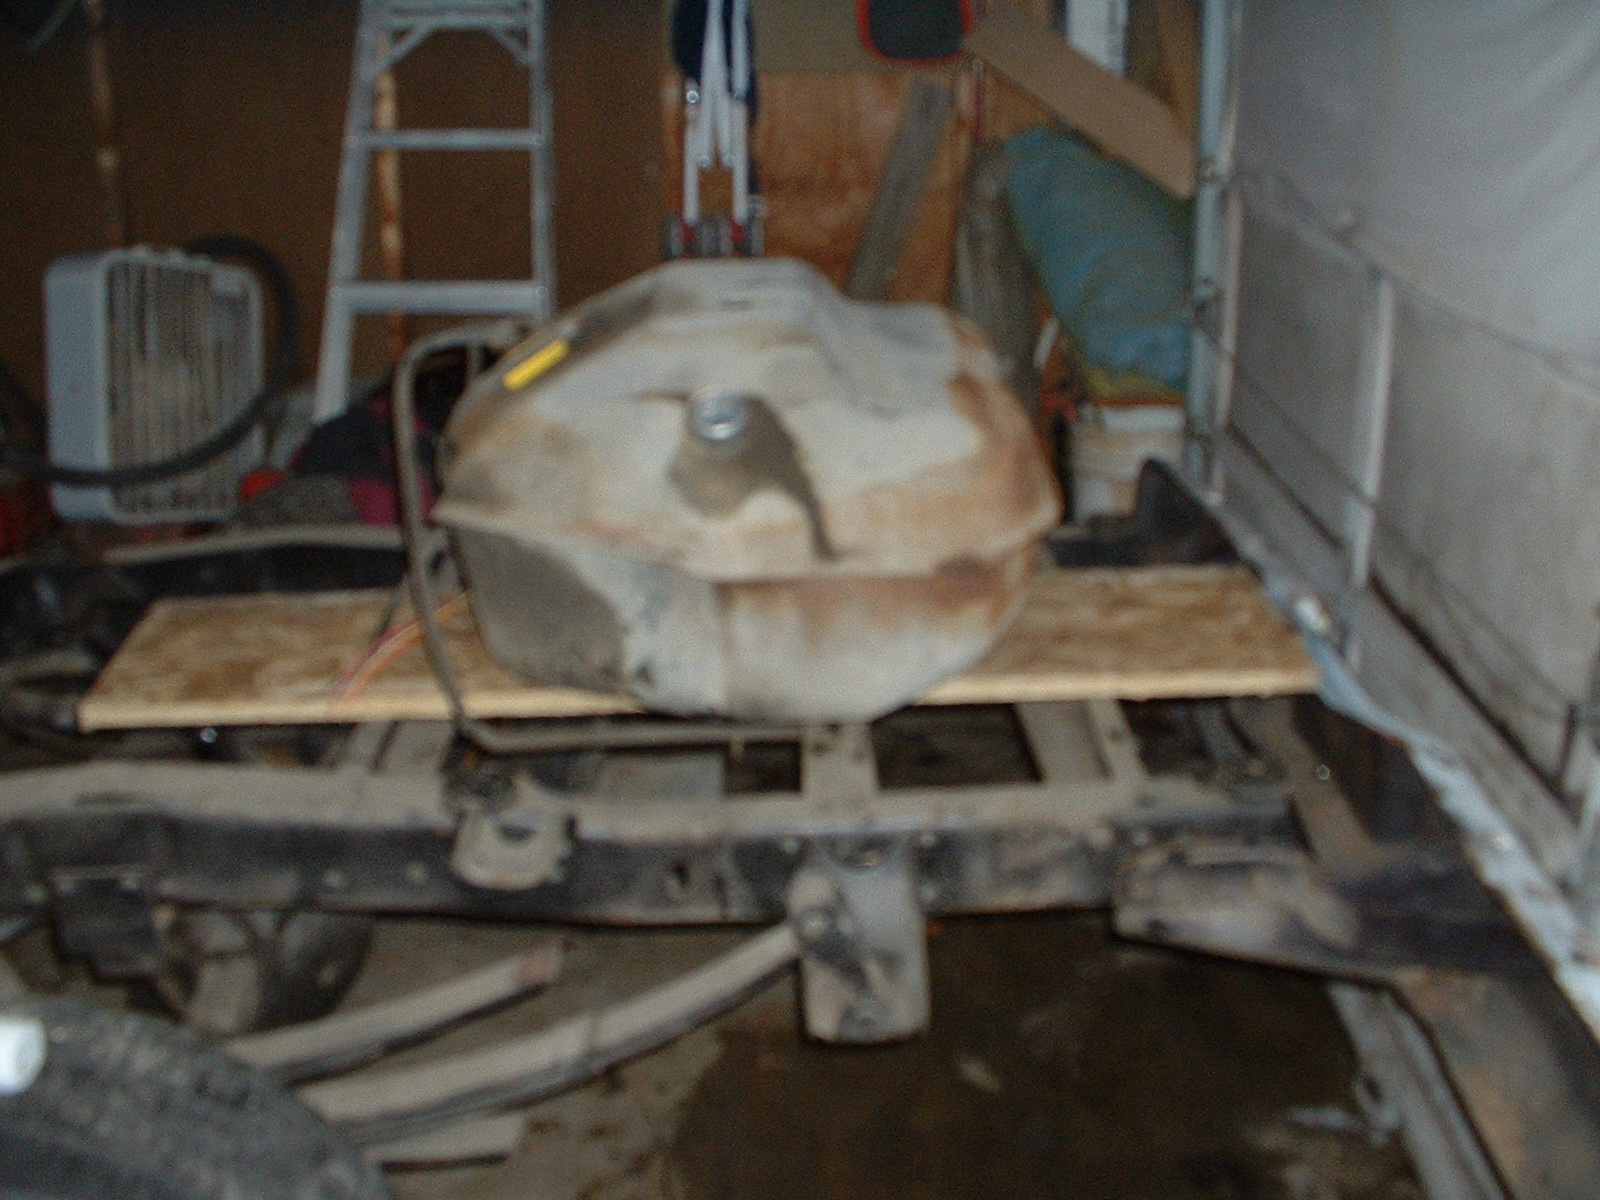
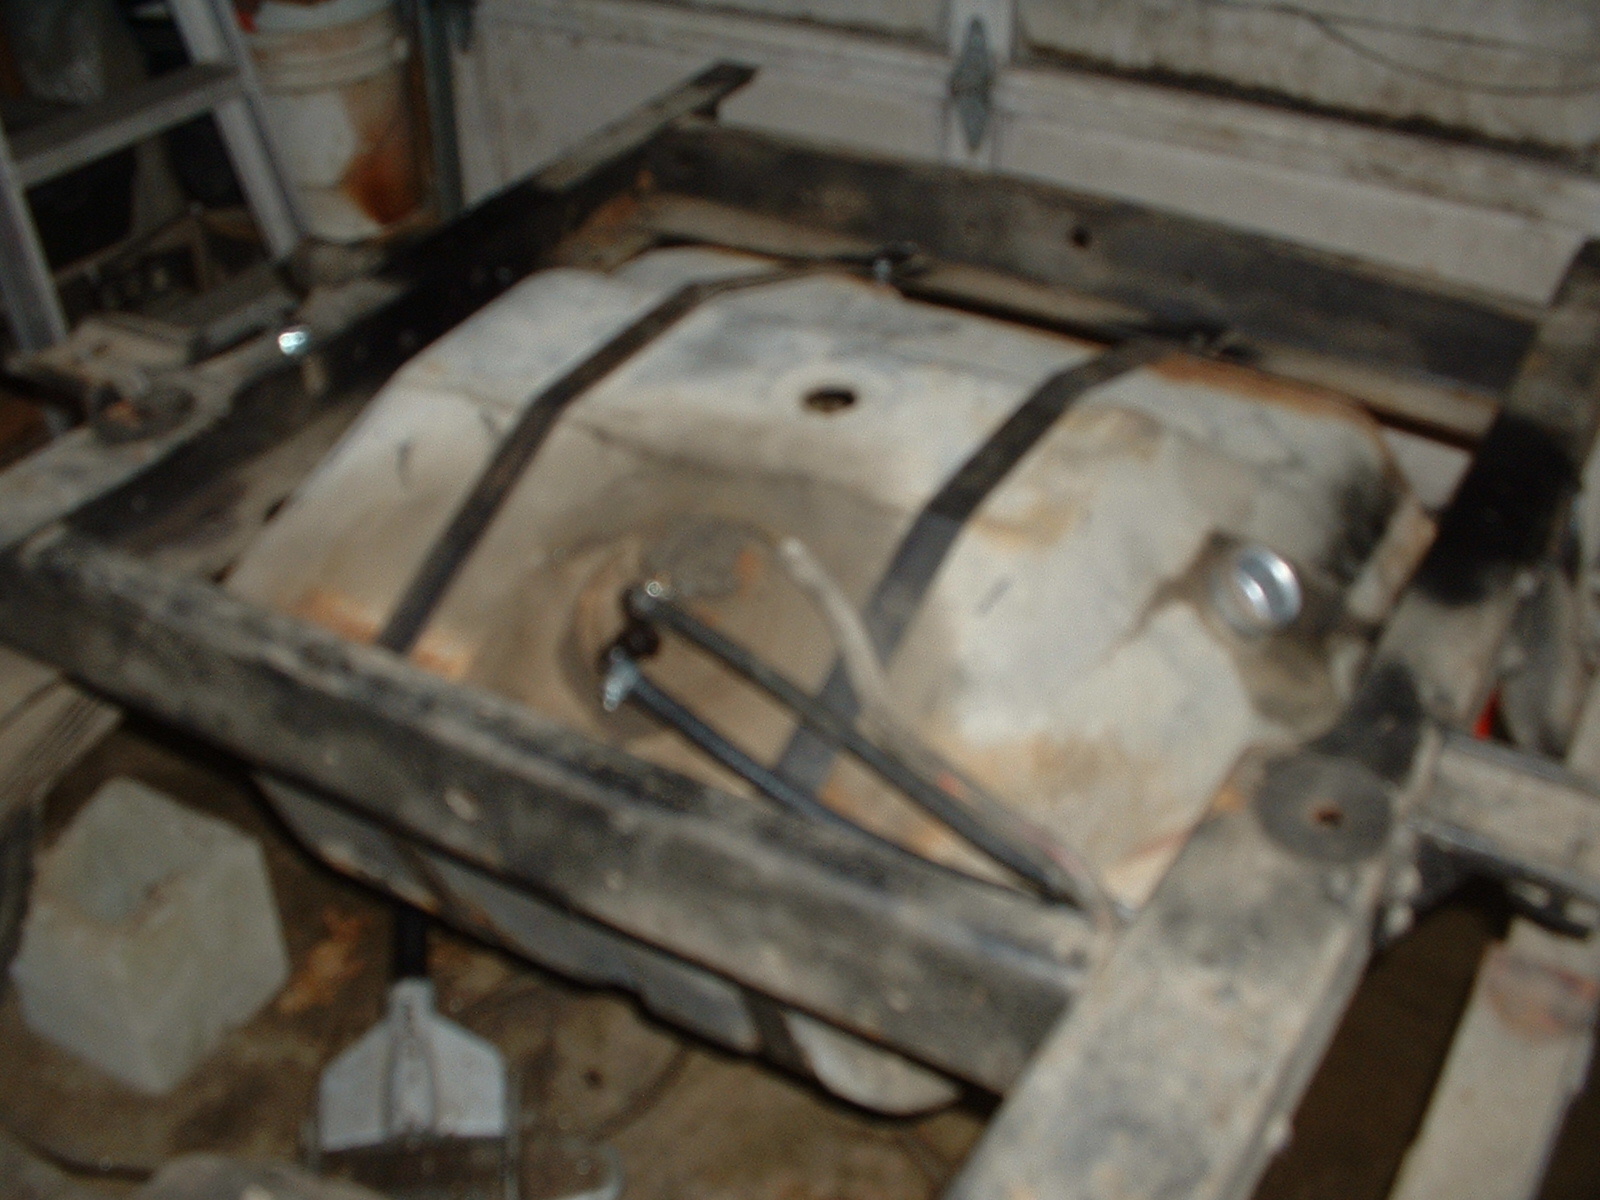
After scoring an aftermarket fuel tank catalog from my local store, and removing the bed from my '65 F-100, I measured and found that a stock fuel tank from a '85 to '90 Bronco II would fit between the frame rails without cutting the frame.
This tank, Spectra Premium Indrustries #F10B measures 29 1/4 X 24 5/8 X 13 7/8 and holds a whopping 23 gallons of fuel (for those long cruises)
The next step is to remove the crossmember that runs between the leaf spring shackel brackets. (Marked by red arrows) and the strap that connects to the crossmember above the rear axle.
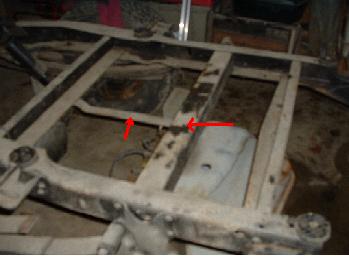
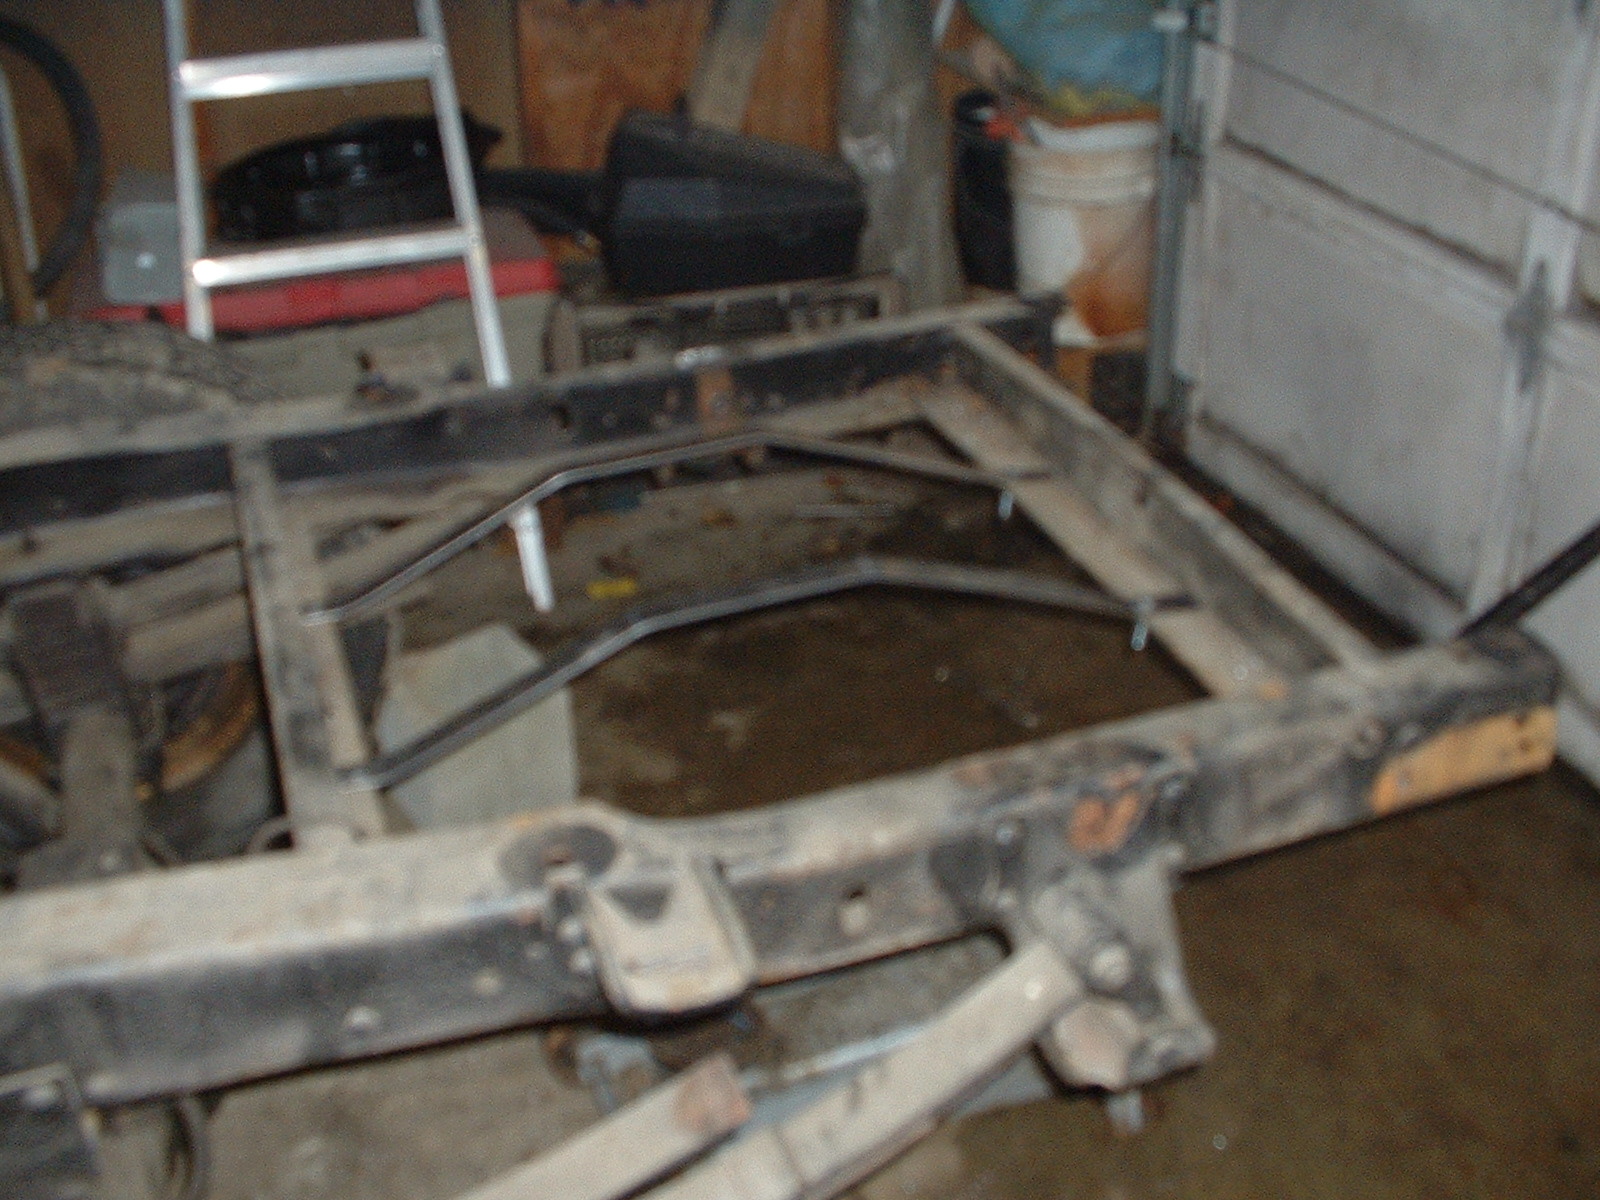
Drill, chisel, or torch the rivets out (four on each side) and remove that crossmember. Prime and Paint the frame (I sugest POR15)
Now that the tough work is complete, you will need two pieces of 1 1/4" X 1/8 strap, 7 feet in length. Cut 1 piece 31" & 1 piece 39" from each 7' piece. Also needed will be (4) 3/8-16 X 1 1/2 bolts, 4 washers, 4 lockwashers & 8 nuts. Drill 3/8" holes in the two 31" straps approximately 1 1/2" from the ends. Bend at equal lengths to make the upper straps as shown.
Bolt these in the bolt pointed downward, and no washers.
Using a floor jack, lift up the tank into place with a layer of bicycle intertube between the straps and the tank for cushioning. The remaining strap will measure 41". Bend a 90 degree angle at one end of each of each of these 1 1/8" from the end. Drill a hole in the center of this area & attach to the front mounting bolt with a washer and lockwasher. Bend carefully around the bottom of the tank moving backwards and upward to the rear bolt. Again, put a piece of bicycle innertube between the tank and lower straps. Then bend another 90 degree in the back, and mark to drill & cut off excess (about 2 inches)
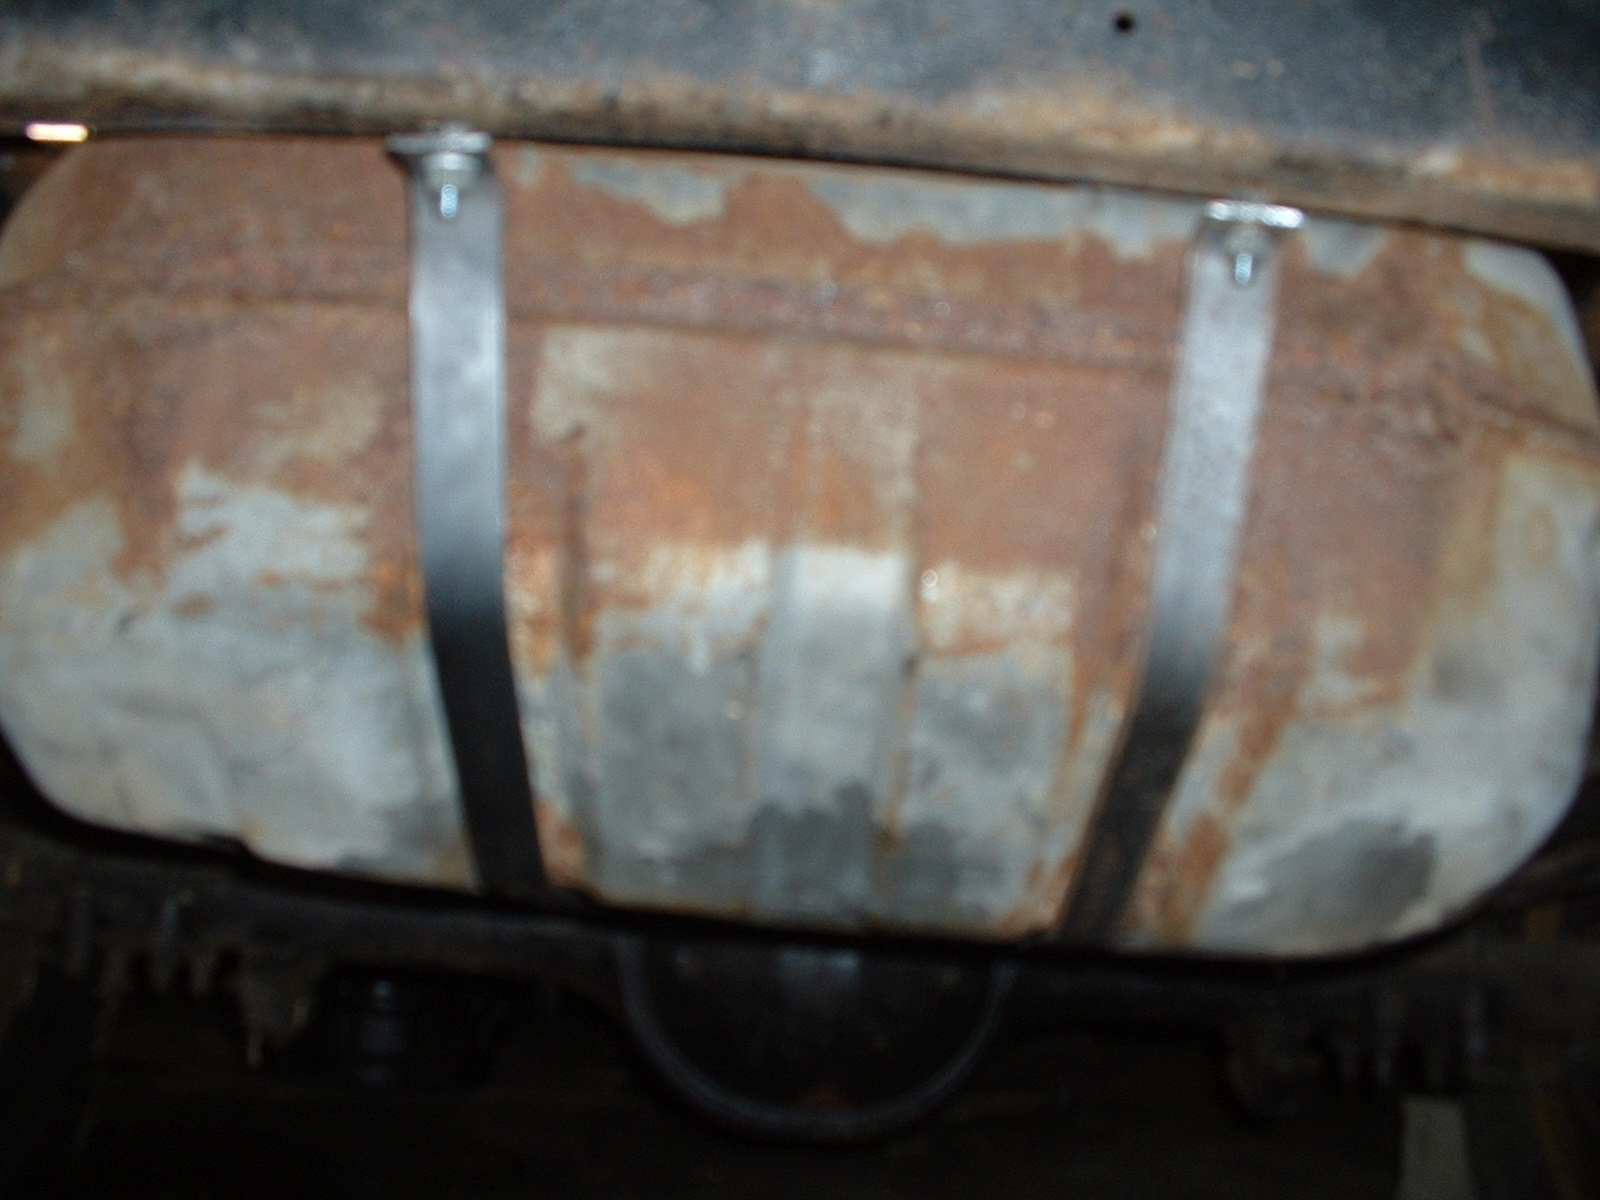
When all of this fits properly, Remove & paint everything with POR15 to protect from rust.
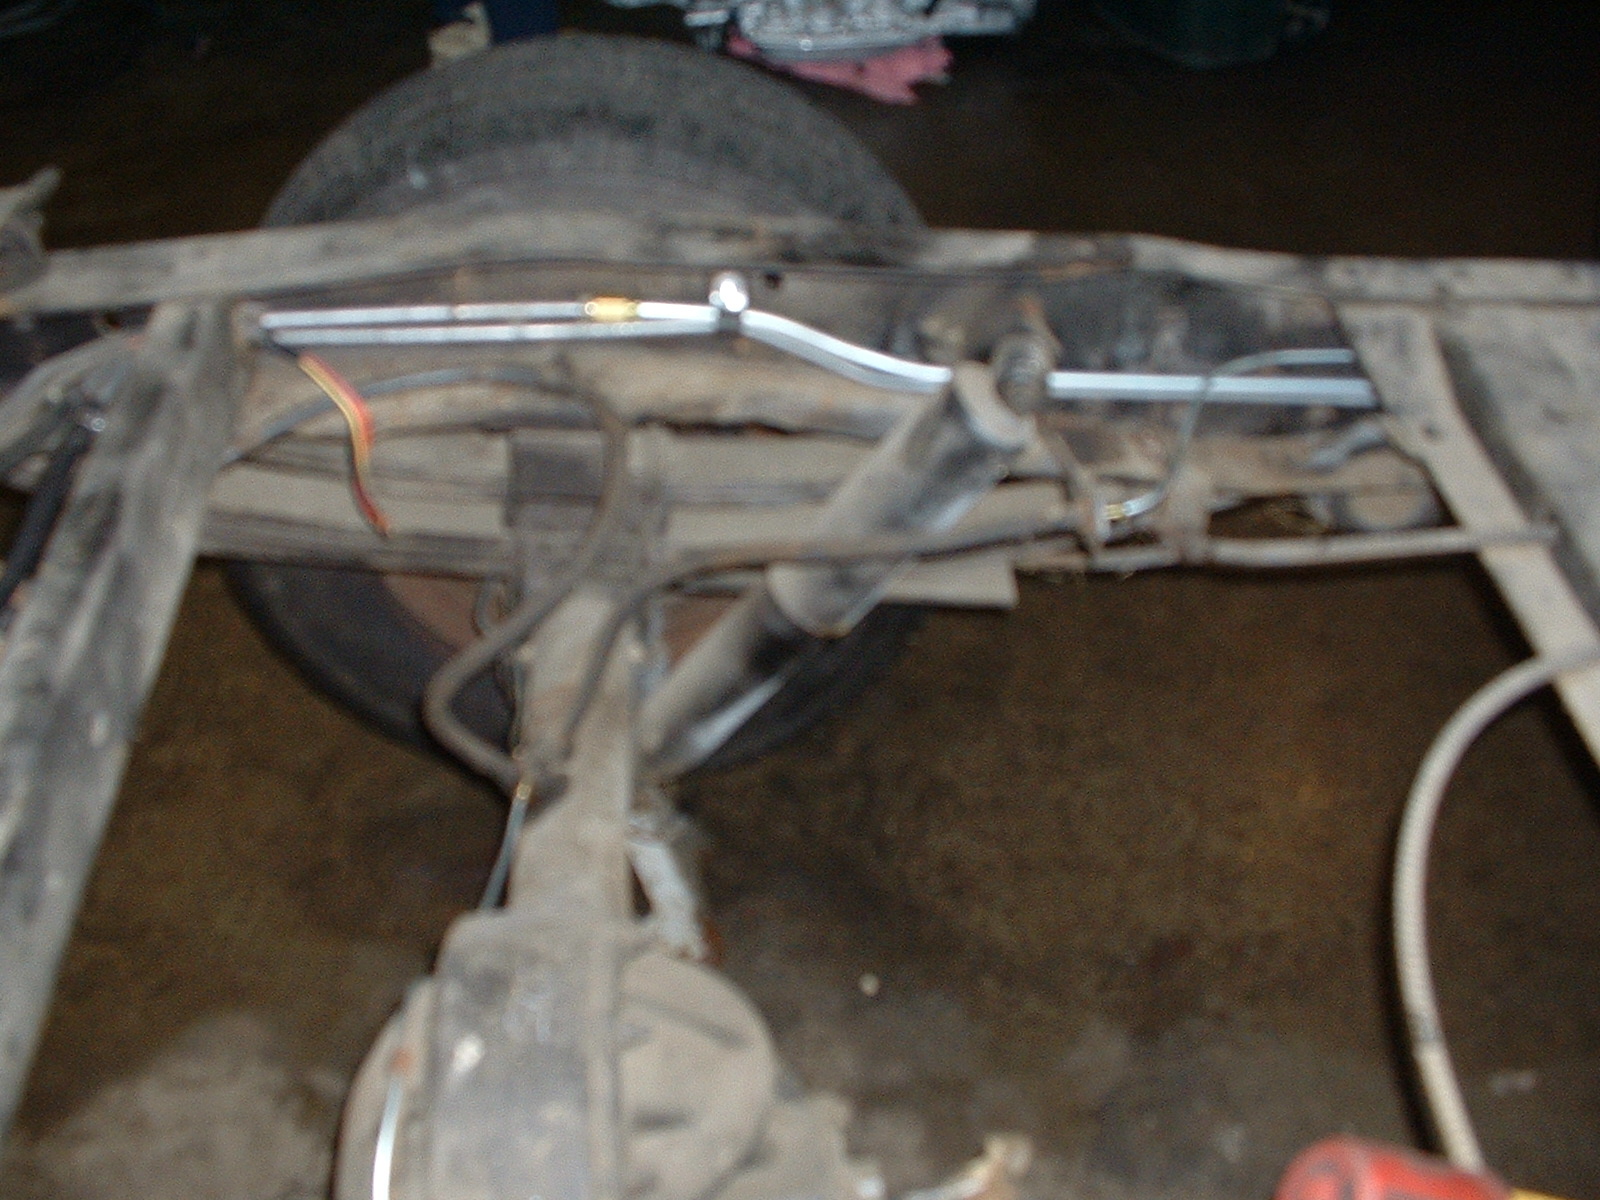
To attach lines to this tank, I purchased replacement/repair ends for a ford fuel injected vehicle & cut the nylon line off the "quick disconnect" ends carefully with a razor blade. I then bent 3/8" steel line (supply) and 5/16" line (return) and attached them to the "quick disconnects" with high pressure hose and proper clamps. (NAPA #705-1556 and 705-1557) There is a diagonal area in the front left of the fuel tank that is indented for the BroncoII's exhaust. These lines should connect in the left front corner of the tank to ease removal once the bed is on.
I then removed the fuel tank from the cab, but left the filler neck and installed a locking gas cap. I made a bracket inside to support the neck.
I opted to drill a hole in the bed floor, rather than ruin the bedside by drilling a hole there, duh! I have a rear bed sidebox in which the filler neck and cap are located. This maintained the "stock look" and made for an easy fix to having a fuel tank inside the cab.
I hope that this has helped for anyone wanting to install a fuel injected engine in our beautiful Ford trucks.
Jim Henderson PUGSLY