
REQUIRED TOOLS: drill – hacksaw – wrenches – protractor, miter saw, or MK I eyeball – screwdrivers (slotted, Phillips, and vodka) – band-aids and iodine – profanity.
And at some point or another, of course, a hammer.
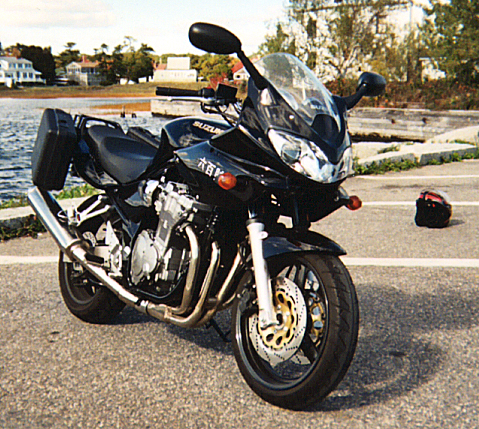

I wanted the convenience and security of hard saddlebags on my 2000 Bandit 600S (aka "Y2K B6"), but I didn't like the bulkiness and expense of aftermarket bags (about $300-$600 for a Givi setup, for example) - my bike is primarily a commuter, so I didn't need the capacity and detachability that the Givis offer. Browsing online, I found the Case Club website and their line of Low Cost Utility/Instrument Cases. I ordered two 17.0 x 12.0 x 5.5 FR2 cases for sidecases, and a 10 x 7.5 x 3.75 box to mount on my luggage rack as a small topbox.
For mounts, I replaced the four bungee spools with 8mm threaded rod, and the two grabrail bolts with 1/4" rod (WARNING: this should have been a metric size, of course. I must have re-cut the threads.) I threaded nuts along part of the exposed length of the 8mm rods to give them more strength, and to provide enough diameter to slip short segments of PVC pipe onto them. One end of each pipe was cut at approximately a 75-degree angle, to allow an aluminum bracket to slip onto the rod and rest against the pipes roughly parallel to the tailsection. Same procedure for the 1/4" rods, but with copper tubing and "O"-size rubber washers around the bolts to support the tubing. The pipes and brackets were sprayed satin black (before installation, of course.)


The sidecases are drilled through to mount to the aluminum brackets, which are mounted on the rods. For lateral support on the lower portion of the cases, I drilled holes in the top/sides of the rear fender and inserted a length of 1/4" threaded rod through them. Again, I used copper tubing (with rubber support washers) to cover the rods. The ends of the rods are bolted through the cases.
There. Clear as mud, ain't it?

Since I wanted to preserve the lines of the bike as much as possible, I mounted the cases closely parallel to the tailsection. This fouled the turnsignals, so I removed them and replaced them with amber marker lights from Autozone. I cut housings for the lights into the backs of the cases, running the wires along (and ziptied to) the lateral support struts. The bulbs are lower wattage than the stockers, so they're dimmer and they cycle faster. I'll be looking for brighter replacement bulbs in the spring.

I mounted a top box with an aluminum plate that goes under the luggage rack. Two bolts covered with rubber washers go up through the plate and into the bottom of the box, with the luggage rack sandwiched between (the top box is off in these pics because it looks a little too small. I'll be ordering a larger one next spring.)
I'm really happy with how this project turned out. There are only three drawbacks:
1) The cases are not detachable. So what?
2) They're not waterproof. No problem - I have a pair of rubberized East German army surplus rucksacks that fit perfectly as inner bags.
3) They're not lockable. I took care of that by drilling a small hole through the two halves of the bags at the top and locking them with a small combination lock.

DISCLAIMER: This Frankenstein project should be undertaken only by idiots or madmen. I accept no responsibility if you're stupid or insane enough to attempt it. If you ruin your bike, make swiss cheese out of your bags, skin your knuckles to the bone, kick your dog or yell at your SO, don't blame me. I warned you.
EXPENSES:

Y2K B6 Home • Kanji • What Your Bike Says About You • Pics • Links
