The battle begins
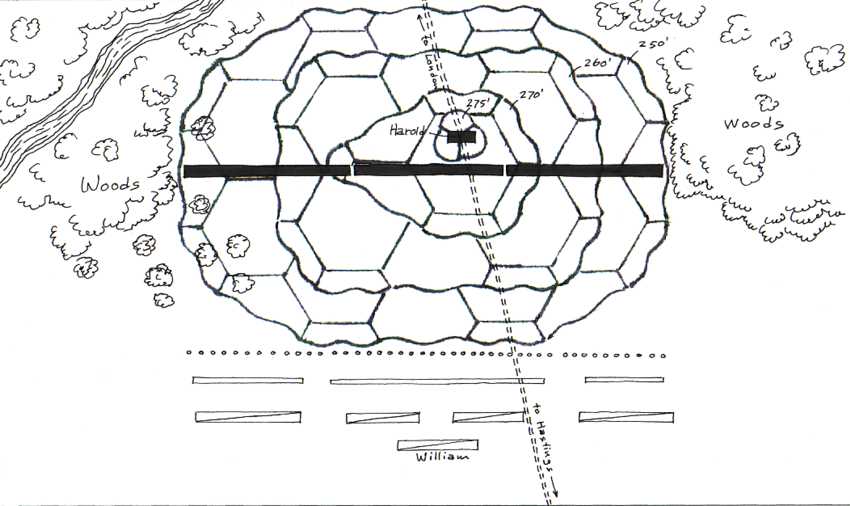
The opening disposition is according to the historically described order of battle: "refight number fourteen" is viewed from the English-right and the Franco-Norman-left, with the Bretons in the foreground.

The first set of sequential pictures is of "refight number fourteen", which I photographed for (just about) every turn of movement. Combat, once joined, was photographed every few turns: had I shot each combat turn the pictures would have been obviously redundant; for although The Art of War produces historically accurate rapid results, it does take several "minutes" (usually) before one side begins to noticably worst the other side in a melee.

The battle begins
The opening disposition is according to the historically described order of battle: "refight number fourteen" is viewed from the English-right and the Franco-Norman-left, with the Bretons in the foreground.
(The miniatures shown are almost entirely by Old Glory. A few odd manufacturers are thrown in. The dead minis are a combination of old plastic Airfix Gauls, Robin Hood and Sheriff of Nottingham, old "McEwan" lead, and some few *elite* Old Glory casualty extras; when a figure becomes utterly obsolete or too damaged to be worth repairing, it becomes a dead marker. And incidentally: when I use dead markers, they become uncrossable terrain to horses, and cut movement to a half-walk for infantry: also, no fighting across the dead is allowed: because in The Art of War only base edge contact allows melee contact: separated bases cannot melee. I did not use these restrictions in the following refights, however, as they are only my personal "house" rules and not an official part of The Art of War: that is why you might discern in the pictures some bases moved on top of the dead.)

Taillefer challenges the English
The Norman army remained drawn up in their formations for an unspecified period of time, reluctant to attack it seems. Whether or not William requested it, a champion (Taillefer by name) rode out and challenged the English. An English champion stepped from the ranks. They exchanged blows and Taillefer was victorious. (Had the English champion won the combat, the Normans would have suffered a morale reduction: the English, comparatively confident at the outset on their chosen ground, did not risk much; and the loss of their man did not effect them noticably.)

The Norman army advances
Taillefer's victory heartened the invaders. They advanced up the lower slopes of Senlac hill. William with his reserve remains well to the rear, so he can observe how the battle progresses, and move to counter any eventuality.

The Norman marksmen shorten the range
While William's archers and crossbow-men advance to shooting range, the rest of the Norman army stops and waits for their missiles to take their toll: but the slope inhibits their effective range: they must move in closer still. Within 100 yards (10") the heavy infantry are still invulnerable to bow fire; but the c. 25% crossbow-men can barely cause some damage to them. The English casualties are light so far.

The knights and spearmen move closer
The marksmen are running short of missiles now. The "softening up" period is almost over and the English casualties are very disappointing to William's side.

The marksmen run out of missiles and begin to withdraw
Mules bearing the reloads arrive on the field in the rear of the Norman army. The French-right marksmen run out of missiles first and withdraw through the opened ranks of spearmen and knights.