
Guage Cluster Removal
Tools needed:
(1) Short, stubby phillips head screw driver
(1) Long handled phillips head screw driver
(1) Flat head screw driver for prying
(2) Hands, more are optional
Step1: Remove the two screws located on the underside of the top of the cluster. Indicated with the red arrows in the picture directly below.
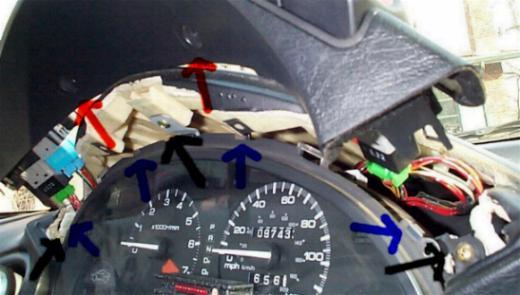
Step2: Pull out the trim, tug!!!
Step3: Unscrew the top screw, and the ones on each side (total of 3). These are indicated by the black arrows.
Step4: Pull out the cluster, and then unplug the plugs behind the cluster. Automatic transmissions have 5 plugs, manual transmissions have 4 plugs.
Step5: Time to disassemble the lens from the cluster. First, take off the 4 little metal clips indicated with blue arrows in the above picture.
Step6: Pull of the little knob that adjusts the lighting of the cluster, along with the knob of the tripometer. The tripometer should come out as a long piece about 3" long.
Step7: Undo the clips around the edge starting at the bottom and working your way around to the top. These are indicated by the red arrows in the picture below. There are about 7 of these.
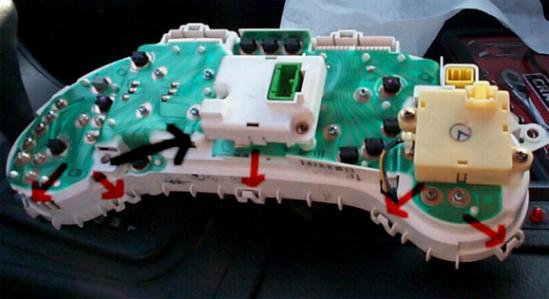
Note: The black arrow points to the box that displays the gear you are in in a car equipped with an automatic transmission. I left this unplugged since I won't be using it in my tranny swap.
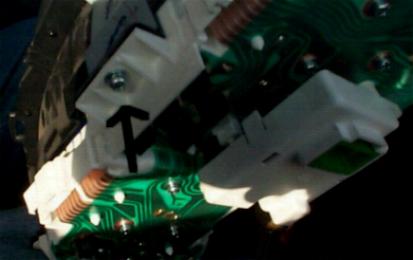
Step8: Undo this screw pointed out below.
Step9: At this point, you can do whatever you want. If you are changing to white face guages, just pull off the needles. I decided not to because it usually results in your guages being inaccurate until they are calibrated in some way. I was simply changing the trim ring to one from a manual del Sol so it looks more like it came from the factory as a manual transmission.
Step10: Put everything back in the reverse order. Don't forget to reconnect the plugs!
