|
|
|
Preventing & Controlling Potato Blight

Potato blight (Phytophthera infestans) requires a mild & damp climate in order to infect potato foliage. In many parts of the UK & Ireland this is the norm during the potato growing season.
Whilst I would personally rather not use them, over 20 years of growing potatoes leads me to the conclusion that it may not be entirely possible to avoid using fungicides on organic potato crops. The advice given below is based on the standards followed by commercial organic potato producers in the UK.
Blight prevention
Potato blight cannot be cured and, particularly in an organic situation, avoidance is definitely the best policy. Under commercial UK organic standards certain protectant fungicides are currently permitted, but not on a routine basis. However, it is highly likely that some of them (copper-based) will be withdrawn at the end of March 2001.
Hygiene is very important
� make sure there are no tubers left-over from last year growing and creating a possible source of blight infection
� fortunately, blight does not normally survive in soil
� a compost heap which heats up properly will kill any blight spores on foliage and tubers
Avoiding blight
Blight is not generally a problem with early harvested, early varieties.
� plant early varieties if suitable/possible
� plant healthy, blight-free seed
� select varieties with high blight resistance
� listen for, and pay attention to, blight warnings on the radio or in the press
� if the blight pressure is high apply a permitted fungicide, particularly to very susceptible varieties
If blight is found on foliage and tuber yield is acceptable
� remove haulms (tops) immediately and compost them
� apply a permitted fungicide to remaining stalks
� once skins have set, harvest and use the crop promptly
� carefully remove all blighted tubers during lifting and storing
� do not consider long-term storage for potatoes which have been infected with blight
If blight is found on foliage and tuber yield is still very low
In this situation the likelihood of having a low yield of blighted potatoes is considerable. This is one of the main risks of growing organic potatoes.
� apply a permitted fungicide as soon as blight is diagnosed
� monitor blight development on a daily basis
� if blight continues to develop rapidly either remove and compost the haulms, or leave them to die naturally
� a further application of fungicide should be made once the approved time interval has elapsed since the last application
� once skins have set, on the tubers harvest and use the crop promptly
� carefully remove all blighted tubers during lifting and storing
� do not consider long-term storage at all
In reality organic potato producers frequently have to remove potato haulms early because of foliage blight. This reduces yield but helps to avoid tuber blight
Fungicide selection
Only selected sulphur and copper-based protectant fungicides are currently permitted, under commercial UK organic regulations. The copper-based ones may be withdrawn at the end of March 2002. This will make preventing blight on organic potatoes very much more difficult and risky.
Only use proprietary products, as home-made formulations are not allowed under the UK's Food and Environment Protection Act 1985 (FEPA) and the Control of Pesticides Regulations 1986 (COPR). Similar legislation may also apply in other countries.
Fungicide application
� only apply fungicides when a real need exists - ie when the risk is very great
� do not apply fungicides on a routine basis
� apply fungicides at the rate, water volume and spray pressure given in the product labelling
� with tractor mounted sprayers pay particular attention to tank agitation and nozzle sizes as some products have a tendency to 'settle out' and/or block small nozzles
� observe minimum time intervals when giving subsequent applications
Beware of unexpected tuber blight !
Foliage (and subsequent tuber blight) blight control has been covered above in relation to an identified foliage blight infection.
However, blight spores can sometimes wash off leaves into the soil without infecting leaves, resulting in unexpected tuber blight.
To avoid taking blighted tubers into store
� at the time of haulm removal, and a week later, inspect a sample of tubers from across the field carefully
� If blight is found the crop should be left in the ground for several weeks until blighted tubers rot and 'melt' into the ground.
Once the crop in which blight has been found has been harvested
� inspect the crop frequently (weekly) for signs of further tuber blight
� use the crop quickly, ensuring all blighted tubers are removed
Tuber blight found during storage
The measures given above offer the best means of avoiding blight entering the potato store.
If blight is discovered during storage
� sort the crop rigorously to exclude blighted tubers
� use the crop as quickly as possible
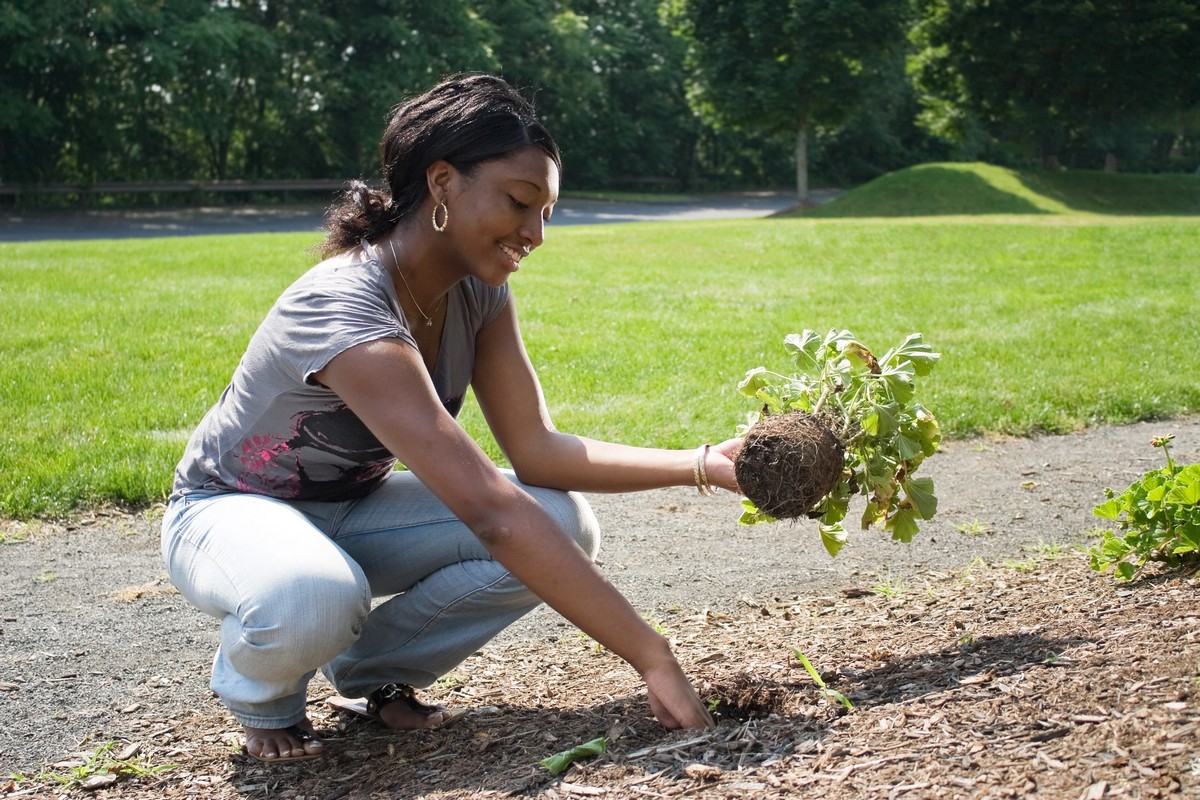
If you need help planting your next tree or an overall garden maintenance is needed, check out Portland TT�s services. See ya' later.
Natural Insect Controls are Cheap and Effective in the Garden

Organic gardeners can use safe physical pest control methods such as bug vacuums, row covers, sticky traps, handpicking, cutworm collars, and water sprays to stop bugs.
Organic gardeners faced with garden pests must choose the right controls to provide the most efficacious results with the least toxicity. Physical and mechanical pest control methods are desirable in that they are completely non toxic to people and wildlife, and in some cases, they can exclude garden pests before they even reach the plants.
Row Covers
Floating row covers are barriers made of synthetic fibers with a thin weave that allows light and water to pass through freely. These barriers prevent pests like cucumber beetles and caterpillars from reaching their host plants. Row covers may also provide minimal frost protection, especially in the fall, when the soil releases heat at the end of the day. Gardeners must remove row covers when flowers appear, to permit pollinators to access plants.
Sticky Traps
Although organic gardeners can buy sticky traps designed to trap specific garden pests, these traps are cheap to make. Start with a foundation that lures the target pest. For example, gardeners dealing with apple maggots can use a red ball as a trap base. Many flying insects are attracted to yellow, so use a yellow card to control fungus gnats and whiteflies. Coat the trap with a nontoxic sticky substance, such as Tanglefoot. To make trap cleaning easy, cover the trap base with plastic wrap, apply the sticky substance to the wrap, and change the wrapper when it loses its stickiness.
Handpicking Bugs
Removing garden pests by hand is a good option for gardeners tending a small plot or container garden. Inspect plants closely in the morning and remove egg masses, caterpillars, slugs, beetles, or any other pest large enough to grasp. Always wear gloves to prevent skin irritation or stings. Drop the insects into a bucket of soapy water, or save a few to make bug juice to fight future pests.
Bug Vacuums
Gardeners can remove garden pests with a vacuum when the insects are too numerous to remove by handpicking, such as a whitefly infestation. Bug vacuums are also useful for squeamish gardeners who don�t fancy the idea of grasping insects, even with gloved fingers. Finally, bug vacuums are handy for removing the occasional aggressive wasp and black widow spider that lurk in the shadows of the garden. Some bug vacuums kill the insect with an electrical shock; others have a catch-and-release feature.
Water Spray
Spraying garden pests with a strong blast of water from the hose may not seem like an effective method of control, but when insects such as aphids lose their purchase on a host plant, they usually are unable to reconvene in large enough numbers to continue their tirade. In addition to aphids, gardeners can control leafhopper nymphs and spider mites with a jet of water. Use this pest control method in the morning, so plants can dry before fungal diseases develop.
Needing professional help to clean up your garden from pests, plant trees or do general garden maintenance, hire a professional company like Portland TT.
How to Mulch: Proper Mulching Techniques with Synthetic & Organic Mulch

Learning the proper mulching techniques for both synthetic and organic mulch will keep your plants and soil healthy and the weeds at bay. Doing it improperly or choosing the wrong type will make it more difficult for your plants to thrive.
Benefits of Proper Mulching
Regardless of what you�re trying to grow, applying mulch will help in a number of ways:
� Keep weeds at bay
� Help ground hold in moisture by slowing evaporation
� Depending on the mulch types you choose, it will either help to keep ground temperature more consistent, warm the soil in the colder months or cool the soil in the hotter months
� Add nutrients to the soil (organic mulch) leading to fuller plants and fruits and a healthier harvest
� The moist and warm conditions it fosters keeps the worms happy which also leads to healthier soil
Proper Mulching with Organic Mulch
When mulching a garden with organic mulch, apply in the fall or early spring when the soil temperature is not too cold or overly wet or dry. Organic mulch added to your garden in the fall has the added benefit of keeping your garden soil warmer during the winter and gives it the time to decompose and improve your soil's quality before your spring planting begins.
Organic mulch should be applied as follows:
1. Pull all weeds
2. Loosely apply a healthy layer of mulch using a shovel � 4 to 6 inches (10 to 15 cm) in sunny spots and 2 to 3 inches (5 to 7.6 cm) where your bed receives partial shade (doesn't apply to cocoa bean mulch of which you only need about an inch/2.5 cm). The mulch should be loose enough to allow moisture to pass through, so do not pack it down when applying or when weeding (in other words, try not to lean or step on it after it�s applied).
3. Be sure to leave a couple of inches (5 cm) open around the stems of each of your plants and at least a foot (30 cm) around your trees and shrubs since moist mulch can encourage rot, pests and disease.
4. Loosely level out the organic mulch using a rake.
Proper Mulching with Synthetic Mulch
Synthetic mulch should be applied in the spring before you plant and is laid down in long continuous sheets...
1. Measure your bed. The synthetic mulch will be stretched taught over the entire bed, so you�ll need slightly longer and wider mulch (at least 6 inches/15cm) than the size of the bed.
2. Stretch the mulch over your bed before planting. It should be pulled tight over the entire bed so that there are no folds or loose spots that could be caught by the wind.
3. To keep the mulch in place, use landscape pins on the corners, bury the corners, push them in with a spade or weigh them down with rocks.
4. Punch holes (or cut an �X�) through the plastic where your plants will grow.
5. If you do not have a soaker hose or drip irrigation system in place, punch small holes throughout the mulch to allow air and water in.
If you need a consultation from a team of professional experts when you�re preparing your garden soil to start planting, be sure to check out Portland TT.
How to Mulch: Proper Mulching Techniques with Synthetic & Organic Mulch
Learning the proper mulching techniques for both synthetic and organic mulch will keep your plants and soil healthy and the weeds at bay. Doing it improperly or choosing the wrong type will make it more difficult for your plants to thrive.
Benefits of Proper Mulching
Regardless of what you�re trying to grow, applying mulch will help in a number of ways:
� Keep weeds at bay
� Help ground hold in moisture by slowing evaporation
� Depending on the mulch types you choose, it will either help to keep ground temperature more consistent, warm the soil in the colder months or cool the soil in the hotter months
� Add nutrients to the soil (organic mulch) leading to fuller plants and fruits and a healthier harvest
� The moist and warm conditions it fosters keeps the worms happy which also leads to healthier soil
Proper Mulching with Organic Mulch
When mulching a garden with organic mulch, apply in the fall or early spring when the soil temperature is not too cold or overly wet or dry. Organic mulch added to your garden in the fall has the added benefit of keeping your garden soil warmer during the winter and gives it the time to decompose and improve your soil's quality before your spring planting begins.
Organic mulch should be applied as follows:
1. Pull all weeds
2. Loosely apply a healthy layer of mulch using a shovel � 4 to 6 inches (10 to 15 cm) in sunny spots and 2 to 3 inches (5 to 7.6 cm) where your bed receives partial shade (doesn't apply to cocoa bean mulch of which you only need about an inch/2.5 cm). The mulch should be loose enough to allow moisture to pass through, so do not pack it down when applying or when weeding (in other words, try not to lean or step on it after it�s applied).
3. Be sure to leave a couple of inches (5 cm) open around the stems of each of your plants and at least a foot (30 cm) around your trees and shrubs since moist mulch can encourage rot, pests and disease.
4. Loosely level out the organic mulch using a rake.
Proper Mulching with Synthetic Mulch
Synthetic mulch should be applied in the spring before you plant and is laid down in long continuous sheets...
1. Measure your bed. The synthetic mulch will be stretched taught over the entire bed, so you�ll need slightly longer and wider mulch (at least 6 inches/15cm) than the size of the bed.
2. Stretch the mulch over your bed before planting. It should be pulled tight over the entire bed so that there are no folds or loose spots that could be caught by the wind.
3. To keep the mulch in place, use landscape pins on the corners, bury the corners, push them in with a spade or weigh them down with rocks.
4. Punch holes (or cut an �X�) through the plastic where your plants will grow.
5. If you do not have a soaker hose or drip irrigation system in place, punch small holes throughout the mulch to allow air and water in.
If you need a consultation from a team of professional experts when you�re preparing your garden soil to start planting, be sure to check out Portland TT.
Principles of Design - Proportion
When designers talk about proportion they are comparing all of the elements in a design with each other. Below is a photo of an arrangement that I did for a flower show on the 4th of July. When flower show judges judge an arrangement, they are supposed to look at the amount of plant material in relation to the container, the height of an arrangement relative to its width, and the whole design relative to its allotted space. The height of the plant material in an arrangement is supposed to be twice the height of the vase. By those standards, the proportions of my arrangement were rather eccentric.
The show was held in a school library and this arrangement was at the end of the checkout counter, so the space between the counter and the ceiling was the �allotted space�. The most effective aspect of this arrangement was the way that it towered over all of the people. For humans, man is the measure of all things. We see something as large or small in relation to ourselves. Everything that humans create is on a human scale. Our sense of proportion is always connected with our own bodies.
When thinking about proportion, we should also be thinking about scale. The arrangement in the photo was created using three containers - all synergistic arrangements must be use at least three containers. The two containers on the left side of the photo are dominated by bright red Crocosmia �Lucifer� flowers - the tallest stems soar to at least 5 feet. The third container had a single short stem of this flower, but it mainly contained yellow flowers. The taller flowers are a species Peruvian lily (Alstromeria aurantiaca) and the shorter are are Saint John�s Wort (a bush hypericum). The photo was taken early in the morning and the hypericum buds were fully open a few hours later, but the proportion of yellow to red was not very effective. In my previous article on balance, I said that if I had added tall yellow crocosmia to the red, the design would have been better balanced; it also would have improved the proportions because the amount of red was almost equal to the amount of yellow. The design needed about a third more yellow and it needed all of it in the upper part of the arrangement. When judging proportions, we are comparing the amount of one element with that of other elements. Equal proportions can be confusing. In this particular arrangement, our eyes keep asking us if the arrangement is yellow accented with red or vice-versa.
The design was intended to create a single arrangement using three containers. I was somewhat successful at doing that, but the arrangement in the smallest container is out of proportion with the other two. This is not because the flowers in that container were shorter, but because that container needed more cocosmia foliage. The other two were filled with that foliage but the third one wasn�t. I should have used the same proportion of foliage of foliage to flowers in that container - just on a smaller scale than the other containers. This would have tied together the three containers into a unified arrangement.
It was difficult to analyze the proportions of this arrangement and it is much more difficult to analyze proportions in our gardens. Most gardens are composed out of many more elements than a floral arrangement and most arrangements are only expected to last a few days so it is relatively easy to control the proportions of color. In our gardens, something will stop blooming while the plant next to it is just beginning to bloom. Gardens have to be planned many months and even years before the intended floral display can be seen.
Most houses in the United States have 8 foot ceilings. The library where I displayed the arrangement of crocosmia had a high ceiling - maybe 12 feet. Outdoors, proportions are often defined by 60 foot tall trees. Crocosmia �Lucifer� is tall in relation to most humans, but it is short in comparison with most trees. When you consider that trees are short in comparison with clouds that are floating by 10,000 feet overhead, dealing with scale in a garden can be quite daunting. The main thing to remember is that gardens are created by and for humans, so everything is on a human scale. Trees tower over us, so the trees are large, we don�t really need to see the garden from a tree�s point of view. Everything in our gardens should be designed in relationship to our bodies.
Many people make the mistake of making garden walks too narrow. Three feet is wide enough for a hallway in a house, so they are surprised by how narrow a three foot wide walkway seems in a garden. This is partially because we are experiencing the walk in relation to trees which tower over us, but it is also because walks are often encroached upon by plantings and because we expect to have more room to move about when outdoors. The principle walks in a garden should be wide enough for two adults to walk side by side. This means that the minimum width for a walk crossing a lawn is 4 1/2 feet. If you are going to have flowers spilling over the edges of a walkway, 6 or even 8 feet is better. If a garden�s walks feel comfortable in relation to your body, you are likely to feel comfortable with the gardens proportions. Plants can tower over you or cause you to kneel down for a closer inspection, but you will be experiencing both of them from the walkway. My advice is to focus on the proportions of your walks and only fuss about the proportions of your plantings when you see obvious design problems. A plant that is too small today may be overgrown in 10 years. Just try to see your garden with fresh eyes every day.
Need help in your garden? Portland TT can offer you the best services in landscape maintenance and tree care.
Principles of Design - Proportion

This is the third in a series of articles about the principles of design. I am trying to explain the principles by writing about floral design because floral design is less complex than garden design.
When designers talk about proportion they are comparing all of the elements in a design with each other. Below is a photo of an arrangement that I did for a flower show on the 4th of July. When flower show judges judge an arrangement, they are supposed to look at the amount of plant material in relation to the container, the height of an arrangement relative to its width, and the whole design relative to its allotted space. The height of the plant material in an arrangement is supposed to be twice the height of the vase. By those standards, the proportions of my arrangement were rather eccentric.
The show was held in a school library and this arrangement was at the end of the checkout counter, so the space between the counter and the ceiling was the �allotted space�. The most effective aspect of this arrangement was the way that it towered over all of the people. For humans, man is the measure of all things. We see something as large or small in relation to ourselves. Everything that humans create is on a human scale. Our sense of proportion is always connected with our own bodies.
When thinking about proportion, we should also be thinking about scale. The arrangement in the photo was created using three containers - all synergistic arrangements must be use at least three containers. The two containers on the left side of the photo are dominated by bright red Crocosmia �Lucifer� flowers - the tallest stems soar to at least 5 feet. The third container had a single short stem of this flower, but it mainly contained yellow flowers. The taller flowers are a species Peruvian lily (Alstromeria aurantiaca) and the shorter are are Saint John�s Wort (a bush hypericum). The photo was taken early in the morning and the hypericum buds were fully open a few hours later, but the proportion of yellow to red was not very effective. In my previous article on balance, I said that if I had added tall yellow crocosmia to the red, the design would have been better balanced; it also would have improved the proportions because the amount of red was almost equal to the amount of yellow. The design needed about a third more yellow and it needed all of it in the upper part of the arrangement. When judging proportions, we are comparing the amount of one element with that of other elements. Equal proportions can be confusing. In this particular arrangement, our eyes keep asking us if the arrangement is yellow accented with red or vice-versa.
The design was intended to create a single arrangement using three containers. I was somewhat successful at doing that, but the arrangement in the smallest container is out of proportion with the other two. This is not because the flowers in that container were shorter, but because that container needed more cocosmia foliage. The other two were filled with that foliage but the third one wasn�t. I should have used the same proportion of foliage of foliage to flowers in that container - just on a smaller scale than the other containers. This would have tied together the three containers into a unified arrangement.
It was difficult to analyze the proportions of this arrangement and it is much more difficult to analyze proportions in our gardens. Most gardens are composed out of many more elements than a floral arrangement and most arrangements are only expected to last a few days so it is relatively easy to control the proportions of color. In our gardens, something will stop blooming while the plant next to it is just beginning to bloom. Gardens have to be planned many months and even years before the intended floral display can be seen.
Most houses in the United States have 8 foot ceilings. The library where I displayed the arrangement of crocosmia had a high ceiling - maybe 12 feet. Outdoors, proportions are often defined by 60 foot tall trees. Crocosmia �Lucifer� is tall in relation to most humans, but it is short in comparison with most trees. When you consider that trees are short in comparison with clouds that are floating by 10,000 feet overhead, dealing with scale in a garden can be quite daunting. The main thing to remember is that gardens are created by and for humans, so everything is on a human scale. Trees tower over us, so the trees are large, we don�t really need to see the garden from a tree�s point of view. Everything in our gardens should be designed in relationship to our bodies.
Many people make the mistake of making garden walks too narrow. Three feet is wide enough for a hallway in a house, so they are surprised by how narrow a three foot wide walkway seems in a garden. This is partially because we are experiencing the walk in relation to trees which tower over us, but it is also because walks are often encroached upon by plantings and because we expect to have more room to move about when outdoors. The principle walks in a garden should be wide enough for two adults to walk side by side. This means that the minimum width for a walk crossing a lawn is 4 1/2 feet. If you are going to have flowers spilling over the edges of a walkway, 6 or even 8 feet is better. If a garden�s walks feel comfortable in relation to your body, you are likely to feel comfortable with the gardens proportions. Plants can tower over you or cause you to kneel down for a closer inspection, but you will be experiencing both of them from the walkway. My advice is to focus on the proportions of your walks and only fuss about the proportions of your plantings when you see obvious design problems. A plant that is too small today may be overgrown in 10 years. Just try to see your garden with fresh eyes every day.
Need help in your garden? Portland TT can offer you the best services in landscape maintenance and tree care.
Indoor Edible Gardening ~ Herbs

In most areas of the United States, it�s getting past the gardening season. There are still options for the edible gardener, however, if you have a sunny window spot or even a place where you can hang a grow light. Herbs can be temperamental little buggers, but there�s nothing better than a meal prepared with fresh herbs.
Over the summer, you probably grew sage, rosemary and thyme outdoors. You can also start some herbs from seed. Each herb has its own preferences, however. Some need to be soaked in water before planting, others need to be refrigerated before they will germinate. Some herbs need darkness, and some need light.
Though it sounds like herbs are a lot of trouble, once you get them started, they aren�t very difficult to take care of. Herbs hate too much care, and often seem to thrive on neglect. You won�t have to fertilize too often or water more than once a week. Let�s get started by talking about propagation.
In The Green Guide to Herb Gardening, Deborah Harding recommends using a soil mix of 1 part potting soil, 2 parts vermiculite, and 1 part peat moss. This soil mix is light and allows the seeds to start easily.
You can use any type of flat pot to start your seeds. If you recycle your flats, however, make sure you clean them well with soap and water with a little bleach added to kill any bacteria. Rinse very well!
Once you have your pots or flats clean and filled with potting soil, you are ready to begin planting your seeds. If you put your seeds too close together, they will bunch up and tangle and eventually die, so space your seeds as carefully as possible.
For seeds that need darkness to germinate, cover the seeds lightly with soil. If they need light to germinate, just press them down into the soil without covering with soil. Then mist your seeds gently with a spray bottle. You will do this once a day, or just water from the bottom if you have a bottom watering tray. Next, cover your planting container with plastic wrap. This will make a little terrarium to keep your seeds moist until they sprout.
Most herb seeds need heat to germinate. You can achieve light heat by placing your starts on top of the refrigerator or by suspending lights over your pots. A waterbed heater is also a good heat source, but you have to maintain the heat at 70�75 deg F. A heat source will speed up your germination time.
Once your seeds sprout, you will remove the plastic cover. After this, you will need about 12 hours of light each day. If your seedlings are in front of a window, you will want to turn the pots a couple of times a day so that your seedlings grow straight up. If you are using a grow light, make sure you raise it up as the plants get bigger so you don�t fry your plants. Now, let�s take a quick look at some of the herbs that grow well indoors.
BASIL
Basil needs heat to germinate and grow well, so if you don�t have a nice window spot, be sure to use a grow light. Basil germinates in three to seven days. It enjoys moisture and well-drained soil. Basil also likes a little fertilizer about once a month. Pinching the tips of the plant once there are four sets of leaves will help your plant bush out. A tip for your vegetable garden is that basil is a companion to green peppers because the growing requirements are the same, and it also enhances the taste of tomatoes. It will also keep harmful insects away because of its pungent smell!
CHIVES
To me, chives were meant to grow indoors, within easy reach of your cooking area. Chives are a pain to start from seed, though! They germinate very slow, require complete darkness, constant moisture, and 60�70 deg F heat, but it can be done. Chives are extremely hardy once they start, however. They tolerate poor soil and will grow wherever they�re planted. In your vegetable garden, chives deter Japanese beetles and aphids!
If you are bringing your chives in from outdoors, wait until they have turned yellow and begun to die back, and then leave them outside for another 3-4 weeks. Chives need a cold period before bringing them indoors. Once they get warm, the plant will start sending out new shoots within a few days.
OREGANO
Oregano seeds are tiny, so if you are starting from seed, don�t even press your seeds down into the soil. Just sprinkle them on top and mist. They need warmth to start, and if they do not germinate in 4-5 days, restart them. Oregano likes dry soil, and the roots will rot if the soil is too wet. It grows very well indoors. If your oregano starts to show any signs of disease, place a fan on low near the plant to aid circulation. In your vegetable garden, oregano enhances the flavor of beans, and planted next to broccoli, it will repel pests.
PARSLEY
Parsley is another very slow germinator, sometimes taking up to six weeks. To speed up the process, you can start your parsley on a wet sponge, or soak your seeds in water, freeze for two days, thaw, and plant, lightly covered with soil. Parsley likes lots of moisture, and snipping the tops promotes growth. Parsley likes to be fertilized about once a month, and can tolerate very cool temperatures. In a container, parsley will grow for 6-9 months before you have to reseed. In your vegetable garden, plant parsley near carrots to deter carrot flies, and parsley will enhance the flavor of tomatoes and asparagus.
If you need help maintaining your garden or clearing trees, be sure to visit Portland TT to know more about their professional services.
Why Bonsai Trees Are So Much Fun
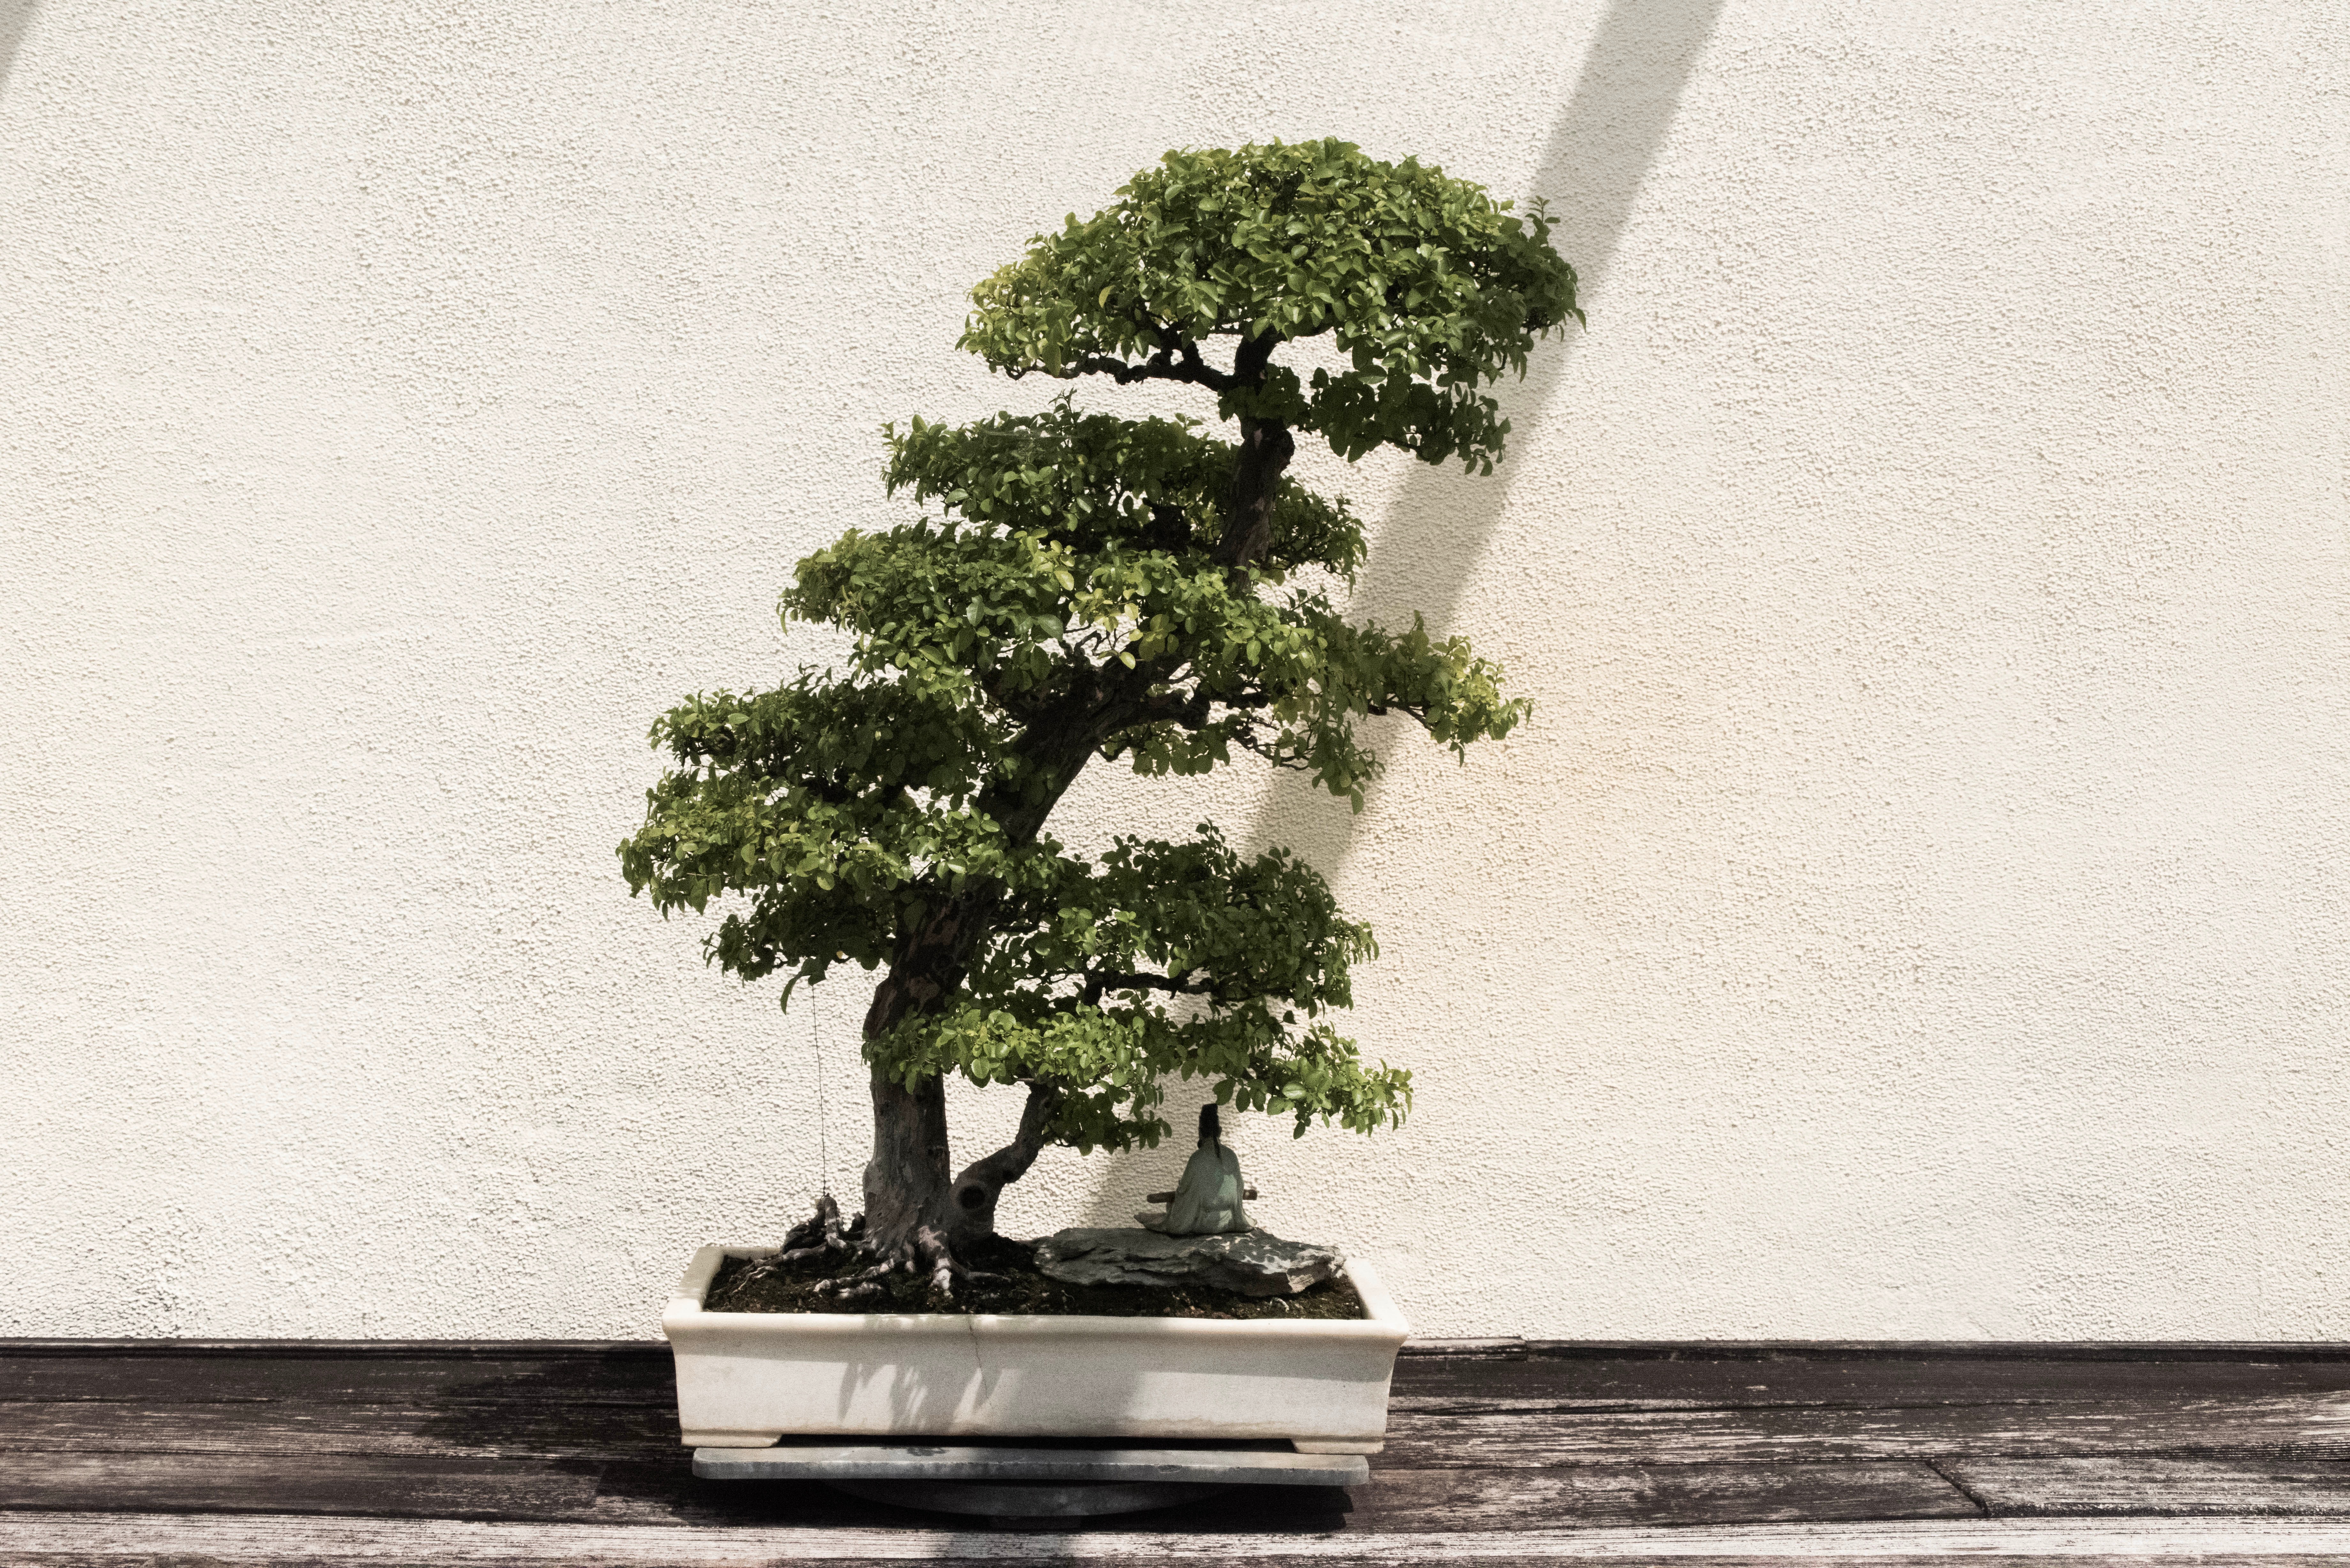
Some plants hold a special place in our hearts because they have been inherited. Some are special because they say something about us to the world in a way we couldn't with words. Bonsai trees fall into the second category, I believe, even though they can be passed down from family members or friends. They bring into our space a smaller version of an outdoor tree and are beautiful in the process.
If you are considering growing a tree such as this, make sure you match the environment it will grow in with the needs of the tree. Some trees will not survive outside at all, and some prefer to be outdoors when it's sunny. Shade is a big part of being indoors, and usually is associated with the more leafy Bonsais. Pine and other trees like them enjoy some sunshine when it's median weather outside.
Starting your seedling out right with the best soil will give it the strongest foundation. They offer particular soil for the Bonsais, and you can find it online or at your local home and garden store. They also need water every day, and are not something you can leave unattended for days at a time. Find which place in your home or office they seem to prefer most, and then leave them there for optimum growth.
When your tree gets big enough, you can begin to shape its branches with wire. There are specialized techniques to do this, however, and you can find instructions online or in educational books about this subject. This is the part of the process where your plant becomes a piece of living art that reflects how you feel about growing it.
If you prefer the unique look, why not try a fruit-producing Bonsai? It is exciting and fun to watch small citrus fruit and berries grow indoors, when they have only been known to grow outdoors on regular sized trees. It also makes for a great conversation piece when people ask about it, and how you are able to grow something of that nature.
Perhaps you don't have the time or desire to grow one, but would like to own a full-sized tree immediately. Be sure to shop around and get the best price for this, since it can be very pricey if you're not careful where you purchase them from. International companies and locally owned businesses offer shipping services, but you will also need to check to see if your state accepts imports of this type.
Bringing a tiny piece of the Orient into your living or work space is bringing a little bit of stress relief at the same time. Its natural beauty and calm presence will help create a small breathing space where you can take a mental break from the pressures of the day. With regular care and maintenance, you can even pass this thing of beauty on down to your children if you so desire.
When you look into working with Bonsai trees, you are agreeing to an exercise in patience and tiny details, but you are rewarded greatly with long-lasting beauty Share this experience with those around you, and, you will be allowing them a special look into the kind of person you are. Because this type of process does not fit everyone, it will show them what you mean to them and how you treat even the smallest details of your life.
Bonsai trees are fun to take care of, but don�t forget to take care of the other trees in your life. Click here to get in touch with a professional tree care service that will maintain your trees and bring them to their best condition.
Mulching Your Garden
Mulching, which involves covering your garden soil with a protective layer, is important if you want to keep your garden healthy. And winter is the best time to mulch your garden.
Why Do I Need to Mulch My Garden?
There are a number of benefits that come with mulching your garden.
Reduces Weeds
Mulching helps reduce the weeds in your garden.
Weeds compete with your garden plants for nutrients. This means that having weeds in your garden can negatively impact the health of your plants. Additionally, many people find weeds to be unsightly.
Mulch creates a protective layer over your garden soil. This makes it less likely for weeds to be able to take root.
Helps Keep Moisture in the Soil
On particularly hot summers, soil can dry out more quickly if you don�t mulch properly. This can put your plants at risk of heat shock.
Mulch helps trap moisture in the soil, which helps improve your plants� health.
Improves the Soil�s Microflora
Good soil has a healthy population of microflora living in it. These microflora release nutrients that your plants need. They also help reduce the number of harmful organisms that can hurt your plants.
Unfortunately, soil can become sterile when it is allowed to heat up or dry out. This, in turn, can negatively affect the soil�s fertility.
Mulching can help preserve your soil�s microflora by keeping the soil moist.
What Kind of Mulch Should I Use?
Fruit and Vegetable Gardens
For fruit and vegetable gardens, the best type of mulch is a layer of organic matter as it can help improve soil fertility.
Newly shredded tree material is a good example of mulch made from organic matter.
If you choose to mulch with newly shredded tree material, take note that it may reduce the nitrogen in the soil as it breaks down. As such, it may be a good idea to supplement with fertilizers such as blood and bone, or rooster poo.
Ornamental Gardens
For ornamental gardens, you can get away with mulch made from non-organic mulch, such as pebbles and small stones.
How Do I Mulch My Garden?
Step 1: Remove Any Visible Weeds and Grasses
Remove any weeds and grasses that are already growing around your plants. If you skip this step, the weeds will simply grow through your mulch.
Step 2: Add Fertilizer
As mentioned before, it�s a good idea to add a layer of fertilizer to increase the amount of nitrogen available to your plants.
It is typically easier to apply fertilizer before you add the mulch.
Step 3: Put Down Your Mulch
Apply your mulch in a layer that is roughly 3 to 5 inches thick. At this thickness, the mulch will easily deter any weeds and create a great microclimate for your soil.
Make sure to keep your mulch away from the trunks of trees. Otherwise, you risk killing your tree or developing collar rot.
Conclusion
Now that you know how to effectively use mulch in your garden, take it a step further and hire a tree care professional to really beautify your garden.
Visit Portland Tree Trimming Services to learn more.
Wintering Your Cactii

In most places, it is necessary to bring your cacti and other succulents indoors during the winter.
Succulents do best in hot, dry weather, as they store a lot of liquid. In fact, water can make up 50% to 80% of a succulent�s weight. Unfortunately, this stored liquid can be fatal for your plant during cold winter months.
In this guide, we�ll discuss the best way to winter your cacti and succulent plants.
Clean Your Plant Before Wintering
Once you see the first signs of autumn, it�s time to stop watering and fertilizing your succulent plant.
Check for Parasites
Carefully check each of your pots for parasites. You will want to have a look around the plant�s collar, as well as under the plant, to make sure there are no scale insects. Signs of scale insects include small white cottony circles. If you do see these parasites on your plant, patiently remove them by hand using a mixture of alcohol and oil.
Keep an eye for signs of root lice, as well, as these parasites are attracted to some types of cacti.
Check for Cryptogamic Diseases
Are there any brown stains on your plant? If so, you might need to isolate your plant and treat it for cryptogamic disease.
Prune and Leaves With Too Much Water
Do the leaves of your plant show any blackish stains? If so, this could be a sign that they contain too much water.
Cut any affected leaves. If necessary, you can leave just the head of the plant. Keep the plant in a dry area.
Refrain From Repotting Before Wintering
Winter is not a good time to repot your plant. It�s much better to wait for spring.
Restful Winters Lead To Spectacular Flowers
If you want your cacti to have spectacular flowers by April, you need to let them have a restful winter. This means leaving them completely unwatered in a cool place for the winter season.
The best place for your cacti during winter would be a cold greenhouse. You can also leave your cacti in a bright, unheated, or slightly heated, room.
Most cactus varieties in the wild can survive sub-zero temperatures, as long as they don�t get rained on. This means that your cacti will be able to handle temperatures of 50�F to 53.6�F.
Be careful with plants which are similar to cacti, like the Rhipsalis (mistletoe cactus) and the Epiphyllum, which come from tropical areas and which don't tolerate temperatures below 6�C.
There are some plants that look like cacti, but are actually from tropical areas. Common examples of this type of plant include the Rhipsalis (mistletoe cactus) and the Epiphyllae. Even though they look like cacti, these plants are not able to tolerate temperatures that fall below 42.8�F.
The Laissez-Faire Approach
Once you have your plants ready for winter, leave them alone. This means no watering, and definitely no fertilizing, throughout the whole winter season. This is the best way to have a hassle-free winter, and beautiful flowers by the spring.
Now that you know how to take care of your cacti, you should also learn how to take care of your trees. You can start by hiring a professional tree planting service who can teach you how to better understand and maintain your flora.
---------------------------------------------------------------
How To Create Beautiful Landscape Designs

Creating landscaping designs requires a strong imagination and the ability to visualize something from a blank slate. But it can be done with the help of a couple landscaping images to kickstart that creative part of your brain. One image can give you multiple ideas for landscape designs.
If you can get your hands on some landscaping software that can be even more helpful. There�s quite a lot of options when it comes to landscaping software. They allow you to import images from a hard drive, digital camera, website or scanner. Most of them come with their own library of images with realistic graphics to include materials, arbors, decks, terrain, shrubs and plants.
There is the internet with its countless options so you can easily get yourself in the right frame of mind to create a beautiful design. You can find free images as inspiration and you can find websites that offer landscaping images for a small fee. Don�t forget your very own neighborhood where you can find some inspiration as well.
Manipulating Digital Images
Get some images of your yard or house from all different angles. These will be the best foundation for your landscaping design. Upload these photos to your landscaping software and start adding digital images to transform your yard space into the beauty you want to look at everyday. You will be able to test all kinds of features not limited to plant life. Check out a cedar deck with a tempered glass rail, a cobblestone walkway and even a Gazebo.
It�s easy to manipulate, simply click and drag items to the images to find out if it works in your space or not. There is even a plant aging feature that can help you see how the setup will age overtime so you can know which plants make the best pick for your design. It�s these types of practical features that help you design a landscape that makes sense and that will fit your budget and lifestyle for years to come.
Bring Designs Alive with 3D Imaging.
3D images add a lot of excitement to the design process. Creating 3D visualizations allows you to view the design from different angles and gives you a more realistic idea of what the actual design will be like. This feature allows you to explore texture, perspective and scale on various elevations, slopes and terrain.
You can even experiment with nighttime and daytime effects and even experiment with a floating solar fountain or an edge-lined walkway. Visualize a cedar garden pergola, or a natural stone pathway and even a relaxing pool complete with a Cabana. The many ways you can explore landscape designs with software are utterly delightful. But at the end of the day if you just need a professional to come in and take care of all your landscaping needs, you can book us. Let the certified specialists at Evergreen Tree Services provide you with the landscaping services you need.
Wintering Your Cactii
In most places, it is necessary to bring your cacti and other succulents indoors during the winter.
Succulents do best in hot, dry weather, as they store a lot of liquid. In fact, water can make up 50% to 80% of a succulent�s weight. Unfortunately, this stored liquid can be fatal for your plant during cold winter months.
In this guide, we�ll discuss the best way to winter your cacti and succulent plants.
Clean Your Plant Before Wintering
Once you see the first signs of autumn, it�s time to stop watering and fertilizing your succulent plant.
Check for Parasites
Carefully check each of your pots for parasites. You will want to have a look around the plant�s collar, as well as under the plant, to make sure there are no scale insects. Signs of scale insects include small white cottony circles. If you do see these parasites on your plant, patiently remove them by hand using a mixture of alcohol and oil.
Keep an eye for signs of root lice, as well, as these parasites are attracted to some types of cacti.
Check for Cryptogamic Diseases
Are there any brown stains on your plant? If so, you might need to isolate your plant and treat it for cryptogamic disease.
Prune and Leaves With Too Much Water
Do the leaves of your plant show any blackish stains? If so, this could be a sign that they contain too much water.
Cut any affected leaves. If necessary, you can leave just the head of the plant. Keep the plant in a dry area.
Refrain From Repotting Before Wintering
Winter is not a good time to repot your plant. It�s much better to wait for spring.
Restful Winters Lead To Spectacular Flowers
If you want your cacti to have spectacular flowers by April, you need to let them have a restful winter. This means leaving them completely unwatered in a cool place for the winter season.
The best place for your cacti during winter would be a cold greenhouse. You can also leave your cacti in a bright, unheated, or slightly heated, room.
Most cactus varieties in the wild can survive sub-zero temperatures, as long as they don�t get rained on. This means that your cacti will be able to handle temperatures of 50�F to 53.6�F.
Be careful with plants which are similar to cacti, like the Rhipsalis (mistletoe cactus) and the Epiphyllum, which come from tropical areas and which don't tolerate temperatures below 6�C.
There are some plants that look like cacti, but are actually from tropical areas. Common examples of this type of plant include the Rhipsalis (mistletoe cactus) and the Epiphyllae. Even though they look like cacti, these plants are not able to tolerate temperatures that fall below 42.8�F.
The Laissez-Faire Approach
Once you have your plants ready for winter, leave them alone. This means no watering, and definitely no fertilizing, throughout the whole winter season. This is the best way to have a hassle-free winter, and beautiful flowers by the spring.
Now that you know how to take care of your cacti, you should also learn how to take care of your trees. You can start by hiring a professional tree planting service who can teach you how to better understand and maintain your flora.
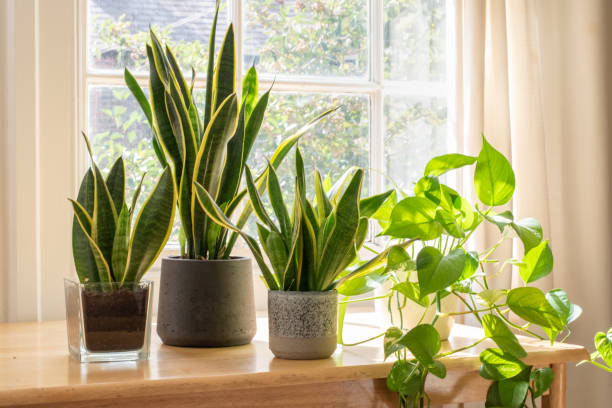
Houseplant Basics 101: Watering
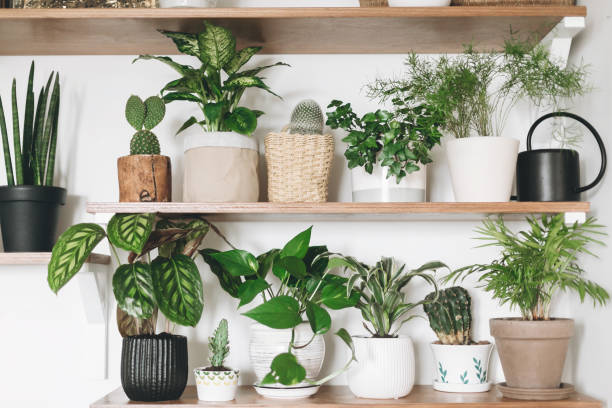
There are a number of gadgets and tools on the market today that are designed to measure the moisture level of your soil. This is great for houseplants since it gives you the opportunity to know just how much water your plant needs. But oftentimes you don�t need these, you simply can stick your finger into the soil of your house plant to determine if it needs water or not. Just scratch down the solid 2 to 3 cm. If the soil feels like a damp sponge it should have enough water and your plant won�t need to be watered that day. The top of the soil may be dry but if it still has that spongy feeling then there will be enough moisture below the dry soil to keep your houseplants healthy.
Amount of Water and Watering Frequency
How much water your plants need and how often you need to water them depends on a number of factors. These include:
- The type of house plant
- A plant�s size
- Potting container used
- Composition of the potting soil used
- Growing environment�s humidity
- Season
- Plant location
- Average room temperature
All these things help you to determine how often you should water your plants and just how much water you need to give them. Most plants will forgive you for missing a watering every now and again as most houseplants are very tolerant.
Watering Methods
Most house plants are watered from the top but this is usually just a matter of personal preference rather than a preference of the plant. The plants just need to have sufficient amounts of water at all times.
Another way you can check if your plant is getting adequate water is by checking for water running through the drainage holes of the potting container. This runoff is necessary as it flushes away salts from the soil which is necessary for plant health. You will need to drain water at the base of the saucer to prevent the soil from holding on to the water which can lead to root rot.
Watering from the Top
If you have multiple houseplants to make the task easier and quicker, group your houseplants in a bathtub and give them a gentle watering with your shower head. Leave them in the tub for a couple hours so they can drain properly. This way you won�t track any water through your home.
When watering in a group or singly try to not water from too high above. Place the watering can�s spout as close to the lip of the potting container as possible. Also try to water from a different side each time. Watering from the same side every time will wash away topsoil leaving craters behind.
Watering from the Bottom
Plants such as African Violets prefer wick watering. They draw up water from below until the soil is adequately moist. Any type of house plant with fuzzy leaves like this watering method and it is useful for other plants too if you build what is known as a wicking bed.
For more gardening tips, tree removal or landscape maintenance services get in touch with us and let our expert help you.
The 5 Best Herbs for Kitchen Container Gardening
We don�t all have green thumbs, that is a known fact. Some of us know nothing about soil levels and must work hard to keep any plant alive. Even if you are this type of person, you can rest assured there is something out there that you can plant. Today we explore the five best herbs to plant in a kitchen container garden.
If you want to grow something and not fail at it, this is definitely a must try. We find most herbs are hardy and can withstand a bit of negligence every now and again without making you feel guilty. The luckiest set seems to be dill, cilantro, chives, sage and basil. These five can help you hone your green thumb while also giving you fresh and tasty herbs for your recipes.
Dill
All you need to be successful in growing dill is some good mulch. Start your dill in some new soil and ensure that it cannot be accessed by weeds. You can mulch your dill with shredded leaves or straw and this will help to not only deter weeds but will also help with water retention.
This is not a plant that will transplant nicely so you want to start out with it in a container that it will remain in. Place its container where it can get at least 6 hours of full sun. It likes a humid climate so if you live in a dry climate you may want to mist your dill plant each day.
Your dill is ready for harvesting right before it starts flowering. If you allow it to start flowering it can still be used but expect a diminished flavor. Harvest as you need to get the best flavor from a freshly harvested batch.
To ensure you have crops all year round, plant new seeds every 6 to 8 weeks.
Cilantro
This herb is known for its great taste and smell. It does require a bit more care than other herbs on this list but it is worth the extra effort. The key to healthy and flourishing cilantro is the location. If placed in temperatures exceeding 75℉ the plant usually stops producing its tasty green parts and starts to create seeds and flowers instead to provide more plants. This is known as bolting. At this point, your cilantro plant becomes inedible. For your cilantro to shine, you want to place it�s pot where it can receive morning and late afternoon sun while remaining shaded between 1pm and 5pm.
Your cilantro plant loves water. When transplanting, you must keep plants close so shade around the roots is promoted. This helps to retain water and can delay bolting. Frequent pruning can also delay bolting. Eventually though, your cilantro will bolt.
Plant new seeds every 6 weeks if you want to have a fresh stash all year round. If you take a break in winter your spring and summer crop will be spicier.
Chives
Imagine a baked potato, loaded with chives and sour cream. I wouldn�t have it any other way. Or imaging adding fresh chives to your salads and soups. You can make this your reality by growing Chives in your kitchen container garden. Chives grow very easily and grow very quickly too.
To plant, you will need a mix of peat moss and potting soil. Before you know it, you will have tiny seedlings growing tall and strong. If you want to promote thicker growth, simply prune your chives. Chives really is a no fuss plant, it doesn�t need heavy watering unless you are in the hostess part of summer. It does well in full sun or even partial shade. They will transplant easily and are great for adding to your garden plot. Their bulbs have a scent that will keep pests at bay and of course you will also have the benefit of great tasting chives.
Sage
Sage is another good option for your indoor kitchen container garden. It prefers drier conditions but grows well from a seedling or from seeds. Once you plant you want to water right away. Keep the plant pruned and keep watering to a minimum. Ensure the soil is aerated to prevent mildew in the first year of your plant.
Prune your sage plants freely or you will find the plant will start to make smaller leaves. Prune with the aim of maximizing sunshine for as many leaves as possible.
Sage is not just useful for cooking but you can also burn its incense. You simply dry it out by hanging it in bunches over 90 days. In cooler months before the frost you should prune heavily and mulch the soil.
Basil
This herb will grow easily from a seed as well as you can sow it straight into a pot. You can mix potting soil and peat moss. Just be sure to keep a ratio of � potting soil to � peat moss. Otherwise you may end up with coagulation preventing water from getting to the plant�s roots.
If you live in an area with a high temperature you can layer with wood chips or straw to help your basil plant retain water. During the hottest part of summer you should mist your plants with diluted fertilizer. Always ensure the soil doesn�t become powdery or gray, this is a sign that the plant is thirsty. Your plants will become more and more lush the more you cut.
Harvest your basil before it flowers as its flavor changes when it flowers. You can prevent flowering by cutting the stalks� top most leaves as often as possible. Unless you are using the plant ornamentally in which case the blooms are very well suited for that since they are so pretty.
Keep your basil on a sunny windowsill or place beneath plant lights.
Other Things to Consider
1. You want to first consider the placement of your container garden. If you have bricks you don�t want to place them up against it as brick is known to retain heat. This can easily be too hot to handle.
2. You also want to consider pests. Even though your plants will be in containers you still need to keep an eye out for pests and disease. If you detect these early enough you will be able to save your plants. Try to check on your plants at least once per day. Look out for pests, discoloration or a stray weed.
3. Drainage is a very important aspect of gardening. The pot you use is important but you also want to be careful with peat moss in any of the applications that necessitate its use. While peat moss is great for the soil, it can crust up. This can be prevented by adding shredded paper or leaves.
4. When planting or transplanting, the best time is in the early evening. Water the pot generously so the plant has less of a shock to deal with and has the entire night to recoup.
With this guidance and these tips you can have a flourishing herb garden in your kitchen soon. If you want to get some yard work done outside as well call us. We are the tree care experts you need.
It�s okay to take it one step at a time. And it's okay to know when to ask for help. Gardening is a lot of trial and error especially when you are just starting out so don�t beat yourself up if you don�t seem to be getting the hang of it right away. Learn from your mistakes and continue on your gardening journey enthusiastically. Before long you will be amazed at just how far you�ve come.
Houseplant Basics 101: Light

Houseplants just need you to fill their basic needs for them to thrive and perform their best. Their basic needs are temperature, humidity, water, soil, fertilizer, some physical space and light. It may seem like houseplants need a lot of care when you list it like this but it really isn�t much. With a small time investment from you, you can set up your houseplants for success without too much ado.
Houseplants need adequate amounts of light to grow just like people need energy. Plants take energy from the sun and convert it to sugars that they need to grow. When there is no sunlight, grow lights can substitute and where there is not enough sunlight you have to make up for it.
How to Measure Light
Light is the most important factor in determining whether your houseplants will make it or not. It is also one of the most misunderstood needs of a plant as well. Simply put, the amount of light your plant gets will determine how fast it will die. You find plants in five different categories:
- Fast dying plants
- Slow dying plants
- Slow growing plants
- Fast growing plants
- Plants that neither gain or lose growth
You can�t hold light in your hands, nor can you pour it into a glass to measure it. So what is enough, what is too little and can there be a thing as too much light for a plant? To measure light for plants we need to think about duration, quality and intensity.
- Duration is the amount of time that a plant is exposed to a light source within a 24 hour period.
- Quality refers to the colors of wavelength of light the plants are receiving.
- Intensity refers to the strength of the available light.
These three factors hold a very important relationship. You may have times when the quality of light available is high but there is not enough intensity nor does the light last long enough to provide a houseplant with the right amount of light they need.
In such cases, your houseplant won�t do well. You can�t always give your plants the perfect duration, quality and intensity and so you have to manipulate the plant and compromise. It is actually better for your plant to have 12 hours of low quality light than to have a short burst of perfect light quality and intensity. It�s all about balancing overtime.
Look at Light Limiting Factors
The hardest thing when it comes to light, is providing your houseplants with the right amount. It can seem like an easy task to do and yes the idea of it is quite easy but it can get complicated based on the time of year, the position of the plant inside your home etc. These are factors that reduce the amount of natural light coming into your home. Here are some of the factors that could affect the light your houseplant is getting.
- Time of year - during the winter months you won�t have as much sunlight entering your home as you did in the summer.
- Placement - if your plants are a few additional feet from a window sill this can dramatically reduce the amount of light they are getting. You may think that a few feet will not be too much but it is very common to see a drop in light when a plant is moved even to a table close by. As we talk about windows it is important to note that windows are not a light source and merely allow the passage of light. At best you can get a 93% transmission of sunlight through a window, if the window is tinted this transmission can drop as low as 50%.
- Window position - if your windows are south facing your plants will get the greatest and best chance of sun exposure. Other windows will not rival this.
There are additional factors that can affect the amount of light your plants get throughout the year. Many of these are outside of our control such as cloud cover, elevation and fog. But then there are the things we can control like window treatments and drapes, ultraviolet blocking coatings and even dust or dirt on a window can reduce the amount of light your indoor plants get. If you have awnings or other types of overhangs and even trees near windows, these can greatly reduce the available light for your indoor plants as well.
Visit Evergreen Tree Services Limited for more tips about tree care and gardening.
Growing Peppers in the Rogue Valley

Fresh veggies are always better than store bought ones and homegrown ones are the freshest! And an easy starter are peppers. They are great in a wide variety of dishes and they are super easy to care for. Just give them fertile, well drained soil and a lot of sunshine with regular watering and they will do just fine. Plus there is a wide variety to choose from including Pimiento, banana, Anaheim and bell.
Planting Peppers
1. Prepare the Soil
The first step in planting anything is to prepare the soil. It is no different when it comes to planting peppers. Adding organic material to your soil is the best way to ensure that your soil is nutrient rich for your pepper plants to grow and mature. You can use compost or rotted manure , the more the better - load up your soil so it is basically brand new and your peppers will thrive no matter what condition the soil was in before or what was growing there previously.
2. Dig A Hole
Once your soil is ready you are now ready to plant. Grab your plants and the appropriate digging tools and dig a hole that is twice as deep and twice as wide as your transplant container. Fill the hole then set the root ball on top. You don�t want to plant your peppers too deep as this can cause tiny fruit or root rot. If you are not growing from a plant and are instead growing from a seed you will need to follow the directions on the packet that the seeds came in. At this stage of growth you must keep your seedlings warm for them to grow well.
3. Plant Spacing
Your pepper plants don�t need a lot of space between them. It is actually more beneficial to plant them closer together. Planting them closer together will prevent the growth of weeds but you don�t want to plant them so close that they will shade each other as they grow.
4. When to Plant
The ideal time for planting a variety of peppers is mid-May to mid-June. If your nighttime temperatures stay above 45 degrees it is safe to plant peppers.
Cultivating
With your plants in the ground, you now need to water them. In warm or hot weather they will need more water each day. You need a consistent watering schedule. If you drown them this minute then leave them without water for days on end you can end up with blossom end rot.
Peppers like the warmth but they also want to be protected from extreme heat. Mid- to late afternoon sun will do the most damage. You can help them out with the use of shade cloth at this time of day.
You want to encourage your peppers to bush out. You will do this by snipping the main stem when the plant is around 7 inches tall. When September hits you will still have some flowering and budding on your plant. You can encourage those fruits to ripen before the nights get too cold by pinching off small peppers and buds. This way the plant will focus on the larger peppers giving them the nutrients they need to reach maturity faster.
Harvesting
Your peppers can be harvested at any time during their growth cycle, they just need to be big enough. Green peppers are just yellow or red peppers that have not ripened. This is why they are not as sweet as their colored counterparts. So harvest them whenever you are ready by cutting the stem an inch from the fruit so you don�t damage the plant.
Considerations and Facts about Peppers
Once peppers ripen, they start to deteriorate rapidly. You want to pick them so they don�t go bad.
You will get multiple harvests from one plant if you keep removing peppers. If you are not picking the peppers and the plant�s branches get to its full weight capacity it will stop producing peppers. Keep picking to prevent it from reaching full capacity and it will keep producing.
If you are planting hot peppers it is important to note their juices/oils burn. Wear gloves when working with these in the kitchen. You don�t want to be removing your contacts later in the day with peppery fingers! If you don't use gloves you can run isopropyl alcohol over your hands when you are done. This will dissolve the oils and really help you to wash them away. For any burns you can use dairy products such as sour cream and yogurt to soothe them.
If you are saving seeds you can leave the peppers on the plants for two weeks after they have ripened. Then you can remove the seeds and allow them to air dry completely before storing them.
Do you have any other pepper tips to share? We�d love to hear them. Share them below. For more gardening tips or if you need professional landscaping done whether residential or commercial give us a call or send us a message. Our certified arborists are waiting to serve you.
Can I Share Some Secrets About Herb Kits
You can start a herb garden by purchasing and using a herb kit. And today we want to tell you more about that. If you decide to start your herb garden from a kit, you will need to transplant your herbs later into larger containers. When choosing a herb kit, you will have a variety to choose from.
You can choose a herb tea kit, a kit for culinary use or a kit for medicinal etc. Herb kits even make great gifts, since they can be used both inside and outside.
With more homeowners using fresh herbs over dried herbs, we find that herb gardening is a growing trend. Think of the money you will save when you grow your own herbs. Additionally, your recipes will taste better when you use fresh herbs picked right before using.
Another benefit of gardening nowadays is that it is a way to relax. So if you are looking for a hobby that will provide you with some therapeutic value, gardening may be your go-to. You also get to dress up your home or yard with herb plants, which can be quite aesthetic.
Beginners Need Not Worry
Herb kits are great for both beginner and expert gardeners. You can choose a kit with seeds for one or multiple herbs. If you have family members who would love to join you on your gardening endeavor, the more the merrier.
If you are looking for a particular herb kit locally and can�t find it, you can always try to source them online. You may even find more intriguing kits online. Think �French Country Herb Trio�. You can find organic kits that come with pots and saucers that are eco-friendly and even compostable.
The herbs you select will determine the time of year to plant. The beauty of starting with a kit is that you can start in your kitchen. Your windowsill is the most ideal placement for growing indoor herbs. This location also adds to your kitchen�s aesthetics.
If you want fast growing herbs, you can choose ones in a greenhouse. This enables them with the right climate to achieve fast growth. With these types, you may even have your herbs ready in just a couple weeks.
Growing your seedlings inside will require adequate sunlight. If you don�t have a lot of sunlight, you will need grow lights. For more tips and advice about planting pretty much anything, you can reach out. Our experts are ready and willing, not only to provide you with advice, but also to get the job done for you. Check out our services offered.
Making The Most Of Your Garden

When you buy a new house or decide to improve your old one, you are, of course, concerned with every foot of ground that goes with it, for modern living and modern gardening can make every inch of your property usable and desirable. New methods of soil improvement, grading, fencing and terracing make even sloping, hilly lots, hitherto undesirable, now attractive and choice. Modern chemistry has brought new nutrients to the soil and has provided weapons against the traditional enemies of the garden: disease and insects.
Hardier bulbs and seeds make gardens more successful as well as wonderfully vivid. Fabulous hybrids have lengthened the list of flowering trees and shrubs, creating specimens for every colour and design scheme, every type of house and garden. New gardening equipment and materials speed the time-consuming garden tasks. New ways of living bring us into the outdoors, and barbecue meals and comfortable lawn furnishings make a small suburban back yard as luxuriously enjoyable as was previously possible only on a large estate.
Architecturally, today's house is much more a part of the outdoors than was yesterday's. Large picture windows, glass walls, glassed-in sun porches and terraces all combine to make the garden a part of the house. Consequently, the view becomes that much more important. A beautiful garden, a luxuriant turf and healthy blossoming trees all add as much to the interior of your home as your draperies or wallpaper. The effort and time you spend on your lawns and gardens will repay you in every way, indoors as well as out.
When you plan your grounds you will be governed by many of the principles you employ in decorating your home. Proportion, texture, colour, line, harmony, and function - these are terms that apply to landscaping as well as decorating. And if you have large grounds you will benefit from careful planning just as much as does the owner of a third of an acre.
Garden books are filled with formal plans for perfect gardens and grounds, but you will want to consider not the perfect garden in itself, but the one plan that will be perfect for your particular family. Analyse your family, its needs and habits; then design your grounds to best satisfy its prejudices, desires and demands.
The thing to do is hold a family council and talk over what you want to do. Of course, you will be governed by questions of cost and available space. Draw a plan of your property in fairly large scale, about 1/4 inch to the foot. Now make a list of the things the family wants, such as a barbecue, tool house, drying yard, rock garden, fences, playhouse, badminton court, better lounging facilities.
Unless you are fortunate and have spacious grounds, you probably won't be able to work everything into your program - but with Planning, you can do things gradually. You can plan your garden so that it never looks bare and yet is always roomy enough for the additions you intend to make in the future.
And some projects will serve more than one function. For example, if you need a driveway and have young children, a blacktop that can be used for hopscotch and bicycle riding will serve a double purpose, and easily justify its cost. Or a fence that cuts off an unpleasant view can also act as a windbreak and a handsome background for a lounging area. A retaining wall can double as a rock garden when planted with hardy dwarf shrubs and other rock-garden species.
Generally, most grounds are divided in three ways: the public area, the area that can be seen from the street; the service area, which includes garage and parking facilities, delivery facilities, clothes-drying equipment, outside storage space and garbage disposal; and the private area, located in the rear of the house. Here is your back yard, available for games and lounging; a terrace or outdoor dining area; the children's playground and a garden with flowers, fruits, vegetables, walks and, perhaps, pool.
In each division there are things to strive for - and to avoid. In your front, or public area, for example, plan for a minimum of care. Select flowers and shrubs that will help you present an attractive face to the passer-by at all times without any undue fussing on your part, so that when you can't manage to give as much time as you would like to your grounds, the front of your house will still be presentable.
In your service area, plan for off-street parking; for deliveries that can be made without intrusion on the privacy of your lawn or terrace; for a drying yard that won't be seen from the street. For your private area, use the largest part of your plot; take advantage of existing trees and the shade afforded by your house and garage for lounging spots. Have seats in pleasant corners and screen off the children's play areas from the rest of the garden.
Needless to say, landscaping can be a never-ending adventure, a pastime that is as gratifying as it is beautifying, for the creation and care of flowers and trees, vines and shrubs, lawns and fences, brings luxury to the home, happiness to the family, and pleasure to all who behold the beauty of a "well-dressed" house.
Click here for more tips about making your garden beautiful.