I began a search for a new Off-road vehicle to build. I had finally decided upon a Suzuki Sidekick or a Geo Tracker. Not many had been built or utilized very much due to the I.F.S. To solve this problem I had planned to go to a solid front axle, for ease of lifting and I had more knowledge of that
 type of suspension. Now that I had chose the base vehicle I determined motor and suspension details.
I ran upon a good deal for a 83’ Toyota so I bought it. That would give me stock 4:11 gears, stronger axles, plus with this purchase it gave me the entire drivetrain so that there would be no angled driveshafts. Soon after came a Samurai frame. By this time I had a lot figured out and was ready to tear into it.(little did I know of the trials and tribulations of this project)
type of suspension. Now that I had chose the base vehicle I determined motor and suspension details.
I ran upon a good deal for a 83’ Toyota so I bought it. That would give me stock 4:11 gears, stronger axles, plus with this purchase it gave me the entire drivetrain so that there would be no angled driveshafts. Soon after came a Samurai frame. By this time I had a lot figured out and was ready to tear into it.(little did I know of the trials and tribulations of this project)
The first thing I did was to strip the frame clean and prime it up to keep rust down. This was a daunting job due to the undercoating from Japan and all the brackets that I had to remove. Gas tank mounts, motor mounts, bump stops, shock mounts, and etc... After that was done, I removed all spring hangers for the drop link suspension to follow. On the front, I made new rear hangers out of 1/4 “ steel to be stronger and to not have to worry about the stock hangers bending on me. (I have heard of some stock hangers bending under stresses) For the front, I welded brackets holding 4 bolt cap bearings to the frame just in front of where the bump stops once were. Then 12 “ long drop links from 2x2 1/4 “ square steel tube and 1" diameter rod were created to fit the bearings. The frame was
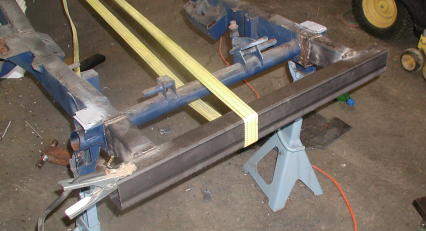 extended out 5 1/2" to compensate for the longer springs and shackles. That extension was then made into a bumper. All rear spring mounts were placed back at the original positions and the spring width was retained as stock locations. This would allow for some great articulation.
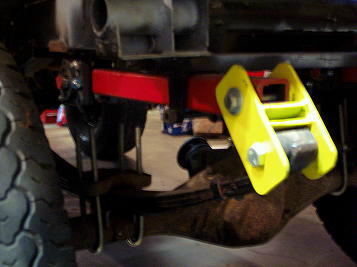
After the front suspension was completed I started on the back. As with the front, I replaced the front hangers with the 1/4 “ steel ones for strength but this time I inboareded them to match the width of the front hangers, which was about 5 “. The inboarding narrowed the spring width by about 10" or so and would by itself add more articulation. On the rear, the bearings were put onto brackets and 22” drop links were made to accommodate the Toyota springs. With new bushings and custom shackles, I gusseted everything up with 1/4" steel and bolted the springs on.Below on the right is the rear spring and link compressed and on the left is the same spring and link flexed.
extended out 5 1/2" to compensate for the longer springs and shackles. That extension was then made into a bumper. All rear spring mounts were placed back at the original positions and the spring width was retained as stock locations. This would allow for some great articulation.
After the front suspension was completed I started on the back. As with the front, I replaced the front hangers with the 1/4 “ steel ones for strength but this time I inboareded them to match the width of the front hangers, which was about 5 “. The inboarding narrowed the spring width by about 10" or so and would by itself add more articulation. On the rear, the bearings were put onto brackets and 22” drop links were made to accommodate the Toyota springs. With new bushings and custom shackles, I gusseted everything up with 1/4" steel and bolted the springs on.Below on the right is the rear spring and link compressed and on the left is the same spring and link flexed.
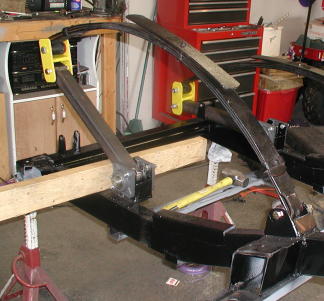


 Both sets of springs I put on the frame reverse of what they were on the Toyota for more wheelbase. As it sets it now has a 89” wheelbase. The Sidekick body is longer and wider that a Samurai so wheelbase issues were having to be delt with. Next the axles were bolted up temporarily and the tires put in place to see how everything is going together. At this time with 31” tires and no weight there was 26” of articulation and the drop links were working perfectly.
The next step was the motor and transmission. For this I didn’t have the right tools for the job so it was taken to Checker Chassis here in town for the installation. All new mounts were made. And
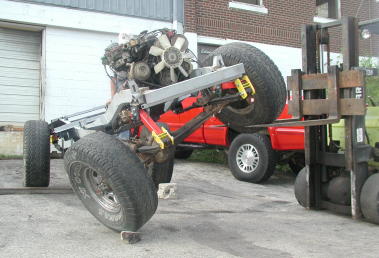 within my specifications, it was done in a day. Everything but about 3” of the transfer, transfer mount, and oil pan is above the frame clean as can be. This will make for easy skid plate construction later. Lucky for me there was a Sammy at the Zuki Melt with the same motor, tranny, and x-fer I had so motor placement was easy figured. By this time there was 33” tires on it so we tested the flex with their forklift. As expected, more weight=more flex. Now there was 33” worth and the links wanted more.
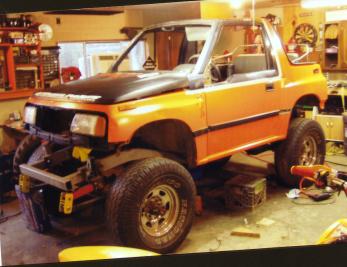
 Now funds were low so the body got fooled with a little. First it got painted about what it was going to be when completed.
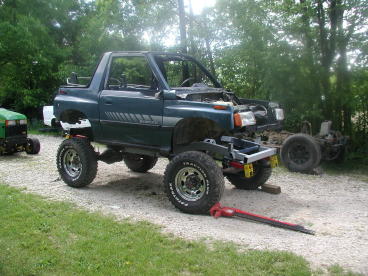
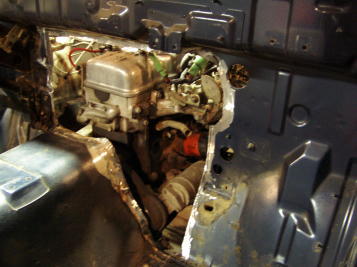
Krylon orange and flat black are the colors of choice. After the paint the body was placed on the frame and the cutting began. To get the body where it needed to be the firewall needed to be moved a tad, and the cross member for the body got cut out for in the floor. The Sidekick frame and Samurai frame are so different drastic measures were taken. I wanted the body to be as low as possible and to still have egnough room to work and to let the suspension do its thing. This puts me to where I am now. Below are some current pictures of this creation. I have been currently working ont he dash getting some switches and guages put in where they are easily readable.
Now funds were low so the body got fooled with a little. First it got painted about what it was going to be when completed.
Krylon orange and flat black are the colors of choice. After the paint the body was placed on the frame and the cutting began. To get the body where it needed to be the firewall needed to be moved a tad, and the cross member for the body got cut out for in the floor. The Sidekick frame and Samurai frame are so different drastic measures were taken. I wanted the body to be as low as possible and to still have egnough room to work and to let the suspension do its thing. This puts me to where I am now. Below are some current pictures of this creation. I have been currently working ont he dash getting some switches and guages put in where they are easily readable.
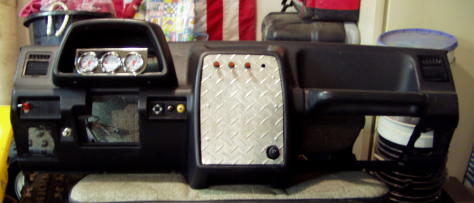
 The dash I am spending some time constructing. Diamond plate is being placed in all open stock locations. And then those are being decided on which will hold switches and such. The center section will be for aux. light, radios, strobes and whatever else that may pop up and be needed. Where the spedometer was is now the amp, oil, and water guages. 4x4 light and other idiot lights will also be there. Starter button will be lower left under dash by steering column and the headlights and parking lights will be lower right under dash by steering column. The tachometer will be in the center on the top of the dash. Optima battery will now be bolted in where the glove box used to be.
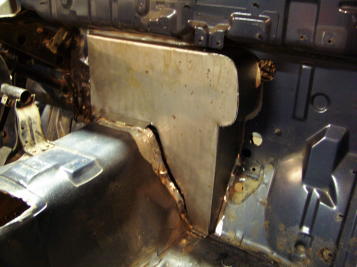
The body situation on the Sammy frame proved a bit of a challenge.At first placement the body sat way too high.So once axels were temporary, I replace the body on and figured out what to do.I decide I had to cut the firewall to fit the 22r in.That was a givin. The other was to cut the floor for the main body mount so the body would sit lower in the frame.Being mny first time working with sheet metal, I hope I don't have to do this again.
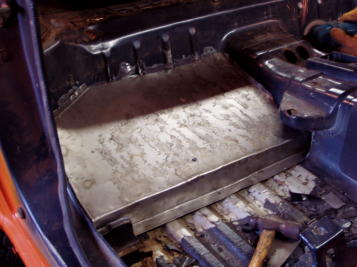
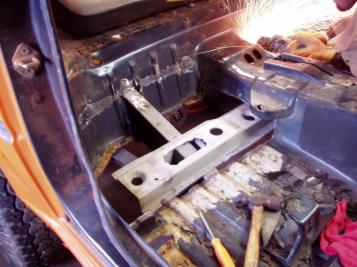
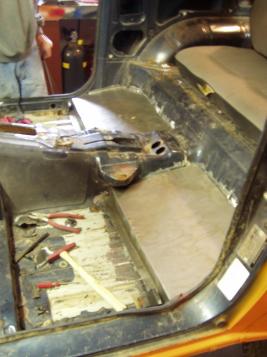
Below is a current pic of how it sits.Compare to pics above and you can see the difference.