Complete Rear end (rotor to rotor)
Both doors
T-Tops
Most of the interior
Engine
Transmission
Radiator
Fuel Tank
All guages except the tac
Drive Shaft
Rear window glass
Tail light lenses
I don't know why, but the previous owner apparently decided to pull the motor
out of this vette and put it in a '71 Chevelle!!! Also, who would take a
perfectly good hood and cut a hole in it? The past owner had some parts
stolen off of it and when money got tough, he would sell parts off of it to
our local 'vette restorer/expert'. The parts were apparently sold so the
owner could pay bills, etc. I contacted our local 'vette shop/restoration
shop' and talked to the shop owner who had purchased the parts off of this
car. He insisted numerous times in purchasing the car from me, but I refused.
He said he would sell the parts back to me, but that it 'would not be cheap'.
He gave me some figures, but they were weren't as high as I expected, but
still refused because I like to get a really good deal, not just a decent
price. I decided to do a little calling and a lot of surfin'.
When I brought this car home, it had "Scorpion" stickers on it. I don't know why, other than the previous owner apparently like to drag race.
 Oh well, the good part is I got a reasonably fair frame, good body (whats left of it), good chrome bumpers and front suspension with a clear title to build on.
I pondered the thought of buying another parts car and combining them into one but that would be too easy right? Also cheaper,
but I like doing things the hard way! In reality, around here Corvettes don't grow on trees especially parts cars so I have been
doing alot of calling into parts and prices. I have found a guy in Waco, Tx who is very reasonable with his prices and is very
knowledgable about Corvettes. His name is Mark Uptmor Phone: (254) 799-1356.
I will place an order from him and see how things go. Based upon his prices and other contacts I have generated a
a conservative budget for project Vette.
Oh well, the good part is I got a reasonably fair frame, good body (whats left of it), good chrome bumpers and front suspension with a clear title to build on.
I pondered the thought of buying another parts car and combining them into one but that would be too easy right? Also cheaper,
but I like doing things the hard way! In reality, around here Corvettes don't grow on trees especially parts cars so I have been
doing alot of calling into parts and prices. I have found a guy in Waco, Tx who is very reasonable with his prices and is very
knowledgable about Corvettes. His name is Mark Uptmor Phone: (254) 799-1356.
I will place an order from him and see how things go. Based upon his prices and other contacts I have generated a
a conservative budget for project Vette.
The Budget
July 6th, 1998
T-Top Trials
Received a set of T-Tops this weekend from Mark and they are in really good shape. I also received a good set of headliners with them. Great deal considering the low price! I have a problem with the fit of the tops, however as there is a large gap between them and a gap between the windshield and the bottom of the tops. I will have to look into this further, but the T-Tops work for the time being. The fit problem is a result of the windshield frame or glass rather than the T-Tops. I am planning to replace the windshield anyway. I am still waiting for the rest of the parts to arrive. I always feel like it is Christmas when I get new parts in the mail and then have the enjoyment of installing them.
July 7th, 1998
Door hangin'
 One door arrived (passenger side) today. The box from UPS was pretty beat-up. The door was in pretty good shape but UPS had dropped it a few times and the fiberglass is cracked in numerous places and one part near the handle is broken. My wife and I hung the door. What a Pain! Corvette doors have to be the worst for adjustment as to adjust the hinges you have to remove the kick panel and the vent just to gain access to the bolts. We adjusted the door as far back as we could yet we still have a good 1/2 to 3/4 inch gap between the back of the door and the quarter panel. I shimmed-out the striker so the door would latch but it is still not even close. Hmmmm... wonder if this has anything to do with the t-tops being out of alignment?
I called Mark and he said the fit of Corvette doors sucks anyway but he said if it is real bad the frame could be weak. He said to try lifting the car up from the back-end and see if the gap decreases in size. So I went outside and lifted the back-end of the car up and sure enough, the door moved toward the quarter panel about 1/8 to 1/4th an inch. The car has no rear and is sitting on the frame with cinder blocks under the doors. I may have to simulate a rear-end by putting the rear frame of the car closer to the bumper on cinder blocks to adjust the doors. Also I will have to check further into the frame. I cannot believe I have to go through this much mess just to hang a door! What other suprises await??!!!
July 8th, 1998
More stuff!
The driver's door arrived today and it is in much better shape than the other one. No time to work on it today, other than just roughly hanging it. will try tomorrow.
July 9th, 1998
Framed!

I repositioned the frame supports under the back of the car rather than under
the door and WALA! The doors and T-Tops fit more like a glove rather than a
loose mitten. I have been told of glass T-Tops shattering sometimes on
Corvettes that are jacked-up under the doors and now I know why. I decided
to investigate this "frame flexing" a little more, so I remove the rocker
panel molding to reveal a rusty frame underneath! My first assesment of the
car's frame being "reasonably fair" was a little optimistic. I will get a
second opinion, but I still feel that I can have this frame patch welded and
detailed (remember this is not a show car) with the body on the frame rather
than doing a "frame off" restoration.
More goodies! I got another box this afternoon with the speed-o and
driver's side lower dash. The speed-o was cracked in about 5 pieces.
Good ol' UPS! So I had my wife glue the speed-o back together and restor
it while she was at it. I dyed the lower dash pad (Gauge housing) and t-top
liners and they look good as new. The vette is really starting to look
like a car now. With silver and black doors on a bright red car, it kinda
looks like a strange cop car or race car.
July 12th, 1998
Time?
 No time to work on the car this weekend. I did, however get the pics back
from developing, so I have uploaded them. I am thinking of buying a digital
camera to upload, but the cost may proclude it. I am awaiting some parts
quotes from Mark for another order. If you need any Corvette parts/advice -
he is the man to see.
No time to work on the car this weekend. I did, however get the pics back
from developing, so I have uploaded them. I am thinking of buying a digital
camera to upload, but the cost may proclude it. I am awaiting some parts
quotes from Mark for another order. If you need any Corvette parts/advice -
he is the man to see.
July 15th, 1998
Stick it!
Just received another box from Mark including the auto shifter, cable and
brackets. All are in good condition and the price was great (I was told it
would be expensive to restore a Corvette, but so far I have discovered it is
cheaper in some areas (but more expensive in others - like rear-ends). Looks
like the shifter mounts a little differently on the drive tunnel because part
of the base looks like it needs to be through the floorboards unlike some other
cars that have the shifter mounted on top of the drive tunnel. I will have
to do some modification to my drive tunnel anyway, as this car was originally
a manual shift.
July 20th, 1998
Psych!
Talked with the guy who originally took all the parts off my car.
I asked him how much for the removable rear window for my car. He said he
would sell it to me for $75.00. I said OK I will be by around 5:30 to pick it
up, however, once I arrived (all the way accross town) he said he could not
find it. Figures! I guess I will have to do more surfing.....
August 3rd, 1998
Whew!

 What a weekend! First, I decided to do some fiberglass repair on the rear
deck of the Vette. Progress is slow and steady (pics to follow). Then I
repaird part of the hideway lights on the SS/RS Camaro. Then my mom decided
that she has had enough of not being in the Corvette club and went out and
bought a beautiful gloss red 1991 Corvette Coupe (car is immaculate and has
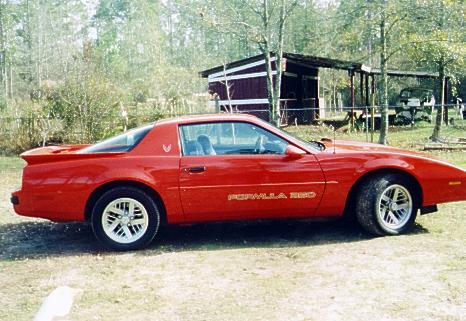
50,000 miles - MORE pics to follow). She is in hog heaven. I told her I
would buy her old 1989 Pontiac Firebird Formula 350. The Formula has the TPI
350 and will run like a bat out of hel@! (see
Projects for more info.) The only thing the car needs to be
perfect is a new paint job, so my focus will change from the vette to the
bird for a few weeks (pics to follow on the projects section). I can use the
Firebird as a test bed for the Imron I plan to use on the Corvette (both cars
will be the same shade of red, which is the same red my Camaro is painted, so
I will have to paint the Camaro blue just to break up the colors)! Got a
price quote for a rear end and a replacement hood for the 1969 Corvette from
Mark, so now I need to
save my money for them. I have decided to trash the original hood as it has
a hole cut in it and I also want to remove all the vaccum operated wiper door
and small hood and replace it with a 70s cowl induction full lenth piece.
The hood will not be correct for the year (kinda like putting on a cowl
induction hood on a '68 Camaro rather than a '69) but this Vette will be a
driver - Not a museum piece that looks good but has inoperable wipers.
What a weekend! First, I decided to do some fiberglass repair on the rear
deck of the Vette. Progress is slow and steady (pics to follow). Then I
repaird part of the hideway lights on the SS/RS Camaro. Then my mom decided
that she has had enough of not being in the Corvette club and went out and
bought a beautiful gloss red 1991 Corvette Coupe (car is immaculate and has
50,000 miles - MORE pics to follow). She is in hog heaven. I told her I
would buy her old 1989 Pontiac Firebird Formula 350. The Formula has the TPI
350 and will run like a bat out of hel@! (see
Projects for more info.) The only thing the car needs to be
perfect is a new paint job, so my focus will change from the vette to the
bird for a few weeks (pics to follow on the projects section). I can use the
Firebird as a test bed for the Imron I plan to use on the Corvette (both cars
will be the same shade of red, which is the same red my Camaro is painted, so
I will have to paint the Camaro blue just to break up the colors)! Got a
price quote for a rear end and a replacement hood for the 1969 Corvette from
Mark, so now I need to
save my money for them. I have decided to trash the original hood as it has
a hole cut in it and I also want to remove all the vaccum operated wiper door
and small hood and replace it with a 70s cowl induction full lenth piece.
The hood will not be correct for the year (kinda like putting on a cowl
induction hood on a '68 Camaro rather than a '69) but this Vette will be a
driver - Not a museum piece that looks good but has inoperable wipers.
 August 5th, 1998
Number Crunching
My wife found the VIN plate on the car today. Suprise! Suprise! The VIN plate reads:
194379S734605. No problem there, but the numbers are real hard to read.
The VIN plate was read hard to see as it was located on the Driver's piller
behind the molding and the window seal. Anyway, pulled out the old title sheet
and the VIN on the title reads:
2H194379573460. Hmmmm... Panic struck as I envisioned the Corvette a
stolen vehicle! The VIN numbers didn't match! My God! I ran around today
doing title searches and having VIN checks and stolen vehicle checks only
to have my mother notice that the numbers were practically the same and
that the title had an incorrect vin (everything after the 2H is the same).
So, what a relief! I do have the correct title and the car is not stolen, but
now I have to have the VIN corrected on the title (have the 'S' changed to a
'5' and the '5' put at the end). What a mess. It its not one thing its another!
August 6th, 1998
No Glass ?
Talked with a Mac in Georgia last night. He is sending me out the removable
rear glass and the center gauges and bazel (cracked). Other than
carpet, seat covers, and emergency brake console, that will complete the
parts needed for the interior restoration. Next order will be with Mark for
the rear end and a hood (although it may be a while as I really have to save
my pennies, but once I have purchased the rear, it should be the last major
purchase with the exception of the engine/trans & headlight assemblies).
I have decided to replace the 'holy hood' with a one piece 70s model. Once
the rear has arrived then I will trying to locate a good set of 15 X 8
rally wheels and a radiator and fuel tank.
BUDGET SPENT TO DATE (INCLUDING PURCHASE PRICE):   915.00
EXPENDITURES ANTICIPATED FOR PARTS AT BEGINING : 1,675.00
AMOUNT UNDER BUDGET TO DATE                    :   760.00
August 10th, 1998
No Glass AGAIN?
What a bummer! Mac (see above) called and said he sent out the center
gauges and should arrive Monday. BUT, he didn't send out the rear glass
because when he went into the shop to get it, it was cracked. So, here
I am again with no rear glass! Anyway, saw an add in the local paper about
a '78 Corvette being parted out with a rebuilt rear. I called about the two
items I need the most (headlight assemblies and rear end). He said he had
a set of headlight assemblies but would not sell them, but he had the rear
and would sell it to me for a good price: $1,000.00!!! I said 'I don't think
so but thanks anyway. He said that it was negotiable, but I figure I would let
him sit on it a week and try again next week (he lives in Alabama). If
I could get it for $450.00 he may have a deal, but I will not pay any more
as I can get one from Mark in Texas for $550.00.
August 17th, 1998
Simply Dashing!
 No, this is not my interior, but I have posted it here for inspiration only.
Received the center dash plate and gauges from Mac on Friday. The box came from
Georgia and went in a complete circle all the way to Ohio, down through the
Carolinas, to Jacksonville and finally here. Good ol' UPS! Box was supposed
to be here in two days but took over a week - they put it on the wrong truck.
Anyway, installed the left, right, and center dash this weekend and the car
is starting to look like a car now. Although I think I will be removing them
again in the future for troubleshooting the gauges, etc. I should be getting
the auto brake pedal and console top plate today from Mark.
Most difficult part of the gauge install was the driver's side. I am sure the
correct way to install the driver's side gauges is to drop the steering
column, but I loosened the dash and squoze them in. The complete lower
dash is held in place with 4 outer screws (2 on each side), 6 upper (3 on each
side), and two for the lower steering dash pad on the bottom. The center
dash is held in place with 4 outer screws (2 on each side) that attach to the
left and right lower dashes. I am having trouble with the center gauge panel
because it does no want to 'drop down' onto the console below and a broken
piece from the top is missing. I will either have to fabricate something or
buy a new one.
August 18th, 1998
Brake'n Plate
Got the console top plate and auto brake pedal from Mark yesterday.
Both are in reasonably good shape. I not only got the brake pedal but
the whole assembly. The console top plate will take a little work as
My heater control has levers on each side of the console top and the
plate does not. However, by turning the top plate over you can see
depressions for the levers for the factory to cut-out if so equiped.
So I will have to do a little cutting to the plate for an exact fit.
I plan to take some photos of the progress this weekend on the interior
for a 'middle' picture (not a before pic and not an after pic). I am
really getting excited watching these hunks of parts transform into a
Corvette. I am really enjoying this build-up and am looking forward to
seeing it progress. Locating and buying the parts is half the battle
but also half the fun. I hope to have enough money to afford the rear
end soon, so I will at least be able to roll it around.
August 23rd, 1998
Double The Pleasure
Finally got over to Alabama to look at the '79 Corvette parts car.
Looked the car over and noticed how rust-free the frame was (v.s. mine
with lots of rust holes). Seems the guy had bought the car to fix the
front end damage to his '76 and wants to sell the rest. I asked how much
he was willing to take for the whole car (frame, body, and rear end) and
he said $700.00. So I said 'ok, as long as you deliver it'. He said that
was fair so now I have a '79 and a '69. So, this turns C3 Econo Resto into
a frame-off restoration. I plan to brake out the old sand blaster and
sand blast the frame and paint it before assembling the '69 body to it.
Also, the '79 had PS, PB, and tilt along with the original steering wheel,
so I think I made-out in the long run.
I have also been kicking around the idea of creating two Corvettes. The '79
is more complete than the '69 was when I bought it (less front clip). Upon
further inspection the car has doors, T-Tops, rear clip (in good condition,
including rear glass and trim), front glass and trim along with a complete
front suspension, original steering wheel with tilt. It looks like most
of the dash is there but melted due to the engine compartment fire. Looks
like the carpet is still good, but missing seats and dash pad. This car is
rebuildable so I am seriously thinking of building two cars. That will cost
double the money (still having to buy a rear PLUS a front clip and TWO sets
of headlight assemblies plus TWO sets of upholstery, etc.) but would still be
cheaper than buying them already done if I am smart with my purchases. Could be
'his' and 'hers' projects. Why not?
July 1st, 1999
Amazing!
It is truly amazing how time flies. It does not seem like a year since I have worked on the '69. It just shows that I am getting old, I guess. Anyway, The above statement proved silly in that the '79 is missing too many parts to be a feasible project and the fact that I bought project '75 pretty much blew the '79 back into the parts car category. After I remove all the parts from the '79, the only parts left will be a set of electric window doors (without the motors), a set of t-tops (without the liners),a complete rear clip, dash, and title column. Yesterday afternoon I located and removed almost all of the body mount bolts in preparation of moving the '69 body on to the '79 frame. After talking to few people (Corvette experts, welders, etc), I came to the conclusion that there could be no saving the old rusty '69 frame. That fact proved itself to me last night as I was trying to jack-up the side of the car to locate the body bolts. The old '69 frame litterally got crushed under the pressure of the floor jack. Anyway, this weekend (weather permitting) I am planning to remove the '79 body from the frame and detail the frame and if I have time I will do a 'rough-in' of the '69 body on its new frame. I should have time to do this considering it is a three day weekend as long as the weather is nice. I will take plenty of pics with the camera do document the 'frame off'.
July 6th, 1999
Weight Lifting and Body Building
Actually, the title should be Body Lifting and weight pulling.....I decided to go ahead and lift the body from the frame off the '79 to use it for the '69. Here are some pics of the rusted frame on the '69 complete with rust holes:


The first step is to remove the body to frame bolts that are located in four points on each side of the body. All eight came out fairly easily except of course the last bolt that rounded out and had to be cut out with a hacksaw, chizle, and hammer. The bolts in front of the rear wheels were difficult to remove as they can only seen by removing the 'access cover' inside the wheel well. You have only about 4 inches in which to work to remove the bolts. You can turn the bolts about 1/25th of a turn each time! Each one of those bolts took about an hour each to remove! Once the bolts were removed, all steering and other connectors were removed, and door and t-tops removed, I placed a jack under the door frame and began to jack. Behold, the body moved! As I don't have a $10,000.00 shop or 12 friends built like Arnold Schwarzenegger, I had to innovate a way to remove this body with just my wife and I. Here are some pics of the body initially separating from the frame ....


Once the body was up so high we had to figure out a way to remove it from the frame. I did not have a strap, come-along, engine hoist, or crane to pull the body from the top; I did not have a bunch of weight lifting friends to help me lift the body from the bottom, so my wife and I figured out a way to construct a quick hoist/platform by getting some old land scaping timbers and making a wooden frame to place under the body. We could steady it with jack stands at each side and move the floor jack from side to side until the body cleared the wheels....


In order to get enought height, we decided to remove the front wheels and drag the frame out from under the body. After a few tries we were succesful and here is the nice rust-free frame awaiting its new '69 body....


Here is whats left of the '79 parts car.....

Wanna buy a cheap Vette? Come on! All it needs is a paint job, and a little TLC......LOL!
July 20th, 1999
Hole in one
Well, I got tired of looking at that huge hole in the hood where the previous owner cut clearance for the air cleaner for a high rise manifold so I decided to take some action. Here is my recipe...
How to fix a Corvette Hood Hole 101
(STEP 1) I removed the hood and set it on a table and cut some flashing (thin aluminum) just larger than the size of the hole.
(STEP 2) I then Duct-taped the flashing on top of the hood to cover the hole to make a mold.
(STEP 3) I turned the hood over (upside down, or over on its back) and poured some motor oil on the backside and all on top of the flashing and all along the perimeter of the hole.
(STEP 4) I then cut some large pieces of fiberglass matting and placed them into the hole and on top of the motor oil. I then poured resin over the matting and continued to apply matting and resin until it was about three sheets thick and then I left it to dry.
(STEP 5) Once dry, I turned over the hood, removed the flashing (came off easy with oil on top of the fiberglass) and then hosed and scrubbed hood to remove the oil.
(STEP 6) I then sanded, applied bondo where needed to smooth things out and then sprayed some primer.
I still have to block sand it prior to paint but heck, it sure beats having to spend big bucks on a new hood. Here is before and after pics:


The 'before' pic on the left shows the custom air induction air cleaner that my mom and dad made back in the mid sixties. I have been told by them that it was cheap to produce (about the cost of a bottle of wine) but costly to maintain (thousands and thousands of dollars). I happened to like it, but others said it was very ugly, producted sluggish response, produced almost no horsepower, was stone-age technology, and added little to the value of the car. Thus, reluctantly, I decided to remove it and cover the hole for a less exotic look. Yes, sometimes I wonder if I am not truly insane!
August 10th, 1999
Buying, Selling and the Infamous Honeydo list grows
I finally sold the '79 rear clip and it is out of the yard (I thought my wife would have a fit if it wasn't moved pretty soon). Anyway, the Ebay transaction was rough because I thought that the guy that had the high bid was the one that came out and offered the money for it - I was wrong and the Ebay guy was upset. I can't blame him but he acted like a real jerk. Anyway, I have bought some rough tail lights for the '69 for $10.00, 'Corvette' and 'Stingray' scripts for the rear and fenders for $20.00, a transmission cross member for the frame for $40.00, and a complete auto trans kit (auto shifter, console, break pedel, cables, etc) for $25.00 and ram head exhaust manifolds for $50.00 for the '75. Somehow in all of this I have undertook a complete renovation of the house including fun stuff like rotted floor joists, redoing the ceilings, replacing windows, building decks, etc, not to mention starting an 11 hour work day. Time is really becoming scarce right now but it is only a temporary setback. One thing I have learned about Budget Projects is patience. Other priorities wind-up pressing upon the project and it gets put on the back burner but not for long.
Back to home


