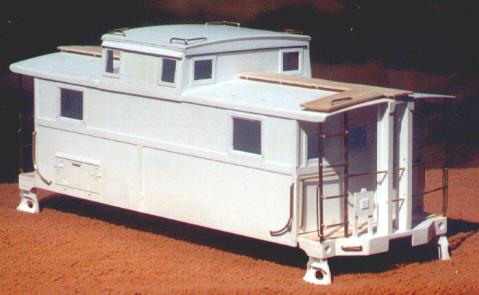


The purpose behind this little project was that I needed a prototype PRR Cabin Car (caboose) to go along with a trio of PRR F3 Locos that I recently made more life like. In the large scale market there is virtually nothing that is available specific to PRR likeness. So if I wanted something bad enough, I had to let my modeling skills work for me.
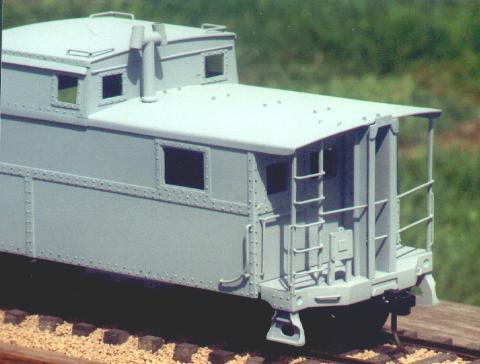
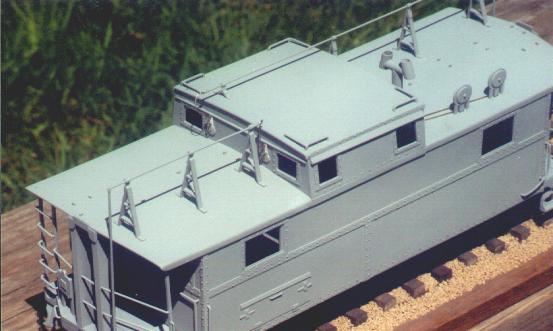
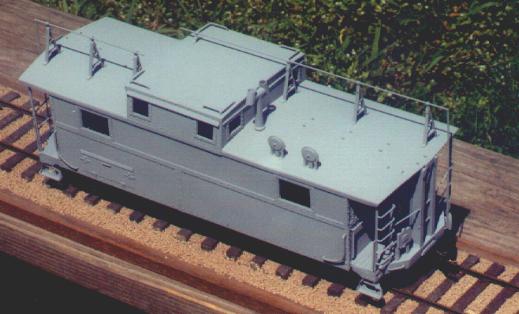
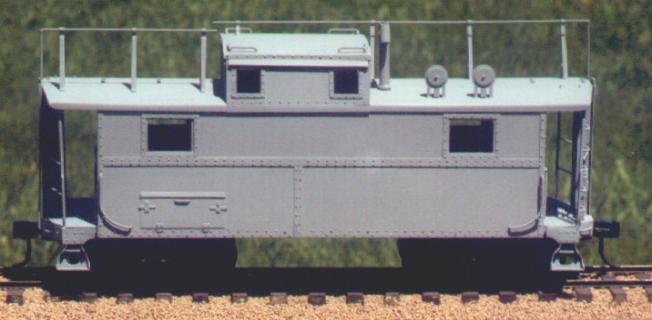
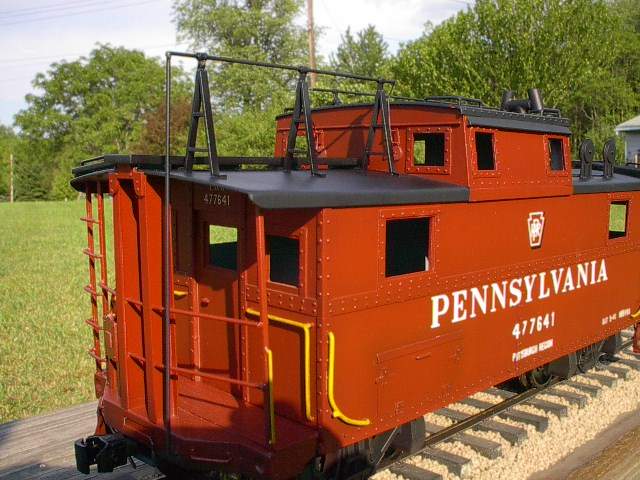
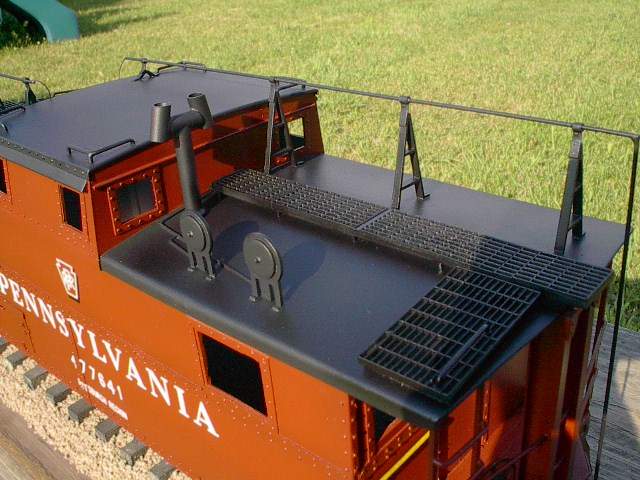
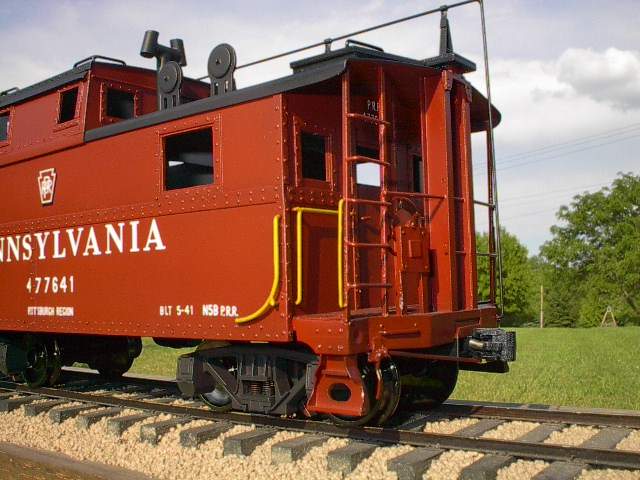
I chose to model the Class N5b because of all the Steel PRR Cabin Cars, the N5 series looked to be the easiest. I would have liked to have built the N5c Class or possibly the N8 Class, but that streamlined cupola looked to be a stumbling block. The N5b also fit my era I was trying to model. The F3 Locos were delivered to the Pennsy in 1948. The N5b Cabins were built in 1941 so a good match in my opinion. The whole N5b is basicaly scratch built. It all started with a few sheets of styrene, strip styrene, brass wire, rod and tubing. My main guidence through this project was my handy 1:29th scale rule. I used this to take measurments from an HO and O scale N5b I had on hand. The only commercial parts purchased (so far) were the Trucks and Air Resivouir (AristoCraft), 1000 Tiny Brass Brads for Rivits, and Kadee #1 Scale Couplers. The body took shape by transfering measurments to the styrene sheets and cutting them out. Each of the sides and ends were done seperately as was the cupola parts. Windows were cut in, Belt lines added where needed and holes marked and drilled for rivits. For the rivit detail I used what ship modelers use to attach planking. These have very small heads, excellent for G Scale rivit heads. Once that work was done the sides and ends could be built into a box shape. Reinforced corners held everything together square. The roof sections was pieced together, hand fitted and sanded to shape. The results were better than expected. The Cupola pieces dropped right in and were glued in place. Styrene sheeting was placed for the cuploa roof. Attention then shifted to detailing the ends. The Pennsy steel cabin cars were often seen being pushed from behind by helper locomotives. To make the Cabins strong enough to handle this routinly, the Pennsy built steel channel Collision Posts into the ends. This bracing reinforced the whole assembly tremendously. I built these by using styrene fabricated together into a channel and glued them to the end platform. Square Brass corner posts were attached to the platform then all the iron (brass) cross pieces soldered together. The assembly resulted in a very strong structure. The Underframe is made of thick styrene sheet reinforced with a center beam and the whole assembly is made removeable from the Cabin body. I thought the steps would be a little tough to build too. I was wrong. I fabricated these out of sheet styrene and strip pieces. I hand formed the curved pieces and glued then in place while holding. Tada! 4 pretty much identical steps. The pennsy Fleet of steel Cabin Cars are known for a particular feature that was attached to many. The Train Phone Antenna. This consists of the roof mounted Antenna Masts, Piping and 2 Reciever Discs. I proceeded with this detail in a different manner. I fabricated an antenna mast and a disc from styrene and had rubber moulds made. Resin Castings were than poured and the result was identical parts. Once mounted inplace a 1/32" Brass rod represented the Pipe.
At this time I am waiting to finish the N5b. I am waiting for a new Roof Walk from Aristo. This represents the see-thru Steel Grate type found on this Class Caboose. You will notice in one photo above that I had attached Wood for the roof walk. I learned of this mistake later and as a result removed this detail. By the way, boh Brass Models I used as a guide also had roof walks represented in wood. I am not the only one who did a little booboo! I am also waiting for Brake Wheels to arrive.
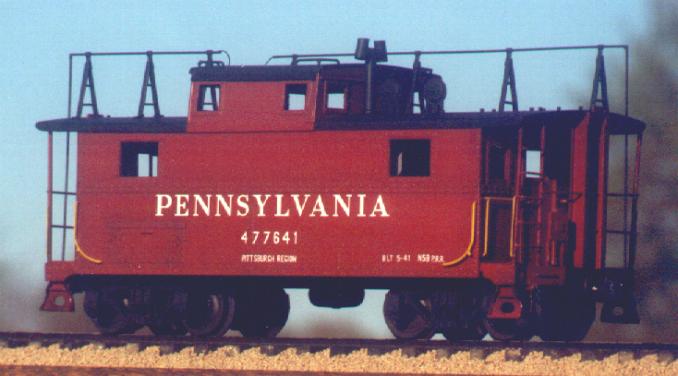
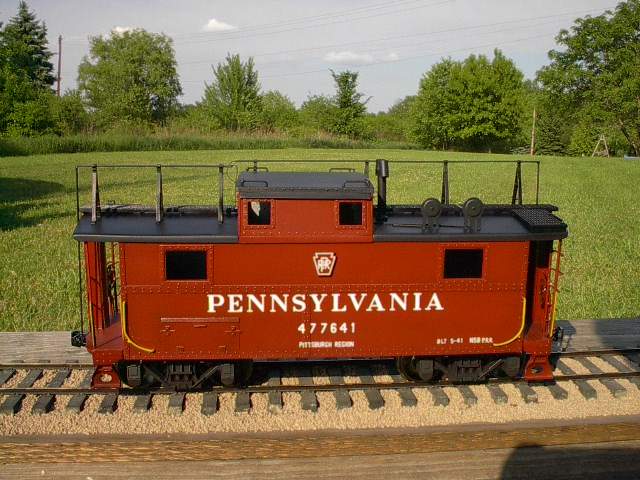
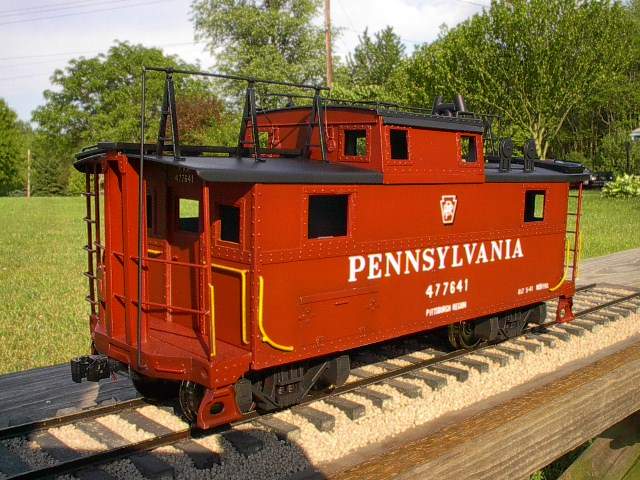
I needed to paint and letter the N5b to represent the look of the mid 1950's. This meant the Shadow Keystone style lettering was a must. I used CDS Transfers for the Letering and a Shadow Keystone Logo from Middle Division Decals. It is not shown in the photos above but it is now applied. Perfect size! The Shadow Keystone supplied with CDS Transfers represents the Large Shadow Keystone. This would be correct but for only several months of 1954. It seems in real life the Belt Line that runs the length of the car side interfered with the Keystone painting stencil placement. Thus the move to the smaller Shadow Keystone.
That is where I stand now. I await the parts to arrive and once applied, I can call it quits. Next project, a PRR N6b wood Cabin Car.....Gary
Free counters provided by Honesty.com.