
Table of Contents
This tutorial was created for those of you who have downloaded pixia and don't know how to use it seriously. Pixia can be a very elaborate, strong art program with many features to your advantage, if used correctly. This is a mostly illustrated tutorial, although the most advanced steps will be strictly written.
Firstly, let's assume that you have pixia. If you don't, you can download it here (English Addition).
Back to Top
Let's now assume you already have it installed. Open the Pixia program. It should start after a image showing brief information pops up. Click on the image to make it go away.
When pixia has fully loaded, click the image to the farthest left, that looks like a piece of paper with a fold in it.
Next, a dialogue box will pop up, asking what dimensions you want your new file to be. The default is 500x500, I chose this size for my tutorial. Hit OK when you've chosen a size.
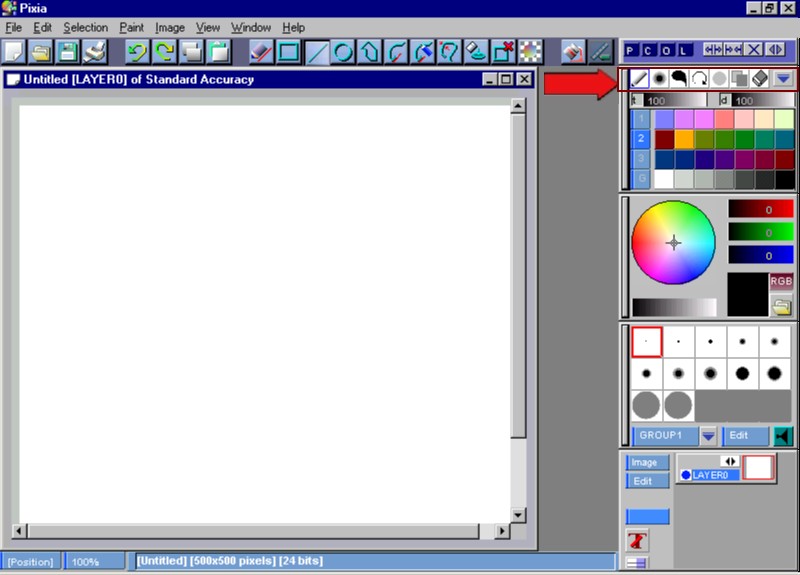
Now notice that the new file has popped up, and it is 500x500 pixels. On the top row, to your right, are your drawing tools, which are, from left to right:
The fourth row is the size you wish to make your drawing tool. Notice there are other options on the bottom of this row. We will discuss those later.
Now, the second row, is the colors. This is the color of your drawing tool. Notice there are numbers to the left, 1, 2, 3, and G (Gradient). Each number brings you to a different set of swatches, or preset colors.
The last area is the Layers box. This is where you add, delete, modify, and choose layers.
You'll notice that to the top of the program, there are sets of various tools. The first set, to the very right, is, from left to right:
The set in the middle contains, from left to right:
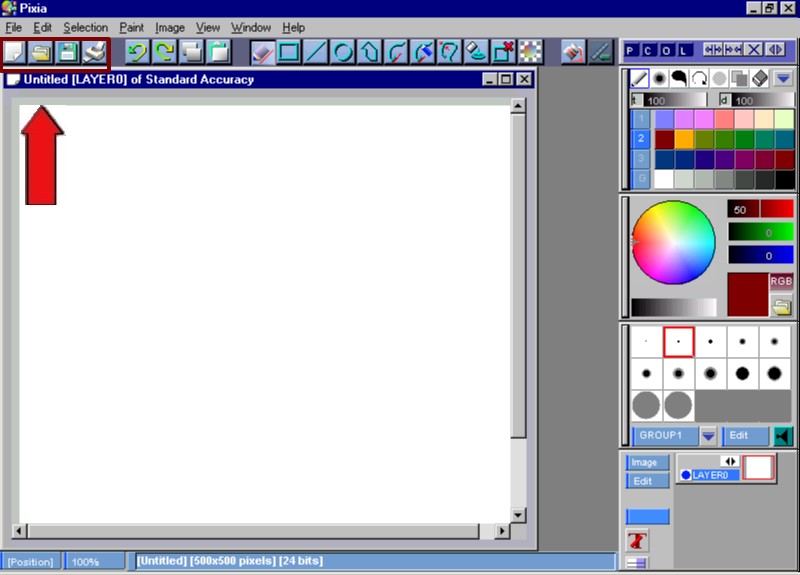
This is the row farthest to the left. It contains, from left to right:
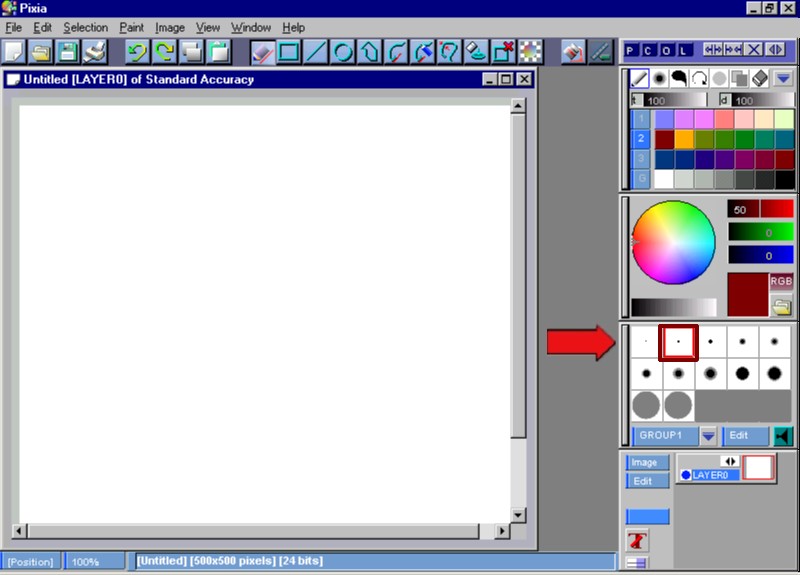
Now we are ready to begin drawing. You must have the pen tool selected to do this, both on the first vertical row to the very right, and on the top row to the right.
Choose the size you want your pen to be. I chose the second size, which is the second smallest brush.
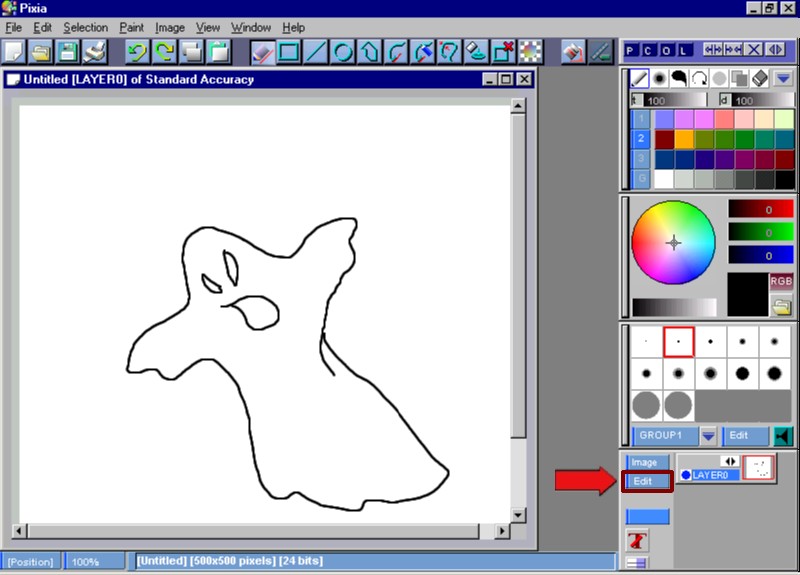
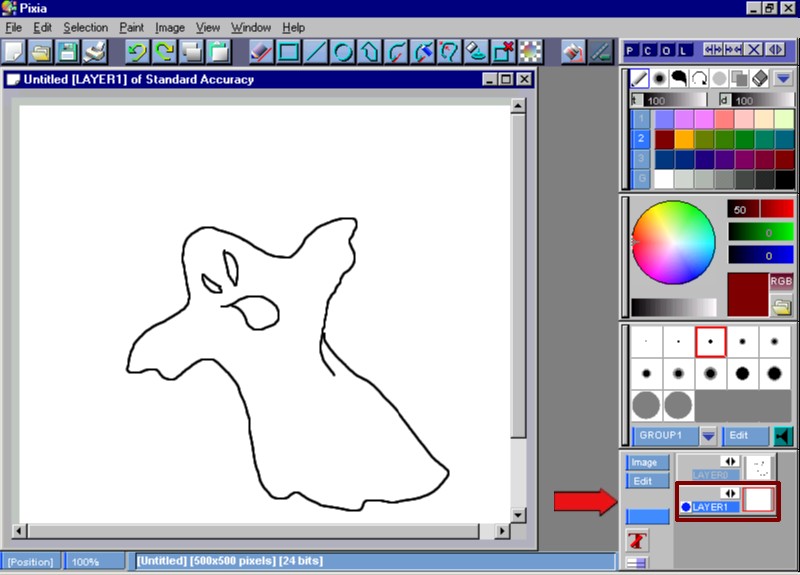
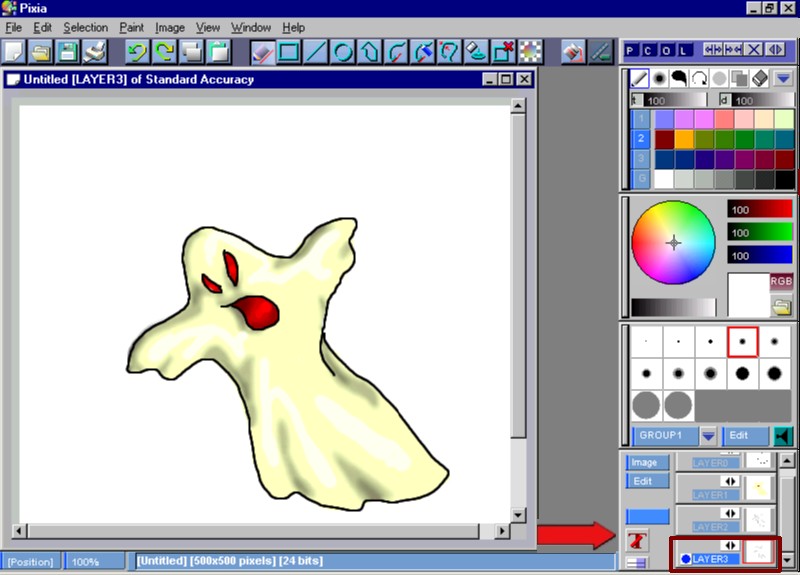
Draw the "line art" of your picture, now. In other words, the outline. I made it a very simplistic picture of a ghost, for the sake of the readers of this tutorial. You may draw whatever you choose.
Now that we have the line art through with, it's time to color in our picture. To do this without going over our line art, look at the Layers area.
Now, I can't show you the menu, but you choose "Add..."It'll bring up a menu, then hit OK:
Notice now, that our new layer is under the base layer that is always there.
There is a blue bar that says LAYER1 on it. Click that, and it will bring up a pop up like this:
Bring down the drop down menu. You will see all of the different layer types. My illustration's popup menu was cut short.
Choose Hybrid, and then hit OK.
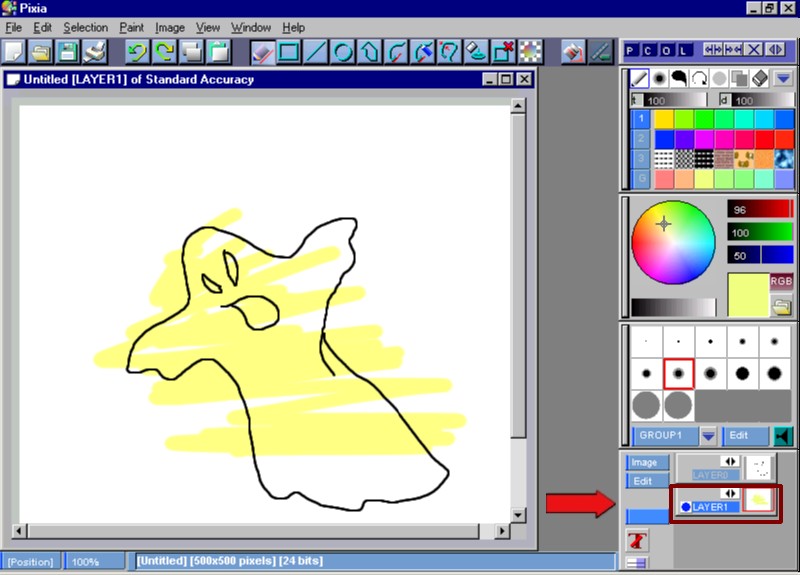
You won't notice any differences in the Layers area, but try coloring over your line art, and see what happens. I colored very sloppily on this illustration for functional purposes.
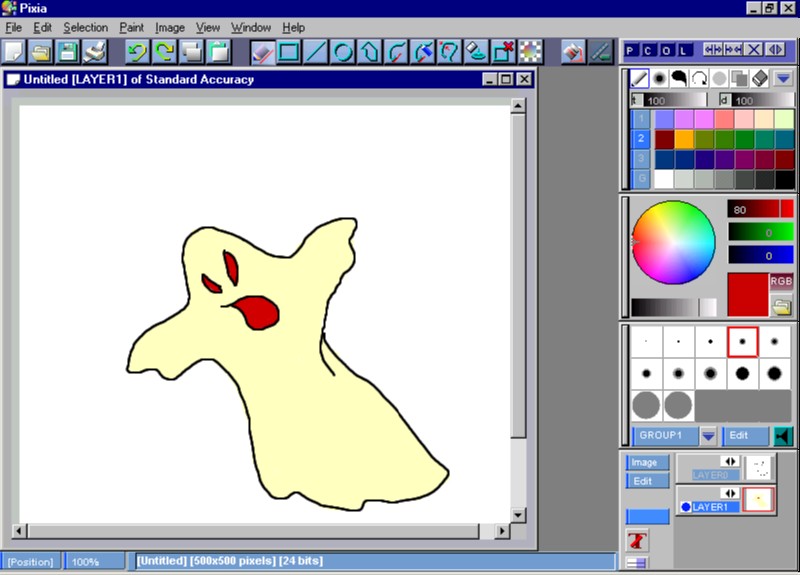
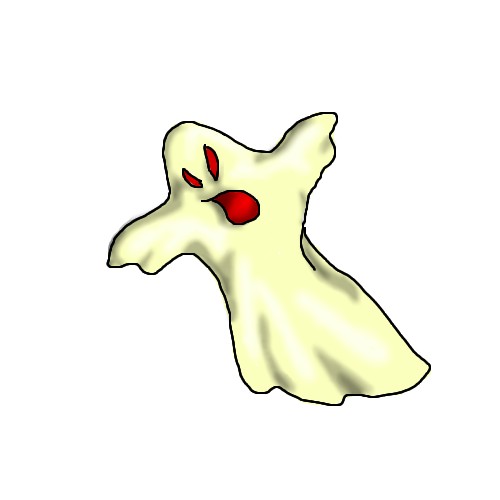
This is my more formal coloring of the simple ghost. It took very little effort to avoid going out of the lines.
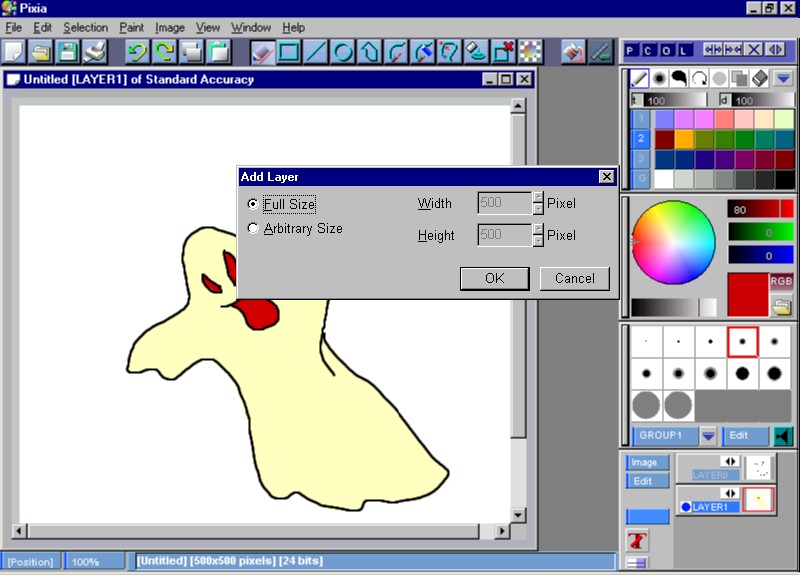
Now colored in your picture, so it's time to add the shading. You do this by adding yet another layer:
We now have three layers in the Layers area.
Like the second layer, choose to make this one hybrid too, and choose OK.
When shading, you really only need to use the last row of swatches in the second set. The grays. I usually use the third gray (from the left) for general shading, then for the darker shades, I use the fourth one..
This is a pretty sloppy, but still sufficient, shading I did for my ghost. I used only the third and fourth grays.
To make it more realistic, you should blur the shading. The blur tool is the second tool on the first of the vertical rows. You should choose a larger brush size, about the first one on the second row, and blur around your lines of shading, sort of tracing them.
Now it's time to add the highlights, or shine. Add your fourth layer.
Choose the blue bar again, the same way we made the other two hybrid.
This time though, choose Overlay. Then hit OK.
For shine, I use, again, only the grays. My main color is the second gray (from the left). For extreme highlights, I use white.
Here is the ghost I drew with the unblurred highlights on it.
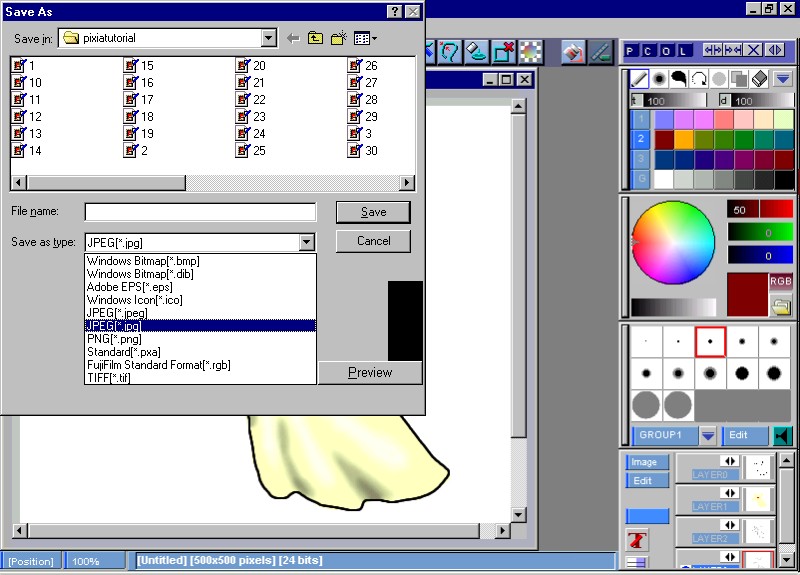
Now, it's time to save your picture. Click on the "File" menu from the very top menus, or click the third button on the first set of buttons to the left, that I told you about. It looks like a floppy disk. (I will discuss the other menus later)
Once you click "Save As...", "Save", or choose the Save button, this window will pop up:
If you bring down the drop down menu, it will show you the different file types pixia will save images as. You might notice that it has very many choices, but it cannot save OR open .gif images.
After you choose your file type, (I chose .jpg, for the tutorial) type in the filename of your picture. I called mine "ghost". When you're done, hit Save.
Advanced Pixa Tutorial, Continued >>>


Back to Top
Pen, Blur Tool, Rub Tool, Stir Tool, Blur 2, Filter Tool, and the Eraser. We will discuss each individual tool later on.
For now, all you need to know is that the pen tool is what you draw with.
Back to Top

Back to Top

The row under it, with the massive color wheel, can be customized to make your own specific color. The bar that gradiates from black to white is how light or dark the current color is. This can also be customized to your liking.

Back to Top

Back to Top

Pen - This is selected when you are drawing and don't wish to use any of the other tools in this set.
Rectangle - This is used to draw rectangles/squares, and also doubles as a generic select tool.
Line - This tool is used to draw lines.
Elipse - This tool is used to draw elipses, and doubles as a selection tool.
Polygon - This tool is used to draw polygons, and doubles as a selection tool.
Bezier - This tool is for making curved lines.
Free Bezier - This tool is used as a selection tool, offers the most freedom out of all the selection tools. You must draw back to the starting point, though, to close the selection area. If it isn't closed, it won't copy what's inside the selection area.
Wire - Similar to Free Bezier, but you don't have as much control over the line. To close the selected area, you must Right Click on your mouse, it will then automatically make a line to the starting point. I find this tool very hard to work with.
Selection Seedfill Tool - This tool is used to select an area for filling. With your mouse, you can click the area you wish to fill. It will automatically select that area, up to a closed line or a different color. This seed tool is a lot more flexible than MSpaint's, it will consider colors of very close value to be the same area.
Deselect Tool - Use this if you wish to take away the selection area, if you have something selected.
Show Outdide Border - This tool is used to switch between different styles of showing what is NOT selected, when selecting an area. You can choose from darkened checkered, very darkened, or to have no way of showing what isn't selected. I reccomend having either the checkered or darkened, it helps a lot when you want to see if your free bezier is closed or not.
To the very right:
Fill Tool - Used for filling the selection you made with the seedfill tool. It can also be used to color in the entire picture or layer a specific color.
Line - This tool is used to make a gradient line around a selected area. It's usually dimmed and unusable, and can only be used when you have something selected.


Undo - Use this to "undo" what your last moves were, from drawing a line to selecting, etc. Can be used to undo up to 10 moves ago, as default.
Redo - The opposite of undo. Can be used up to 10 times, as default, I believe.
Copy - Used to copy your selected area. You can also press Ctrl + C to do this.
Paste - Used to paste what you copied onto your current file. You have to then right click the pasted image, which is selected, and choose Paste.


New File - This is used to create a new file. Your current file will not be closed in the process.
Open File - This is used to open a file from your computer. Your current file will not be closed in the process.
Save File - Use this to save your current file. It will save as the file type you last selected. When you first start the program, the default file type is .pxa .
Print - Use this to print your current file. A printing options window will pop up after picking this button.


Do you see how it says "Edit"? Well, choose that.


As you can see, the colors go under the line art. This makes for easy coloring..


Here is how it looks after it's blurred, remember where the blur tool is:


BUT, there is a very good free online image converter called iaza that will convert pixia images to .gif format for you. Most programs cannot convert images drawn on pixia because of the anti-alias. Iaza can.

You now saved your first picture in pixia!
Back to Top
Copyright 2005 RaggedRook. Do not use this without my permission.
