
This is update to my motorcycle page on December 2012 Good things for those who wait and Big Zed have been sitting in boxes for long seven years waiting for master who one day would come and turn this pile of miserably looking scrap metal rubbish into fine piece of machinery it once was..
Synopsis of this project photographed and written by Ross Birch who brought this bike back to life and to whom we greateful from bottom of our hearts for his great work.
I am Ross Birch. I come from the south east of England, not far from the port of Dover. I first found out about Elena Filatova and her interest in the Chernobyl disaster and its related happenings in around late 2005. My background is various forms of engineering with engines, manufacturing of metal components, electronics and electrical power generation. I am also interested in motorcycles. I had a feeling that at some time or other I would have a hand in bringing this motorcycle back to life. I had wanted to visit some of the Chernobyl area for a long time and this seemed like the ideal opportunity, all be it in the middle of winter. Since the time I discovered the Kid of Speed website I have been very busy spending a number of years working in the middle east. It was very recently, in the first year of my present job that a work mate, Darren Mawby, said he had an old ZZR1100 with the bottom half of the engine still in it sitting outside his house in the garden covered in plastic and it was in the way. I decided to turn this into the project of reviving the Big Zed. I salvaged the crank shaft, bearings, rods, oil pump, starter sprag clutch, all the bolts and a hand full of other parts that may have gone missing, packed them up into a box to hand carry them to Kiev. I also took a full engine gasket set, new timing chain, torque wrenches and a small bag of other things I used in the strip down and arranged a 2 week holiday with my hosts. During this time the engine was rebuilt as best as I could manage to running order and at the same time I enjoyed visiting some interesting things and the company of a very pleasant family whom I would be happy to visit again. This exercise is not intended to fully overhaul the engine, just to provide the major component needed, the crankshaft, and to put it all back together in running order so it can be used once again. Making use of full speed riding is not advised and it is wise to drive carefully and slowly for at least 1000KM to be sure that all is well and nothing is going to blow up again. And from then on to ride it as if it is near retirement. After all it is a touring bike and not a racing bike.

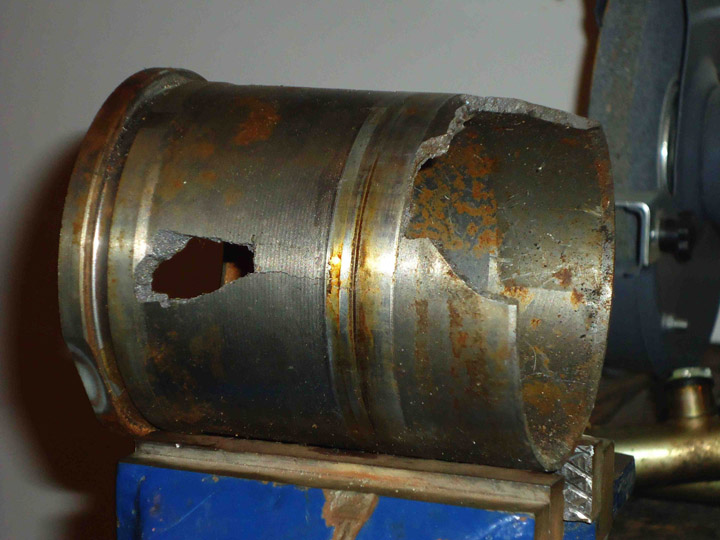


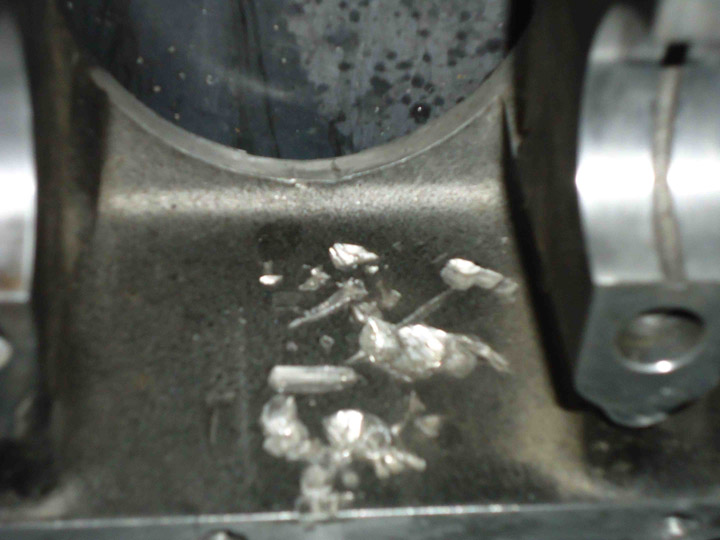
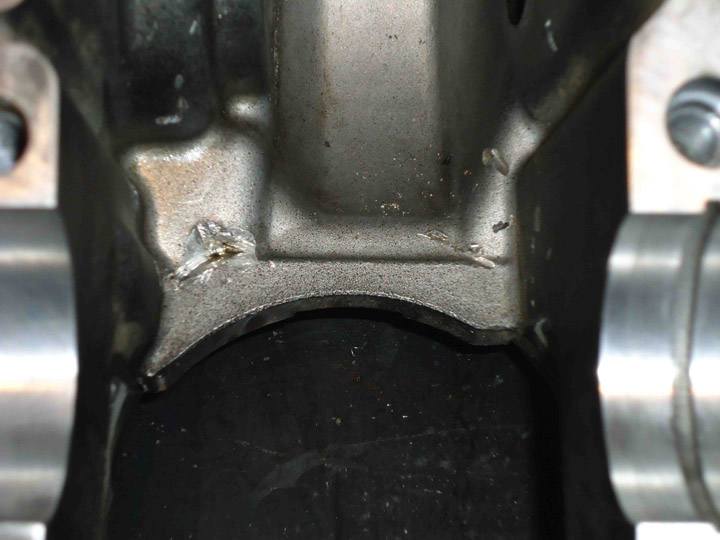
This engine had suffered 2 major failures in its life. A common problem with this engine is the failure of no 3, or 2 big end, depending on what end of the engine you count from. This big end bearing gets its oil supply from main oil transfer bearing on the crankshaft. The crankshaft has 5 main bearings, numbers 2 and 4 transfer oil into a drilling in the crank shaft and then on to the two big ends each side of same. The oil supply for this bearing comes via a formed metal pipe, unlike the other 4 mains that are fed from a drilling in the engine casing its self. This failure often occurs when the engine is driven hard for a lot of miles, and/or is used for pulling wheelies when the oil will run away from the oil pickup causing a loss of pressure and this is the bearing that will take the abuse. The big end shells picked up and seized (PIC 2). With the other 3 cylinders running at high power forcing the crank to turn and a catastrophic failure breaks the rod and often launches it out of the engine. In this case it only damaged them a little and broke a cylinder liner.

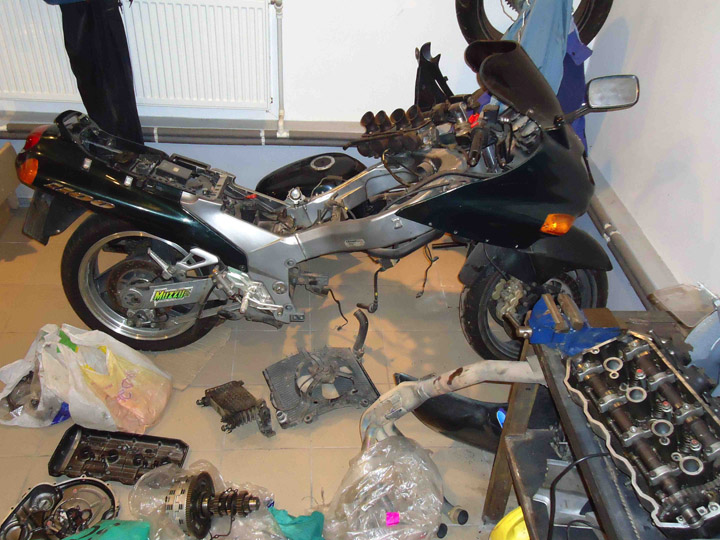
After being moved several times in the last 7 years, the bike and all of it’s engine parts got mixed up and may be a few nuts and bolts became lost. I had to sort through what was in boxes and plastic bags to be sure every thing I needed could be found and start in some sort of orderly manor.
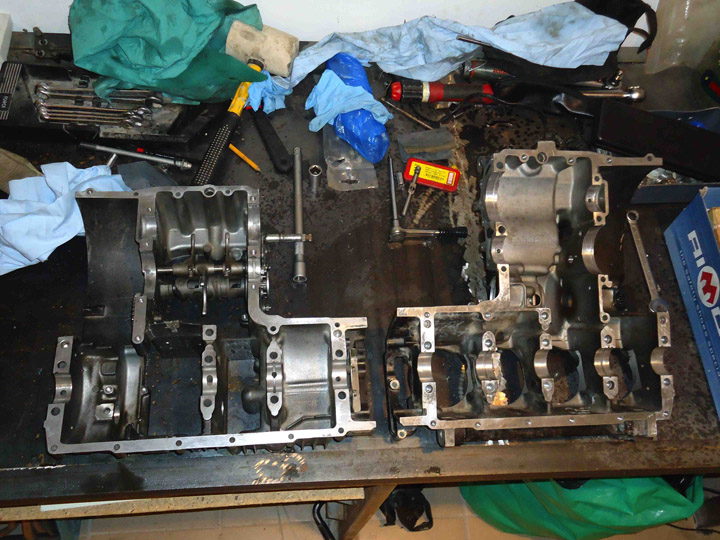
The first job was to inspect the engine cases. A choice of 2 bottom halves and one top half existed in the pile. During manufacture, the halves are bolted together and the bearing surfaces are machined by “line boring” them as a pair. They can only be used with the correct halves of the pair together. After determining the bottom half that must be used I set about checking all the bolt hole threads. I had some taps to clean out and check every hole and only one 6mm hole was found to be stripped so I enlarged it to m8. After pressure washing them they had to dry indoors by the radiator.
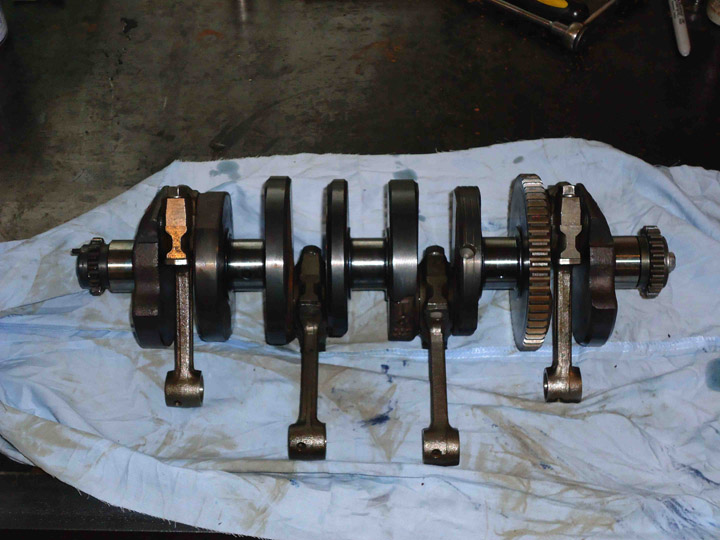
The donor crankshaft was in a bit of a state but it cleaned up well. The rods from this engine were used and all the bearing shells remaining in the same positions as before. The clearances were checked with “Plastiguage” and engineers blue before final fitting.


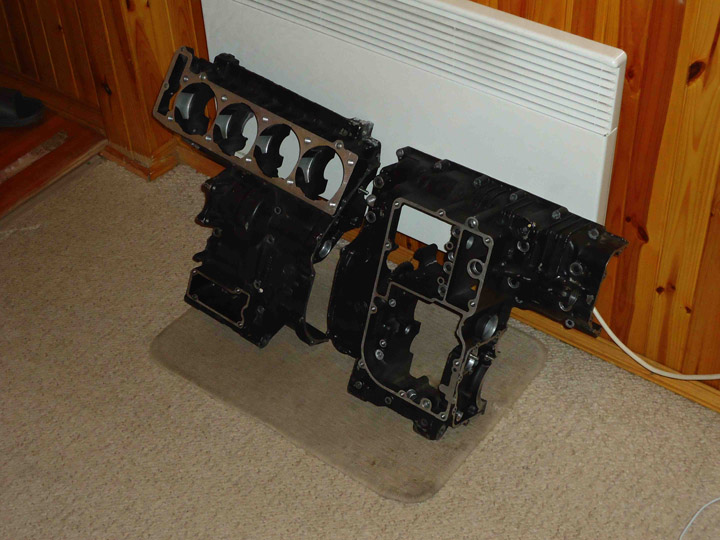
With everything nice and clean the crank and gears are closed in the crankcases. Everything torqued up, oil pump fitted, starter/charger shaft in and clutch on. The engine is starting to take shape.

The pistons are now fitted. No’s 1 2 and 4 are used from the previous set of cylinders but with number 3 missing one had to be chosen from a pile found in a box.


The cylinder liner for number 3 had to be taken from the set of cylinders once used before the first failure. We set them up with some wood and planned to drive the car up onto them in order to use the weight of the car to press one out. We decided against this and in the end found a repair shop used to dealing with this sort of thing and bribed them with a bottle of Vodka to do it for us. The cylinders are now installed with a couple of bolts retaining them and the first cranking test of the starter can be done with some jump leads, making sure to hold the timing chain out straight. The bulk of the carbon on the pistons was scraped off. No need was found to clean them back to a shiny state.


Nearing the end of the build attention must be turned to the cylinder head. As found it was all together and appeared to be ok. It was very dirty with dust and grit all over it so it had to be taken apart and cleaned just like the engine cases

The cam bearing caps are kept in order on the left. The valve shims are kept in the correct places and cam followers, springs and shafts all laid out. The valves are removed and stored in a sheet of foam to keep them in order


After cleaning the head at the local car wash via another bottle of Vodka, The valves are lapped in slightly to ensure the surfaces are usable, no seats are cracked and no valves are bent. DISASTER! 2 exhaust valves are found bent, only slightly but enough to be bent. The head cannot be installed without first finding usable valves. Some phone calls were made and a breakers in the next city “Odessa” 400KM away found 2 used valves for a whapping 80 Euro. Expensive by main dealer prices in the UK but they had to be got. 6 hours later, another bottle of vodka and delivery by bus driver meant the head could be made ready for fitting.


Valve clearances on this engine, and most motorcycles today are set by the use of shims. Small coin shaped discs of various thicknesses. Measurements are taken with feeler gauges and the shims also measured, calculations will show what shims to change. Shims are expensive new but can often be found cheaply at breakers, in the UK and EU any way. I will locate the shims needed and take them with me next time I visit Kiev.


The electrics are connected to a 12V battery and tested for the first time in 7 years and all seems to be working fine. The Bottom end of the engine is installed in the frame and the head fitted to it after. With everything fitted and ready all we need to do now is put the oil in and give it a crank to get the oil up before starting.

With the garage door open and the loud end pointing out, the bike is fired up, carbs balanced and the engine warmed up to temperature. After 30 minutes of running all was found to be well.

The next day the oil and filter was changed as a precaution. The filter paper was cut out, pressed in a vice to dry it and inspected. The dirt and small metal particles found after the initial run are likely to have come from inside the oil cooler since it was in use during the previous failure. However the filter did its job and trapped it. Further filter changes and checks will be done after the first road run, after the winter snow and ice has thawed.
All in all a fun and satisfying project, a nice 2 week holiday spent with a good family who are like minded and who have similar interests to my self. I look forward to return again some day.
Ross Birch.