
Kyosho Tigermoth Conversion
This is a very quick
write up on the Kyosho Tigermoth conversion.. The idea started up with a discussion
on
the Ezone on ideas about converting the .40 Gas model into an electric version
powered by a Maxcim brushless
motor system..
One member stated that
in the USA , the model was considered a 'Floater' on gas with its 900 Sq inch
wing area.. and this prompted me to do a quick conversion.
Some Caution:
When
I was building the model, I found that the wings did not fit perfectly against
the wing root
when I was test assembling them.. morever after I made the wing root fit, I
found to my dismay
that after I have glued the wings, the wing struts were TOO SHORT to reach the
bottom wing.
So my
suggestion is that , If you are not very experience in measuring things, I strongly
suggest
that you finish the upper wing by following the steps outlined below
Assemble and glue the bottom wing sections together first.. After it is dry..
** I use Metric M3 and M3 Locknuts
so that the parts won't come flying off in flight...
the Kyosho wing fasteners screws are useless.
This will prevent the improper alignment
problem I got caught up into.. I was forced to hand
make the struts from K&S flat aluminium tubing. For easy assembly , buy
a T allen key wrench
with a ball socket so that you can angle the tools and a lock nut driver.
Battery Tray placement
The battery will be placed into
the hollow nose area. Before this can be done, Hollow out the instrument
panel area so that two batteries can be inserted flat , on top of each other.
A spare piece of light ply was stuck with velcro and with a releasible wire tie for model R/C cars
 |
 |
|
Battery tray
before gluing
|
Inside the
nose
|
The spacious nose area was then filled
up with a piece of light BALSA scrap wood block to make the inside Level
The tray was then CAed to the nose area with thick CA.. The inside of the battery
compartment was laid up with
SCRAP EPP foam to prevent the front of the battery from moving around.
 |
 |
|
Fiberglass
cloth to the bottom of the battery tray
|
Battery placement
in flight
|
The bottom of the servo tray area
. A scrap piece of balsa was use to separate the servos from the battery tray..Next
picture
shows battery placement in flight.. The two batteries also have VELCRO on top
of each other as well as the bottom ..
This prevents any shifting around in flight.
Motor Placement
 |
 |
|
Maxcim Motor
placement
|
Speed control
placement
|
A Maxcim 15-13 D with a ROBBE metal
3.7: 1 gearbox with a Master Airscrew 12x10 electric was used in the initial
test
flight.. Make sure you make holes under the motor
mount and above the batteries for air to travel from the firewall
to the battery compartment.
All mounting parts and motors are available from Maxcim.
|
|
|
Receiver is
placed i n the cockit hump area above the two servos
|
The final flight configuration has
the receiver inside the space hollow space in the hump between the pilots.
As shown, place the speed control inside the hollow part on top of the batteries..
the SERIES wire
joining the two batteries should be kept as SHORT as possible.. According to
Bob Boucher of Astroflight
a battery wire that is too long will affect the
speed controller in a detrimental fashion..
It will either DESTROY
the speed control or cause the speed control to think that voltage
is lower than it actually is, causing short duration flights .
 |
 |
|
All dolled
up with 13x8 MAE
|
Model Figures
 |
 |
A couple of soft toys was VELCROED to the empty seats - Flying was more draggy
but nothing detrimental..
Tigger and Piggy sits very well..
Electric Calc info - Simulated only
All up weight without batteries :
82 Ounces, 109 Ounces with 14 2400 Cells.
7 mins estimated cruise. 1349 Ft per min climb at full throttle, 67 Amps@full
power.
(Within rating of Maxcim speed control- no worry as model takes off easily w/o
Full power)
Gear Ratio: 3.7 : 1
Maxcim 15-13 D brushless motor, BEC on 14 Cells. (special Maxcim only speed
control)
Actual Flying config:
I changed the prop to a MAE 13x8 Prop, and the flying is even more fantastic..
I can fly for longer
periods at 40% Throttle.... Take off was very impressive to say the least..
However I do caution that
adequate cooling is required.. So please drill a few holes in the fire wall
near the engine mount
so that air can pass through and above the batteries .. Earlier drilling of
the holes near the bottom
of the firewall , I feel is not adequate.
Flying behaviour
The model floats on less than 1/2
throttle, Take off run was around 20 average human footsteps
The model was a little tail heavy a I have balanced it according to Kyosho recommendations
however
a little down trim fixed the problem.. Really easy to fly... Mixing rudder with
ailerons makes for
a smooth turning model..
Do not Roll the model because it
has only 1 set of ailerons and will not roll like a biplane with
4 ailerons. Rolling the tigermoth will result in heavy nose down attitude which
must be recovered
from a safe height.. The roll also looks ugly... don't bother for sport flying..
You can always increase
aileron throw to make better rolls, its up to you..
DO NOTE that you have 14 cells on
your model and you should land the model smoothly
with plenty of airspeed, do not try to bleed off airspeed by pulling on the
elevator
More flying notes:
When flying in high head winds condition,
use a 12x8 prop. The 13 inch prop hit
the ground and broke during landing because I had to do a power landing..
The model loves to float so much
that it can actually HOVER.. Weight was
not a helper , the model hovered like a UFO. and landed vertically with the
prop spinning, ouch... A smaller prop would have solved this problem as
thrust can more easily managed.. A large prop gives too much thrust in
these conditions.
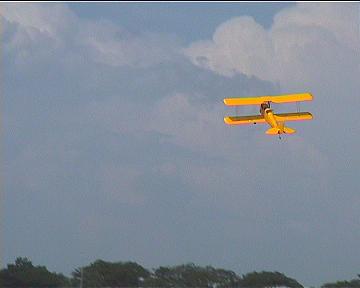
Videos
Ok , enough talk.. here are videos
with the biplane in test flight mode (not dressed up).. as I was eager to
see the results...
 |
 |
|
Takeoff (149k)
|
landing (120K)
|
CLICK ON THE PICTURES ABOVE TO VIEW THE MOVIES
Movies are in Windows media 7.1 format
using the windows media 8 encoder.
please visit http://www.microsoft.com/windows/windowsmedia/en/default.asp
for more information or to download
the latest version.
