
Hirobo Paraplane Sport
Review and Enhamcements
 |
Original Specifications Overall body length:406mm WingSpan: 59 Inches, Width: 25 inches Information: http://model.hirobo.co.jp/english/ Direct link to paraglider Fullscale: http://www.paraplane.com |
This review contains information on how to get your stock paraplane
sport in the air with the least of hassles
and also notes on what you need to do to ensure a trouble free day at the airfield..
This article will also
cover some enhancements and tests and a final conclusion on how to make the
model a really fun machine with
adequate duration.
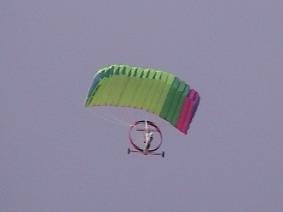
The paraplane sport's steering system is based on a TILT BAR..
So far
all the commercial models on the market has a FIXED canopy support bar and
steering is done by pulling strings (Brake lines) on the back the of canopy..
The advantage of the brake line system is that you can carry lots more
weight and you can also flare during landing without power.
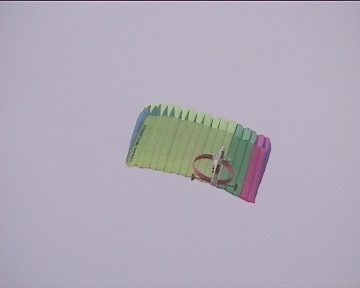
The tilt bar method works best for rectangular canopies and not
very well for those thin long kites like the Thunderfoil Kites or
Go-fly-a-kite parafoils.
With a tilt bar system, almost the whole weight of the model needs
to
be serviced by the single servo everytime it pulls the model. This
means that your servo needs to be a strong one and if you ADD
any more weight to the model you add additional stress to the steering servo.
The tilt bar system requires only 1 servo to operate and it is
located
on the CG of the model. Tilting the bar to one side, shifts the balance
and the model turns. (see the full scale link for a techical explanation)
(http://www.paraplane.com)
Lets get started
============
When you order the model make sure you also order
1 Spare carbon tilt bar
Quick System Summary - Package for initial testing as used by author
Model Assembly requirements
Pre flight mental activity - Thinking in your head.
Tools to bring to the flying field

Face the Wind before launch
Pre-flight activity - ROG
 |
 |
|
Full power into the wind
|
good airspeed
|
Flying
Landing - little wind - at 3 mins alarm
Landing - with wind at 3 mins alarm
Flying tips and Warning
A very nice addition to the flying field
Original gearbox with Clutch
When using the original gearbox
Speed Control
Servos
Enhancements and Modifications to the Model
I have decided to modify the model for enhanced performance and here are the
results..
Reasons:
1) Hirobo gearbox will lose its teeth at 8 cells because of heat buildup.
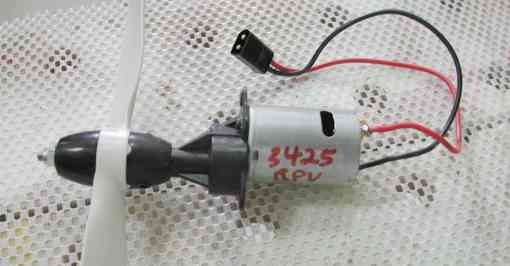
2) The 540 can motor has good performance but as you can see from the results,
I am truly enjoying
myself with a LRP car motor.
Ferrite Version
==========
1) LRP Generation X 16x2 double wind car motor, timing at 2 degrees, on Hirobo
Prop
2) Master Airscrew gearbox , 3.5:1
3) Powered Flight time: 6 mins on Sanyo 7x 2400
4) 40 amp Robbe Speed control with BEC
Any car motor that is around 16 - 15 turn would do. The original motor has
a RPM/V constant of 3425..
A rebuildable car motor can be timed to your liking and this is like changing
a 16 turn into a 15 or a
17 turn by changing the timing.. I timed the motor 2 degress in the direction
of the desired rotation to
give about 1.5 to 2 amps at 0 load.
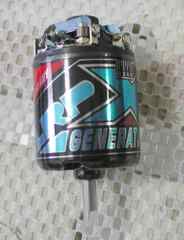
I chose the LRP Generation X - 16 x 2 double wind because they are cheap and
out of fashion
for (US$30.00) old price - US$90... .. people are going for Trinity D4 car motors..
we don't
need that..
Current measurements
Current Draw: 7x2000 @ 9.5 volts fully warmed ,charged
watts: 313 watts, 33 amps.
prop: Hirobo 14x7 plastic prop. (balanced with CA)
ROG Take off requirements: 80 Watts per pound minimum
Kontronik motor with aluminum mount
and fiberglass cloth with Wood brace.
Brushless Version
============
1) Kontronik B/L 480-42 and 4.7:1 gearbox on Hirobo Prop
2) Axon Gearbox (Pre installed)
3) Powered flight time: 3.5 mins on sanyo 7x2400
4) 40 amp Kontronik with NO BEC
5) 4x 600mah NIHM Cells.
Climb rate:
With the Kontronik Brushless, the climb rate is very impressive, lets give
it a number - 10 for fantastic performance
The climb rate of the LRP motor I would say is VERY VERY good - say 7 compared
to the brushness motor..
The major shock to me is that the Kontronik lasted only 3.5 mins. I was informed
that this is due to the POOR
performance of the software in the speed control that caused the system to be
inefficient at throttle setting below 60%..
The LRP brushed version lasted 5.5 to 6 mins with power left for flaring..
Since the paraplane is meant for a lot of cruising, the throttle would be about
40-60% most of the time.. this
manifested the problems in the Kontronik controllers today.. Schultz has a new
series of controllers that is
suppose to address this problem.. See http://www.schulze-elektronik.com/fut-e.htm
for an explanation.
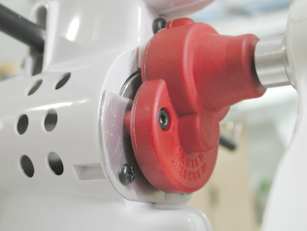
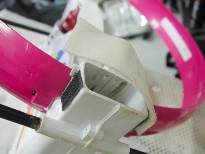
Master Airscrew 3.5:1 gearbox. Note template and Note that the
tilt bar
philips screw is reversed with the lock nut now in front.
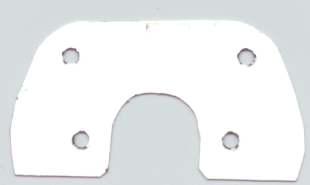
Click to download full size template
IE (right mouse,save as)
You must use a dremel tool to SAND AWAY the clutch formations
on the prop. Then you sand the surface FLAT.
You also need to use a Tower Hobbies prop Reamer as the prop hole is a metric
5mm, using a tower hobbies reamer,
I widened the hole to the regular US size hole , which will then fit the master
airscrew prop adaptor. You would find it
useful to MARK the front of the propeller with a marker pen on the prop hub
area.. The reason is that the prop is WHITE
and you have a tendency of making a mistake. The Prop must mount with the front
part of the hub mating with the master
airscrew prop adaptor..The back of the prop has slotted holes .. See the Kontronik
Mount picture above... Mounting the prop backwards will still fly the model
but with about 20% reduction in power. From behind the model, the prop should
rotate CLOCKWISE.
A template is required for attaching the MAS gearbox. Print it
on a printer, Spray 3m77 on it and attach it to
some very thin aluminium. Cut and drill out the holes.. You may need to lengthen
the Metric M3 screws ..
Next, Adjust the pinion gearbox for the MAS gearbox until all
the pinion contacts the main gearbox on a
1 to 1 meshing.. You Can do this by pushing out main gear and prop shaft from
the mas unit and
then while holding the motor on your hand
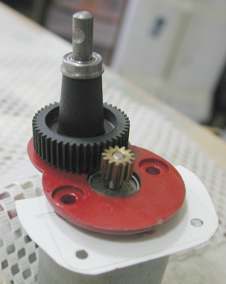
1) Place the template onto the face of the motor
2) Place the BACKPLATE of the Mas gearbox onto the template
3) Place the main gear of the MAS gearbox onto the backplate
4) Here you can then see if the pinion gear's meshing is a complete 1:1 mesh,
if not, adjust the pinion gear.
5)Once you have done this, apply a drop of locktite onto the pinion gear and
later grease the gears.
Reassemble the gearbox and it is now ready for installation
1) Remove the tilt bar screw
2) Place the LOCK NUT which was at the back , to the front position and insert
the long Philips
3) Screw from the BACK.
4) Put in the template and the MAS GEARBOX.
 |
 |
|
Note Lock Nut is on the front now
|
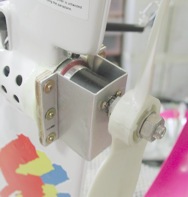
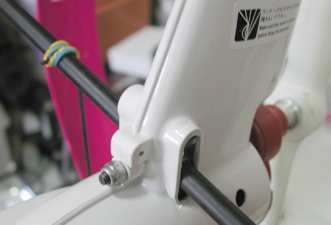
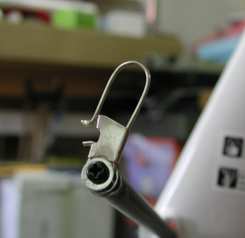
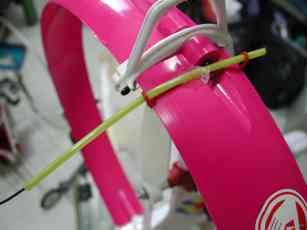
Fishing Clevis replaces the original hooks.
|
The original canopy hooks on the tilt bar were replaced by strong
fishing clevises.. The original hooks
has a problem of bending very easily.
The fishing clevis is oriented vertical and tightened. A loose
clevis will cause the model to swing to
one side during takeoff. Check to make sure the clevis does not swing freely,
if it does , it is because
the plastic inserts in the carbon rod is loose. USE CA to fasten it properly.
 |
 |
|
Attach a self adhesive Velcro on both sides of the battery
compartment.. So that when the battery is inserted, a non-adhesive Velcro
strip can be placed across the hole You also need to TEAR OUT one side of the internally attached soft Velcro for the flight battery to go in faster... (Non-adhesive velars are sold at DIY clothing outlets) |
For the Antenna, use a hard left over sullivan pushrod or
if using the original antenna tube, apply GOOP adhesive to glue the tube
to the prop ring, otherwise the original tube likes to get sucked into
the prop . A longer sullivan pushrods keeps the |
Windows Media MOVIES
|
|
|
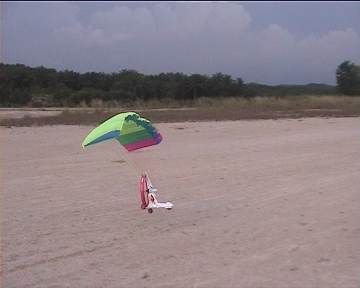
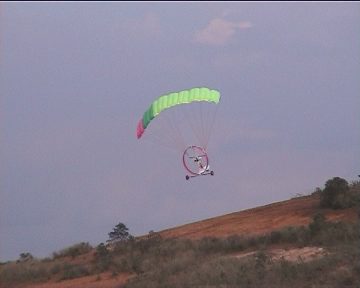
Take off (with head wind)
|
Landing (with strong wind) (KEEP CHILDREN AWAY- See video) |
Click on the links to see the takeoff and landings, Windows Media Player is required... Get it here
So here is the final configuration for the enhanced Hirobo paraplane
SEND COMMENTS to author
Eflight news groups comments on the MAS
| I use these boxes and really like them. I'm using
10 cells, 3.5/1, 16 turn car motor, about 32 amps 10 cells, 3/1, Astro 05 cobalt, about28 amps 10 cells,2.5/1, MMR, about 25 amps I've got over 2 seasons on 2 of these boxes and they're holding up fine.
When I get one I check the spur gear for flashing from the manufacturing
David B. Chewning Sr. |
|
