
In the following documentation you will find out easy steps to gain knowledge in setting up a program called Mirc. This document will cover setting up this platform for a web site called Jmeeting. Please read through the descriptive pictures and the documentation underneath of these pictures carefully as it will make the process of setting up this program a lot easier.
Step 1:
This is an opening screen that you will see when opening Mirc.
From here we want to establish a connection by filling out the details under View, Options menu. Detailed bellow in the diagram.
Step 2:
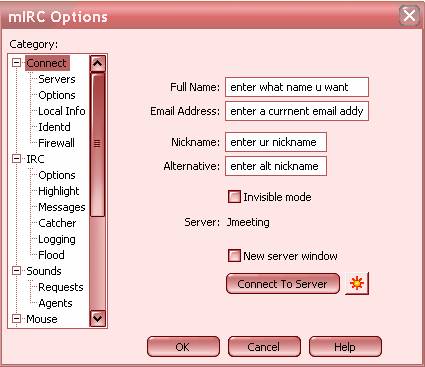
To get to this screen you need to go to View, then Options menu. This is pretty much self explanatory in what you have to do here. (Where it asks you to place your full name to remain annonymous you can elect to use a screen name).
All you have to remember to do is not to press OK at any stage here till the end.
Step 3:
The next step is to add our Jmeeting server: To do this we need to open up the Servers tab under Connect, then go to Add and fill out the details as directed in the diagram below.
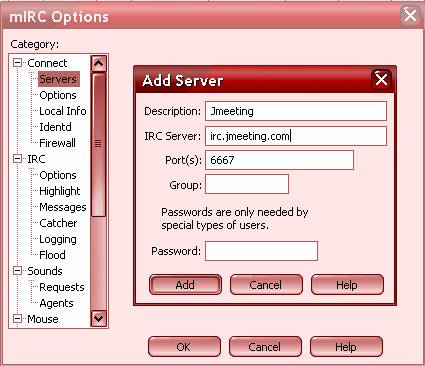
Here we want to press Add then move onto our next step which is setting up our Options tab:
Step 4:
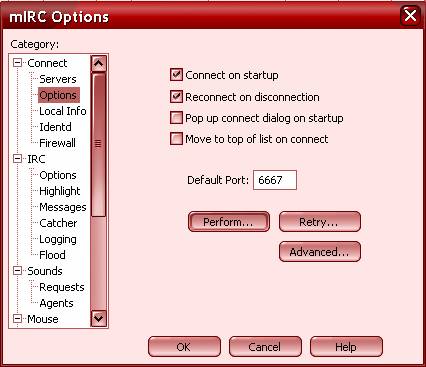
It is entirely up to you to whether you wish to set it to Connect on startup and Reconnect on disconnection. We dont have to worry about the other tabs in this section at this stage as they are for the more advanced users.
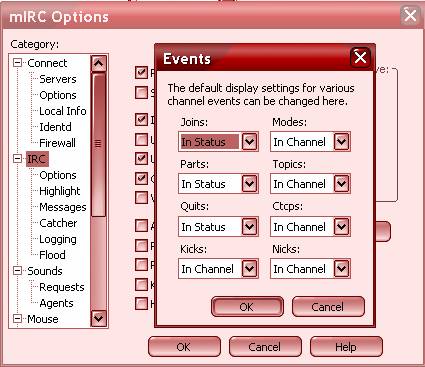
Step 5:
From this step we will lead into the
IRC features as all the other tabs in this category will be left as is and
automatically filled in by the server.
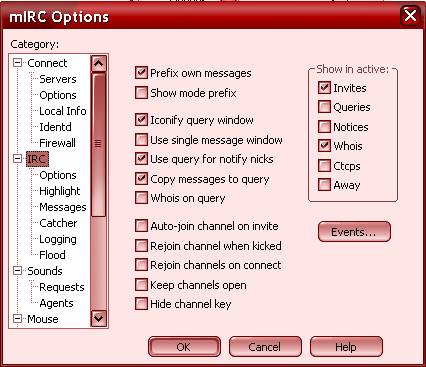
This is self explanatory as all you need to do is tick what is shown. From here we need to press the Events button and fill out as shown in the diagram bellow: then press OK in the Events box
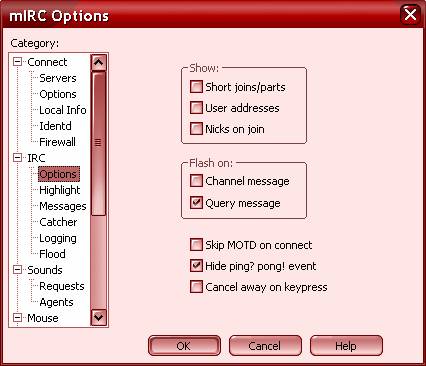
Step 6:
Now we will move onto the Options Tab under IRC: again this step is basically explained in just following the diagram bellow.
Step 7:
From here we will move right along to the Logging Tab as the others remain at the default settings. In this tab it is up to the user to whether they set it up the way we have as it depends on what you wish to keep logged for further use and to be able to see at a later date.
Step 8:

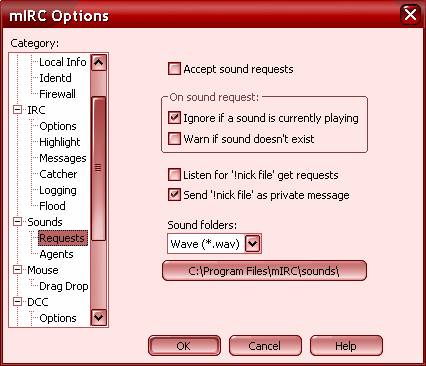
You will notice as we move on in the steps below that they are mostly self explanatory. Just follow them as they are shown in the following diagrams and if need be there will be short description to help you on your way. We will move to the Sounds tabs now: and they will be displayed in sequence as they are all self explanatory:
Step 9:

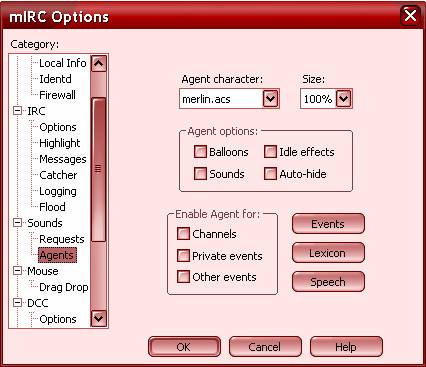
Within the Agents tab there is an Events, Lexicon and Speech Button that is located in this section but dont need to adjust these as your Agents are turned off as they are just a hassle to deal with. If you have ever used Word, Excel or Publisher you will understand us not allowing the Agents to appear as it can just cause confusion. Now that we have completed this section we go onto connecting and finding chat rooms within Jmeeting. If you have setup your Mirc to Connect on Startup all you have to do is press OK at the bottom of the Mirc program. Every time you open up your version of Mirc it will automatically go to the Jmeeting server unless you choice another server before connecting. Once you have connected you will wish to view the Channels list (the chat rooms), this is pretty easy and able to be set up so all you have to do is press a button on your Mirc to see what chat rooms there are there. To do this go to the fourth button and press it. This will bring up the channels box: detailed below:
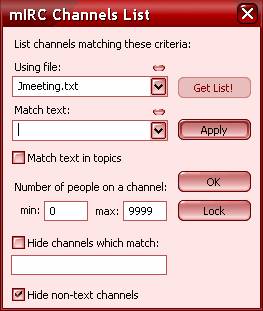
All you have to do is make sure the settings are the same as above and press Apply and Get List! Once you have done this you can get the list of chat rooms by just pressing the button as done in this step and double click the chat room you wish to go into. Its as simple as that. At this point your finished the Basic Techniques of Mirc and able to use it to go into Jmeeting and experience the complete chatting and viewing techniques of this wonderful Web Site. Good Luck and Happy Chatting . Hope to see you in there . SwtAngl626.
![]()