Regearing Mazda Transmissions
I DO NOT recomment this modification be done by beginners. Unless you are changing the entire transmission by swapping out the bell housing and tail housing this is not your unbolt/bolt in mod. There are many intricate parts and fasteners. Slightly damaging or misinstalling just one of them can grenade your tranny.
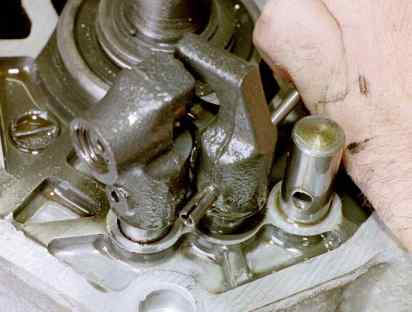
On the B2200 tranny the whole shifting lever mechanism is contained in the tail housing. Here is where things slowly start getting harder. The next housing you have to remove is the center housing to get this off, first you have to remove the shifting feet. These are the 3 nuckled pieces. They are held in place by a clotter pin. To take off the shifting feet you need to take an appropriate size punch and slowly punch the pins out with a hammer. Get a good image of how the feet interlock before removing them. Be careful some of these nuckles have springs and bearing keepers so if you are not careful parts may fly appart or get lost easily. Put the nuckles and the parts that go with in a zip lock bags and label them.
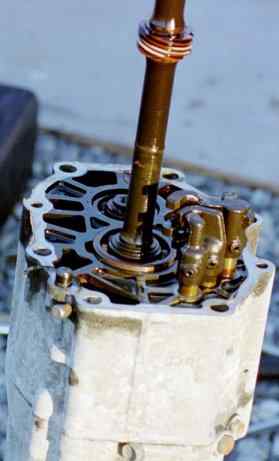
You may want to remove the gland nut at this time too, although you can remove it after taking the center housing off. This will be a pain in the ass. There is a groove in the shaft that it threads into and the flange of the nut is crimped into this groove. You will have to either grind out the crimp with the dremel tool or straighten it out with a punch and hammer or something. It is a 32 mm nut, you can either find a 32 mm socket or you can take a chisel and tap the nut around.
This is where the hammer and prybars come in handy (percusive maintenance hehe). Take the hammer and gently tap up on either side of the center housing. You must alternate sides otherwise it will not come off, If it doesn't tap off easily you will have to take the pry bars and wedge them in the crack. You have to be careful not to screw up the sealing surface on the housings here, gently pry up on both sides at the same time. The first time doing this is the hardest, just work with it until you come up with a pretty decent method to getting it off, you will use the same procedure to get off the bell housing if you need to.
If you have not already done so, remove the speedometer gear in the middle of the output shaft. It should come off with a series of snap rings and washers. Pay careful attention to how these are aranged and how you take them off. Putting them back on later is a chalange as well as all the other fasteners for the internals.
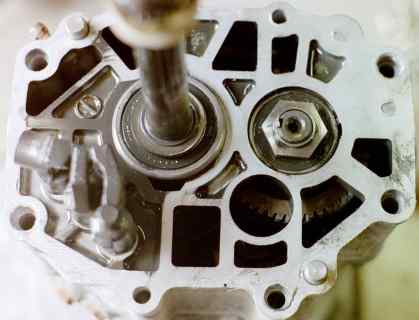
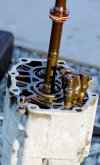
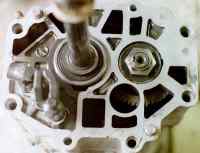
 You should have something like this now.
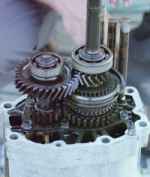
 This is what the B2200 tranny should look like (Big Ass Picture).
Sorry if the large picture is grainy, I had to compress the hell out of it to make it 56k compatable. In the B2200 tranny you may notice a few things that you do not see in other transmissions and some of them to the untrained eye may like like wear on the gears or other internals. Mazda made all kinds of little modifications to these trannies. One of the big ones is the upside down U shapped bracket going over the reverse pin gear which is shown in the picture above. Another is the grooves in the teeth of the gears, these where added to help with lubrication. The edges of the teeth where also chamfered. Mazda also started using sealed bearings in their transmissions. The most puzzling thing is that Mazda removed every 11 tooth on the synchronizers, I have not found this in any other Mazda tranny. Some think this is to make shifting easier but looking at the clutch hubs and the synchronizers the only way to get them to shift better would be to completly redesign them. All the other teeth interlock the same, therefor 3 missing ones will make no difference. If anyone knows why Mazda did this email me at Kyrasis6@hotmail.com
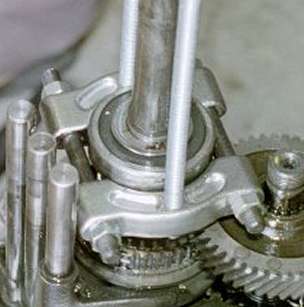
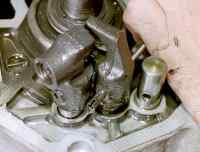
Here is where the neat stuff begins, being since fasteners are different from tranny to tranny use the appropriate snap ring pliers and C-ring pliers to remove the rings holding both the bearings on. There are usually washers underneath the rings and sometimes there might be keepers holding some stuff in. I've only seen the keepers on the Dynamic Dampener of the series 5 trannies though. This is where the experience comes in handy, you must be prepared for whatever surprises you may run into.
Once you get all the fasteners off you are ready for the bearing and bolt puller. Purely for the sake of clairity I will start with the counter bearing on the shorter of the two shafts. Loosen the side nuts on the bearing puller until you can get the cup to fit around the bearing, then hand tight the nuts so the bearing puller fits around the bearing. Now take the bolt puller (the bracket with the large pointed bolt in the center) and hold it on top of the counter shaft. Then take the right length bolts out of the set to thread down into the bearing puller. Make sure the bolts are tightened so that the bolt puller sits evenly, or perpendicular to the shaft. If it is crooked the bearing won't come off or may damage the parts. Take a wrench, ratchet and socket, or impact driver to tighten the center nut, this will pull the bearing right off. You basically do the same thing for the bearing on the output shaft except you use the long 3/8" threaded rods to go down the length of the output shaft and into the bearing puller, use two nuts on the threaded rods to level out the bolt puller thighten the center bolt and your done with the bearings. You will have to crank quite a bit to get them off so I recommend an impact gun if you have one.
 This is the bearing puller.
 Bolt & Bearing puller with 3/8" threaded rods.
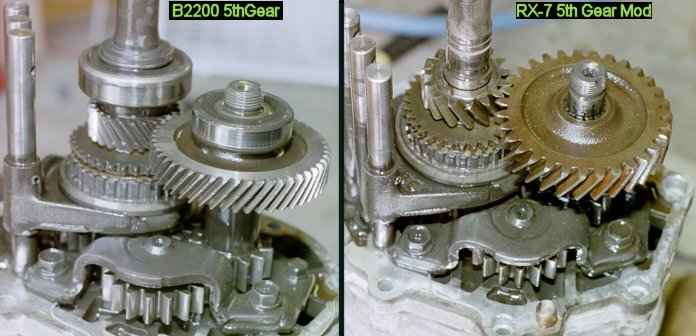
Now the input and counter gears that make up 5th gear should slide right off, if you already have both transmission torn down to this point you just slide the gears on the transmission you are going to use. It may take a couple of tries to get them to line up just right.
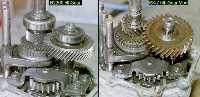 5th Gear before and after
This may be a good time to count the teeth on the new 5th gears, you will need to know this as well as the number of teeth on 4th gear (main) to calculate the new 5th ratio. You can also get the gear counts Here.
Now press fit the bearings back on, make sure the bearings are sitting perfectly straight. Put something over each bearing to pretect it from scouring like a piece of cardboard with a hole cut in the center then take the pipe and gently tap the bearings back in place. Put all the retainers, c-clips, snap rings, etc... back on. This will be the hardest part of the modification. You may get half the transmission back together in a couple minutes and then suddenly spend an hour putting one ring back on, it is a pain in the ass. Now that you got all the gear internals back together put some gasket sealant on the mating surface of the center housing slide it on and tap it in place. Take the shifter feet parts out of the bag and assemble them back on the shifter rods, skrew the gland nut back on and tighten it. Dont forget to crimp the lip back into the recess on the shaft with a punch. Install the retainers that go beneath the speedometer gear, put the speedometer gear on, don't forget the ball and then put the retainers on top. All you have to do now is put sealant on the sealing surface of the tail housing and get it and the shifting rod back on. I don't remember exactly how I did this but you MUST make shure the end of the shifting rod is in the shifting feet. You can probably let the rod slide out a little bit as your putting on the tail housing to position it and once it is in place slide the tail housing the rest of the way down. Put the long 12mm bolts back through the tranmission housings and lightly tighten them for now. Place your shifter in the turret and run it through the gears to make sure everything is ok. If not take the tail housing back off and inspect the shifter feet and shifting rod. Once your sure you have everything back together right tighten down the 8 bolts and your all set to go. Email questions, details, or suggestions to Kyrasis6@hotmail.com.