
I like to call this the WCHSDP
 ~or~
The Water Cooled Heat Sink Documentation Project.
GoG.Pvt.Unit
 |
This
is a before and after picture taken of the inside of my computer
case. As you see the water made a huge differance |
 |
It all started with a simple problem. Earlier that day my computer had crashed right in the middle of a toasty battle field game. It crashed due to overheating. My system is over clocked from 1.84 (AMD 2500+) to 2.22 (3200+) as a result it runs at a steamy 127 Degrees. At 127 degrees most systems become unstable. At that time had a MEGA BEEFFY heat sink & fan on. The next step up would be a water cooling system but those averaged in the 400$ range. Now you may have 400$ but when you’re a high school senior saving for collage and you have a computer to feed it’s not easy to save up that amount of money. So I started to try to think my way past this problem and that where I came up with the crazy idea of building my own.
1. First lets reivew some simple physics (yeah right like thats possible!)
Water cooling has every thing to do with the exchange of energy in the form of heat. The heat is generated from the resistance that the electricity encounters when moving through the logic gates in a processor. Now we are left with the problem of moving that damaging heat out of your computer. First of all you have to under stand the concept of thermal dynamics. There is no such thing as a cold object, just an object that lacks heat. It’s a lot like light. There is no such thing as “darkness” just an absence of light. With this in mind we under stand that ice in a beer doesn’t cool the beer off but the beer heats up the ice, losing its own heat/energy. So why use water. The answer is water is a MUCH better conductor of heat than air. Many many time (18 I think). You must also consider the fact that water has a very high thermal capacity.
Example 65 degree weather is great. You know play some soccer go for a walk play with the dog but jump in a 65 degree pool and you will wish you hadn’t. Not that the pool is colder but the rate that the water caries the heat away from your body is much greater than the speed at which you body replaces it. That’s why it seems colder, while in all actuality it is the same temperature.
 |
 |
A standard heat sink and block uses metal fins to draw heat from the CPU and than passes air thought the fins where the heat exchange occurs and is carried off by the other 16 million fans you may have in your case. A water system works the same way except water is passed through some sort of object and than radiated off into the air later.
2. Conceptual Design & sketches.

Idea!
Here are some of my first concept sketches.
|


Once I got the idea, of course I did some research on my idea to make sure it was possible. Than I started thinking of how I could accomplish this and would it be any better than my current heat skink and fan. While making the sketches I kept in mind the shape of the processor where I wanted the water. The cooling priority of where the water went and how I could move the water around with out risking it coming in contact with the computer.
I than borrowed a micrometer from my schools drafting teacher. Micrometers can measure up to .001 of an inch (that’s 3 times SMALLER than a single strand of hair). I took these tools and measured the mounting bolts on my ASUS A78NX-Delux Mother Board. I did this several times because I didn’t want to waste resources on screw ups. Once I got the dimensions and all of the other specs I started to draft up some 2D and some 3D models.

My first and favorite design is A. but unfortunately because of the thin & deep valley we could not cut it using the milling machine. So I had to change the valley from 1/16 inch to 1/8 inch although I decided to keep the valley depth at .5 inches. Once I changed to a .125 inch bit I came up with designs B & C. as I began construction on B. I reached up to the point of creating the holes into the plastic prototype and than I realized that it was not feasible because of the size of the holes. At this point I was quite upset I had wasted 2 weeks on this idea you can see what i mean by looking at the below picture.

There was no way I could remove the water from the processor beacuse the side space was to small.
Finally I restarted my work from scratch here are some screens from my work.


At this point I began the search for some usable material. I chose copper although it is more expensive and harder to work with than aluminum it has a much higher thermal rating than aluminum.
I was looking for a nice big chunk of copper &
a good thick sheet of copper. Finding the Materials
was a lot harder than I originally envisioned. I searched ever where
and I mean every where. Final after about 20 calls I found a place
called Svinga brothers. This place had every thing from old planes,
computers and scrap metal to a huge 8 ton Electric generator sitting
around. The total cost of the copper was 22 bucks for the block and
the sheet. I than took my treasures and ran home.


3. Program writing and building.
Before I actually cut any copper I used a wax like plastic as a blank I used this thought out the project. This way if I totally screwed up it wouldn’t matter to much.
To cut it I used my schools CNC Milling machines, which are like giant drills on the end of a robot arm. You can use the machine in 1 of two ways. You can A. control it manually or B. you can write an automated program to drill it for you. People use milling machines in manufacturing, rims, sheet metal and almost every other part of any thing you can imagine. Even computer parts can be built using CNC machines. Here are all of my programs I wrote for the machine and a picture of the modle CNC machine i used. It was a lot of work but well worth it.

(BLCKMNTH.MCD) (25/11/2003) (Post fanucm:1.21 23rd January 2001) G20 [BILLET X3.255 Y2.65 Z0.2 [EDGEMOVE X0 Y0 [TOOLDEF T1 D0.125 G91G28X0Y0Z0 M6T1 G43H1 M3S3000 G90G0X0.2637Y0.278 Z0.08 G1Z-0.1F1.6 G0Z0.08 X0.264Y1.653 G1Z-0.1 G0Z0.08 X2.8737 G1Z-0.1 G0Z0.08 X2.874Y0.278 G1Z-0.1 G0Z0.08 M5 G91G28X0Y0Z0 M30 |
(BLOCKMNT.MCD) (14/11/2003) (Post fanucm:1.21 23rd January 2001) G20 [BILLET X3.255 Y2.65 Z0.2 [EDGEMOVE X0 Y0 [TOOLDEF T1 D0.125 G91G28X0Y0Z0 M6T1 G43H1 M3S3000 G90G0X0Y0 Z0.08 G1Z-0.1F1.6 X3.1374F2.4 X3.137 G1Z-0.1F1.6 Y0.5296F2.4 Y0.5291 G1Z-0.1F1.6 X2.9358F2.4 X2.936 G1Z-0.1F1.6 Y1.3751F2.4 X3.1372 X3.137 G1Z-0.1F1.6 Y1.9041F2.4 X2.936 Y2.4133 Y2.4131 G1Z-0.1F1.6 X0.201F2.4 Y1.9041 X0 Y1.3751 X0.2012 X0.201 G1Z-0.1F1.6 Y0.5291F2.4 X0 Y0 G0Z0.08 M5 G91G28X0Y0Z0 M30 |
(BLOCKH.MCD) (25/11/2003) (Post fanucm:1.21 23rd January 2001) G20 [BILLET X1.957 Y1.742 Z2.037 [EDGEMOVE X0 Y0 [TOOLDEF T1 D0.3125 G91G28X0Y0Z0 M6T1 G43H1 M3S2200 G90G0X0.9785Y0.9772 Z0.08 G1Z-0.5F2 G0Z0.08 X0.979Y1.4295 G1Z-0.5 G0Z0.08 M5 G91G28X0Y0Z0 M30 |
(BLOCKWP.MCD) (20/11/2003) (Post fanucm:1.21 23rd January 2001) G20 [BILLET X1.957 Y1.742 Z2.037 [EDGEMOVE X0 Y0 [TOOLDEF T1 D0.125 G91G28X0Y0Z0 M6T1 G43H1 M3S3000 G90G0X0.666Y0.1875 Z0.08 G1Z-0.5F1.6 X1.291F2.4 Y0.188 G1Z-0.5F1.6 Y1.303F2.4 X1.541 Y0.1875 Y0.188 G1Z-0.5F1.6 X1.7695F2.4 X1.77 G1Z-0.5F1.6 Y1.5545F2.4 Y1.555 G1Z-0.5F1.6 X0.1875F2.4 X0.188 G1Z-0.5F1.6 Y0.1875F2.4 Y0.188 G1Z-0.5F1.6 X0.416F2.4 Y1.303 X0.666 Y0.1875 G0Z0.08 X0.916 G1Z-0.5F1.6 Y0.9772F2.4 Y0.977 G1Z-0.5F1.6 X1.041F2.4 Y0.1875 G0Z0.08 X0.916Y1.5545 G1Z-0.5F1.6 Y1.4295F2.4 Y1.43 G1Z-0.5F1.6 X1.041F2.4 Y1.5545 G0Z0.08 M5 G91G28X0Y0Z0 M30 |
4. Building the prototypes and milling the parts.
Now that I had written my programs and build virtual models I was ready to carve it out of plastic so I prepared my plastic for milling and milled away. Here are some pics of the finished milled material. Sorry I don’t have any pictures of the actual milling process. Its just I got so tied up in my work I forgot about documenting it.
 Here
is a picture of they copper right ontop of the wax. As you see they
are the same size down to the .001 of an inch.
Here
is a picture of they copper right ontop of the wax. As you see they
are the same size down to the .001 of an inch.
Here
is a picture of my first wax proto but i couldn't use it beacuse of
wall thickness.
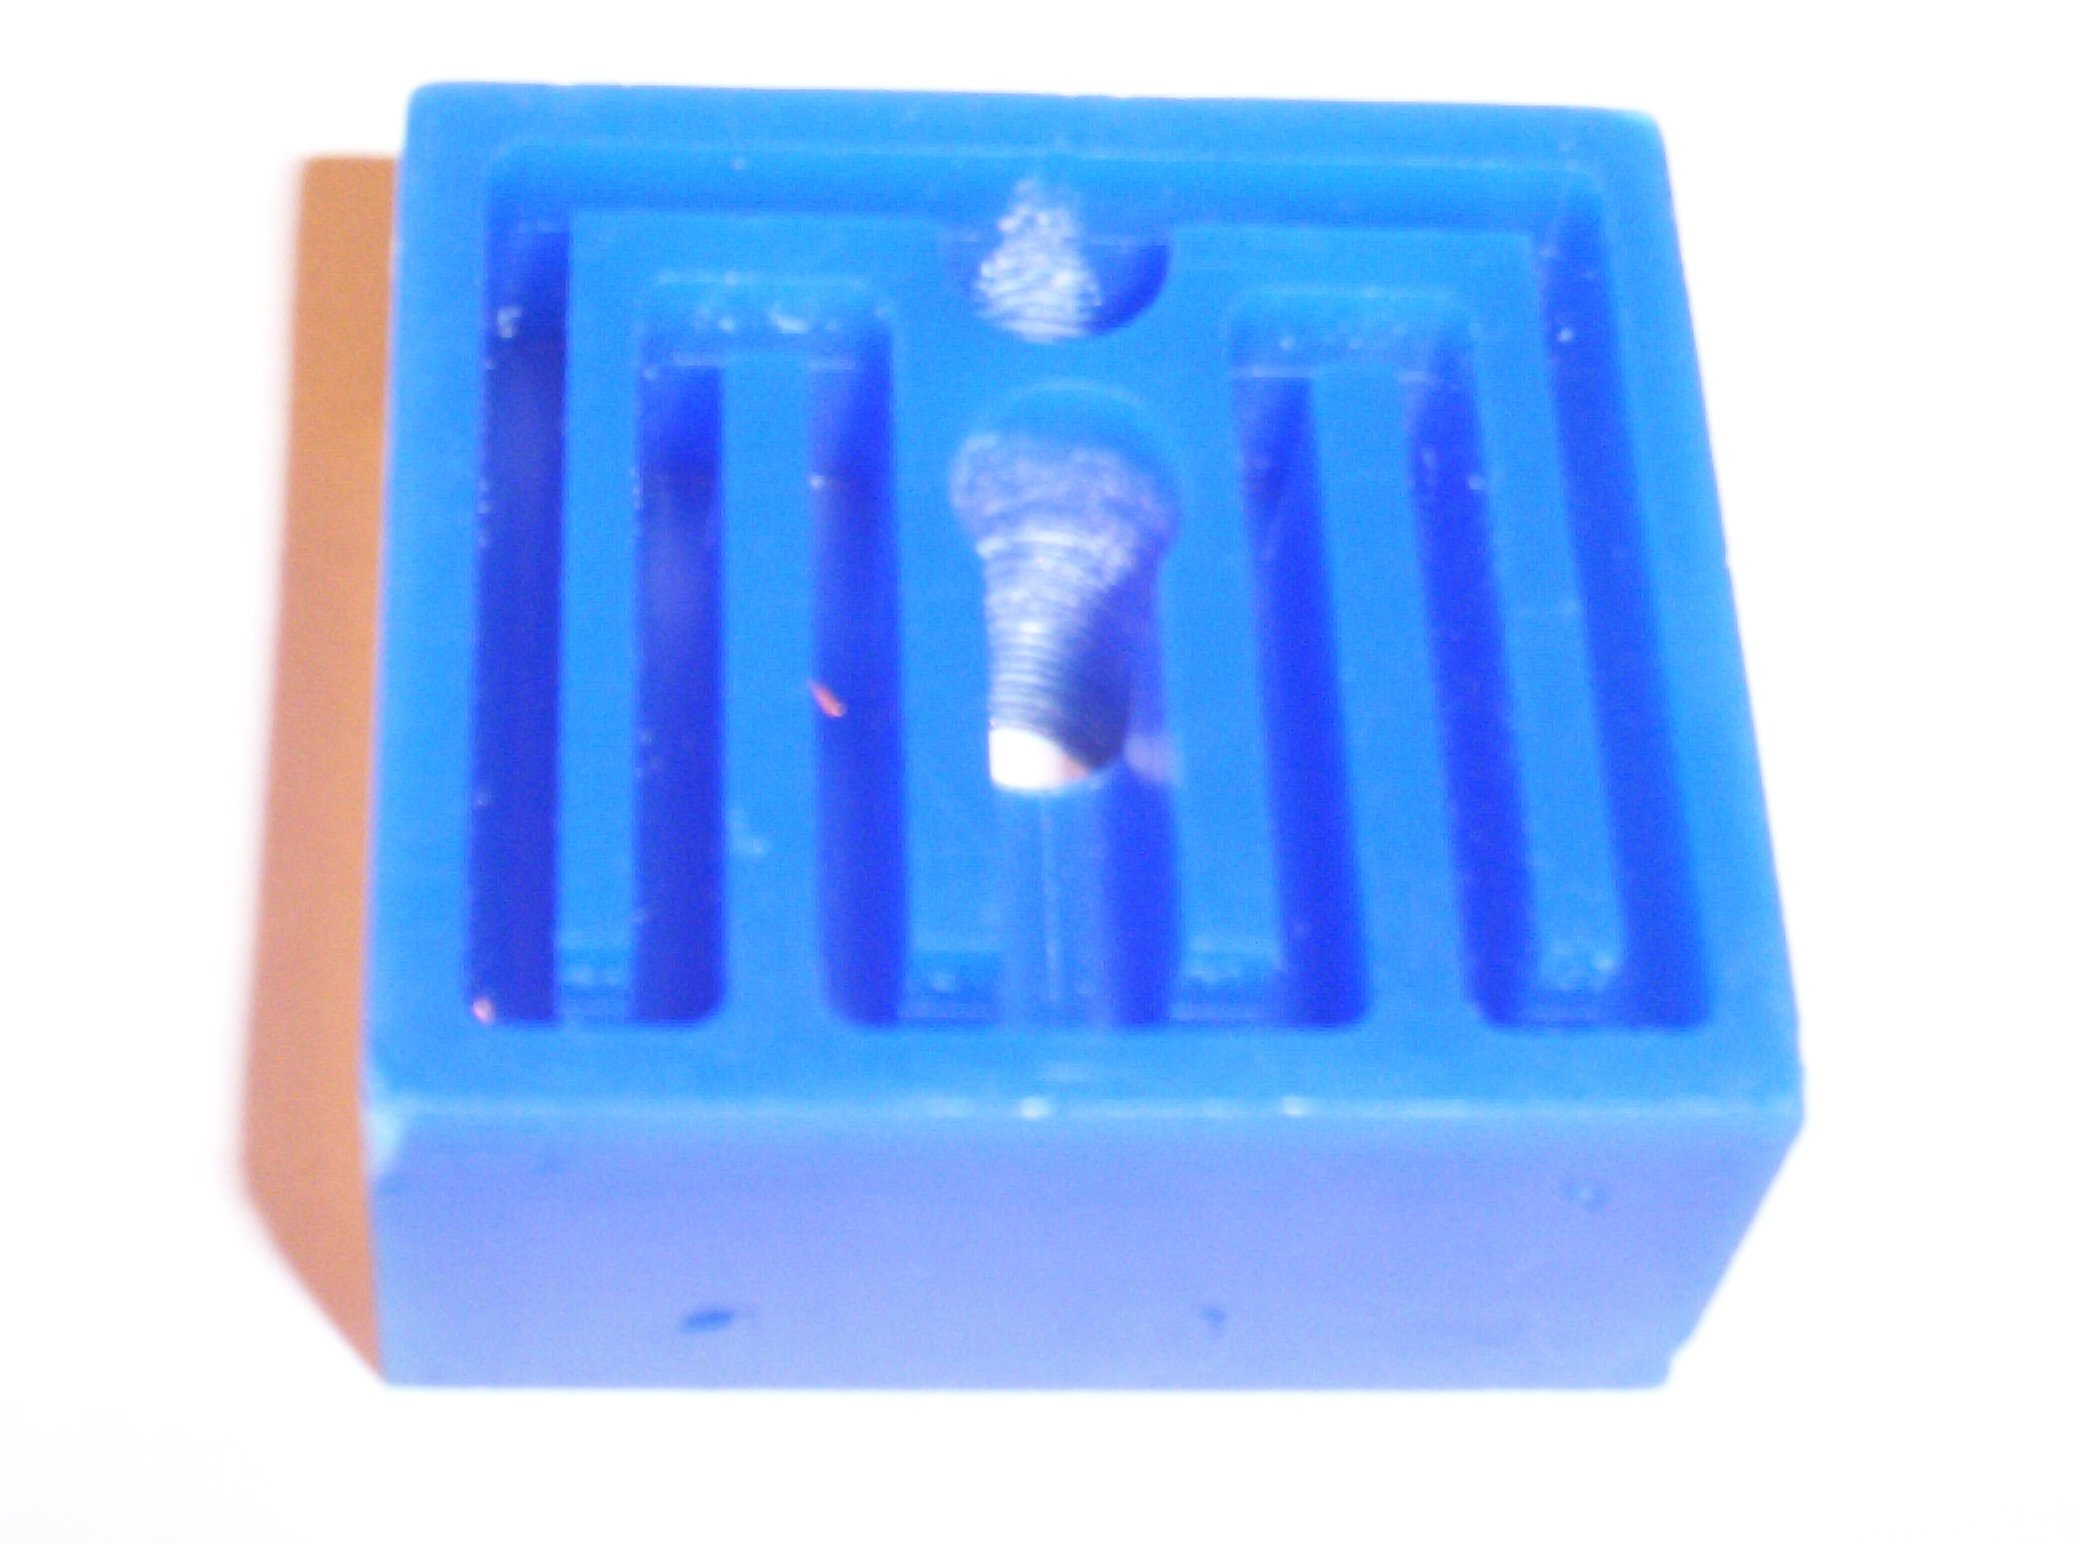 Here is a pic of the proto I used at end.
 And
here is the block mount. (I steped on it! D:)
And
here is the block mount. (I steped on it! D:)
Now I was ready to make the finished product. No screw ups now because im cutting into my 100% pure copper.

In this one I used supper double sided tape and heat from the cutting melted the tape and the part moved off causing lota vibration and a horrible cut.

In this one I screwed up the offsets while setting them and this caused the part to be exactly 1/16 of an inch off on all sides!
 I finally hit the money on this one BUT while making the wholes i
again messed up. You see you have to tell the machine where the part
is, so it knows where to cut. Well I told it where the part was but
later i moved it out to show a friend and just put it back in with
out thinking.
I finally hit the money on this one BUT while making the wholes i
again messed up. You see you have to tell the machine where the part
is, so it knows where to cut. Well I told it where the part was but
later i moved it out to show a friend and just put it back in with
out thinking.
 4th
try’s the charm!
4th
try’s the charm!
Milling the Block wasn’t so bad. I got it the first try. Milling the water path was a little harder but the first try came out almost perfect but as you see in the picture again offset problems. Milling the water path was very time consuming because of the density of the copper and the durability of the bit I had to cut the water path in .05 inch passes. Luckily I could make it automated. In the end to mill the whole thing took a total of 4 hours.

Once I completed milling both the block mount and the block. I cleaned them up and soldered them together as you see machining the part with a milling machine makes a really cool design into the surface of the copper. Although it looks wavy it is really totally flat. All that was left was threading it, spraying it with enamel and cleaning the bottom.
5. Finished product!
 Bottom
still needs work.
Bottom
still needs work.  looks
good with threads.
looks
good with threads.
 Nice
color and did you get a load of that beautiful solder job I did?
Nice
color and did you get a load of that beautiful solder job I did?
 from
a diffent view.
from
a diffent view.

My god look at that Sexy (and available) man, holding that awsome heat sink. I wan't one!
6. The next step.
Well there is still the step of actually testing the heat sink. I have a good feeling about how it will perform under harsh conditions. Although there is still the task of purchasing a radiator, reservoir and pump. after that’s done all I have to do is over clock away!
 |
 |
 |
Let me know what you think about the WCHSDP (but only if you have some compliment)
Cya all later and thanks for reading my gramatical & spelling error filed web page hope you gained valuable decifering knowlege.
GoG.Pvt.Unit
