Headstock

The headstock design was drawn free-hand, and with the aide of a straight-edge, directly onto the wood. A 36" straight-edge
was lined up with the corresponding notch in the nut and saddle in the bridge for each string. This gave me lines for each
string on the headstock that allowed me to plan placement of the tuning keys for least friction. If the string travels at an
angle from the nut to the tuning key, higher friction is produced between the string and the nut than if the string travels at no angle. This results in less accurate tuning, and
the tendency for the string to go out of tune during play. The nut on this neck is made of graphite, purposefully slippery. If I had all of my wishes, I would use a brass nut here as well as brass frets. A brass nut would likely produce more consistent tone between fretted and open notes.
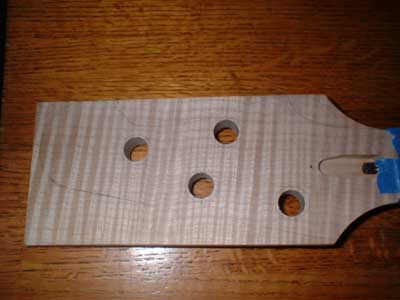
I masked off the lines of my headstock shape with blue safe-release tape, and placed the tuning key washers where the tuning
keys would be. This was my way of checking if I really liked the design. It is inspired by the traditional
Fender bass headstock
seen on Precision and Jazz basses. However, it is much smaller, and the tuning keys are opposed to each other and closer to
the nut. Also, there is no string tree in this case, because unlike the Fender headstocks, this one is angled away from the
neck (thereby providing downward string pressure on the nut).
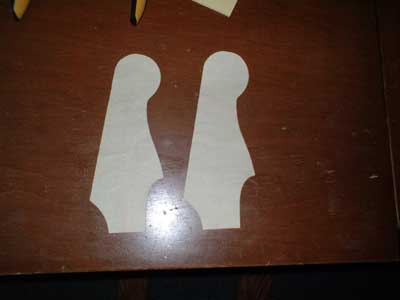
I made two tracings of the headstock shape from the headstock, and made paper templates from them, which were strengthened by masking
tape. I made two and chose the one I liked best because a traced and cut-out line always differs from the original somewhat.
The paper template was used to trace the headstock pattern on MDF board. The MDF was cut to produce a headstock template
for routing. After the MDF was cut with a jigsaw, it was sanded with a sanding-drum attatchment on the drill
press, and finally sanded by hand.
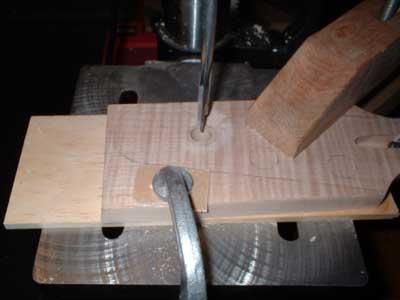

The blue tape was removed, and the tuning key holes were cut on the drill press. It was important to do this before cutting
out the headstock shape because the extra wood is invaluable as a clamping surface. A board of pine was placed behind the
headstock in order to minimize chipping as the drill bit exited. I used a spade bit with a leading brad. Some people swear
by forstner bits, but I heard these tear out quite badly on exit.

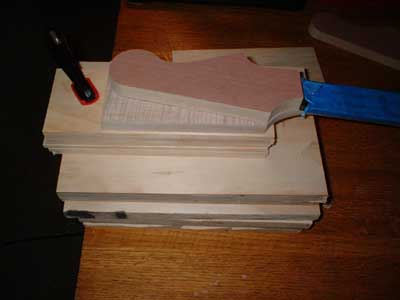
The headstock was placed on plywood and pine boards to compensate for the headstock angle, so that it would rest parallel to
the work table surface. Then the MDF headstock routing template was put on top of the headstock. All of these layers were
secured with carpet tape, and a clamp.

The headstock is completely cut out: a solid feeling of accomplishment.


The tuning keys were put in place, and their angles were marked with pencil at the center of their screw holes (on the back of the
neck). The tuning keys on the top of the headstock are angled away from the player (ala Fender). The bottom two tuning keys
are angled toward the player, and will be easier to handle than the traditional Fender setup where the last two keys are farthest
away and angled away.
The black truss rod cover was put on to see how it looked (a bit dressed up, black/white, tuxedo colors). I plan on
making bookmatched flamed maple (waste pieces from maple top and back) truss rod covers, then deciding which to use. The truss
rod cover is a nice place to put a logo or name, since if you mess up, it's replaceable.


__Back__
Index

