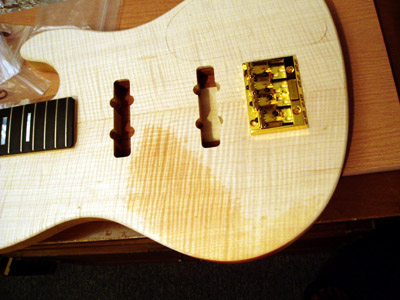
electronics, bridge
click

laying out electronics, battery box, and bridge


can't help checking out how the finish will look


carving truss rod covers out of bookmatched flamed maple pieces left over from the front lamination


final placement decided with actual components, holes drilled for electronics


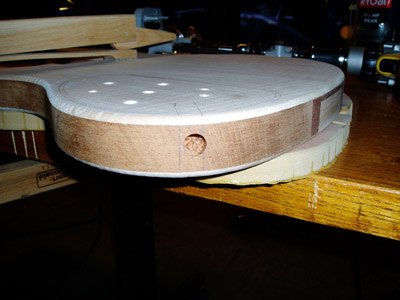
lexan cavity ledge template used to draw the cavity ledge line, MDF cavity ledge template with
1/4" oak dowels glued to it where screws are planned


drill atatchment and 1/2" brad point bit used to drill output jack hole


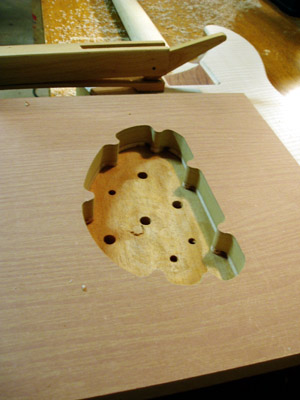
the cavity ledge template with glued oak dowels was used to make this new cavity ledge
template which has nicely shaped screw placements

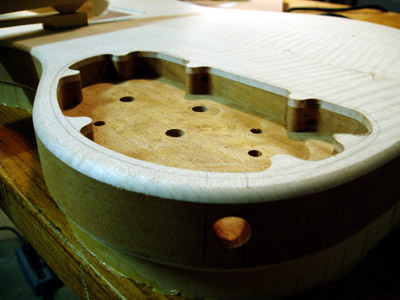
routing about halfway done, slightly more than 1/4" of wood was left to secure the electronics to the
face of the instrument


a piece of pine with exact hole placements is used as a soldering rig, I switched the placement of
the OBP-3 unit


from left to right: recess for coverplate routed, lexan coverplate created in order to test fit of
coverplate template and to mark screw holes for actual coverplate, coverplate made with Black/White/Black
pickguard material, it fits so tight it won't come out unless you push it with a pencil from one of
the potentiometer holes


I decided to add a piece of pickguard material under the battery boxes in order to leave more wood
on the face of the bass to support them

all routing complete, bridge drilling complete with string-through-body ferrules
__Back__
Index