|
 |
 |
 |
| Welcome to Hollywood's Corner! Many people have been asking Dreamchaser how she makes her graphics,
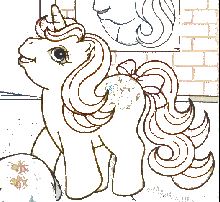
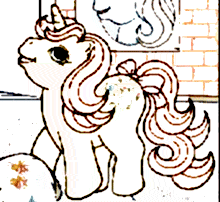
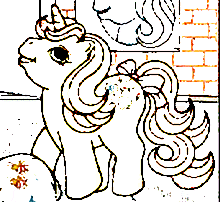
so she has asked me to show you how! These graphics were made with Jasc paint shop pro (download a free trial!) but you can read my directions and do the equivilant with some other programs. PLEASE DO NOT TAKE THESE IMAGES!!! These are for reference only. The finished Baby Lucky leaf is on the almost free pony graphix page. Now for the real lecture!  First of all, you usually start out with a colored picture, such as the scan from a puzzle box I used of Baby Lucky Leaf above. Make sure to save it as a gif format, so that your colors will not get mixed up with eachother. (if you use a jpeg/jpg format, the colors bleed together.)  Second, you have to select the colored areas and fill them with white.  Then make the image 16 million colors again. (this is under the "colors" menu) This is only temporary, it allows you to work with more freedom on the image. Add a blur to soften the edges of your image (I use the "soften" filter, under the "image" menu). Then go to "colors;" adjust the "highlight/midtone/shadow" to make the lines thicker and darker.  Then go to "image" menu, and select enhance edges. This gives the image a crisper look.  After that, go to the "colors" menu again, and select "decrease colors" to 2 bit, (2 colors) and choose black and white. You can now start editing the black and white image, removing stray lines and enhancing the picture to look right. In a gif, you only get a maximum of 256 colors. Do your really want to waste half of them on shades of gray? I didn't think so!  This was the image cropped, cleaned up (pixel by pixel) and ready for Dreamchaser to color. When you get your picture to this point, save 2 copies. You will/may need one as a backup. As you can see, a lot of work went into this, so please respect her work by not stealing these images. (If you wish to use them, please ask).  You can now start coloring your pony. If you wish to make them like Dreamchaser does, choose lighter colors that you normally would for the body/hair fill color (do the fill colors first). Then choose a slightly darker color for the outlines. Select the outline (which should still be black), and use a paintbrush tool to color the outlines. Dreamchaser uses a paintbrush with a hardness of 100% so that she doesn't get different shades within her outlines. Once your image looks similar to this, save it and close the image. Why is this so important????  Open it again. Zoom in on your image. Do you notice anything funny? The colors you used may look checked or dotted.
It happens when you choose a color that isn't a compatible color in a gif. So, you get a dithered color like the image section I have here of Baby Buttons' foot. Now what?!?!?!? This may be simple. If your colors are different enough from the outline to select just the colors that are dithered, you can choose the closest dither color (the color closest to your desired color) and fill the entire problem area with it. If you can't, either you'll have to correct it pixel by pixel, or start over. I had to correct Baby Buttons by using the paintbrush.  SHADING!!!! This is the point of no return. You have to finish from here, or you risk your .gif graphic not turning out right. (Note: you can save them as a .bmp image if absolutely needed, and save them as a .gif after you completely finished shading.) So, if you are at the point of filled/outline color you can stop there and come back later, or take a while longer to finish this entire graphic. All I can say is, make sure you have plenty of time for this stage. If you haven't already, choose "increase to 16 million colors" again. Select the sections you wish to shade all at once (like the hair). Use the outline color as the shading, and white or yellow as the highlight. What's great about this type of graphic is it not only looks nice, but it's hard to re-edit them. It doesn't stop people of course from taking them and trying, but it makes it that much harder. Well, that's all I can tell you. The symbols are usually made pixel by pixel, so I can't be much help there. If you are going to make the image transparent, make sure it's a color that stands out in case you have to make corrections. |