
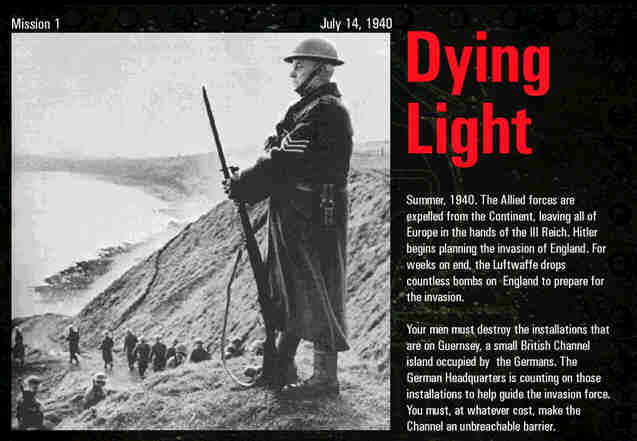


The objective of this mission is to destroy the installations on Guernsey. You must destroy the radar station, the light house, and the antiaircraft batteries.
HARD SETTING
Gaining Access to the Island
The first move is to row the rubber raft toward the Radar Station just enough for the Sniper to dispatch the sentry on top. This can be done without being seen. Now have the Marine move the raft back out of sight. The Marine must now swim over to the dock and get out of the water. Stand at the base of the ladder and throw a rock at the sentry that walks up and down the hill. Once the sentry begins to come to where you are, step back away from the ladder, staying next to the wall. While the sentry is on the ladder, use the harpoon. The sentry will fall silently to the platform and not be noticed. Timing is critical in this next move and the Marine must move swiftly to keep from being seen. Wait for the sentry to begin to walk away from the platform area. Throw a rock just behind the guard at the platform to distract his gaze from the ladder. Climb the ladder, being careful of the sight line of the machine gunner. Stay close to the hill as you approach the sentry and dispatch him with the knife or harpoon. Now remove the machine gunner, and then the guard at the platform. With these men out of the way, return to the rubber raft and bring the others to the platform.
Securing the Lower Level
Disembark. Remember to pack the raft and then crawl to the first bend in the path up the hill picking up the cigs along the way. The Green Beret should now place the decoy behind the guard house as far up in the corner as possible and crawl back down to a safe place behind the hill. It is necessary to throw a pack of cigs up into the sight line of the guard standing by the tower. When he gets close to the pack, activate the decoy and bring the Green Beret up with his knife. Be careful to not be seen by the guard on top of the tower. Once the Green Beret takes his man out, the Sniper must crawl up to within shooting range of the tower and dispatch the guard that over looks the first compound area. Be careful to not shoot while another guard is watching. Have the Sapper crawl up between the guard house and the steps and distract the guard on the steps by throwing a rock just to the North so he looks away from the tower. Once the tower guard has been killed, have the Sapper set the trap along the bottom of the steps. Throw rocks at the sentry that is patrolling along the West wall of the upper compound. He will run to investigate and if the trap is set correctly, will meet his demise. Bring the Marine up to the wall of the steps and throw a rock behind the guard. When he turns, run toward the bottom of the steps and use the harpoon. The Green Beret must come and quickly remove the body before he is seen by the remaining guard patrolling the upper compound. Hide all the Commandos except the Marine. Place him in the upper West corner of the lower compound and throw rocks at the sentry walking up and down the steps of the lower West compound. When he runs to investigate, bring the Marine back behind the wall of the steps and wait for the sentry to come down the steps and into the corner. Now dispatch him with your choice of silent weapons. Also, have the Sapper set the first explosive charge between the guard house and the Anti-Air Battery.
Securing the Upper Level
Bring the Marine up the steps and behind the boxes in a crawl. When the remaining sentry passes, follow him toward the far end where you cannot be seen and dispatch him silently. Now crawl the Marine to the area between the guard house and the light house building. Hide there with the harpoon ready. Bring the Sapper up next to the South end of the boxes across from the lower level steps. Set the trap without being seen and wait for the sentry by the Radar tower to come around the front where he can see the Sapper. Have the Sapper stand so both the sentry and guard see him and immediately lay back down. Crawl behind the boxes and wait. When the sentry and guard begin to investigate have the Marine take out the rear man. The other man should walk right into the trap. If done correctly, the upper level is now secure. The Sapper should now set the second explosive charge between the guard house and the Light House building. The third explosive charge should be set West of the West A.A.B. on the upper level between the Light House and the guard shack on the lower West compound. The fourth explosive charge can now be set at the base of the ladder of the Radar Tower.
Securing the Lower Compound
Bring the Marine down to the boxes on the lower compound just behind the barrels. Bump the West barrel a few times to move it out of the way and wait for the sentry to walk into the upper corner of his patrol pattern. Use the harpoon before he turns around. Now dispatch the remaining guard by the guard shack with your choice of silent weapons and hide in the corner of the wall and the guard house. Bring the Green Beret down to move some barrels and the Sniper over to the steps of the lower compound. The Sniper must dispatch the remaining guard on top of the tower without the remaining sentry seeing. Bring the Sapper and the Sniper down to the lower compound and hide them behind the boxes between the boxes and the wall. The Green Beret should move one fuel barrel to a position between the guard shack and the A.A.B. yet far enough from the marine that he will not be harmed by its explosion. Hide the Green Beret with the Sniper and the Sapper. Have the marine ready with his pistol to blow the barrel once the explosive charges have been detonated to kill the officer that comes out of the guard shack. Blow all four of the explosive charges and switch back to the Marine and blow the barrel. Two guards and one sentry is all that remain and can be dispatched with the Green Beret in one easy move. Bring the Green Beret into the corner of the wall and the tower as tight as possible and wait for the sentry to come up the hill and begin to go toward the lift. Immediately run up on the sentry, going behind the two guards. Don't worry if you bump the first guard on your way by, because he must be sleeping. He won't notice you at all. Dispatch the sentry as quickly as possible and step back away from the lift. Dispatch the two remaining guards and send the Green Beret to set the last two barrels next to the last two A.A.B.s. Bring one of the commandos down the path and hide from the view of the sentry on the lower platform behind the path wall. Shoot the machine gunner. While the other machine gunner and sentry are looking, stand the other two commandos up and shoot the sentry and the machine gunner by the platform. You may have to stand and lay down after each shot to keep from being shot by the machine gunner. Have the Green Beret shoot the barrels and destroy the last two A.A.B.s.
Securing the Bay Area
Send the Green Beret into the lift and wait. If you have timed
it just right, the Gestapo officer and sentry will run up to investigate.
It is an easy task to dispatch these two without receiving any injury.
If they do not investigate, simply send the three commandos down the ladder
of the lower platform and ambush them as they come around the corner of
the path. Bring the three commandos up to the next guard on the path
and dispatch him with your choice of weapons. Pistols work best.
One of the lower guards will climb the ladder and investigate. Dispatch
him also. Send the Green Beret down the lift and use the knife to
dispatch the two remaining guards. Have all the commandos meet at
the waters edge and deploy the rubber raft. Get in the raft and row
into a clear position for the Sniper to take out at least two of the under
water mines. But he should have three shells left and can open the
path wider by shooting three. After all, we don't want to fail the
mission by being blown up after everything is clear. Row out to the
buoy. Congratulations, officer you should have completed this mission
with an excellent time and without any injury! You should receive
six silver stars and the rank of Major.
Return to Mission Codes page
