


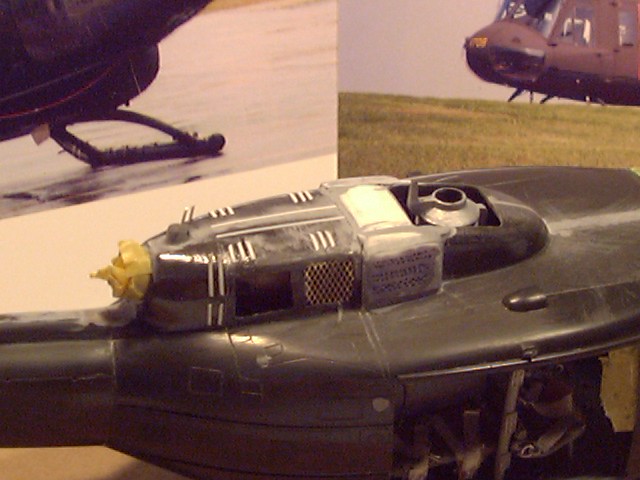
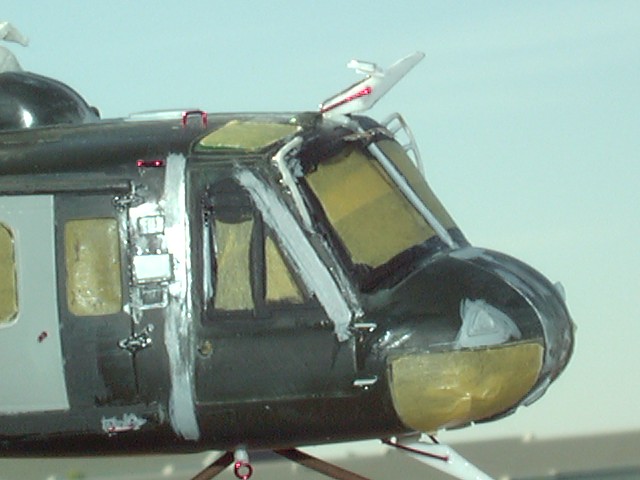
The base kit is the venerable Esci UH1D Huey troop transport, and the concern was to update it to modern UH1H post-Desert Storm standards. The main difference was creating an inlet particle seperator to replace the chicken wire screen on the kit. The kit proportions are wrong, so the interior is shorter than it should be, cramping the scratchbuilt troop seats and crewman seats. The first change was to install photo etched details from Eduard on the instrument panel, and replace the kit seats with resin parts, detailed with strip and sheet styrene, as well as coiled wire for the big springs behind each seat. True Details seatbelts completed the look.


The back seats are totally scratchbuilt from .020" &.030" rodstock, solder wire, thin copper wire for the seat rings and blue 3M Longmask tape for the seatnylon. The crew seats are similar construction, but are webbed with Tamiya Tape. Seatbelts are made from 3M Durapore medical tape cut to size, with paper chafe pads, individually bent wire for the buckles and hooks to hold them to the walls. The seats were installed into individually drilled holes in thefloor, based upon photos taken of the real thing. The outer posts are made from .030" rodstock shaped and pointed on both ends, that are socketed into .030" rodstock drilled to accept them. The mounting clip plates are resin copies of the original Eduard brass parts; copies of it are mounted on the aft gunner well sidewalls. Communication cords are old motor wire wrapped around a pin, painted black and installed in the roof. Pilots' doors recieved T shaped jettison-pull handles, and were outlined in yellow prior to paintingthe cockpit black from the broomclosets forward. Broomclosets are modified Cobra Company UH1N units. Photoetch replaced the nose formers, and the TSEC-KY58 communication system was made from strip and stock, along with additional small nose details. Dont forget that there is plenty of room in the nose for weight, and I added a .45 calibre bullet tothe transmission area.This beast is HEAVY!
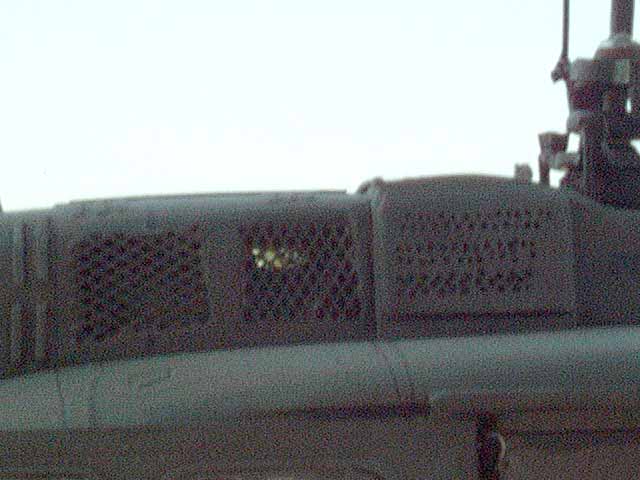
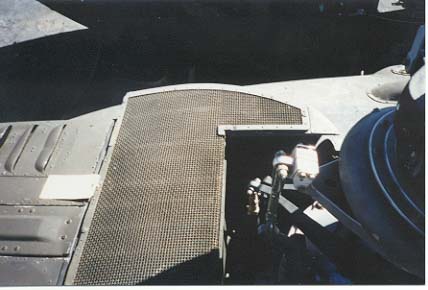
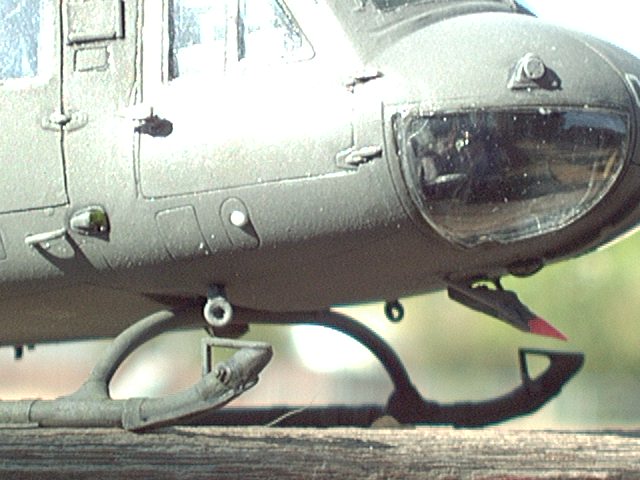
Now lets move outside. Cut away that big bulge on the belly, and you may as well cut off the hook now. Sand, carve, fill, putty and blend the big hole that remains to totally get rid of it. Also check the fit of your skids and see how the whole kit fits together. My skids sat at the wrong angle when checked against 1/48 scale side views, so I added strip to the aft crosstube to get it to sit properly. Set the skids aside and get the fuse halves put together. You'll find a gap if you dont perfectly seat the interior to the fuse halves, so you may need to add some strip to the top forward half, but be certain that the windscreen still fits! I rescribed the diamond pattern on the rooftop to match the original following all that sanding and filling. Now you can bore out all your sight glass/inspection holes for the transmission and gearbox. I sanded most of the engine external reverse scoop vents off and made new ones with .010" strip stock, which look much better. Also, using your references, cut away the molded in engine vent screens and replace them with brass mesh.
Phew! Now, walk away for a few days, your going to need the rest...
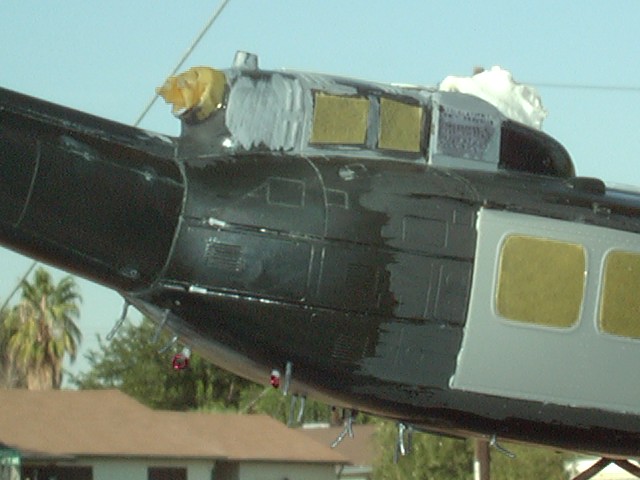
Lets cut plastic! Cut and carve away all of the plastic associated with the old chicken wire inlet system. install a thick plastic slab to fill the void, even withthe top of the engine nacelle and the tranny housing, and allow it to stick out 1MM. Now, cut a sheet of .010" sheet and blanket this over the peice you just installed. This is happening on both sides of the doghouse area, so just do it twice. There should be a small pointed lip at the front that blends into the doghouse, and the aft end should leave a gap that is plainly visible from behind.

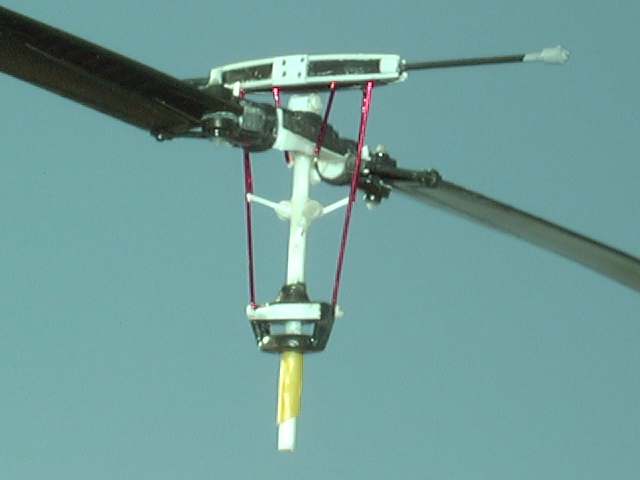
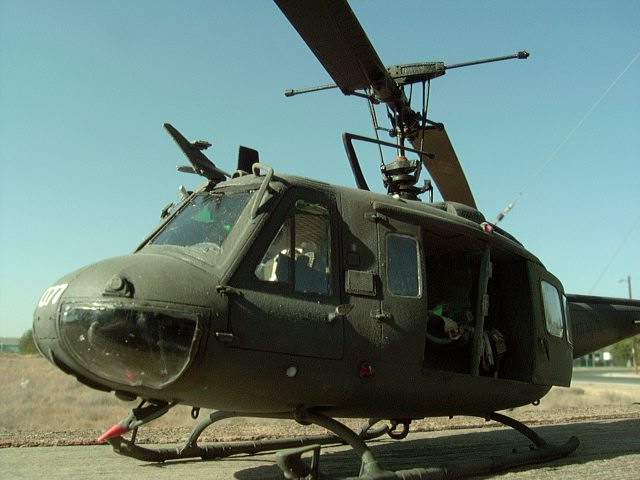
Now that were done building it, lets give it an appropriate color. After priming in light grey and preshading shadow pockets and natural panel lines, I painted Helo Drab overall, then dusted on a layer of the drab lightened with light grey to highlight individual panels and leading edges. The markings are a mix and match affiar put down over Future. Ilike to seal my decals with anohter coat of Future, then flat coat with Model Master Acryl Flat. A final drybrush with a lightened base color and a bit of sand tops it off. Rotors are flat black, with Future applied to the grip area. Pastels were applied overall for the soot trail, since helicopters work for a living!
Well, there it is, I hope you enjoyed it. If your interested in this project, dont be afraid to tackle it. Yes it was a lot of work, but look at the end result!
© David Campbell,
Photos © David Campbell and David Rosenthal as marked,
19 Aug 2002
