
The way I'm going to show you to make a flute isn't the old way. I'll show how to do that later. Right now We'll concentrate on doing it as fast as possible with modern tools.
First we'll start with wood. Handiest is a 1 × 4 piece of dimension lumber about 22 inches long. Pine or Fir are good woods to start with as they are both fairly soft, cheap and readily available, but just about anything will work as long as it is fairly straight grained and free of knots. The example I'm using is about 26" long, but anything between 18 and about 30" will work. I've found that 22" gives a good sound for the size of sound chamber that a 1 × 4 piece of lumber forces you to make.
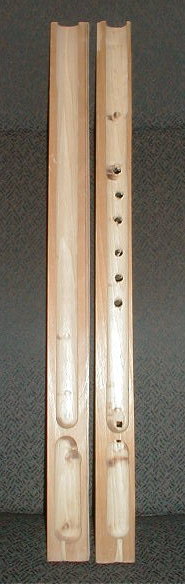
Measure the width of the wood and find the center. Be careful, it won't be 2" because the dimension of the wood is measured before it is shaved smooth and then sold to you. The object being to cut the wood length wise into two equal pieces. From here on out exact dimensions aren't important and can be modified, but should remain approximately the same size relative to each other.
The two boards you have will make the top and bottom halves of your flute. Decide which will be the top of the top board by chosing the one most pleasing to your eye and with a pencil lightly write top on it. Next decide which end will be the end you play and which will Now its time to hollow the pieces out. I'll tell you several ways to do it and any method you find and use on your own won't offend me! The quickest and easiest method that I know is to use a router. You want the hollow part to be about 1" on the inside diameter. I have used a 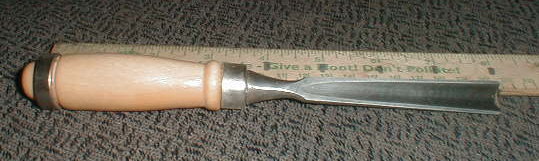 wood carving chisel with a lot of success and last but least,
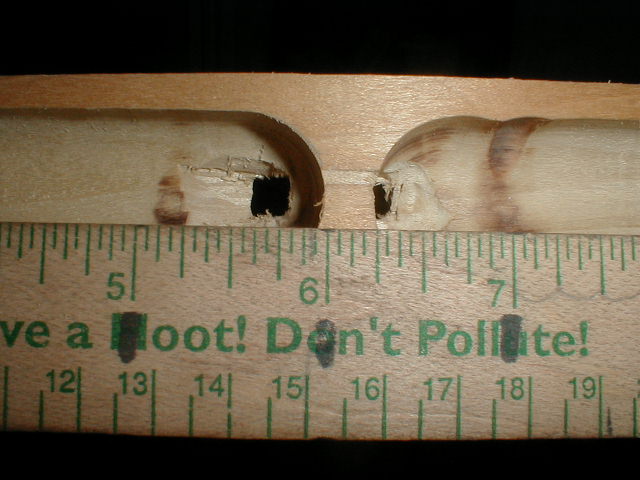
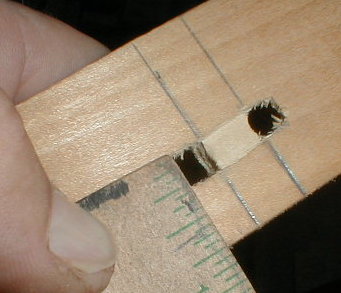
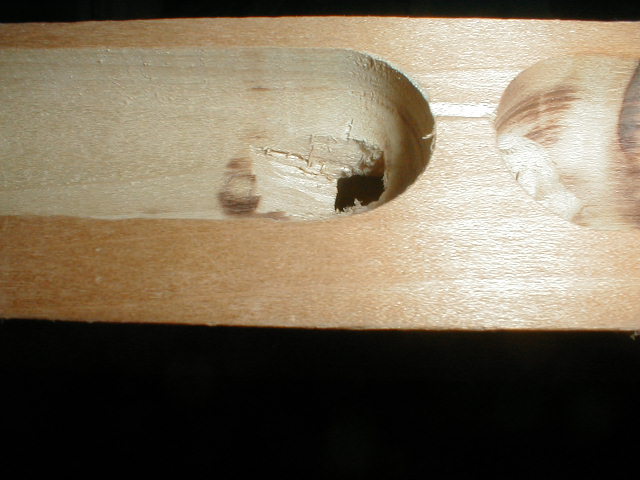
  a small knife. Use any method you want but the object is to end up with a chamber in the mouthpiece end that's about as long as your hand is wide. As the photo shows the measurement starts about 1" from the mouthpiece end. Leave a ¼" block of wood and start the channel again and continue to the end of the soon-to-be flute. Both boards need to have this done to them and they need to match as closely as possible. So that when you finally put them together they will form one hidden chamber and a tube that opens on the end opposite the mouthpiece. A piece of 60 or 80 grit sand paper helps smooth & finish things up.
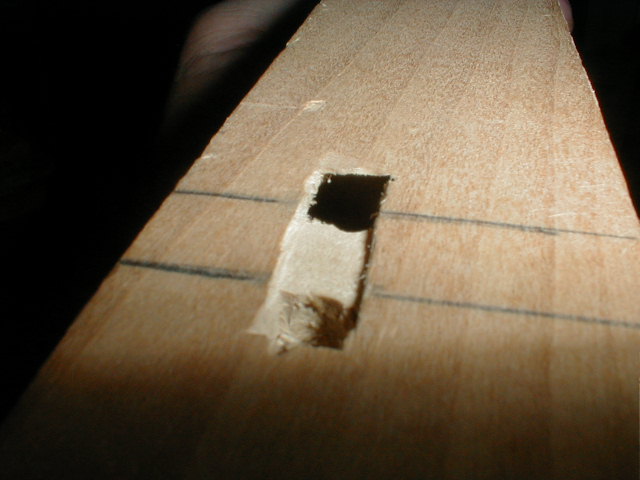
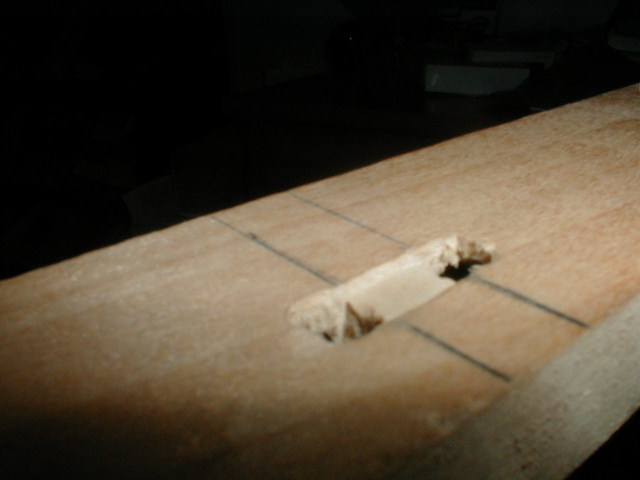
When you've got the boards all hollowed out, (probably the hardest part of making a flute) the next step is to drill or carve a small ¼" square hole on each side of the piece of wood in the board that will be the top ½ of the flute. All the work will be done on the top ½ of the flute now until the two halves are glued together. The hole farthest away from the mouthpiece will need to be sharpened. It is the "reed" that makes the noise so its shape affects the sound the finished flute will make tremendously! Remove wood from the inside of the soon-to-be flute only when working the "reed". Here are several pictures of what it should look like when you're done; photo one, photo two, photo three, I have used small fingernail files or tiny, flat sticks with sand paper wraped around them to get a good smooth, angular finish here.
This next part isn't traditional at all but I like it because it lines the flow of air across the "reed" much easier making it a more forgiving design. Make a tiny 1/16" deep channel as wide as both holes connecting the two holes. The traditional way is to carve this channel into the bottom of the bird, and you can of course skip this part and do it that way yourself if you prefer. Which ever way you decide to do it make sure the channel is smooth and straight.
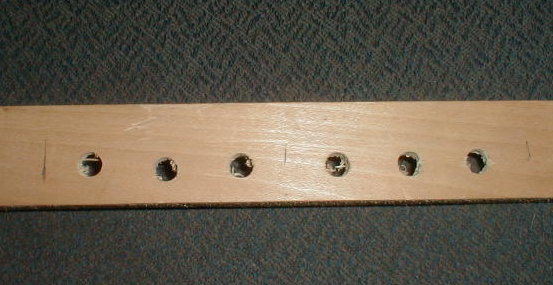
OK, Now lets measure the distance from the reed to the end of the flute opposite the mouthpiece and divide it in half. Using a pencil make a light mark at this halfway point. Now we're going to make this flute fit your hand! This is the traditional way. Place your hand next to the center mark you just made and draw another line marking the width of your hand. Do the same thing on the other side of the center mark. Now divide the width of your hand in half on each side of the center. At these ½ hand marks you will drill your first two holes but before you drill divide those ½ hand marks in half giving you ¼ hand marks that also need to be drilled. Erase the center mark and the two outermost marks and drill or cut or burn a hole about ¼" in diameter in the six remaining marks. Now when it's finished the flute will fit your fingers easily making it custom made to fit your hand!
When you get all those holes, channels and such all smoothed, buffed and pretty then it's time to glue the two halves of the flute together! Elmers white glue isn't traditional but it's easy to find and cheap and works well. You use what you want, but get it glued together and hold it together with clamps or tie it with string, rope or whatever and leave it at least overnite or however long it will take the material you chose to use to cure. When it's cured drill a small hole about ¼" in the mouthpiece into the sound chamber and round it however you can. I use a rather large heavy knife and whittle it down then I finish it with finer and finer sand paper until I've got it the way I want it. Take special pains to not disturb the area immediatly around the area where the bird must sit.
Now carve a bird as simple or ornate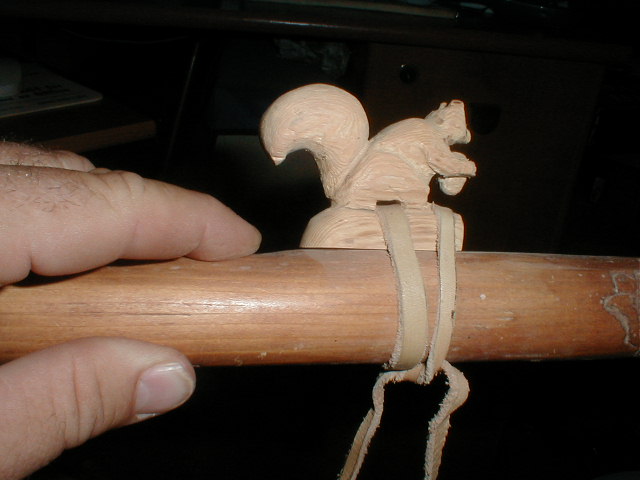 as you want. The only absolute is that the bottom be flat and cover the hole from the sound chamber and the entire channel between the two holes while leaving the reed hole open. If you chose to do it the old way then the 1/16" channel must be cut to let air flow from the sound chamber to the reed. When you get this done tie the bird in place, (an Elk hide string is traditional but almost any thing will work) and blow gently into the mouthpiece and enjoy the soothing, melodic sound!
Below Are The Links To My Other Pages
 Home
Home
 Flutes
 Animals
 Interests
 Wagon
Wagon
 Area
Area
 Family
 Me
Me
 Links
Links
 Horses For Sale
Money is not required to view this site, but it is appreciated! Just send it to the address below. Thanks!
For more information or just to visit email me atcmfaz@juno.com, call me at 1 (520)775-5812 or snail mail me at Mike Fields, 8185 E. Mountain View, Prescott Valley, Az, 86314.
Unless otherwise noted all contents and Photos in this site are © 2000, © 2001 by Mike Fields
