When I received the tubes of the valentine bugs from Kalamity Kat I just loved them and had to make a valentine with them. This is an easy tutorial and for beginners but you know I would do it even as advanced as I am. So PLEASE Have FUN!
Beginner High Level
Visit Home Page of Tutorials Writers I belong. You will enjoy the trip. Just click on Fly By Nights Button above. But, only after you do my tutorial hehehe. Just kidding.
What you will need to do this tutorial:
Let's Get Started
You have completed your tag. I really hope you enjoyed it. If you have any questions please feel free to email me just click on the tag below.
CC
To Visit My Favorite Web Sites
Click on the Tags below
Web Page Created By Angel Breezes (Carol) Copyright © 2001 by Angel Breezes,
all rights reservedBee My Hug A Bug

By
CC
Carol Walters
All Rights Reserved


1. PSP 7
2. Font I used. Download and unzip to the fonts folder.
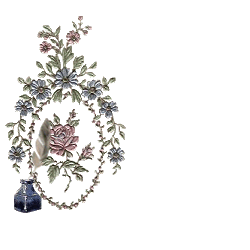
3. Tubes & Mask used in this tutorial. Download and open in PSP.
1. Go to File>New> you want a 400x400 transparent image.
2. Go to Layers>New Rastar> click ok.
3. In top color palette select a color you want your heart mask to be I used HTML . #FF0000
4. Click on the Flood fill tool and flood fill the transparent image.
5. Go to Masks>Load From Disk> select CWheat.bmp. You will just have your mask with the transparent background showing through.
6. Go to Masks>Invert. All that should be showing is the hearts no border.
7. Go to Masks>Delete. Answer yes to the pop up box question you want to merge it into the current layer.
8. Go to Effects>Texture Effects>Weave. Settings: Gap Size 8 Width 8 Opacity 50 Weave Color White Weave Gap Color White. Click ok.
10. Open Bee2.psp tube in PSP. Go to Edit>Copy.
11. Click on the working image to make it active. Go to Edit>Paste As A New Layer. Move it into position.
12. Go to Effects>3D Effects>Drop shadow. Settings: Vertical and Horizontal minus –3 Opacity 40 Blur 3 Color Black. Click ok.
13. Open tube Bee1.psp go to Edit>Copy.
14. Click on working image to make it active go to Edit>Paste As A New Layer. Move the tube where you want.
15. At this time you may have other tubes you would like to use. If so apply them to your working image by Copy and Pasting it As A New Layer.
15. Go to Layers>New Rastar>Click ok.
16. Click on Text Tool (Letter A). Pop up window select the font in the download Fiolex Girls. Size 36 or 48 color of text is white. Put text like on tag in the header see above. You will have to rotate these words. “Bee” go to Image>Rotate>15 Left click ok. “My” go to Image>Rotate>Right 15 click ok. “Hug A Bug” go to Image>Rotate>Left 15 click ok.
17. Go to Layers>Merge> All Flattened.
18. Go to Image>Resize. Make sure the Pixel Size has the check in it type in 300 x 300. This will make your image the proper size for email. Make sure the bottom two boxes have check marks click ok.
25. Go to Files>Save As>Name your finished tag make sure you save it as .jpg. This will still have a great quality to your tube but will take up less space on your hard drive.
Have Fun!!!
Carol