

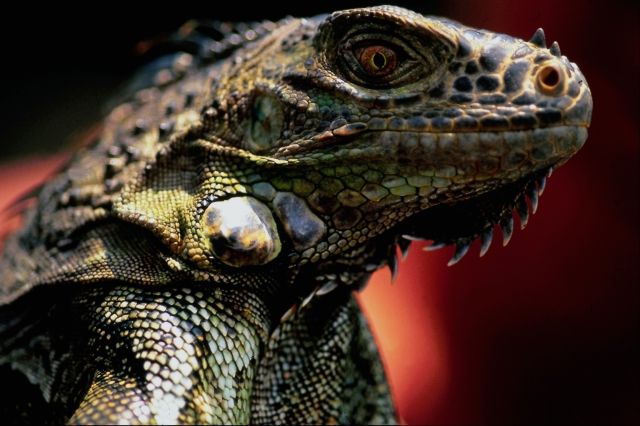
ok this web is deside to help with care and breeding for your iguana nesting and excercising firt the picture on the botome is a pictur of a female iguana now lets get started.
 this site is still under construction
introduction
"Females need as much exercise (primarily climbing) as
possible to ensure smooth laying. One of the most common problems
with females in captivity is egg binding resulting in C-section and
hysterectomy. Many vets actually recommend spaying females routinely
to prevent the problem. It is, of course, less costly for you and
less stressful for the ig if she can just get the exercise she needs.
This is probably the best argument for keeping igs free roaming or
housing them in very large (wide AND tall) enclosures with lots of
branches and other climbing apparatus.
The iguana does not begin to "show" until the last couple of
weeks of the gestation period. (Which lasts a total of two months.)
She will be getting fatter with the eggs as she is losing weight, so
she won't look much different, albeit her belly and sides will be more
taut. You will be able to feel some of the eggs along her sides
before they are developed enough for you to be able to see them.
Generally, a row of two eggs on each side will be felt.
Preparing the Egging Box
Females dig burrows underground and excavate a small cavern in
which they lay their eggs. They then back out and back fill the
cavern and burrow. Interestingly enough, many females reuse the same
cavern year after year, and there are recorded instances of more than
one female using the same cavern, digging separate burrows to get
in....
You need to recreate the digging area by making an egging box,
a place for her to dig a burrow and lay her eggs in a cavern.
Depending upon the size of the iguana, two huge kitty-litter pans,
placed rim-to-rim and duct taped together, with an access hole cut in
one end of the upper pan, will do the trick for a smaller iguana (say
10-12" snout-to-vent length). Larger iguanas will require a larger
area... one of those squarish outdoor garbage cans (made of plastic,
with a lid) work well as they can be laid on their side and not roll
around. Duct tape the lid to the can, and cut an access hole at the
highest point (which will be in the side of the lid). Essentially,
any large, water- or moisture-proof container which you can keep warm,
provide an access hole for the iguana but keep it closed enough so
that all the excavated dirt doesn't come flying out, and can easily
get into yourself to later remove the eggs, will do.
Needless to say, you need to fill the egging box with the
proper digging medium before taping it shut. What you need to achieve
is soil which you can easily push but which will stay in place when
you take your hand away. Too hard, and the iguana can't dig; too
loose, and it falls back into the burrow or cavern. I have found the
following proportions to work quite well:
14 parts sterile potting soil (from peat, available from nurseries)
1 part sterile sand (From nurseries, or playground sand from hardware
stores)
9 cups of warm water
Mix thoroughly together, and test. If it falls back, add more
water. If too damp/gloppy/heavy, add more soil or sand.
This can be quite heavy when you have almost-filled a garbage
can with this mixture, so be prepared with a dolly or a hand-truck, or
prepare it where you are going to be leaving it. If the iguana's
enclosure is large enough, then place the egg box in side in a warm
area. The box needs to be placed in a quiet warm area. A spare
bedroom or closet works well. Place a heating pad under the
egg-laying container or direct a basking light on it (making sure not
to melt the plastic!). (To make as much privacy as possible to reduce
stress, hang a cloth over that part of the enclosure so the iguana
cannot see out.)
Introduce your iguana to the container. Hold her up to the
opening, let her sniff/taste and look, and then put her down. When
she is ready, and if you have prepared the soil/sand mixture properly
and the area is quiet and warm, she will go to work. (If she is
already going crazy trying to dig through the floor and other
surfaces, she is ready.)
It can take 10 hours or so to lay all the eggs; number of eggs
varies from 12-40+, with older/bigger ones laying more. First year
layers can lay 18 or so, so don't be fooled by the size of the iguana.
Once she lays, she will drag herself out and collapse on her
basking area (or set one up for her nearby, with a bowl of water, and
introduce it to her at the same time as you do the egg box). Keep an
eye/ear out to see when she is done, then be ready with some comfort
food for her - she is going to look like a skeleton. I steam brussels
sprouts for a couple of minutes until they are bright green, and slice
them up and put in a shallow jar lid. I will hand feed her some, then
leave her with the plate. Feed lots of high calcium foods, and be
generous with the calcium supplements for the next couple of weeks.
By the end of the month after laying, she should begin to look like
her old self.
If your iguana shows signs of twitching, jerky gait or
difficulty using her back legs at any time during the gestation or
after she has laid, get her to a veterinarian for Calcitonin
injections of Neo-Calglucon supplementation.
Incubating the Eggs
If your female has mated with a male, then there is a chance
that the eggs are fertile; iguanas can produce eggs without being
around males but, just like chicken eggs, they are not fertile.
If there is the possibility of fertile eggs, you can begin
putting together an incubator to have it ready before the end of the
gestation period.
Handling the Eggs
Our fingers, no matter how recently we washed our hands, are
full of oils and bacteria (beneficial to us, but bacteria just the
same) which can harm the eggs. Before handling them at any time
during the transfer and incubation process, wear surgical gloves.
Iguana eggs, like most reptile eggs, are white, ovoid
(elliptical rather than round) and slightly soft or leathery rather
than hard and brittle like a bird egg. Pick up gently at the ends of
the egg, and avoid squeezing.
Home-Made Incubator
One method of constructing a home-made incubator is to fill a
plastic lidded container with a mixture of vermiculite (not perlite)
and water, in equal volumes by weight (the vermiculite should be well
saturated but there should be no puddles of water). Poke holes in the
lid.
In an aquarium or other water-tight container equipped with an
adjustable lid or cover, fill the bottom with several inches of warm
water. Using a submersible water heater (as for aquariums), keep the
temperature at 86-87 degrees fahrenheit or whatever temperature is
required to keep the air temperature within the enclosure at 86-87F.
Place two bricks or another container upside down to form a base on
which to rest the vermiculite-filled box.
The tank and box together form the incubator. The box will
hold the eggs, the water heat and humidify the environment, and the
lid of the tank can be adjusted to let out excess humidity and to help
regulate the internal temperature. Make sure your two thermometers
(the one on the heater and the one monitoring air temperature at the
same level as the box) are clearly visible to you.
Once your iguana has laid her eggs and is resting comfortably,
you can carefully dig up her eggs and place them in small depressions
(made with your thumb or the back of a spoon) in the surface of the
vermiculite. Keep the eggs oriented in the same direction: the side
of the egg that was facing up when you dug it up should still be
facing up when placed in the vermiculite. You can gently mark the
tops with a pen. Any eggs which are clumped together are best left
together.
After your eggs are in place in the vermiculite, top with a
layer sphagnum moss which has been dampened in warm water (this is
available along with the vermiculite at nurseries and many hardware
and large grocery stores). Place the lid loosely on the vermiculite
box, and place on the base in the aquarium. Cover the aquarium
leaving a slight opening to vent out excess humidity. Open completely
every couple of days for a few minutes.
Commercial Incubators
There are several types of incubators made for the bird
industry, both for poultry and pet birds. The Hova-Bator (R) is one
type. It is a foam box with ventilation and troughs in the inside
bottom into which water may be poured. One suggested use for
Hova-bators is to fill several deli cups or margarine containers with
the vermiculite-water mixture, and place several eggs in each one.
The moss-topped containers are then placed on the screen, and the
Hova-Bator cover put into place. The unit should be plugged and
brought up to temperature several days before the anticipated date of
laying.
Incubating
The incubation period is about 90 days. Check the eggs
regularly (say, every several days). Generally speaking, eggs which
collapse or turn moldy are not viable. But surprises can happen. If
an egg is getting moldy and you want to take a chance on it, separate
it from the other eggs by putting it into its own container; remember
to wear gloves when doing this, and to avoid knocking the moldy egg
against anything as you move it to its new container, and to take off
and throw away the gloves, washing your hands and don fresh gloves if
you are going to be handling any of the other eggs."
this site is still under construction
introduction
"Females need as much exercise (primarily climbing) as
possible to ensure smooth laying. One of the most common problems
with females in captivity is egg binding resulting in C-section and
hysterectomy. Many vets actually recommend spaying females routinely
to prevent the problem. It is, of course, less costly for you and
less stressful for the ig if she can just get the exercise she needs.
This is probably the best argument for keeping igs free roaming or
housing them in very large (wide AND tall) enclosures with lots of
branches and other climbing apparatus.
The iguana does not begin to "show" until the last couple of
weeks of the gestation period. (Which lasts a total of two months.)
She will be getting fatter with the eggs as she is losing weight, so
she won't look much different, albeit her belly and sides will be more
taut. You will be able to feel some of the eggs along her sides
before they are developed enough for you to be able to see them.
Generally, a row of two eggs on each side will be felt.
Preparing the Egging Box
Females dig burrows underground and excavate a small cavern in
which they lay their eggs. They then back out and back fill the
cavern and burrow. Interestingly enough, many females reuse the same
cavern year after year, and there are recorded instances of more than
one female using the same cavern, digging separate burrows to get
in....
You need to recreate the digging area by making an egging box,
a place for her to dig a burrow and lay her eggs in a cavern.
Depending upon the size of the iguana, two huge kitty-litter pans,
placed rim-to-rim and duct taped together, with an access hole cut in
one end of the upper pan, will do the trick for a smaller iguana (say
10-12" snout-to-vent length). Larger iguanas will require a larger
area... one of those squarish outdoor garbage cans (made of plastic,
with a lid) work well as they can be laid on their side and not roll
around. Duct tape the lid to the can, and cut an access hole at the
highest point (which will be in the side of the lid). Essentially,
any large, water- or moisture-proof container which you can keep warm,
provide an access hole for the iguana but keep it closed enough so
that all the excavated dirt doesn't come flying out, and can easily
get into yourself to later remove the eggs, will do.
Needless to say, you need to fill the egging box with the
proper digging medium before taping it shut. What you need to achieve
is soil which you can easily push but which will stay in place when
you take your hand away. Too hard, and the iguana can't dig; too
loose, and it falls back into the burrow or cavern. I have found the
following proportions to work quite well:
14 parts sterile potting soil (from peat, available from nurseries)
1 part sterile sand (From nurseries, or playground sand from hardware
stores)
9 cups of warm water
Mix thoroughly together, and test. If it falls back, add more
water. If too damp/gloppy/heavy, add more soil or sand.
This can be quite heavy when you have almost-filled a garbage
can with this mixture, so be prepared with a dolly or a hand-truck, or
prepare it where you are going to be leaving it. If the iguana's
enclosure is large enough, then place the egg box in side in a warm
area. The box needs to be placed in a quiet warm area. A spare
bedroom or closet works well. Place a heating pad under the
egg-laying container or direct a basking light on it (making sure not
to melt the plastic!). (To make as much privacy as possible to reduce
stress, hang a cloth over that part of the enclosure so the iguana
cannot see out.)
Introduce your iguana to the container. Hold her up to the
opening, let her sniff/taste and look, and then put her down. When
she is ready, and if you have prepared the soil/sand mixture properly
and the area is quiet and warm, she will go to work. (If she is
already going crazy trying to dig through the floor and other
surfaces, she is ready.)
It can take 10 hours or so to lay all the eggs; number of eggs
varies from 12-40+, with older/bigger ones laying more. First year
layers can lay 18 or so, so don't be fooled by the size of the iguana.
Once she lays, she will drag herself out and collapse on her
basking area (or set one up for her nearby, with a bowl of water, and
introduce it to her at the same time as you do the egg box). Keep an
eye/ear out to see when she is done, then be ready with some comfort
food for her - she is going to look like a skeleton. I steam brussels
sprouts for a couple of minutes until they are bright green, and slice
them up and put in a shallow jar lid. I will hand feed her some, then
leave her with the plate. Feed lots of high calcium foods, and be
generous with the calcium supplements for the next couple of weeks.
By the end of the month after laying, she should begin to look like
her old self.
If your iguana shows signs of twitching, jerky gait or
difficulty using her back legs at any time during the gestation or
after she has laid, get her to a veterinarian for Calcitonin
injections of Neo-Calglucon supplementation.
Incubating the Eggs
If your female has mated with a male, then there is a chance
that the eggs are fertile; iguanas can produce eggs without being
around males but, just like chicken eggs, they are not fertile.
If there is the possibility of fertile eggs, you can begin
putting together an incubator to have it ready before the end of the
gestation period.
Handling the Eggs
Our fingers, no matter how recently we washed our hands, are
full of oils and bacteria (beneficial to us, but bacteria just the
same) which can harm the eggs. Before handling them at any time
during the transfer and incubation process, wear surgical gloves.
Iguana eggs, like most reptile eggs, are white, ovoid
(elliptical rather than round) and slightly soft or leathery rather
than hard and brittle like a bird egg. Pick up gently at the ends of
the egg, and avoid squeezing.
Home-Made Incubator
One method of constructing a home-made incubator is to fill a
plastic lidded container with a mixture of vermiculite (not perlite)
and water, in equal volumes by weight (the vermiculite should be well
saturated but there should be no puddles of water). Poke holes in the
lid.
In an aquarium or other water-tight container equipped with an
adjustable lid or cover, fill the bottom with several inches of warm
water. Using a submersible water heater (as for aquariums), keep the
temperature at 86-87 degrees fahrenheit or whatever temperature is
required to keep the air temperature within the enclosure at 86-87F.
Place two bricks or another container upside down to form a base on
which to rest the vermiculite-filled box.
The tank and box together form the incubator. The box will
hold the eggs, the water heat and humidify the environment, and the
lid of the tank can be adjusted to let out excess humidity and to help
regulate the internal temperature. Make sure your two thermometers
(the one on the heater and the one monitoring air temperature at the
same level as the box) are clearly visible to you.
Once your iguana has laid her eggs and is resting comfortably,
you can carefully dig up her eggs and place them in small depressions
(made with your thumb or the back of a spoon) in the surface of the
vermiculite. Keep the eggs oriented in the same direction: the side
of the egg that was facing up when you dug it up should still be
facing up when placed in the vermiculite. You can gently mark the
tops with a pen. Any eggs which are clumped together are best left
together.
After your eggs are in place in the vermiculite, top with a
layer sphagnum moss which has been dampened in warm water (this is
available along with the vermiculite at nurseries and many hardware
and large grocery stores). Place the lid loosely on the vermiculite
box, and place on the base in the aquarium. Cover the aquarium
leaving a slight opening to vent out excess humidity. Open completely
every couple of days for a few minutes.
Commercial Incubators
There are several types of incubators made for the bird
industry, both for poultry and pet birds. The Hova-Bator (R) is one
type. It is a foam box with ventilation and troughs in the inside
bottom into which water may be poured. One suggested use for
Hova-bators is to fill several deli cups or margarine containers with
the vermiculite-water mixture, and place several eggs in each one.
The moss-topped containers are then placed on the screen, and the
Hova-Bator cover put into place. The unit should be plugged and
brought up to temperature several days before the anticipated date of
laying.
Incubating
The incubation period is about 90 days. Check the eggs
regularly (say, every several days). Generally speaking, eggs which
collapse or turn moldy are not viable. But surprises can happen. If
an egg is getting moldy and you want to take a chance on it, separate
it from the other eggs by putting it into its own container; remember
to wear gloves when doing this, and to avoid knocking the moldy egg
against anything as you move it to its new container, and to take off
and throw away the gloves, washing your hands and don fresh gloves if
you are going to be handling any of the other eggs."
 Head bob
Iguanas often shake their heads. This behavior is called the "Head Bob" or "Bobbing". This is their unique communication method as they don't have a vocal organ. As you see, this language is very difficult to human. I live with 3 iguanas for about 6 years but I still can't translate exactly. It sometimes means "I love you, I love you, I love you." but it sometimes means "I hate you, go away! Mad mad mad". The difficult part of this language is, these two opposite meaning phrases seems same to human. I know iguanas can recognize and communicate their thoughts.
HOUSING CONSIDERATIONS
The "Roam Free" Option
Many iguana owners like to allow their lizards to roam free throughout the entire house or apartment, or at least one or two rooms. These are viable situations, but many important precautions must first be taken into consideration. As I will discuss shortly, iguanas need to live in very high temperatures if effective digestion is to take place. You will need to heat all the areas that the iguana will occupy. In addition, it is not always particularly easy to potty-train iguanas, who generally defecate daily. Some iguanas will choose a particular spot (or maybe two or three particular spots) and use it faithfully. In that case, you can place a litter box or newspaper in that spot for easy cleaning. Other iguanas may use a certain area sometimes, but frequently stray from it. Still others will return to a particular spot thanks only to sheer coincidence. You must be prepared to deal with these daily clean-ups. Iguanas' stools can stain and many iguana owners already know that some of their lizards' favorite spots to relieve themselves are beds and stacks of clean clothes. In addition to the problem of staining, general hygeine is extremely important. It is easy to put off cleaning an iguana mess if it's in the corner of a room, but that corner will soon become a breeding ground for harmful bacteria.
Another important consideration is iguana-proofing the rooms. Iguanas can be even more curious than cats, but unfortunately, tend to be much less graceful. If you have fragile objects on shelves, they are likely to be knocked over and possibly damaged by your iguana. Climbing is facilitated by your iguana's use of its claws. If much of your furniture is slippery (wood, as opposed to upholstery) your iguana will likely slip off and possibly injure itself. Electrical outlets can also be hazardous. Iguanas can get caught in between radiators and walls, get tangled in stereo wires, burn themselves on lightbulbs, or even decide to hang out underneath heavy furniture for several days at a time, thus missing meals and probably cooling down. You must also consider the iguana's general happiness: iguanas are arboreal, which means that they are tree-dwelling in the wild. They will want to climb the furniture, which may be impossible for them if their claws don't have anything to grab onto. Alternately, their claws might tear holes in your upholstery if too much wanton climbing takes place.
Despite all of the above warnings, there are indeed many iguanas that do share their living space with their owners. A suitable environment can be created if you carefully consider the above precautions. You might even consider adding some large branches to your decor for your iguanas to climb. You might also section off one corner of the room for use as an open cage. If you heat that area, supply branches and feed them there, they may spend much of their time in that area, only leaving for temporary changes of scenery and for exercise. One option is to hang a heat lamp from the ceiling, above your iguana's basking area. Iguanas like to bask in hot light (like the sun) and generally prefer to do that over merely sitting in a heated room. If you do choose to let your iguana free-roam, please read the rest of this section so you can learn about their light and temperature requirements
The Cage Option
Generally, owners of juvenile iguanas choose to house their lizards in aquariums or other types of cages. Small lizards are likely to get lost when released into large areas, so an enclosure of some kind is recommended. Aquariums tend to be the most popular choice, probably due to their availability. Glass surfaces are also easy to clean, and allow for high visibility. Some iguana owners opt to build cages for their lizards. A common type of custom cage is one with a wooden frame, with the sides made of cage wire or plexiglass. Glass can also be used, as it won't scratch or bend, but it is much heavier when coupled with the wooden frame and is more fragile during construction and when moving. Glass and plexiglass are popular because they tend to look nicer than cage wire, allow for optimum visibility of the lizard inside, and they also keep the heat in the cage. Cage wire, however, may be favored by the iguana because it will provide a climbing material, and also because it allows for ventilation. (It is also much cheaper.) It is crucial to keep the cage warm, but it is also important to allow the animal inside to breathe. In general, when constructing your iguana's cage, you must take many factors into consideration, which are discussed below. If you find that you cannot meet the requirements that are given, it would be a good idea to try to find your iguana a different home. Many people buy iguanas not realizing how much time and money they will need to invest in their new pets, and it is always best to find a better home for the iguana than put a half-hearted effort into caring for it.
Cage Size
As a general rule, you should offer your iguana the largest enclosure that you can possibly afford and have room for. Adult iguanas are arboreal, which means that they spend most of their time in trees in the wild. As juveniles, iguanas spend much more time on the ground, so smaller, shorter cages are acceptable for a while. But as iguanas grow, they want to climb. This means that you must provide an enclosure that has very much vertical space. As a matter of fact, if faced with the choice of one or the other, it would be better for you to provide a cage that is 7 feet tall than 7 feet wide or long. You may find that this sort of cage structure is advantageous to you as well, as you can then devote less floorspace to your iguana's enclosure. If you are not sure if the cage you have in mind is large enough for an iguana, there are some general guidelines that can be followed: the cage should be at least as tall as the iguana is long. (Including tail.) Preferably taller. It should be about 1 1/2 times the total length of the animal in length, and 2/3 the total length of the animal in width. The iguana should have ample room to walk, turn around, and climb. These guidelines should be considered minimum standards. Your iguana will probably become quite depressed if it has less room than this in an enclosure that it will be spending much of its time in. (As a side note: I house my four iguanas in a cage that is six feet tall, eight feet long, and three feet wide, and I would still prefer it be less crowded in there.)
Cage Toys
Your iguana will not be happy if it doesn't have anything to do besides sitting on the floor of its cage. You must provide branches for climbing in the cage. The branches should be a little larger in diameter than your iguana at its largest point. Climbing is a favorite pasttime of green iguanas, and you must not deny them this option. The branches should sit diagonally within the cage. Many iguanas like to sit atop high horizontal surfaces such as shelves, so you may wish to install a shelf near the high end of the branch. A regular shelf will be slippery to an iguana, so it should be covered with carpet or at least have grooves cut into it so the iguana can grab on and not fall off. You may wish to make a place like this into your iguana's "basking spot", which will be discussed next. In addition to branches and shelves, some choose to add ropes or rope ladders. These are usually used for juvenile iguanas only. You must be careful with large iguanas because due to their weight, if they get tangled in a rope they can actually suffocate. Make sure all the items in the cage are safe and secure, to avoid any accidents!
Heating and Lighting
Heating and lighting the iguana's enclosure are two problems that many people choose to solve at the same time. Incandescent spotlights, available from your hardware or lighting store in a wide variety of wattages, can keep your iguana's cage both warm and bright. This is my heating method of choice. By placing a spot light at one end of the cage, you can create a nice temperature gradient for your iguana, which is essential to its well-being. The area directly under the light would be the basking spot, where your iguana will go to warm up early in the day. The basking spot should be no hotter than 95 degrees Fehrenheit. You might want to invest in an aquarium thermometer so that you may test the temperature at all parts of the cage. As the iguana gets farther away from the basking spot, the ambient temperature decreases. The coolest part of the cage should be no lower than about 80 degrees. As a general rule, iguanas need to maintain an internal temperature of 88 degrees for about 10 hours a day if effective digestion is to take place. My favorite way to mount the spot light is to screw it into a shop-light fixture, and set it right on the screen or wire top of the cage. Lights should never be placed inside the cage because iguanas will climb on them and burn themselves. If you do not have a screen or wire top to your cage, you could shine the light through a screen or wire side. If your cage has no screen or wire sides but still has effective ventilation, it is possible to shine a spot light through glass. You must use a thermometer, however, to make sure the inside of the cage is at the correct temperature
There are also under-tank heaters made to be placed under aquariums to warm the floor, which is suitable for young specimens that spend much of their time sitting on the floor of their cages. They are not very effective at warming up the air temperature inside aquariums so if you have an iguana that spends its time on branches or rocks that do not come into contact with the floor of the aquarium, an under-tank heater will not do you much good. In addition, I recommend against using "hot rocks," as they are notorious for over-heating and burning reptiles on their ventral sides. Also, wild iguanas obtain their heat from the sun above, not rocks below. Hot rocks are kind of neat ideas in themselves in that the manufacturers have given you a mini heater in the shape of a rock, which might seem perfect for a reptile cage. But remember - the rock is just a heater, and in the author's experience, an unstable one at that. All of the author's hot rocks have "burned out" and are now useless except for decoration - probably because it is impossible to keep them from getting wet. The author knows several other people whose hot rocks have overheated, thus resulting in burns on their iguanas. In conclusion, the only suitable methods the author has found for heating iguana enclosures has been incandescent spot lights and regular space or room heaters. If you use a heater, make sure that the iguana cannot come into contact with it and knock it over or burn itself. Iguanas seem to be the happiest when they have a basking spot, so you may use a space heater to help heat the iguana's area, but the iguana should really have a basking spot as well.
Vegetable matter contains a large amount of cellulose (which is the main component of plant cell walls) which most animals cannot digest on their own. Iguanas have microorganisms living in their hindgut which break down the cellulose for them. These microorganisms need hot temperatures in order to do their work, so if you keep your iguana too cool, one of the effects will be poor digestion, which will lead to problems stemming from malnourishment.
Ultraviolet Light
It is absolutely essential that your iguana be provided exposure to wide ranges of ultraviolet light. Natural sunlight is best. Iguanas' bodies synthesize vitamin D3 with exposure to UV light, and vitamin D3 is essential for calcium absorption. It is also speculated that there are many other benefits of UV light. If you can, you should take your iguana outside on sunny days, even when it is chilly. If your iguana does not usually live outside, you must purchase "full spectrum" fluorescent bulbs. There are many different brands on the market, and your local pet or lighting store can probably order whatever brand you want. You need a full spectrum, not broad spectrum, light, and if possible, you should buy a few bulbs, all different brands. None of the bulbs radiate exactly the same wavelengths, and like with diet, the widest range you can offer is the best thing you can do for your iguana.
These full spectrum bulbs can be inserted into any fluorescent "tube" light fixture. You can leave these bulbs on all day, for the same amount of time that you offer light. You must, however, offer UV light unfiltered through glass or plastic. If the light fixture you have has a plastic "shield," it must be removed. In addition, if your cage has a glass or plastic top, adjustments must be made so that your iguana can be exposed to unfiltered UV light.
Head bob
Iguanas often shake their heads. This behavior is called the "Head Bob" or "Bobbing". This is their unique communication method as they don't have a vocal organ. As you see, this language is very difficult to human. I live with 3 iguanas for about 6 years but I still can't translate exactly. It sometimes means "I love you, I love you, I love you." but it sometimes means "I hate you, go away! Mad mad mad". The difficult part of this language is, these two opposite meaning phrases seems same to human. I know iguanas can recognize and communicate their thoughts.
HOUSING CONSIDERATIONS
The "Roam Free" Option
Many iguana owners like to allow their lizards to roam free throughout the entire house or apartment, or at least one or two rooms. These are viable situations, but many important precautions must first be taken into consideration. As I will discuss shortly, iguanas need to live in very high temperatures if effective digestion is to take place. You will need to heat all the areas that the iguana will occupy. In addition, it is not always particularly easy to potty-train iguanas, who generally defecate daily. Some iguanas will choose a particular spot (or maybe two or three particular spots) and use it faithfully. In that case, you can place a litter box or newspaper in that spot for easy cleaning. Other iguanas may use a certain area sometimes, but frequently stray from it. Still others will return to a particular spot thanks only to sheer coincidence. You must be prepared to deal with these daily clean-ups. Iguanas' stools can stain and many iguana owners already know that some of their lizards' favorite spots to relieve themselves are beds and stacks of clean clothes. In addition to the problem of staining, general hygeine is extremely important. It is easy to put off cleaning an iguana mess if it's in the corner of a room, but that corner will soon become a breeding ground for harmful bacteria.
Another important consideration is iguana-proofing the rooms. Iguanas can be even more curious than cats, but unfortunately, tend to be much less graceful. If you have fragile objects on shelves, they are likely to be knocked over and possibly damaged by your iguana. Climbing is facilitated by your iguana's use of its claws. If much of your furniture is slippery (wood, as opposed to upholstery) your iguana will likely slip off and possibly injure itself. Electrical outlets can also be hazardous. Iguanas can get caught in between radiators and walls, get tangled in stereo wires, burn themselves on lightbulbs, or even decide to hang out underneath heavy furniture for several days at a time, thus missing meals and probably cooling down. You must also consider the iguana's general happiness: iguanas are arboreal, which means that they are tree-dwelling in the wild. They will want to climb the furniture, which may be impossible for them if their claws don't have anything to grab onto. Alternately, their claws might tear holes in your upholstery if too much wanton climbing takes place.
Despite all of the above warnings, there are indeed many iguanas that do share their living space with their owners. A suitable environment can be created if you carefully consider the above precautions. You might even consider adding some large branches to your decor for your iguanas to climb. You might also section off one corner of the room for use as an open cage. If you heat that area, supply branches and feed them there, they may spend much of their time in that area, only leaving for temporary changes of scenery and for exercise. One option is to hang a heat lamp from the ceiling, above your iguana's basking area. Iguanas like to bask in hot light (like the sun) and generally prefer to do that over merely sitting in a heated room. If you do choose to let your iguana free-roam, please read the rest of this section so you can learn about their light and temperature requirements
The Cage Option
Generally, owners of juvenile iguanas choose to house their lizards in aquariums or other types of cages. Small lizards are likely to get lost when released into large areas, so an enclosure of some kind is recommended. Aquariums tend to be the most popular choice, probably due to their availability. Glass surfaces are also easy to clean, and allow for high visibility. Some iguana owners opt to build cages for their lizards. A common type of custom cage is one with a wooden frame, with the sides made of cage wire or plexiglass. Glass can also be used, as it won't scratch or bend, but it is much heavier when coupled with the wooden frame and is more fragile during construction and when moving. Glass and plexiglass are popular because they tend to look nicer than cage wire, allow for optimum visibility of the lizard inside, and they also keep the heat in the cage. Cage wire, however, may be favored by the iguana because it will provide a climbing material, and also because it allows for ventilation. (It is also much cheaper.) It is crucial to keep the cage warm, but it is also important to allow the animal inside to breathe. In general, when constructing your iguana's cage, you must take many factors into consideration, which are discussed below. If you find that you cannot meet the requirements that are given, it would be a good idea to try to find your iguana a different home. Many people buy iguanas not realizing how much time and money they will need to invest in their new pets, and it is always best to find a better home for the iguana than put a half-hearted effort into caring for it.
Cage Size
As a general rule, you should offer your iguana the largest enclosure that you can possibly afford and have room for. Adult iguanas are arboreal, which means that they spend most of their time in trees in the wild. As juveniles, iguanas spend much more time on the ground, so smaller, shorter cages are acceptable for a while. But as iguanas grow, they want to climb. This means that you must provide an enclosure that has very much vertical space. As a matter of fact, if faced with the choice of one or the other, it would be better for you to provide a cage that is 7 feet tall than 7 feet wide or long. You may find that this sort of cage structure is advantageous to you as well, as you can then devote less floorspace to your iguana's enclosure. If you are not sure if the cage you have in mind is large enough for an iguana, there are some general guidelines that can be followed: the cage should be at least as tall as the iguana is long. (Including tail.) Preferably taller. It should be about 1 1/2 times the total length of the animal in length, and 2/3 the total length of the animal in width. The iguana should have ample room to walk, turn around, and climb. These guidelines should be considered minimum standards. Your iguana will probably become quite depressed if it has less room than this in an enclosure that it will be spending much of its time in. (As a side note: I house my four iguanas in a cage that is six feet tall, eight feet long, and three feet wide, and I would still prefer it be less crowded in there.)
Cage Toys
Your iguana will not be happy if it doesn't have anything to do besides sitting on the floor of its cage. You must provide branches for climbing in the cage. The branches should be a little larger in diameter than your iguana at its largest point. Climbing is a favorite pasttime of green iguanas, and you must not deny them this option. The branches should sit diagonally within the cage. Many iguanas like to sit atop high horizontal surfaces such as shelves, so you may wish to install a shelf near the high end of the branch. A regular shelf will be slippery to an iguana, so it should be covered with carpet or at least have grooves cut into it so the iguana can grab on and not fall off. You may wish to make a place like this into your iguana's "basking spot", which will be discussed next. In addition to branches and shelves, some choose to add ropes or rope ladders. These are usually used for juvenile iguanas only. You must be careful with large iguanas because due to their weight, if they get tangled in a rope they can actually suffocate. Make sure all the items in the cage are safe and secure, to avoid any accidents!
Heating and Lighting
Heating and lighting the iguana's enclosure are two problems that many people choose to solve at the same time. Incandescent spotlights, available from your hardware or lighting store in a wide variety of wattages, can keep your iguana's cage both warm and bright. This is my heating method of choice. By placing a spot light at one end of the cage, you can create a nice temperature gradient for your iguana, which is essential to its well-being. The area directly under the light would be the basking spot, where your iguana will go to warm up early in the day. The basking spot should be no hotter than 95 degrees Fehrenheit. You might want to invest in an aquarium thermometer so that you may test the temperature at all parts of the cage. As the iguana gets farther away from the basking spot, the ambient temperature decreases. The coolest part of the cage should be no lower than about 80 degrees. As a general rule, iguanas need to maintain an internal temperature of 88 degrees for about 10 hours a day if effective digestion is to take place. My favorite way to mount the spot light is to screw it into a shop-light fixture, and set it right on the screen or wire top of the cage. Lights should never be placed inside the cage because iguanas will climb on them and burn themselves. If you do not have a screen or wire top to your cage, you could shine the light through a screen or wire side. If your cage has no screen or wire sides but still has effective ventilation, it is possible to shine a spot light through glass. You must use a thermometer, however, to make sure the inside of the cage is at the correct temperature
There are also under-tank heaters made to be placed under aquariums to warm the floor, which is suitable for young specimens that spend much of their time sitting on the floor of their cages. They are not very effective at warming up the air temperature inside aquariums so if you have an iguana that spends its time on branches or rocks that do not come into contact with the floor of the aquarium, an under-tank heater will not do you much good. In addition, I recommend against using "hot rocks," as they are notorious for over-heating and burning reptiles on their ventral sides. Also, wild iguanas obtain their heat from the sun above, not rocks below. Hot rocks are kind of neat ideas in themselves in that the manufacturers have given you a mini heater in the shape of a rock, which might seem perfect for a reptile cage. But remember - the rock is just a heater, and in the author's experience, an unstable one at that. All of the author's hot rocks have "burned out" and are now useless except for decoration - probably because it is impossible to keep them from getting wet. The author knows several other people whose hot rocks have overheated, thus resulting in burns on their iguanas. In conclusion, the only suitable methods the author has found for heating iguana enclosures has been incandescent spot lights and regular space or room heaters. If you use a heater, make sure that the iguana cannot come into contact with it and knock it over or burn itself. Iguanas seem to be the happiest when they have a basking spot, so you may use a space heater to help heat the iguana's area, but the iguana should really have a basking spot as well.
Vegetable matter contains a large amount of cellulose (which is the main component of plant cell walls) which most animals cannot digest on their own. Iguanas have microorganisms living in their hindgut which break down the cellulose for them. These microorganisms need hot temperatures in order to do their work, so if you keep your iguana too cool, one of the effects will be poor digestion, which will lead to problems stemming from malnourishment.
Ultraviolet Light
It is absolutely essential that your iguana be provided exposure to wide ranges of ultraviolet light. Natural sunlight is best. Iguanas' bodies synthesize vitamin D3 with exposure to UV light, and vitamin D3 is essential for calcium absorption. It is also speculated that there are many other benefits of UV light. If you can, you should take your iguana outside on sunny days, even when it is chilly. If your iguana does not usually live outside, you must purchase "full spectrum" fluorescent bulbs. There are many different brands on the market, and your local pet or lighting store can probably order whatever brand you want. You need a full spectrum, not broad spectrum, light, and if possible, you should buy a few bulbs, all different brands. None of the bulbs radiate exactly the same wavelengths, and like with diet, the widest range you can offer is the best thing you can do for your iguana.
These full spectrum bulbs can be inserted into any fluorescent "tube" light fixture. You can leave these bulbs on all day, for the same amount of time that you offer light. You must, however, offer UV light unfiltered through glass or plastic. If the light fixture you have has a plastic "shield," it must be removed. In addition, if your cage has a glass or plastic top, adjustments must be made so that your iguana can be exposed to unfiltered UV light.
more infor mation frome diffrent people click here
clike here to vieu my reptile album
