


Here shown is a N-gauge model railroad which is mainly built from second had material - rails, trains and scenery. I've owned a N-gauge train since the age of twelve. The present layout emerged in may 1999. The track circles around the ceiling of the house so small dioramas appear at the height of one's shoulder. This keeps the trains safe for kids and cats. Take a look at the rail plan.
I've drawn some conclusions to myself to work with:
* The era is after the war in southern Germany. There is no electrified track. The trains exist of steam engines and small 'railbusses'.* Because I don't concentrate myself on intensive driving, the track is analog and a simple single track. Furthermore a single track is more suitable for these small dioramas.
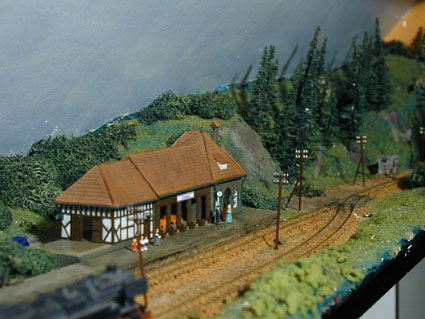
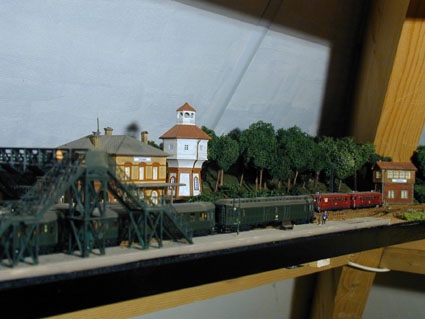
* I always fancy a 3-rail station where the bulk trains can pass through on the middle track.
Furthermore there is a small station like there used to be a lot in the sixties in Germany.* Because of the structure I can avoid the trains climbing. So I didn't have to adjust the power on steep tracks.

* Also because of the structure I could avoid sharp curves. It appeared more than I expected to offer a realistic track. On one side a removable track is made to make it possible to enter the area. Only on this side sharp curves are hidden behind hills.
 Structure
The model railroad is build on narrow shelves. I've put cork on top of it where the tracks are constructed and hard board (upside down) where the town is. Cork is suitable to stop the resonance and its base colour is perfect for colouring the rails. The structure of the bottom side of hard board is perfectly suitable to act as pavement. It only needed to be painted.
The rails is constructed on top of cork. This reduces the noise and resonance of the trains, improving the driving capabilities. I've mainly worked with flex rails from Peco. In order to link the rails to each other, I remove 3 sleepers at the end. Then these sleepers are horizontally flattened in order to keep enough space left to use the rail contacts. After the rail links are in place the sleepers are shifted underneath.
 Scenery
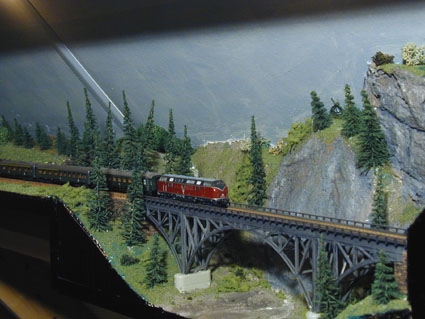
The hills are made of vertical pieces of carbon paper covered with 2-3 layers of newspaper. This is covered with modelling plaster. The hills are painted green and in wet condition covered with grass and small bushes. Certain steep spots have been painted in a combination of grey, brown, black and white to imitate rock. A lot of study has been done to the colour of the roads, because its colour is ofthen unrealistic and I ended up with liver colour. I use no asphalt colours because of the chosen era.
Scenery
The hills are made of vertical pieces of carbon paper covered with 2-3 layers of newspaper. This is covered with modelling plaster. The hills are painted green and in wet condition covered with grass and small bushes. Certain steep spots have been painted in a combination of grey, brown, black and white to imitate rock. A lot of study has been done to the colour of the roads, because its colour is ofthen unrealistic and I ended up with liver colour. I use no asphalt colours because of the chosen era.
 Making trees takes a lot of time.
The're made of real twigs covered with Iceland moss. The pine trees are from Heki.
The lampposts are of messing from Langley . They are cheap and very realistic.
Making trees takes a lot of time.
The're made of real twigs covered with Iceland moss. The pine trees are from Heki.
The lampposts are of messing from Langley . They are cheap and very realistic.
I've chosen for a station area in connetion with an imaginary town on the left side. In favour of realism I've avoided homes near the station building. The town would look awfully tiny compared to the station.
