 | | | | The images was scanned into the computer in grayscale, because of my limited RAM, i scan in at low resolution, about 100 dpi. The image was then converted into RGB mode. |
|
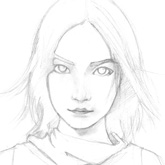
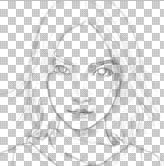 | | | | Adjust the Brightness/Contrast to eliminate unecessary spots or dirty areas caused by pencil sketching, by the way I don't ink my artwork because the linework will be discarded upon completion. Then copy the image, paste it onto a new channel, then invert that channel(ctrl-I). Load that channel as selection, then return to layers, create a new layer, then press alt-delete(make sure the foreground color is black). u should have a transparent layer with lineworks by now. . |
|
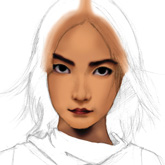
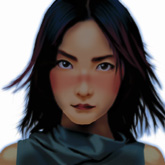
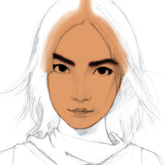 | | | | Try to color different parts on separate layers.I color the face first. For the shadows and highlights, I no longer use dodge and burn as I used to, but rather I color the same color on a separate layer then use 'multipy' mode for shadows, and 'overlay' for highlights. You can use as many layers of tones as you like, as it tends to produce better results. |
|
 | | | | The most difficult part for me is rendering of the hair, it takes quite a lot of patience(which I lack). Lots of layers... |
|
 | | | | when done, flatten the layers, then copy the layer onto a new layer, invert the layer, then motion blur the surroundings(optional). |
|
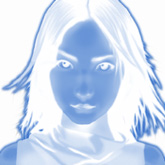 | | | | After that use Hue/Saturation to give the inverted layer a blue hue(adjust accordingly), or any other hues you prefer, normally I use sepia brown or blue, green might be a bit weird, remember to check the colorize box |
|
 | | | | Then chose a mode for this layer, I use 'multiply" for this piece. Finally reduce the opacity of this layer, then flatten it. Its done!!!. |
|
 |